Navigation
Install the app
How to install the app on iOS
Follow along with the video below to see how to install our site as a web app on your home screen.
Note: This feature may not be available in some browsers.
More options
Style variation
You are using an out of date browser. It may not display this or other websites correctly.
You should upgrade or use an alternative browser.
You should upgrade or use an alternative browser.
Ready to start color sanding.
- Thread starter rayhyar
- Start date
hernandez.art13
New member
- Apr 8, 2013
- 6,958
- 0
Never really worked on single stage, mostly modern paint. So I'll just subscribe. Good Luck and post pictures of what you working on... ")
BobbyG
New member
- Dec 29, 2009
- 13,211
- 0
I suggest you read and study several articles written by Mike Phillips.  rops:
rops:
Wetsanding, Colorsanding & Dampsanding
rops:Wetsanding, Colorsanding & Dampsanding
Mike Phillips
Active member
- Dec 5, 2022
- 51,004
- 6
I guess everyone is in to maintaining perfectly painted cars.
Thanks guys.
I'd be happy to share some tips...
I see you started this thread last Thursday, sorry I missed it I was in the garage testing out the Rupes sanding system on a boat from plus setting up for a boat wetsanding class and then starting at 5:00pm leading a team of guys to actually sand and buff the boat.
Pictures: Shearwater Extreme Boat Detailing Class
This section has been Machine Sanded, technically called damp sanding because you only use a LITTLE water not a lot of water so it's not WET sanding it's DAMP sanding.

This is after compounding and polishing

This is after machine waxing...

So I apologize I missed the posting of this thread but was a tick busy.
While forums are not instantaneous, we do try to get back to people as fast as we can.
And if you look through my posting history and the type of projects I work on I cover a wide spectrum of projects, sometimes as you say, maintaining perfect painted cars, like this 2-door plastic fantastic,
How to detail a 2014 Corvette Stingray

Other times I'm doing exactly what you are asking for help with. Here's to my knowledge the first time the entire wetsanding, cutting and buffing process has ever been captured using time lapse photography.
From start to finish I MACHINE sanded a 1966 Malibu and as I work through the project I bring each sanding disc, tool, pad etc up to the camera so a shot is taken of what I'm using next for this project.
How to wet sand a car - Time Lapse Video
How to wet sand a car
[video=youtube_share;5zDuFzvKSAI"]How to wet sand a car[/video]
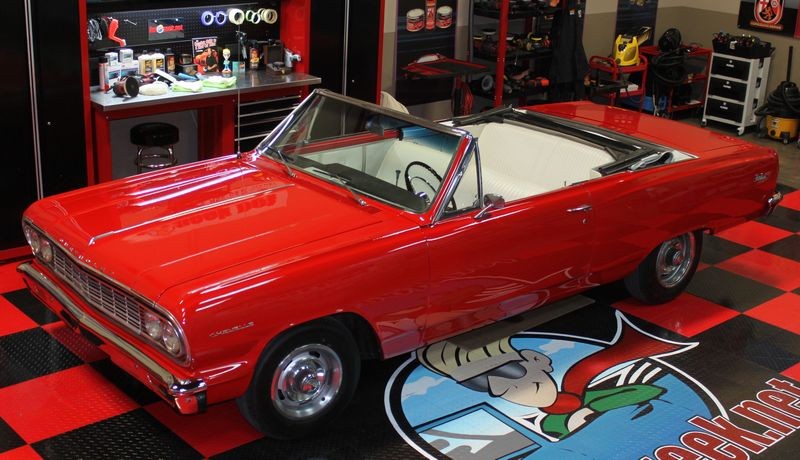
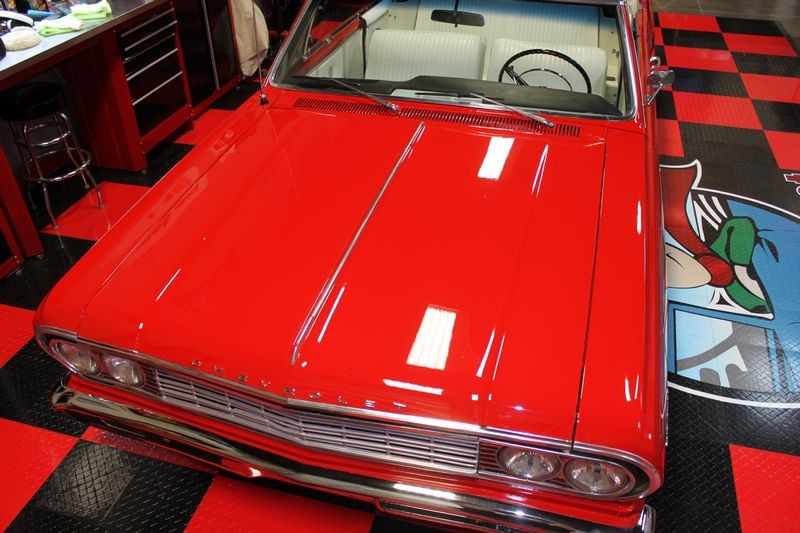
It was cloudy the day Mike Gelter brought his 1964 Chevy Chevelle Malibu Convertible to Autogeek but I did take a few before pictures to show the current condition of the paint.
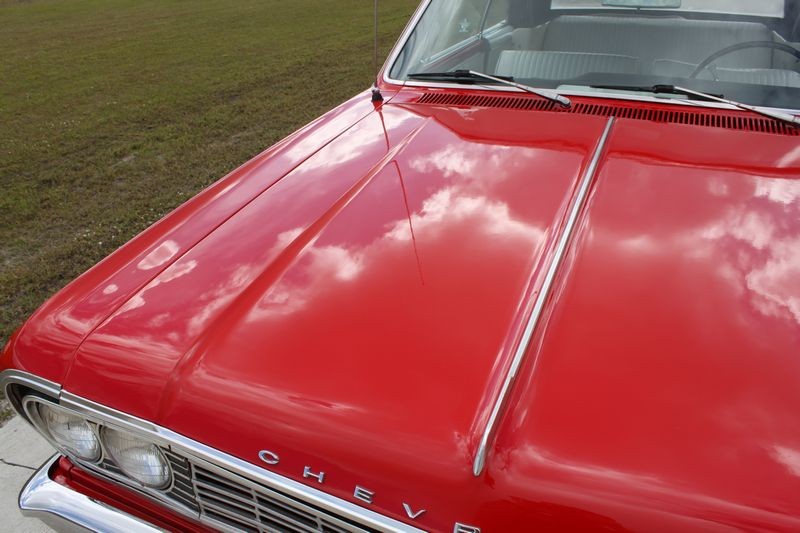
Under the cloudy sky you can see the orange peel, it actually looks worse under fluorescents and if I can find the "before" pictures I took under the florescent lights in the studio I'll add them to this thread...
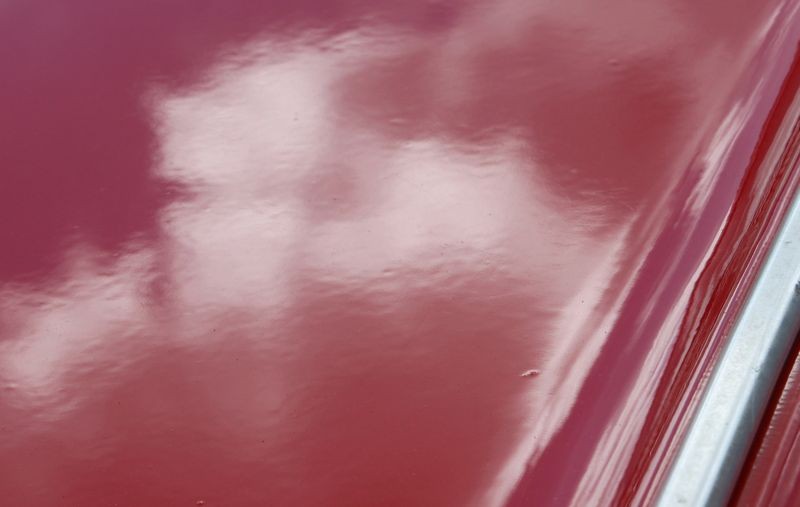
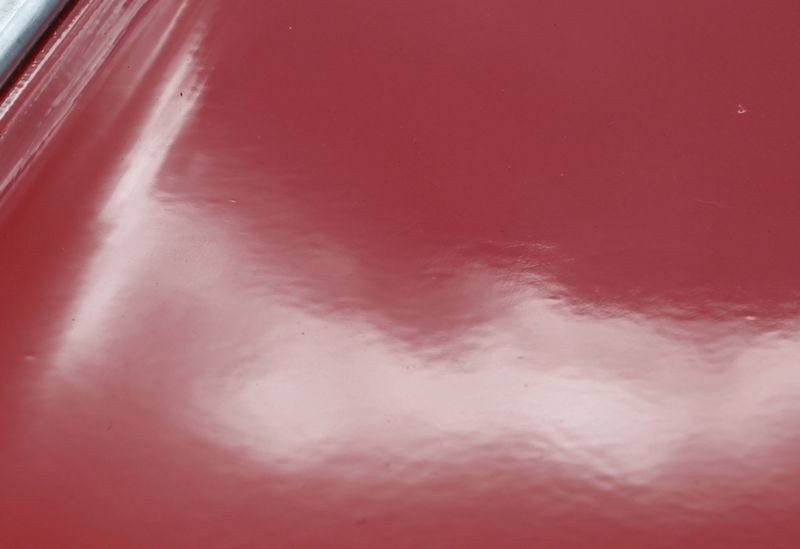
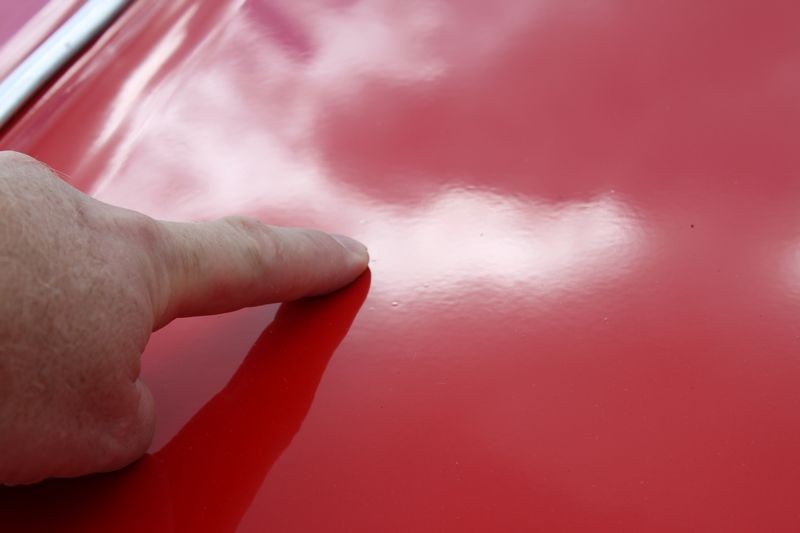
IF you look closely you can see dieback in the paint, that's where the paint shrinks back into the prep sanding marks in the primer. These all sanded and buffed out.
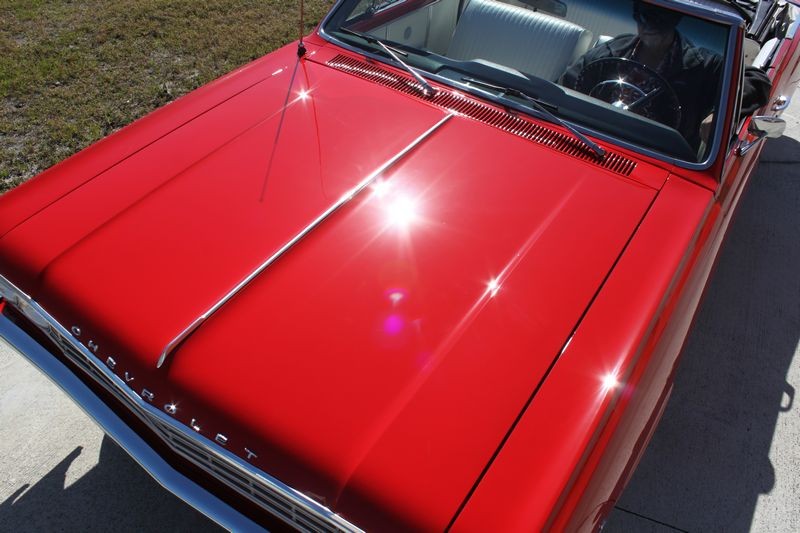
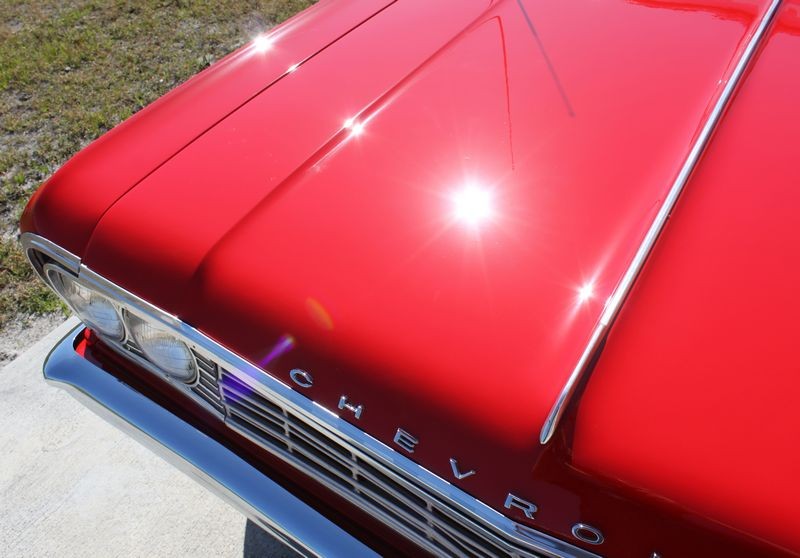
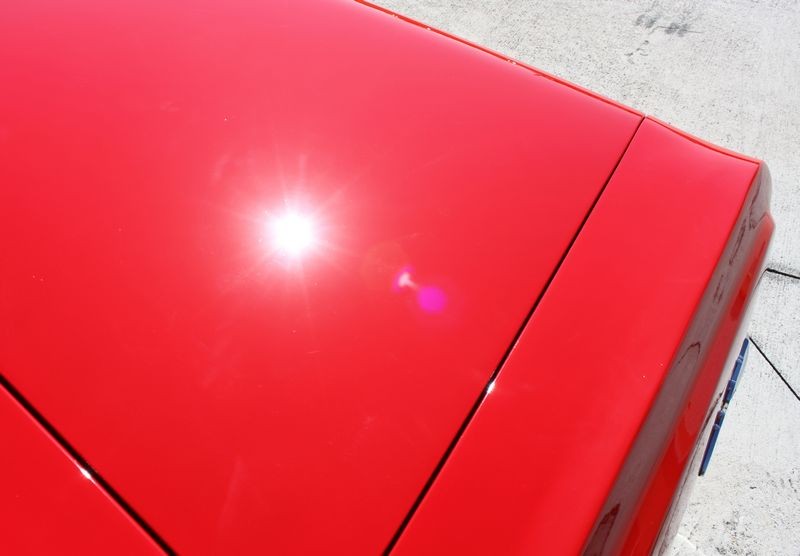
AFTER


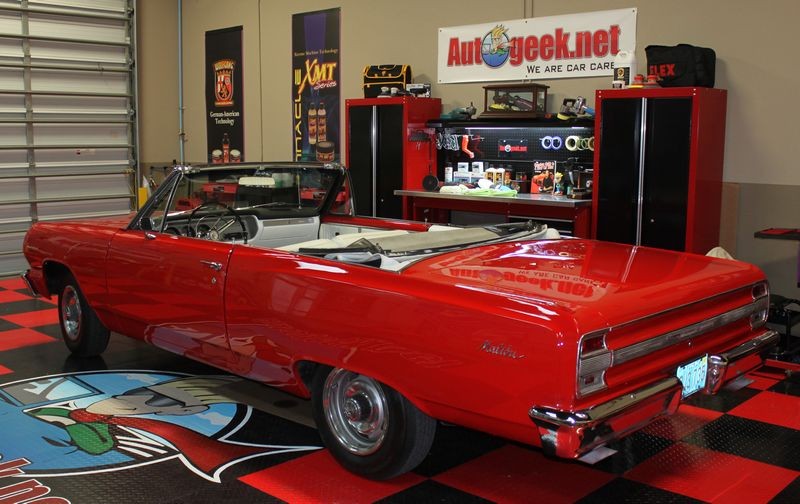
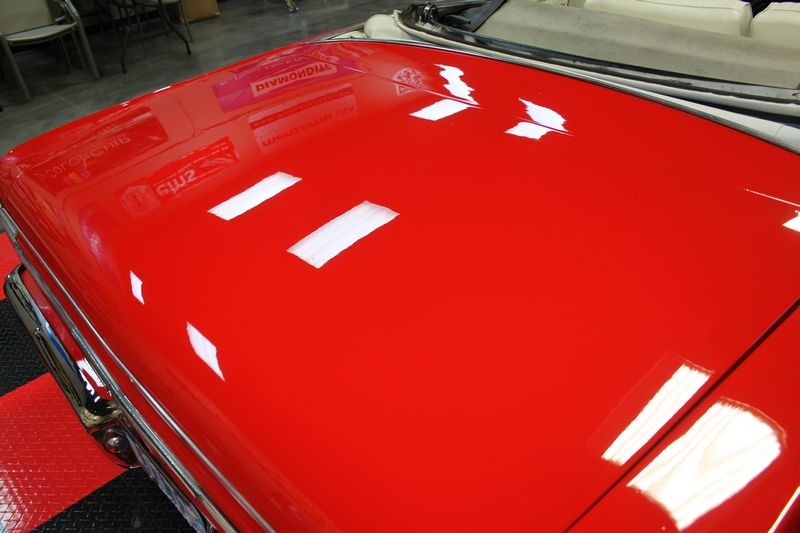

The sun shots....

I guess everyone is in to maintaining perfectly painted cars.
Thanks guys.
So yeah... we do a little bit of everything but we're not always behind the computer 24 x 7
57BORNTORUN
New member
- Jul 19, 2012
- 1,554
- 0
Ray is it your 55 that you painted?Do a test spot maybe on the flat part inside of your deck lid.Keep it well lubricated.Keep it flat on medium speed.Up and down and across for 5-6 passes in a two square foot section and change to 5000.When the paint is flat time to buff.Make sure the machine is turning by putting a mark on your backing plate or pad.If you feel uncomfortable with the Trizact then try Car pro denim pads.Post some close up pics. of the orange peel.We are here to help.:buffing:
Mike Phillips
Active member
- Dec 5, 2022
- 51,004
- 6
I received my 3M DA sander today. I am going to start with 3000 then 5000.
Anyone got any tips or advise? I have Indian Ivory on my 55 Chevy. It is single stage urethane.
I have never done this before.
Do I keep it wet?
Yes. You want to keep the surface wet but only DAMP not dripping wet. The Trizact #3000 and #5000 sanding, or technically FINISHING discs are for damp sanding, not wetsanding. The difference is in the volume of water you use.
I wrote the below right after the Meguiar's Unigrit Discs were introduced, everything holds true for the 3M Trizact finishing discs EXCEPT you WANT to use a little car wash soap in your spray bottle of fresh water.
With the Meguiar's Unigrit sanding discs you DO NOT use soap as there's a lubricant built into the medium that holds the abrasives.
Here's your sander... note the foam interface pad. I hope you also purchased the interface pad, it will make sanding not only a lot more fun as in SMOOTH as your run the sander over a panel but the interface also helps the sanding disc to contour or form to curved panels.
It also reduces the aggressiveness of the abrading action.
3M Random Orbital 6 Inch Air Sander 20325
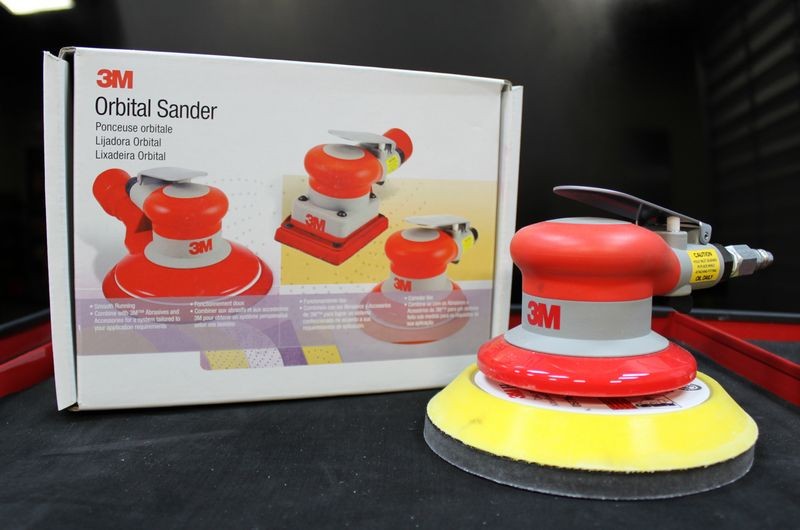
The #20325 3M Orbital Sander comes with a 6" backing plate for use with 3M Stickit brand adhesive backed sanding papers. To use it with either Meguiar's or 3M hook-n-loop sanding discs you need to get either the matching 3M Hookit Backing Plate or you can also use the Meguiar's Backing Plate.

3M Hookit Backing Plate
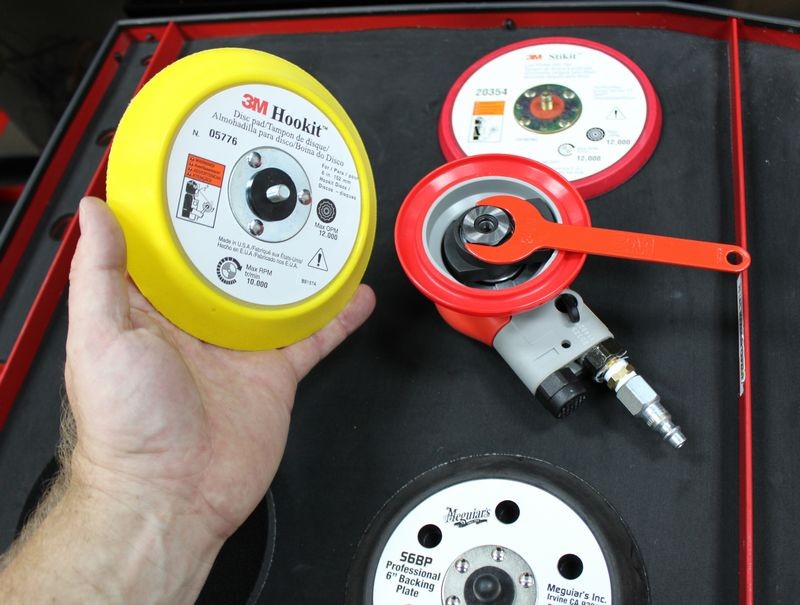
Attach and tighten till snug using the wrench that comes with the 3M Orbital Sander

If you want a less aggressive cut or some cushion for curved panels, then use the 3M Hookit 6" Soft Interface Pad #05777


Mike Phillips
Active member
- Dec 5, 2022
- 51,004
- 6
Here's the how-to portion of this article written and posted in June of 2010
Damp-Sanding Tools, Tips and Techniques by Mike Phillips
Tools needed,
High quality microfiber towels
Microfiber towels are more gentle to the finish then most other commonly available wiping cloths. As you work through the process of sanding and then buffing, polishing and even waxing or sealing the paint, you'll want to increase the quality of ANYTHING that touching the paint to avoid instilling any swirls, scratches or toweling marks. This is vitally important when you reach the final machine polishing steps and any steps where you're removing any finishing waxes or paint sealants.
Terry cloth towels
Optional: these can be used to remove water slurry and compounding residue but after the compounding step you should switch over to microfiber towels as they are more gentle to the finish than most cotton towels.
Painter's Tape
You'll want a variety of widths and types of painter's tape to tape-off and cover edges, body lines, trim and other areas or components to protect them from being sanded on, compounded or splattered with sanding or compounding residue.
Spray Bottle
A known clean spray bottle for holding clean water.
Wheel covers or Wheel Maskers
These are used to cover and protect wheels and tires from spatter from either your sanding process or any of the machine buffing procedures.
Soft Flannel Bedsheet
I use these to cover and protect engines and engine compartments. Often times custom cars have highly detailed engines and engine compartments with lots of polished aluminum, chrome or paint work. Engines and engine compartments can be difficult and time consuming to detail if they are accidentally splattered with sanding or compounding residue. It's much faster, safer and profitable to cover an engine and engine compartment than it is to later try to wipe it clean. You could also use plastic drop cloths like Painter's use available at most hardware supply stores.
Plastic Drop Cloths
These are optional but are a great, inexpensive way to cove-up a larger area to protect it from spatter.
Pad Cleaner
A pad cleaner is a device that will remove buffing compound and paint off the face of your buffing pad enabling you to work clean and avoid swirls. As you compound the compound you're using will be come spent or used-up and particles of paint will be coming off the car as you abrade it with the compound, both of these substances will build up on the face of your pad and a pad washer will remove this residue by washing and extracting via the pad washer.
Spur
A spur can be used instead of a pad washer or together with a pad washer to clean wool compounding pads. I personally use both a pad washer to clean my pad first and then afterwards use a Spur to further clean and fluff the fibers of the wool pad.
Safety Glasses
Kind of speaks for itself...
57BORNTORUN
New member
- Jul 19, 2012
- 1,554
- 0
You see Ray, your in good hands here at autogeek sponsor of trifive.com. and C-10 trucks.com.
Mike Phillips
Active member
- Dec 5, 2022
- 51,004
- 6
How-To Damp-sand
Here are the basic techniques for damp-sanding
Preparation
Wash OR wipe the vehicle to remove loose surface dirt
Wash car to remove all loose surface dirt off the paint and out of any cracks, crevices, body seams and trim. It is vitally important that the vehicle is surgically clean before sanding because if any abrasive particulate enters the sanding process and is trapped between your sanding disc and the paint finish it will instill what are referred to as pigtails.
Work Area Size? - 2" x 2" or smaller
In the real world, you would slice up the car panel by panel and then slice up the panel to section usually no larger than about 20” squarish or so. This is not a hard and fast rule because not all panels are square and flat, in fact since the 1980’s most car bodies incorporate aerodynamics designs and are very rounded and curvy.
Water Volume?
Damp-sanding is using only a few mists of water. Meguiar’s new Unigrit Sanding and Finishing Discs MUST be used wet but not over-wet. All you need is a mist or two of clear water to the face of the pad and a few mists of water to the surface to be sanded. Damp-sanding should not be a wet-mess on the car, or on the ground surrounding the car.
Use a clean water source - no soap or sanding lube

It's safer to error on the side of caution and use an extra mist or two of water until you get a feel for the right balance for your environmental conditions. Temperature, humidity, airflow, affect all machine sanding process including the Unigrit Sanding System so there can be no hard and fast recommendations. Practice makes perfect.
I took the below picture after completely sanding down a 1969 El Camino. Note the water level in the clear spray bottle.
Only 16 ounces of water used to sand an entire 1969 El Camino

This is a 32 ounce spray bottle and I never refilled it during the sanding process, this means I used approximately 16 ounces of water to sand down a full size, domestic vehicle.
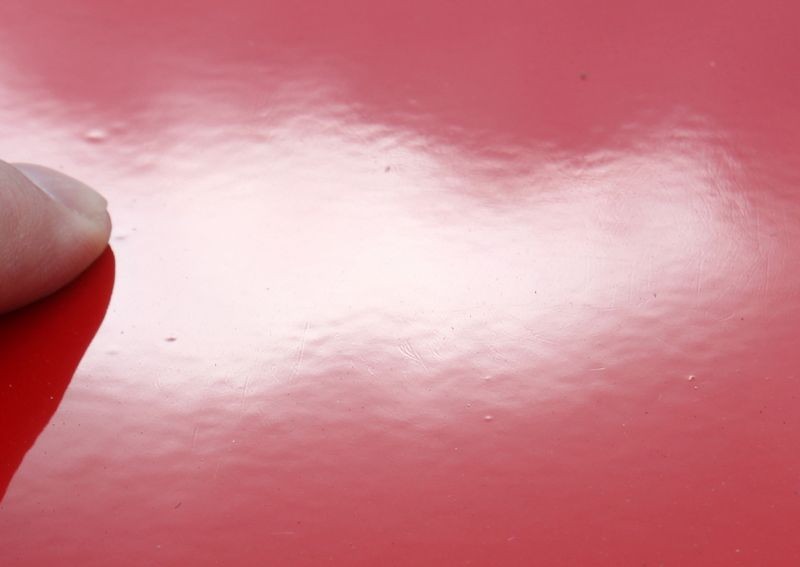
Downward Pressure?
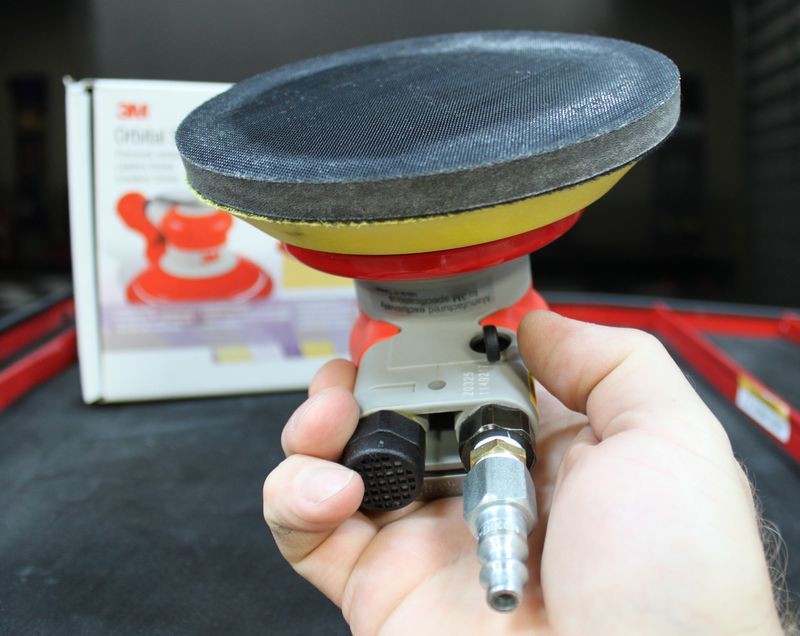
Light Pressure. When machine sanding you only need to use the weight of the machine and whatever more pressure it takes to keep the pad flat to the surface with no hopping or skipping. It’s vitally important to maintain disc rotation so you don't want to use too low of a speed setting.
Tool Speed Setting?
Fast. With an air powered D.A. Sander you're going to be on 3/4 to full throttle With a Meguiar's electric polisher you’re going to use the 3.0 to 6.0 speed setting depending upon whether you're sanding a flat surface or a curved surface. It's safer to turn the speed down anytime you're sanding small curved areas or hard to reach areas.
You can see the Throttle next to my thumb on the underside of this 3M Air-Powered DA Sander
Air Pressure or PSI
Before using an air powered DA Sander check to see what the tool manufacture recommends for Maximum PSI or PSIG.
I think the main difference between PSI and PSIG is that PSI is not specific to the point of connection for the tool and could mean compressed air pressure at the tank and not the actual gauge and thus the air line feeding your tool. That means there can be differences in PSI by the time it gets to your tool depending upon the shop you work in and how many lines are being fed by the air tank/compressor. The important point is to make sure you don't starve your air tool for compressed air and you don't over feed the tool with too much air pressure.
The 3M DA Sander shown in this article states to not exceed 90 PSI
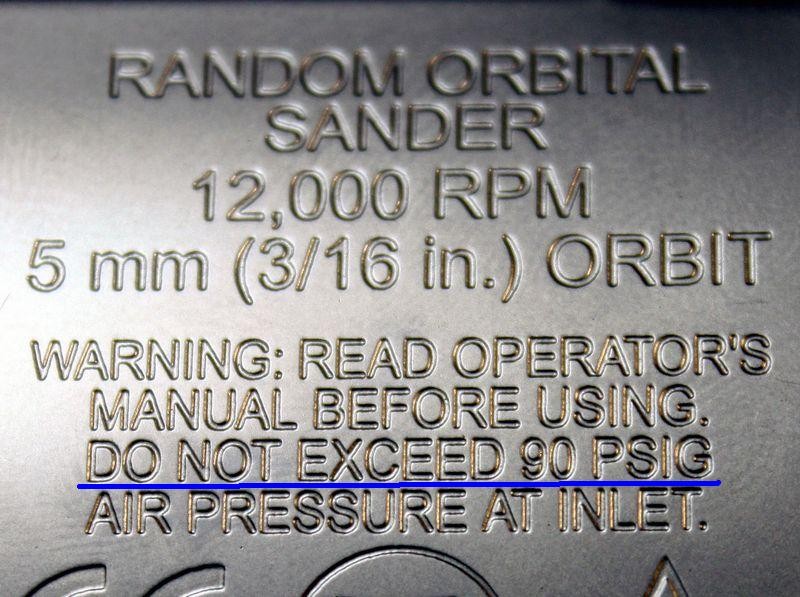
The air regulator for use in our shop is usually set to around 110 PSI so when I want to use the air compressor I have to decrease the pressure coming out of the line by adjusting the regulator down to 90 PSI

Sanding Pattern?
Cross Hatch Pattern --> UMR = Uniform Material Removal.
The goal when sanding is to remove the defects while removing as little paint or topcoat material as possible. Of course the reason for this is to leave as much paint on the car to last over the service life of the car. So your specific goal is to only sand enough to remove the defects and then STOP. The only way you will know how much sanding is required to remove the defects is by testing each paint system you work on and getting a feel for how many passes it takes to remove the defects you're going after.
Because topcoat hardness is a variable you cannot control, you must do a Test Spot on each new car you work on to figure out how easily or difficult the paint is sanding to remove enough material to reach your goal.
Cross Hatch Pattern
Sanding back in forth in a straight line with a DA Sander creates the potential to remove material unevenly if you're not very careful. Adding a second direction will help insure the surface remains flat with no low/high troughs or valleys running a dedicated direction in the panel. A cross hatch pattern helps to ensure uniform material removal over an entire panel.
Of course the shape of some panels will not lend themselves to sanding in a cross hatch pattern and you will be limited to only sanding in one direction. For panels such as these be sure to overlap your passes by 50%
Pre-determined pattern = Easy to duplicate and less thinking required
The benefit to using a cross hatch pattern is that it's easy to remember and thus easy to duplicate over and over again for production sanding work. Feel free to come up with your own system that suits your goals best, these are just my recommendations as to what works best for me. If you have employees, you always want to make procedures they will do over and over again easy to learn and repeat for fewer mistakes.


Arm Speed?
Use a rapid arm speed when machine sanding.
Unigrit discs are designed to cut fast and cut for a long time with light pressure and a fast arm speed. Moving the sander/polisher too slowly will cause the abrasives to cut too deeply and will wear the disc out prematurely. There’s a learning curve to every process and that includes machine sanding with these new Unigrit Sanding Discs and you’re better to error on the side of caution by using too fast of an arm speed versus too slow.
When first starting out, stop often and check your results.
Number of passes?
When sanding with the Meguiar's Unigrit Sanding Discs, after the initial break-in of the disc, sand for 4 - 6 Section Passes and then inspect.
The definition of a pass
There are two definitions of the word pass as it relates to machine polishing with any type of machine. We can apply this to machine sanding as well.
The definition of a pass
There are two definitions of the word pass as it relates to machine polishing with any type of machine. We can apply this to machine sanding as well.
Big Picture
Sand a section of a panel until you have removed the orange peel and any other surface texture or surface imperfections. Then move to a new section on the panel and contour until the entire panel is sanded flat.
Next move onto a new panel and repeat.
Sand until the entire car is sanded flat.
Next you want to give the car a complete and thorough wipe down using a water dampened microfiber towel to make sure any loose abrasive particles are removed. If any sanding abrasive particles get trapped between your buffing pad and the paint when you go to buff out the sanding marks this can lead to deep swirls. So be sure to work clean.
Next you'll want to,
I'm going to guess that the goal for your 1955 Chevy is a show car finish, if that's the case then I'll guess you don't want any holograms in the paint left by a rotary buffer.
The easiest way to ensure there are zero holograms it to use a dual action polisher for your LAST machine polishing step.
I'd also recommend using the best compounds and polishes your budget will allow. The most important aspect of the finish results for ANY type of machine polishing project is the abrasive technology.
Hope the above helps, if you have any further questions please post them and myself and the rest of the AGO forum members will do our best to answer them as quickly as possible.
:xyxthumbs:
Here are the basic techniques for damp-sanding
Preparation
Wash OR wipe the vehicle to remove loose surface dirt
Wash car to remove all loose surface dirt off the paint and out of any cracks, crevices, body seams and trim. It is vitally important that the vehicle is surgically clean before sanding because if any abrasive particulate enters the sanding process and is trapped between your sanding disc and the paint finish it will instill what are referred to as pigtails.
Pigtails - Photo courtesy of Mister B
Pigtails are deeper circular scratches that look somewhat like a curled pig's tail thus the name. Typically what happens is an abrasive particle gets trapped between the paint and the face of your sanding disc and because the backing plate that holds the sandpaper is moving in an oscillating fashion, it grinds the abrasive particle into the paint in a curly pattern that looks somewhat like the tail on a pig, thus the name.
Pigtails
Work Area Size? - 2" x 2" or smaller
In the real world, you would slice up the car panel by panel and then slice up the panel to section usually no larger than about 20” squarish or so. This is not a hard and fast rule because not all panels are square and flat, in fact since the 1980’s most car bodies incorporate aerodynamics designs and are very rounded and curvy.
Why you don't want to tackle too large an area at one time...
Regardless of the shape of the panel, the reason you don't want to tackle too large of an area at one time is because you have better control over downward pressure when the sander is near your body. The further you reach out away from your body the more likely you'll change the downward pressure and possibly tilt the polisher potentially causing more pressure to and edge on the face of your sanding disc and this can cause gouging or deeper scratches in the paint.
The width of your shoulders is a pretty good measurement for as large of a dimension as you would ever want to tackle on a surface. My shoulders measure approximately 20" wide so I would only want to tackle a section 20" squarish or smaller, not larger.
Water Volume?
Damp-sanding is using only a few mists of water. Meguiar’s new Unigrit Sanding and Finishing Discs MUST be used wet but not over-wet. All you need is a mist or two of clear water to the face of the pad and a few mists of water to the surface to be sanded. Damp-sanding should not be a wet-mess on the car, or on the ground surrounding the car.
- Too much water will hyper-lubricate the surface and reduce cutting action.
- Too little water will increase cutting, clog disc and wear disc out prematurely.
Use a clean water source - no soap or sanding lube
It's safer to error on the side of caution and use an extra mist or two of water until you get a feel for the right balance for your environmental conditions. Temperature, humidity, airflow, affect all machine sanding process including the Unigrit Sanding System so there can be no hard and fast recommendations. Practice makes perfect.
VITALLY IMPORTANT
It's vitally important that you stay focused on the amount of water you're using when damp-sanding because if you use too much water and your disc hydroplanes, you can mis-read this to mean the disc is spent of used-up and no longer cutting.
If the disc is in fact still good and you throw it away because you used too much water then you waste a good disc and these are not inexpensive.
Remember, it's not wet sanding it’s damp-sandingIt's vitally important that you stay focused on the amount of water you're using when damp-sanding because if you use too much water and your disc hydroplanes, you can mis-read this to mean the disc is spent of used-up and no longer cutting.
If the disc is in fact still good and you throw it away because you used too much water then you waste a good disc and these are not inexpensive.
I took the below picture after completely sanding down a 1969 El Camino. Note the water level in the clear spray bottle.
Only 16 ounces of water used to sand an entire 1969 El Camino
This is a 32 ounce spray bottle and I never refilled it during the sanding process, this means I used approximately 16 ounces of water to sand down a full size, domestic vehicle.
Downward Pressure?
Light Pressure. When machine sanding you only need to use the weight of the machine and whatever more pressure it takes to keep the pad flat to the surface with no hopping or skipping. It’s vitally important to maintain disc rotation so you don't want to use too low of a speed setting.
Tool Speed Setting?
Fast. With an air powered D.A. Sander you're going to be on 3/4 to full throttle With a Meguiar's electric polisher you’re going to use the 3.0 to 6.0 speed setting depending upon whether you're sanding a flat surface or a curved surface. It's safer to turn the speed down anytime you're sanding small curved areas or hard to reach areas.
You can see the Throttle next to my thumb on the underside of this 3M Air-Powered DA Sander
Air Pressure or PSI
Before using an air powered DA Sander check to see what the tool manufacture recommends for Maximum PSI or PSIG.
PSI = Pounds per square inch
PSIG - Pounds per square inch at the gauge
PSIG - Pounds per square inch at the gauge
I think the main difference between PSI and PSIG is that PSI is not specific to the point of connection for the tool and could mean compressed air pressure at the tank and not the actual gauge and thus the air line feeding your tool. That means there can be differences in PSI by the time it gets to your tool depending upon the shop you work in and how many lines are being fed by the air tank/compressor. The important point is to make sure you don't starve your air tool for compressed air and you don't over feed the tool with too much air pressure.
The 3M DA Sander shown in this article states to not exceed 90 PSI
The air regulator for use in our shop is usually set to around 110 PSI so when I want to use the air compressor I have to decrease the pressure coming out of the line by adjusting the regulator down to 90 PSI
Sanding Pattern?
Cross Hatch Pattern --> UMR = Uniform Material Removal.
The goal when sanding is to remove the defects while removing as little paint or topcoat material as possible. Of course the reason for this is to leave as much paint on the car to last over the service life of the car. So your specific goal is to only sand enough to remove the defects and then STOP. The only way you will know how much sanding is required to remove the defects is by testing each paint system you work on and getting a feel for how many passes it takes to remove the defects you're going after.
Because topcoat hardness is a variable you cannot control, you must do a Test Spot on each new car you work on to figure out how easily or difficult the paint is sanding to remove enough material to reach your goal.
Cross Hatch Pattern
Sanding back in forth in a straight line with a DA Sander creates the potential to remove material unevenly if you're not very careful. Adding a second direction will help insure the surface remains flat with no low/high troughs or valleys running a dedicated direction in the panel. A cross hatch pattern helps to ensure uniform material removal over an entire panel.
Of course the shape of some panels will not lend themselves to sanding in a cross hatch pattern and you will be limited to only sanding in one direction. For panels such as these be sure to overlap your passes by 50%
Pre-determined pattern = Easy to duplicate and less thinking required
The benefit to using a cross hatch pattern is that it's easy to remember and thus easy to duplicate over and over again for production sanding work. Feel free to come up with your own system that suits your goals best, these are just my recommendations as to what works best for me. If you have employees, you always want to make procedures they will do over and over again easy to learn and repeat for fewer mistakes.
Arm Speed?
Use a rapid arm speed when machine sanding.
Unigrit discs are designed to cut fast and cut for a long time with light pressure and a fast arm speed. Moving the sander/polisher too slowly will cause the abrasives to cut too deeply and will wear the disc out prematurely. There’s a learning curve to every process and that includes machine sanding with these new Unigrit Sanding Discs and you’re better to error on the side of caution by using too fast of an arm speed versus too slow.
When first starting out, stop often and check your results.
Number of passes?
When sanding with the Meguiar's Unigrit Sanding Discs, after the initial break-in of the disc, sand for 4 - 6 Section Passes and then inspect.
The definition of a pass
There are two definitions of the word pass as it relates to machine polishing with any type of machine. We can apply this to machine sanding as well.
Single Pass
A single pass is just that. It's when you move the tool from one side of the section you're sanding to the other side of the section you're sanding. That's a single pass.
Section Pass
A section pass is when you move the tool back and forth, or front to back with enough single overlapping passes to cover the entire section one time. That's a section pass.
Big Picture
Sand a section of a panel until you have removed the orange peel and any other surface texture or surface imperfections. Then move to a new section on the panel and contour until the entire panel is sanded flat.
Next move onto a new panel and repeat.
Sand until the entire car is sanded flat.
Next you want to give the car a complete and thorough wipe down using a water dampened microfiber towel to make sure any loose abrasive particles are removed. If any sanding abrasive particles get trapped between your buffing pad and the paint when you go to buff out the sanding marks this can lead to deep swirls. So be sure to work clean.
Next you'll want to,
- Compound the paint using a wool pad, cutting compound and rotary buffer.
- Polish the paint using a fine cut polish a foam pad and your choice of a rotary buffer or some type of dual action polisher.
I'm going to guess that the goal for your 1955 Chevy is a show car finish, if that's the case then I'll guess you don't want any holograms in the paint left by a rotary buffer.
The easiest way to ensure there are zero holograms it to use a dual action polisher for your LAST machine polishing step.
I'd also recommend using the best compounds and polishes your budget will allow. The most important aspect of the finish results for ANY type of machine polishing project is the abrasive technology.
Hope the above helps, if you have any further questions please post them and myself and the rest of the AGO forum members will do our best to answer them as quickly as possible.
:xyxthumbs:
Mike Phillips
Active member
- Dec 5, 2022
- 51,004
- 6
To Ray,
Down the road, consider adding a 3" Griot's Mini Polisher and 3" Trizact sanding discs to your tool collection.
This is without question, one of the most important tools for any full sanding project as the pictures below show why....


Down the road, consider adding a 3" Griot's Mini Polisher and 3" Trizact sanding discs to your tool collection.
This is without question, one of the most important tools for any full sanding project as the pictures below show why....
Mike Phillips
Active member
- Dec 5, 2022
- 51,004
- 6
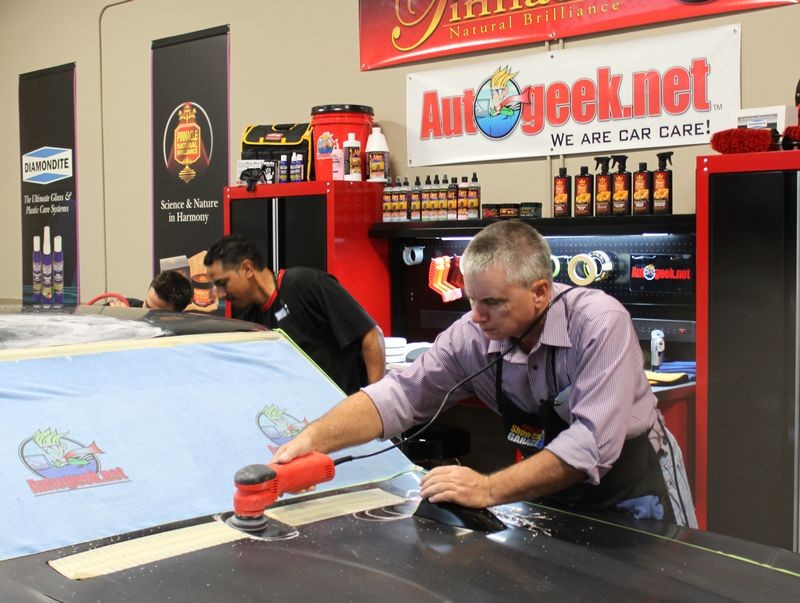
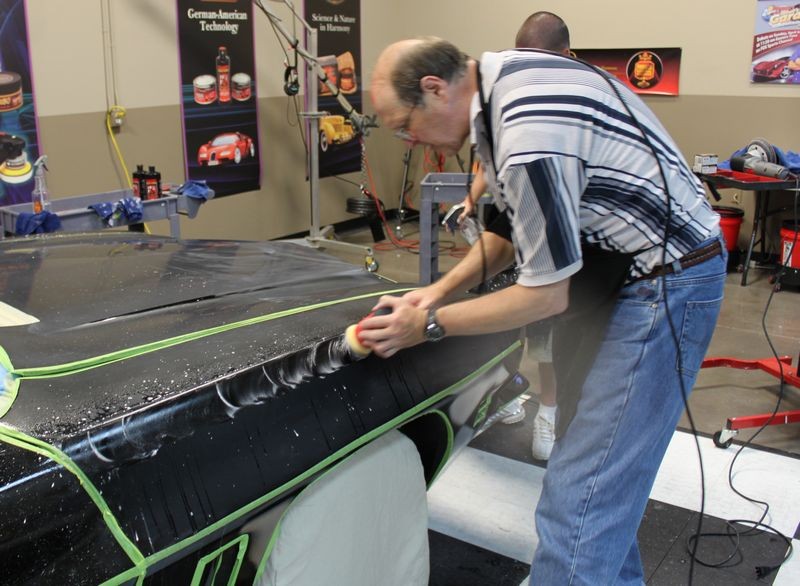
Managing your air line
Anytime you use an air tool you have to contend with a very stiff air line that will try to kick or tilt your tool to an angle unless you constantly monitor and control the air line. With an electric tool the power cord is limp, you just keep it over your shoulder to keep it from dragging against the paint.
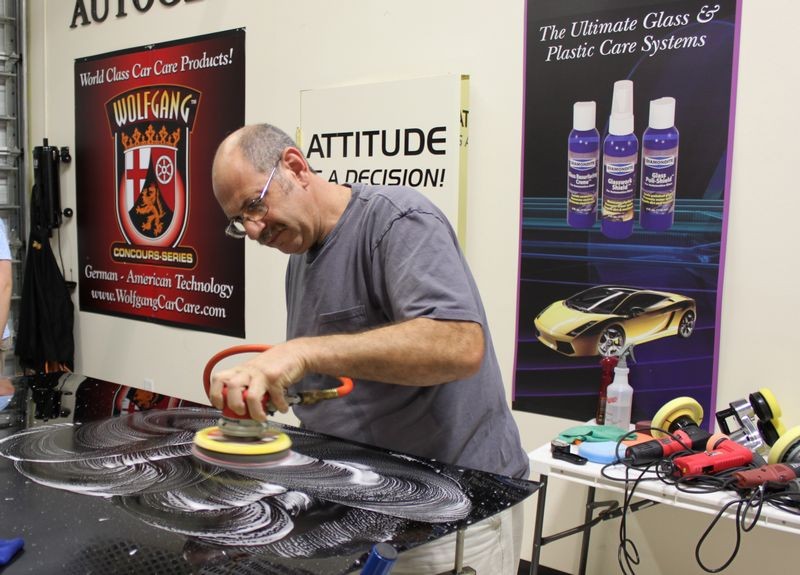
IF you look at these pictures from one of my wetsanding classes you can see each person holding the air sander with one hand and managing the air line with the other hand.
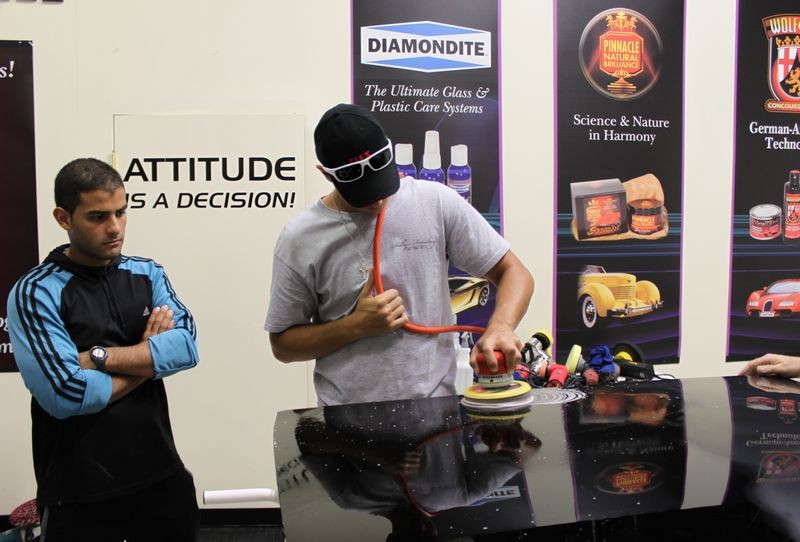
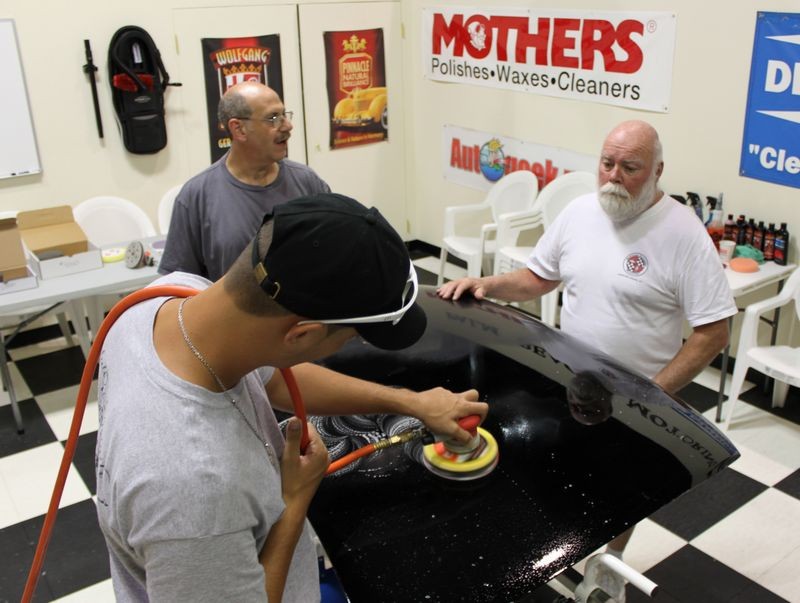

Adam aka HarleyGuy
:xyxthumbs:
Anytime you use an air tool you have to contend with a very stiff air line that will try to kick or tilt your tool to an angle unless you constantly monitor and control the air line. With an electric tool the power cord is limp, you just keep it over your shoulder to keep it from dragging against the paint.
IF you look at these pictures from one of my wetsanding classes you can see each person holding the air sander with one hand and managing the air line with the other hand.
Adam aka HarleyGuy
:xyxthumbs:
Mike Phillips
Active member
- Dec 5, 2022
- 51,004
- 6
Here's the live video captured at the 9th Annual Detail Fest. In this video I'm going to show how to;
1. Machine sand - Including how to edge a panel and then tackle the major portion of the panel.
2. Compound using a wool pad with a compound and rotary buffer
3. Machine polish with a foam pad and a fine cut polish and a rotary buffer
4. Jewel with gold jeweling pad, a fine cut polish and a rotary buffer
2. Compound using a wool pad with a compound and rotary buffer
3. Machine polish with a foam pad and a fine cut polish and a rotary buffer
4. Jewel with gold jeweling pad, a fine cut polish and a rotary buffer
rayhyar
New member
- Apr 17, 2014
- 20
- 0
- Thread starter
- #14
Well,I wet sanded instead of damp sanding. Friday I wet sanded with 3000 and followed with 5000. I read the how to articles and did the rule of thumb trick. I ordered 1500 grit which will be here tomorrow. The weather is pretty bad here for now,but when it clears I will go over the car again with 3000 damp sanding. I did order and receive the correct backing pads. I am very happy with the performance of the equipment and accessories. I just want to mention that my paint is urethane. I will take some pictures and post later. May take a couple of days. I was beginning to think this site was more for detailing cars.
Last edited:
Mike Phillips
Active member
- Dec 5, 2022
- 51,004
- 6
Here's a single stage urethane paint job on my buddies 1969 GTO. I'm not 100% sure how they sanded it but think Den took them some of the #3000 and #5000 Trizact discs we use at Autogeek and showed them to the guys that painted his car and then they might have actually ordered and used them.
Paint polished using all Pinnacle polishes and waxes.
Back in Black! 1969 GTO!!!

:dblthumb2:
Paint polished using all Pinnacle polishes and waxes.
Back in Black! 1969 GTO!!!
:dblthumb2:
rayhyar
New member
- Apr 17, 2014
- 20
- 0
- Thread starter
- #17
Ray is it your 55 that you painted?Do a test spot maybe on the flat part inside of your deck lid.Keep it well lubricated.Keep it flat on medium speed.Up and down and across for 5-6 passes in a two square foot section and change to 5000.When the paint is flat time to buff.Make sure the machine is turning by putting a mark on your backing plate or pad.If you feel uncomfortable with the Trizact then try Car pro denim pads.Post some close up pics. of the orange peel.We are here to help.:buffing:
Yes, I am working on the 55. My paint has some flaughs in it that I would like to try to remove. The equipment worked fantastic. I apparently purchased the right accessories it just would not cut deep enough into the paint to remove the imperfections as well as I thought it should. According to the information I have now, I was wet sanding and should have been damp sanding. I think I am on the right track now. I can handle a sander and buffer pretty well. I think I was expecting too much out of 3000 grit. I am going to try damp sanding with 3000. I Have 1500 on the way just in case.
Mike Phillips
Active member
- Dec 5, 2022
- 51,004
- 6
I think I was expecting too much out of 3000 grit.
#3000 is pretty fine, a lower grade is usually needed to cut orange peel and other imperfections down fast.
I am going to try damp sanding with 3000.
What happens if you use too much water is you hyper-lubricate the surface and hinder the abrasives from cutting. This is better than using too little water as too litter water will clog the face of the sanding disc with paint and prematurly wear out the disc.
I Have 1500 on the way just in case.
That will get the job done....
Here's you picture uploaded to your free gallery here on AGO

:dblthumb2:
civicgeek133
New member
- Sep 1, 2008
- 7
- 0
Mike you make the wet sanding process sound way to easy! I'd love to wet/damp sand my project car. The inexperienced painter who attempted to wet sand and polish the car left what I call "sanding grain marks" idk if that is the proper term, but first that comes to mind. Informative write up though! I enjoyed that!
Sometimes it is easier to wet sand out the flaws in the paint with anything from 1000 to 3000 to remove the flaws. Depends on how bad the flaws are you can even drop down a grade to more aggressive cutting paper. Then go over that with your jitterbug with your trizact 3000 and 5000 discs. These are judgment type calls.
The methods used all depends on the type of flaws and the location of the flaws on the body of the car. If you decide to go with wet hand sanding the flaws out use a pads or block. You do not want to dig into the paint work.
You tube has videos on color sanding and polishing some are good some are not so good view them and maybe gather some techniques.
Good Luck