I'm not a pro, I'm just a guy with a 1988 black corvette who likes to keep it looking nice.
I'm in Canada, so my product selection is more limited than what can be had in the USA. Shipping in liquids or aerosols is a major PITA with customs. I've never had much luck with them in that regard and it usually ends up being "denied" or seized for one BS reason or another.
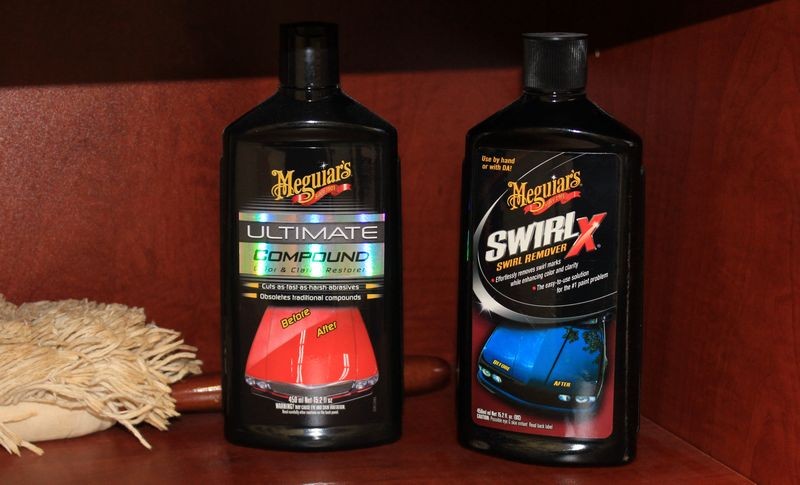
So I use the Meguire's stuff (ultimate compound, polish and wax) because I can buy it locally at a major dept store. For buffers I use a rotary and a 21mm throw orbital. The rotary is the Dewalt XP and the orbital is an ebay special, the one you see in a couple youtube videos with the digital speed display on the handle. They work fine for my limited use. My pads come from a local jobber who deals in car care/body shop supplies.
I've never had issues with buffer trails before (holograms if you prefer), but this year I'm beset by them.It seems like if I even think about buffing the car, trails start to show up. I haven't changed products or techniques, but they seem to just keep coming back. The car looks fantastic in the garage, but out in the sunlight the trails become stupid evident. Same with scratches. I buff them out and the car looks fantastic. Roll it out in the sun and....BAM! Just like that, the scratches are back.
So I'd like to know if there's shop lighting that would make the trails/scratches more obvious to me when buffing. My "shop" is a two car garage and the lighting is four overhead LED lighting fixtures. They're the ones that look like the rectangular florescents, but they're led elements (and bright as hell).
Would one of those "mega shop lights" do the trick? Something along these lines:
View attachment 69676
I've seen the little "pen light" style led's guys use to check paint, but I need something that will show me what's going on in large scale. A flashlight sized item just isn't going to work for that.
Then there's the buffer trails. Like what the heck? As I mentioned, I'm not doing anything differently than I have all along and now....trails. Speed and pressure is what I thought mainly created trails. But I only use the weight of the buffer itself (rotary or DA) and I make sure I'm traveling at a good rate. Speed on the rotary I limit to about 1800 rpm and lower. I usually compound with the rotary and finish with the orbital.
The paint does seem pretty soft this year. It seems like even my bare skin will leave scratches. It wouldn't do that last year. It would buff up nicely and stayed clean until years end. It may (or may not) be original paint. the drivers door has been changed out (before I bought it) and painted to match. I can't be sure if the whole car was painted as I don't see any paint edges or overspray anywhere. Although, it is all in OEM black so there could be overspray and I can't tell if it's OEM or from a respray. I lean towards saying just the door was resprayed when it was changed, although the paint match must be dea on, you can't tell the door has been painted until you pull back a little interior trim and find a purple instead of black.
I just can't figure out why I'm getting buffer trails now when I'm doing the same processes/products that I used sucessfully last year. Could the impression that the paint clear seems softer than it was last year be a clue?
I'm in Canada, so my product selection is more limited than what can be had in the USA. Shipping in liquids or aerosols is a major PITA with customs. I've never had much luck with them in that regard and it usually ends up being "denied" or seized for one BS reason or another.
So I use the Meguire's stuff (ultimate compound, polish and wax) because I can buy it locally at a major dept store. For buffers I use a rotary and a 21mm throw orbital. The rotary is the Dewalt XP and the orbital is an ebay special, the one you see in a couple youtube videos with the digital speed display on the handle. They work fine for my limited use. My pads come from a local jobber who deals in car care/body shop supplies.
I've never had issues with buffer trails before (holograms if you prefer), but this year I'm beset by them.It seems like if I even think about buffing the car, trails start to show up. I haven't changed products or techniques, but they seem to just keep coming back. The car looks fantastic in the garage, but out in the sunlight the trails become stupid evident. Same with scratches. I buff them out and the car looks fantastic. Roll it out in the sun and....BAM! Just like that, the scratches are back.
So I'd like to know if there's shop lighting that would make the trails/scratches more obvious to me when buffing. My "shop" is a two car garage and the lighting is four overhead LED lighting fixtures. They're the ones that look like the rectangular florescents, but they're led elements (and bright as hell).
Would one of those "mega shop lights" do the trick? Something along these lines:
View attachment 69676
I've seen the little "pen light" style led's guys use to check paint, but I need something that will show me what's going on in large scale. A flashlight sized item just isn't going to work for that.
Then there's the buffer trails. Like what the heck? As I mentioned, I'm not doing anything differently than I have all along and now....trails. Speed and pressure is what I thought mainly created trails. But I only use the weight of the buffer itself (rotary or DA) and I make sure I'm traveling at a good rate. Speed on the rotary I limit to about 1800 rpm and lower. I usually compound with the rotary and finish with the orbital.
The paint does seem pretty soft this year. It seems like even my bare skin will leave scratches. It wouldn't do that last year. It would buff up nicely and stayed clean until years end. It may (or may not) be original paint. the drivers door has been changed out (before I bought it) and painted to match. I can't be sure if the whole car was painted as I don't see any paint edges or overspray anywhere. Although, it is all in OEM black so there could be overspray and I can't tell if it's OEM or from a respray. I lean towards saying just the door was resprayed when it was changed, although the paint match must be dea on, you can't tell the door has been painted until you pull back a little interior trim and find a purple instead of black.
I just can't figure out why I'm getting buffer trails now when I'm doing the same processes/products that I used sucessfully last year. Could the impression that the paint clear seems softer than it was last year be a clue?
")
")