Hello!
Been a lurker for a long time now, and have learned a tremendous amount of valuable knowledge off here, but I've run into a problem with one of my vehicles and I haven't read of a solution.
Welcome to AutogeekOnline! :welcome:
I have an original paint (brochures advertise it as acrylic enamel, blue non metallic) 1968 International Travelall. It has been very well kept all its life, as far as I know never polished. Only very lightly waxed. The paint is healthy and not oxidized. It is due for a very light polish and good wax/sealant, though.
I'll guarantee you that if you clay the paint and then give it a light machine polish and then apply a coat of wax the paint will explode with gloss. Acrylic enamel polishes up really well as it's "real paint".
For those reading this into the future that might not know what a 1968 International Harvester Travelall looks like here you go...
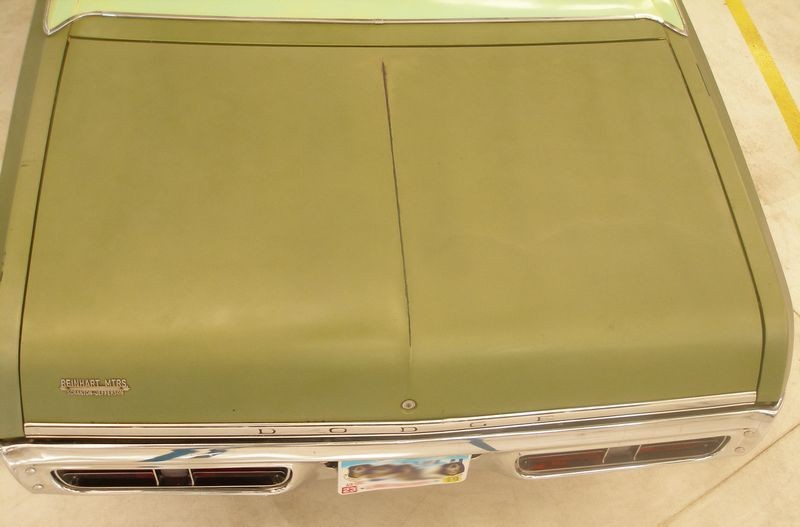
My problem comes from this last winter storage, the weather seemed to fluctuate quite a bit this year, and I believe is what caused the fuel to seep out the fender fill on the passenger side front fender. I was able to clean a lot of the residue off with some soapy water, but there is a fairly prominent stain directly under the cap that ran down the fender. I hit it with a little cleaner wax and that didn't seem like it was going to work so I quit not wanting to remove any more paint than necessary.
So that means you have a stain in the yellow circled area here,
If any, what are my options to remove this stain? Thanks for the help! :buffing:
First, when I was 15 years old I got a job at a full service Mobil Gas station pumping gas and there was a customer that owned the tan version of this truck that brought it in ALL the time. I remember it well because,
A: Being full service gas station I had to clean all the windows.
B: The design of the gas filler, at least on the Travelall I filled with gas was such that gas would only go in VERY SLOWLY so it was a real pain to fill when all my bays were full.
Very cool truck back then and very cool today. Most people think these trucks back then were on the ugly side but they have their own cult following today and a part of their popularity has to do with their appearance.
Here's the deal on the stain...
Single stage paint tends to be a lot more porous than basecoat/clearcoat paints and the gas has likely penetrated "into" the paint to the degree that you "might" not be able to completely remove 100% of the stain by polishing this area.
Like Bobby stated, you're only option is to polish the paint which means to "abrade" the paint and try to remove as much of the stained portion as possible without removing too much paint.
You'll have to go with your instincts based upon your comfort level with the risk involved. IF you remove too much paint you'll expose the primer and it's probably a black or gray primer under the blue paint.
If this truck were mine, I would do and use the exact same products I used recently on a 1953 Hudson Hornet with original paint and a 1955 DeSoto Firedome with the original paint and that is to,
1. Wipe the paint clean - I never wash classic cars.
2. Clay the paint to remove above surface contaminants. This alone will increase the "gloss" of the paint.
3. Rub the paint down with the Meguiar's #7 Show Car Glaze with a very heavy or wet application and let it soak in for a few hours or overnight before removing.
4. Machine polish the paint using a Porter Cable DA Polisher with a 5.5" LC White Foam Polishing Pad with Pinnacle Advanced Swirl Remover. The Pinnacle Advanced Swirl Remover is a "Medium Cut Polish" as described in my how-to book and completely safe for this antique single stage paint. It will remove years of embedded dirt and light oxidation and restore the full richness of the original color PLUS build off the results from claying to further maximize gloss but to also restore clarity to the paint.
5. Machine polish the paint using the Porter Cable DA Polisher with a 5.5" LC Black Foam Finishing Pad and Pinnacle Advanced Finishing Polish. Pinnacle Advanced Finishing Polish is a "Fine Cut" polish as described in my how-to book and this will maximize the results from the first polishing step.
6. Seal the paint with a premium quality Carnauba Wax like the Pinnacle Souveran Paste Wax. I would apply this by machine also as I do all my work by machine when I can and simply avoid working by hand.
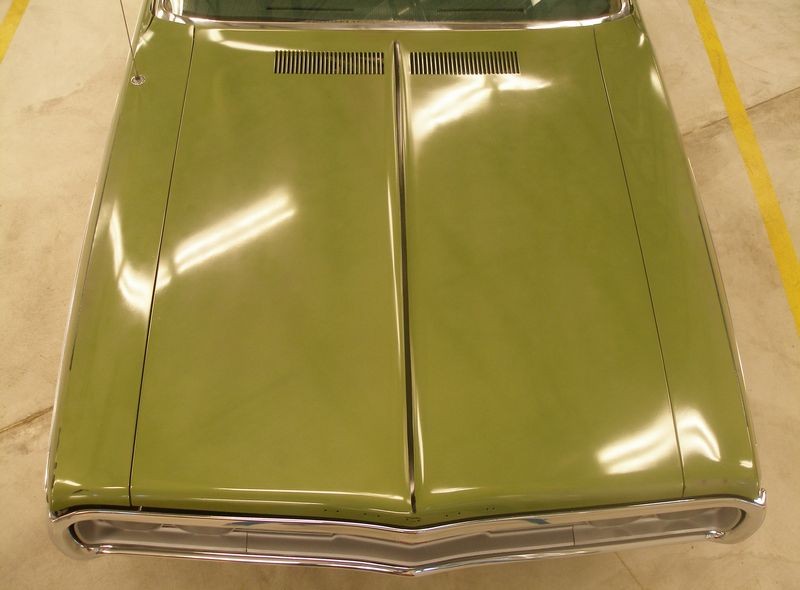
But most important... I would get on a Werner Work Platform and take a overhead hood shot to fully document the "before" condition and appearance of the hood because if you don't get the before picture BEFORE you start the polishing work you can never go back in time and get it.
And like the title of my article on this topic, the power in the "after" shot is created by capturing a very good "before" shot.
The power in the after shots is created in the before shots
Also read through my article on the topic of restoring single stage paint here,
The Secret to Removing Oxidation and Restoring a Show Car Finish to Antique Single Stage Paints
I have an updated article on this in the works...
Again, welcome to the forum, I think you'll find the people on this forum will go out of their way to help you with all your detailing projects.
")