Removing glaze

superwhite

New member
Joined
Jan 6, 2010
Messages
23
Reaction score
0
This may sound silly but I am using Wolfgang galze and its proving very difficult to remove, got any advice?:buffing:
 
This may sound silly but I am using Wolfgang glaze and its proving very difficult to remove, got any advice?:buffing:

Are you letting it dry?

Here's how you would typically use it...

Apply by machine to a small section at at time, about 20" square using a DA Polisher nd then after working the product for about 4-6 Section Passes, turn the polisher off and then wipe the product off using a premium quality microfiber polishing cloth.

Now move onto a new section. It's actually one of the easiest product to use and remove when used correctly.

How are you using it?

Also, if you haven't read through this article, it discusses just about everything related to using this product by machine in detail.


Tips and Techniques for using the PC 7424XP Dual Action Polisher to remove Below Surface Defects


If you're using it by hand, remember it's not a wax or a paint sealant, apply, work in and over the paint and the remove it.

:)
 
How long are you working the product in? You should work it in until it becomes fairly clear / translucent, but not dry. If you're removing it too soon without working it in completely, it will be tough to remove. You may also be experiencing trouble based on temperature and humidity...what conditions are you working in?
 
How long are you working the product in? You should work it in until it becomes fairly clear / translucent, but not dry. If you're removing it too soon without working it in completely, it will be tough to remove. You may also be experiencing trouble based on temperature and humidity...what conditions are you working in?

I'm in the garage but its VERY humid out. My vehicle is white so I'm finding it hard to tell when the glaze is translucent or just drying out. I've varied my working time to see if it was easier wet or nearly dry. Maybe i'm not working it in well? I have mostly been stoping when its nearly invisible which on white doesn't take long at all. Ever leave a scratch remover on too long then like to have never got it off? Its like that. I've watched the dvd they sent me but I'm not seeing it get that translucent look like they do but their vehicle is darker.
 
On a ~20"x20" work area, making slow overlapping passes, I usually have to work the FG about 30-45 seconds I suppose. This could vary due to a lot of conditions, but that's my typical. Never had a problem with removal this way either.

It sounds like you may not be working it long enough. White is harder to work in that respect - but you can still usually get an angle and figure out what you are accomplishing. If you aren't working it long enough, you are essentially just smearing the product on the surface, then trying to wipe it off wet.

It is kind of tough to overwork the TSR and FG without knowing it - it will start to dust and you can feel that you are dry buffing.

DLB
 
I'm in the garage but its VERY humid out. My vehicle is white so I'm finding it hard to tell when the glaze is translucent or just drying out. I've varied my working time to see if it was easier wet or nearly dry. Maybe i'm not working it in well? I have mostly been stoping when its nearly invisible which on white doesn't take long at all. Ever leave a scratch remover on too long then like to have never got it off? Its like that. I've watched the dvd they sent me but I'm not seeing it get that translucent look like they do but their vehicle is darker.

Sounds like you could also be using too much product. Remember, a little bit goes a long way with this stuff. Try using a fresh pad, on a 2x2' area.

I do find that it can act up under high humidity, especially on my Honda paint (for whatever reason, my paint hates being polished...it's such a pain to remove, and when I work on the clear bra it's WAY easier to remove polish so I know it's the paint!).

Either way, try using less product and work it in for a long time - like DLB said, you should know when it's fully worked in. Lighting will also play a big effect; if you can get some good halogens, it will help you see when the polish turns clear.

Remember, you can always mist some water, QD, or isopropyl alcohol on the surface to help with removal of a polish. :xyxthumbs:
 
Sounds like you might be using to little product. Finishing Glaze looks like this in color, so while working on white paint can be a challenge, at least the FG isn't white in color.

  • What machine are you using?
  • What pads are you using?
  • How much product are you applying?
When starting out with a new/clean dry pad, here's an example of how much product to apply to the pad before working a section about 20" squarish.

Xpattern.jpg


CirclePattern.jpg
 
Thats alot of product in my opinion; I start with 3 pea sized drops of polish and work from there. Once that is done, the pad is primed and I only use 2 drops.
 
Thats alot of product in my opinion; I start with 3 pea sized drops of polish and work from there. Once that is done, the pad is primed and I only use 2 drops.

Everyone can find a way that works best for their application but here's the skinny...

You need an ample amount of product on the surface to both lubricate the surface and provide whatever key ingredients the product offers for the process at hand to accomplish the goal.

I see people putting pea sized amounts on all the time and that's great for them but for most people, tacking a finish in neglected condition, working a section 20" by about 20" in order to ample amount of product to make up to 8 section passes without going to a dry buff, 3 pea sized dots of product will not be enough... in my opinion...

My background also as an instructor for the last 22 years, showing people with zero experience and people that have been doing this longer than myself, you need to find a balance that will work for the broadest spectrum of people and again, 3 pea sized dots of product won't be the right balance.

Now after a person starts out with the Circle Pattern or the X-Pattern of product on their pad, and the pad starts to be wet or damp with product that has penetrated into the foam, then you can cut down on the amount you apply for new sections.

Again, one thing I've learned since coming to Autogeek from Meguiar's is there is no right or wrong way for detailing a car, each person will need to find their own path that works for them. One of my jobs is to create procedures for people with vary diverse backgrounds, climatic conditions and skills and experience and for the last 22 years these procedures have been working well enough to get me to the place I'm at now and at a minimum, that's an indicator that I must be doing something right.

But yeah, if pea sized dots work for you then that's the best method for you.

:cheers:


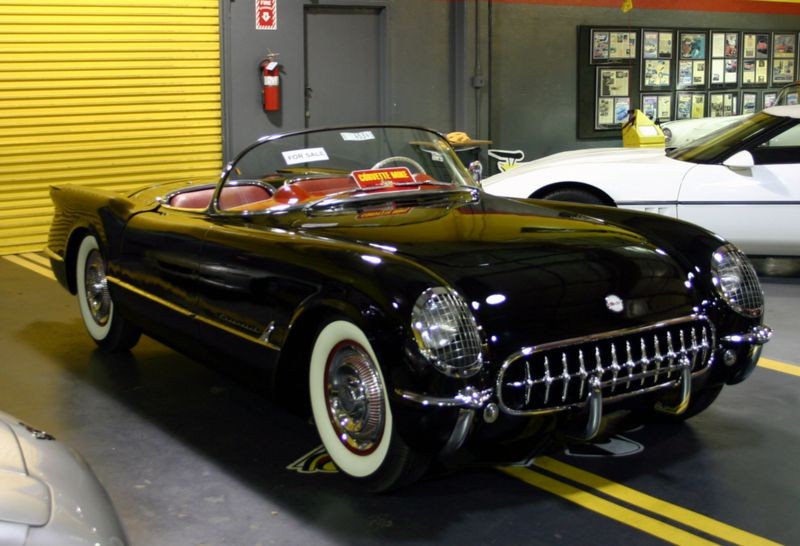
I hate to abuse pictures from work I've done but here's a few from a 1954 Corvette that started out horribly swirled and it's just one example of a car that I took from horrific swirls to show car finish using the amount of product I show in the pictures above.


54VetteEM002.jpg


54VetteEM003.jpg


54VetteEM004.jpg


54VetteEM005.jpg


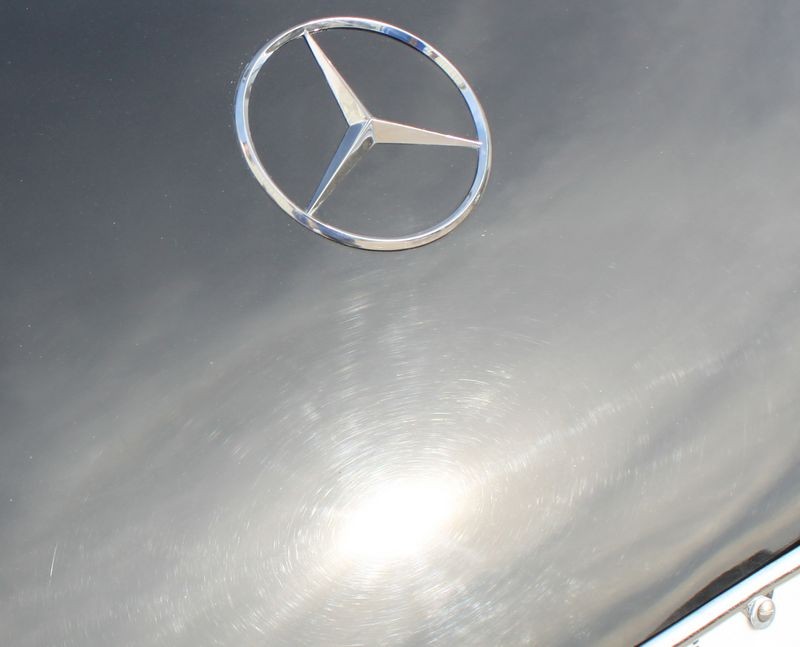
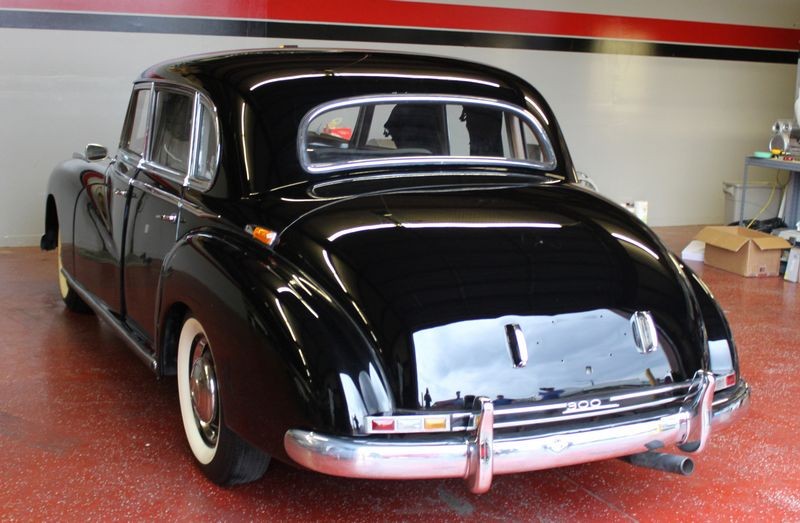
Same technique used on this Mercedes-Benz that we used for an extreme makeover in Dallas, Texas back in November,

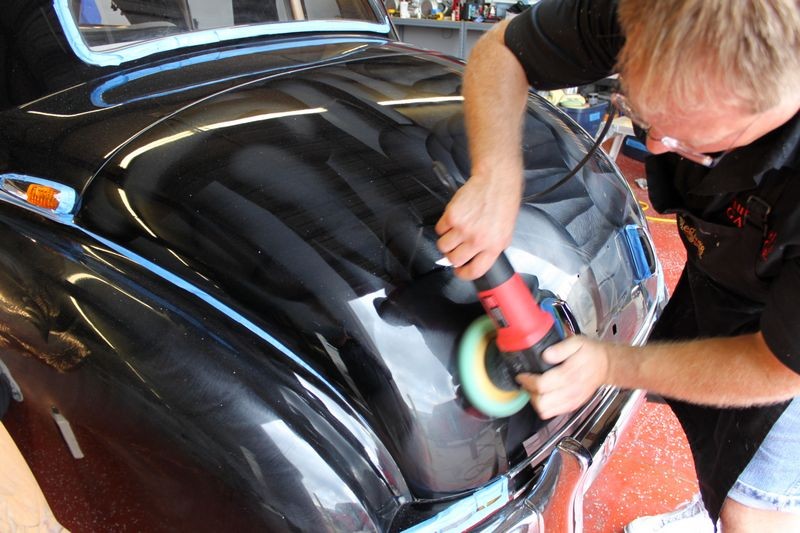
I was buffing out a 1954 Mercedes-Benz on Dallas a few weeks ago and as long as I held the pad flat the new GG ROP worked just like a rotary buffer. I couldn't stop it from rotating the pad and it was removing swirls and scratches like nobody's business and unlike a rotary buffer it was so easy to use.

Swirled-out 1954 Mercedes-Benz
54MBinDallas007.jpg


Cropped out of the above original
54MBinDallas007c.jpg


WG TSR with a Green Kompressor Cutting Foam Pad on the GG ROP Speed Setting 6.0
54MBinDallas008.jpg


After
54MBinDallas009.jpg


Same section only zoomed in on the Van in the reflection.
54MBinDallas010.jpg


The X-Pattern and Circle-Pattern technique work.

It's important to have the AMPLE amount of product on the surface to get the job done. You don't want too much product and you don't want to little product you want the AMPLE amount of product.

:)
 
Thanks for your help! It has been drizzling rain so the humidity is high which could be part of the problem but its mostly a lack of experience. I'll just have to work with it. By comparison though the polish enhancer and sealant were very easy to remove.
 
White paint is challenging just because it's white so it's hard to see thin films of product. One of the few tips I can think of is really simple but sometimes simple is all you have...

Have plenty of clean microfiber polishing cloths on hand as a fresh wiping side will tend to remove product better than a section of towel with product on it.

Another thing you can do when removing everything but a wax or paint sealant is use a little spray detailer to help aid in residue removal. For that matter, if you're one that likes to strip each panel after any compounding, cleaning or polishing work you could also use IPA or Mineral Spirits or even a quality All Purpose Cleaner diluted at 20:1 with water.

Not to try to take this thread off-topic but the reason you don't want to use a spray detailer to remove wax or residue is because the idea behind applying a coating of wax or a paint sealant is to leave a coating behind, after initial wipe-off any more disturbing of the coating simple removes more of the coating which defeats the purpose of applying the product in the first place.

I wrote an article on white paint years ago and while it offers no tips on removing residues, I'll post it today for your reading enjoyment.


:D
 
Back
Top