Mike Phillips
Active member
- Dec 5, 2022
- 51,004
- 6
Review: Griot's Garage Fast Surface Prep Mitt
Griot's Garage has just introduced two new replacements for traditional detailing clay. These clay replacements are designed to be used during the washing step or with a clay lubricating like Griot's Speed Shine. Unlike detailing clay, if you accidentally drop one of these mitts on the ground instead of throwing it away you can simply wash it off and continue using it.
The new Griot's Surface Prep Mitts are available in two different grades for mechanically decontaminates paint, glass and chrome of various levels of neglect.
Griot's Garage Fine Surface Prep Mitt
Griot's Garage Fast Surface Prep Mitt
These two new Griot's products arrived just in time for my current project, Wayne Carini's 1949 Buick Roadmaster aka the Rainman car. It's called the Rainman car because it is the car driven by Dustin Hoffman and Tom Cruise in the movie by the same name, The Rainman.
Wayne had the Rainman on display at the 11th Annual Detail Fest show. To restore and maintain a show car finish worthy of a movie car I chose to machine jewel the paint using McKee's 37 Jeweling Wax. Before machine jeweling the paint however I preformed 2 basic steps,
It was Step 2 where the paint failed the Baggie Test. Before I could machine jewel the paint I would first have to mechanically decontaminate the paint to remove the offending contaminants.
Enter Nick Rutter
Right about this time, Nick came out to the garage, just in the nick of time. He asked me what I was going to do the the Rainman car and after sharing my plans he said,
Wait right here, I'll be right back!
Upon returning he handed me the new Griot's Garage Surface Prep Mitts. Told me the yellow was the fine grade mitt and the read was the medium grade mitt. Asked me if I would test one of them out on Wayne's 1949 Buick. I said,
Sure!
Back to the Baggie Test
Upon inspecting the paint with the baggie test I was shocked at what I felt. The paint felt like it had sand glued to the top surface! This car was recently on display at a number of shows including the Amelia Island Concours D'Elegance. When cars, any car), is parked outside it is exposed to all the airborne contaminants and pollution floating around in the air so it's possible that while it was on display outside this is where the contamination came from. It's also possible it could be overspray paint. Car guys, and Wayne's a car guy, live in a world where cars are being painted as well as disassembled cars are being painted if they own a restoration show, (Wayne owns a restoration shop), so it's completely possible that this car could have any number of types of contaminants and my job was to remove them to restore a smooth, shiny finish.
Because of the level of contamination and also the size of the car, I chose the Fast Surface Prep Mitt to effectively remove 100% of whatever was on the paint and to do it quickly. As a practice I only perform mechanical decontamination if I ALREADY plan on doing at least one machine polishing step, which can include using a one-step cleaner/wax or in this case, an ultra fine cut jeweling wax.
The Baggie Test
If you've never inspected paint using the baggie test for most people it's a real EYE OPENER!

How to do the baggie test
1: First - get the paint clean. Either wash and dry the car or like I do with classics, use a waterless wash. (I never use a traditional wash to wash a classic as it introduces water into places where it can form rust).
2: Next - feel the paint with your clean hand. This is key because this shows shows you what you CAN'T feel with just your sense of touch.
3: Now place a clean sandwich baggie over your hand and feel the paint a second time. This is here the eyes of most people LIGHT UP! The thin layer of plastic dramatically increases your sensitively so that you can now FEEL what you couldn't not sense before. In most cases, if the paint is contaminated instead of feeling smooth like it did to your bare hand - instead, through the sandwich baggie the paint is going to feel coarse and rough. As though there is something on it. Surprise! Your paint is contaminated and you need to remove this contamination and the removal process is called - mechanical decontamination.

Frequently Asked Questions
What if my paint feels smooth?
If your paint feels completely smooth then it's passed the baggie test and you can proceed to whatever paint care step you're were planning on doing.
What if my paint feels rough?
If after doing the baggie test you find the paint feels rough then you need to remove the contamination. If you don't remove the contamination then your car's paint will NEVER be as shiny as it can be and because the contaminants will block a coat of wax or paint sealant from getting to the paint itself applying a coat of wax or a sealant will never provide the full benefits you expect.
How to use the Griot's Garage Surface Prep Mitts
Tip: The first time you use a Griot's Garage Surface Prep Mitt break-in the rubber surface first by rubbing it against a more resilient surface first like glass using plenty of lube. Be sure the glass is clean.
The way you use both mitts is the same so after choosing the level of contamination removal you think best fits the contamination level of your car's paint follow these four easy steps to mechanically decontaminate your car's paint using a clay lubricant like Griot's Speed Shine.
Step 1: Remove the Surface Prep Mitt from the packaging and place your hand inside.
Step 2: Spay down an ample amount of Griot's Speed Shine to fully lubricate the panel to be decontaminated.
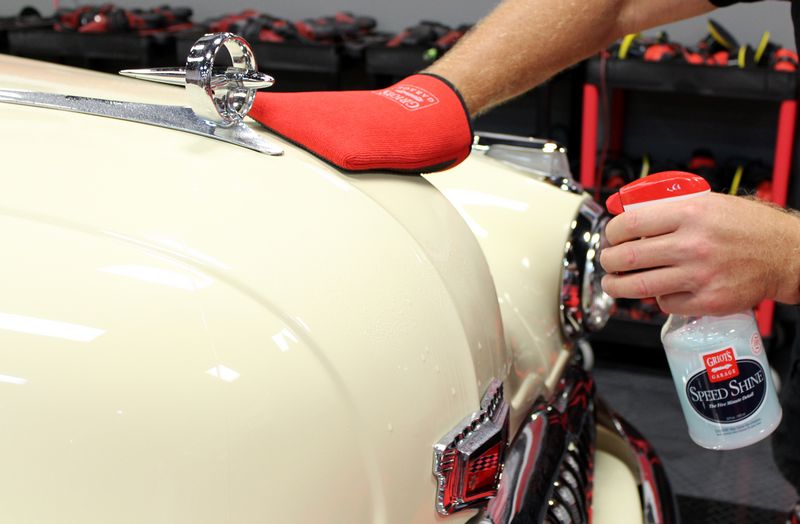
Step 3: Using light pressure, gently rub the Surface Prep Mitt over the paint. When you start out you should feel the mitt dragging over the paint as it rubs against the contaminants which at the surface level are sitting or bonded to the top of the paint. As the rubberized surface abrades these contaminants off you will then feel the mitt to begin to glide effortlessly over the finish. This is a sign that the paint in this area is effectively decontaminated and you can wipe off the residue using a clean, microfiber towel and move on to new territory.
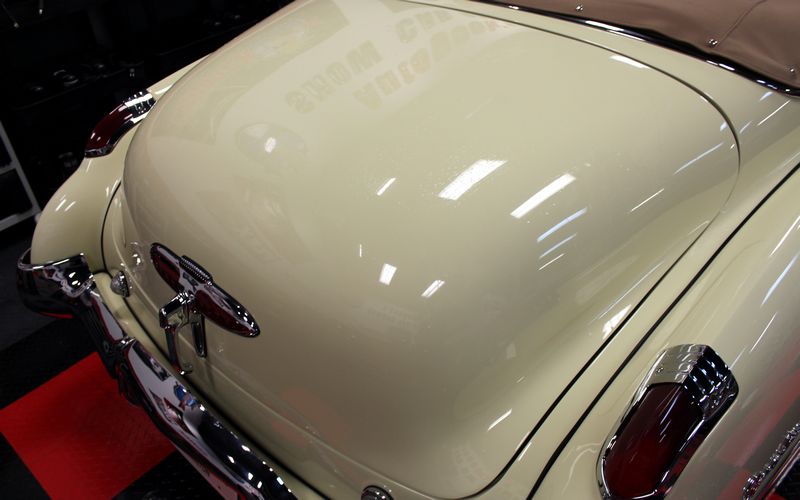
Step 4: Continue this pattern until all contaminated panels are decontaminated and the residue had been wiped off to reveal clean, dry smooth paint.
After the paint on the car has been decontaminated you can repeat this procedure to any other hard surfaces like glass, chrome, stainless steel, etc.
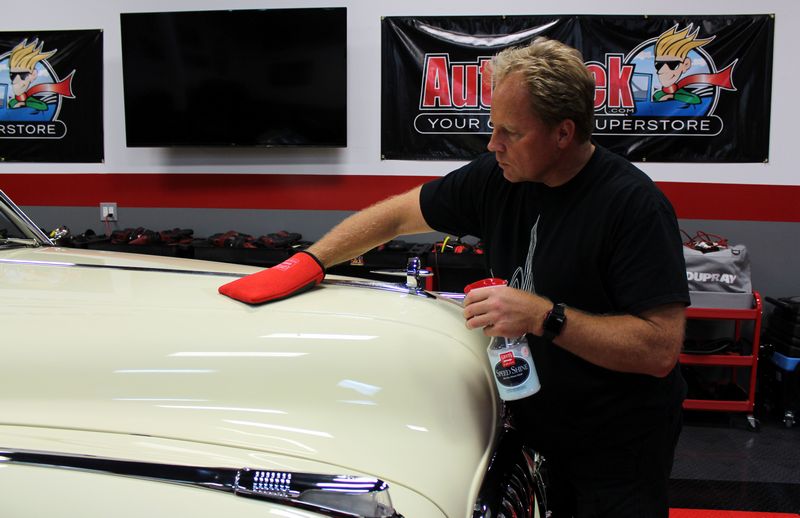
Mechanically decontaminating the paint on the Rainman car using Griot's Garage Fast Surface Prep Mitt and Speed Shine


On Autogeek.com
Griot's Garage Fine Surface Prep Mitt
Griot's Garage Fast Surface Prep Mitt
Griot's Speed Shine
")
Griot's Garage has just introduced two new replacements for traditional detailing clay. These clay replacements are designed to be used during the washing step or with a clay lubricating like Griot's Speed Shine. Unlike detailing clay, if you accidentally drop one of these mitts on the ground instead of throwing it away you can simply wash it off and continue using it.
The new Griot's Surface Prep Mitts are available in two different grades for mechanically decontaminates paint, glass and chrome of various levels of neglect.
Griot's Garage Fine Surface Prep Mitt
- Removes light to moderate bonded contaminants, impurities and overspray.
- For use with Speed Shine or wafter wash with car wash solution and thorough rinse.
- Unique diamond patterned polymer rubber surface outlasts clay 10 to 1.
- Effective on paint, glass, chrome and more...
Griot's Garage Fast Surface Prep Mitt
- Removes moderate to severe bonded contaminants, impurities and overspray.
- For use with Speed Shine or wafter wash with car wash solution and thorough rinse.
- Unique diamond patterned polymer rubber surface outlasts clay 10 to 1.
- Effective on paint, glass, chrome and more...
These two new Griot's products arrived just in time for my current project, Wayne Carini's 1949 Buick Roadmaster aka the Rainman car. It's called the Rainman car because it is the car driven by Dustin Hoffman and Tom Cruise in the movie by the same name, The Rainman.
Wayne had the Rainman on display at the 11th Annual Detail Fest show. To restore and maintain a show car finish worthy of a movie car I chose to machine jewel the paint using McKee's 37 Jeweling Wax. Before machine jeweling the paint however I preformed 2 basic steps,
Step 1: Wash car using a waterless wash.
Step 2: Inspect paint using the Baggie Test for above surface bonded contaminants.
Step 2: Inspect paint using the Baggie Test for above surface bonded contaminants.
It was Step 2 where the paint failed the Baggie Test. Before I could machine jewel the paint I would first have to mechanically decontaminate the paint to remove the offending contaminants.
Enter Nick Rutter
Right about this time, Nick came out to the garage, just in the nick of time.
He asked me what I was going to do the the Rainman car and after sharing my plans he said, Wait right here, I'll be right back!
Upon returning he handed me the new Griot's Garage Surface Prep Mitts. Told me the yellow was the fine grade mitt and the read was the medium grade mitt. Asked me if I would test one of them out on Wayne's 1949 Buick. I said,
Sure!
Back to the Baggie Test
Upon inspecting the paint with the baggie test I was shocked at what I felt. The paint felt like it had sand glued to the top surface! This car was recently on display at a number of shows including the Amelia Island Concours D'Elegance. When cars, any car), is parked outside it is exposed to all the airborne contaminants and pollution floating around in the air so it's possible that while it was on display outside this is where the contamination came from. It's also possible it could be overspray paint. Car guys, and Wayne's a car guy, live in a world where cars are being painted as well as disassembled cars are being painted if they own a restoration show, (Wayne owns a restoration shop), so it's completely possible that this car could have any number of types of contaminants and my job was to remove them to restore a smooth, shiny finish.
Because of the level of contamination and also the size of the car, I chose the Fast Surface Prep Mitt to effectively remove 100% of whatever was on the paint and to do it quickly. As a practice I only perform mechanical decontamination if I ALREADY plan on doing at least one machine polishing step, which can include using a one-step cleaner/wax or in this case, an ultra fine cut jeweling wax.
The Baggie Test
If you've never inspected paint using the baggie test for most people it's a real EYE OPENER!
How to do the baggie test
1: First - get the paint clean. Either wash and dry the car or like I do with classics, use a waterless wash. (I never use a traditional wash to wash a classic as it introduces water into places where it can form rust).
2: Next - feel the paint with your clean hand. This is key because this shows shows you what you CAN'T feel with just your sense of touch.
3: Now place a clean sandwich baggie over your hand and feel the paint a second time. This is here the eyes of most people LIGHT UP! The thin layer of plastic dramatically increases your sensitively so that you can now FEEL what you couldn't not sense before. In most cases, if the paint is contaminated instead of feeling smooth like it did to your bare hand - instead, through the sandwich baggie the paint is going to feel coarse and rough. As though there is something on it. Surprise! Your paint is contaminated and you need to remove this contamination and the removal process is called - mechanical decontamination.
Frequently Asked Questions
What if my paint feels smooth?
If your paint feels completely smooth then it's passed the baggie test and you can proceed to whatever paint care step you're were planning on doing.
What if my paint feels rough?
If after doing the baggie test you find the paint feels rough then you need to remove the contamination. If you don't remove the contamination then your car's paint will NEVER be as shiny as it can be and because the contaminants will block a coat of wax or paint sealant from getting to the paint itself applying a coat of wax or a sealant will never provide the full benefits you expect.
How to use the Griot's Garage Surface Prep Mitts
Tip: The first time you use a Griot's Garage Surface Prep Mitt break-in the rubber surface first by rubbing it against a more resilient surface first like glass using plenty of lube. Be sure the glass is clean.
The way you use both mitts is the same so after choosing the level of contamination removal you think best fits the contamination level of your car's paint follow these four easy steps to mechanically decontaminate your car's paint using a clay lubricant like Griot's Speed Shine.
Step 1: Remove the Surface Prep Mitt from the packaging and place your hand inside.
Step 2: Spay down an ample amount of Griot's Speed Shine to fully lubricate the panel to be decontaminated.
Step 3: Using light pressure, gently rub the Surface Prep Mitt over the paint. When you start out you should feel the mitt dragging over the paint as it rubs against the contaminants which at the surface level are sitting or bonded to the top of the paint. As the rubberized surface abrades these contaminants off you will then feel the mitt to begin to glide effortlessly over the finish. This is a sign that the paint in this area is effectively decontaminated and you can wipe off the residue using a clean, microfiber towel and move on to new territory.
Step 4: Continue this pattern until all contaminated panels are decontaminated and the residue had been wiped off to reveal clean, dry smooth paint.
After the paint on the car has been decontaminated you can repeat this procedure to any other hard surfaces like glass, chrome, stainless steel, etc.
Mechanically decontaminating the paint on the Rainman car using Griot's Garage Fast Surface Prep Mitt and Speed Shine
On Autogeek.com
Griot's Garage Fine Surface Prep Mitt
Griot's Garage Fast Surface Prep Mitt
Griot's Speed Shine


