Mike Phillips
Active member
- Dec 5, 2022
- 51,004
- 6
Review: IGL Poly Ceramic Coating - 2020 Porsche 911 Carrera S
This is IGL Poly Ceramic Coating or as we say in the industry.... the glassy look!

The back story...
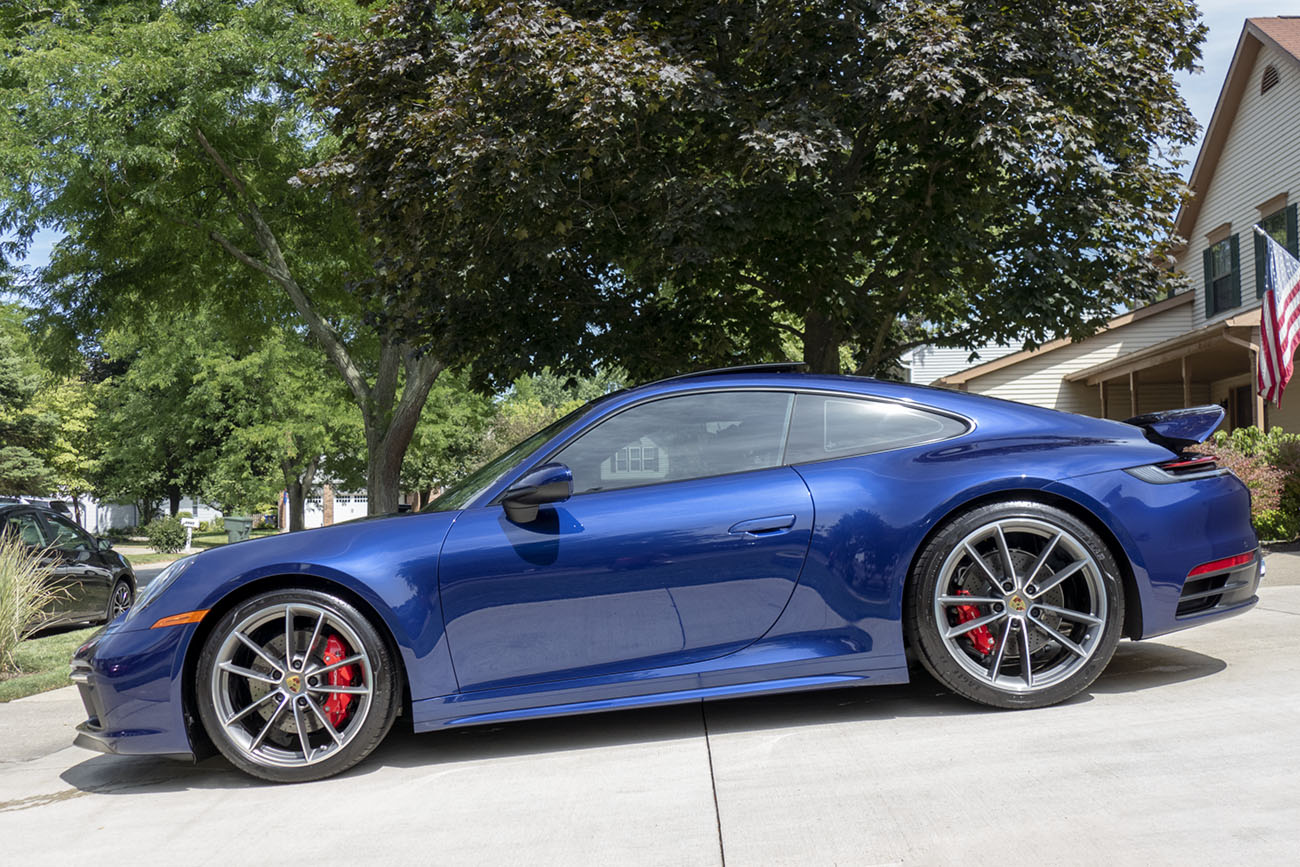
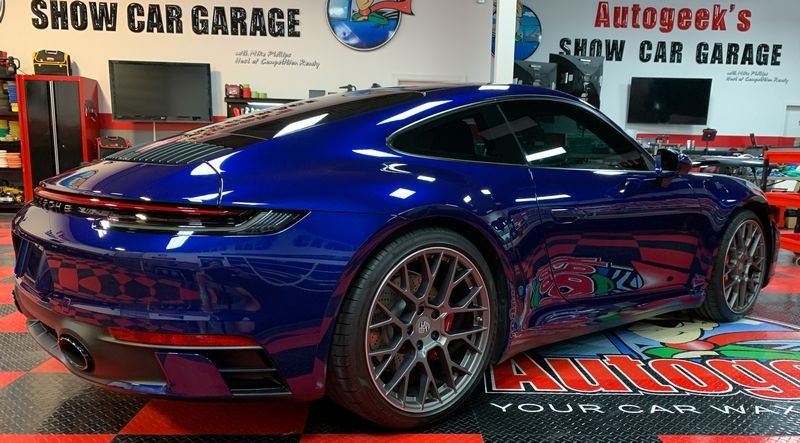
So my friend buys a brand new Porsche and of course, he wants to get a ceramic coating installed to protect the paint. Here's the car and how it looked when it arrived, this is before I washed it, clayed the paint or did anything to it.
Not bad huh?
Close Inspection
The first thing I did was a waterless wash using SONAX Glass Cleaner. Sorry no pictures, pretty basic stuff. Wipe the car down to remove any loose dirt and road grime.
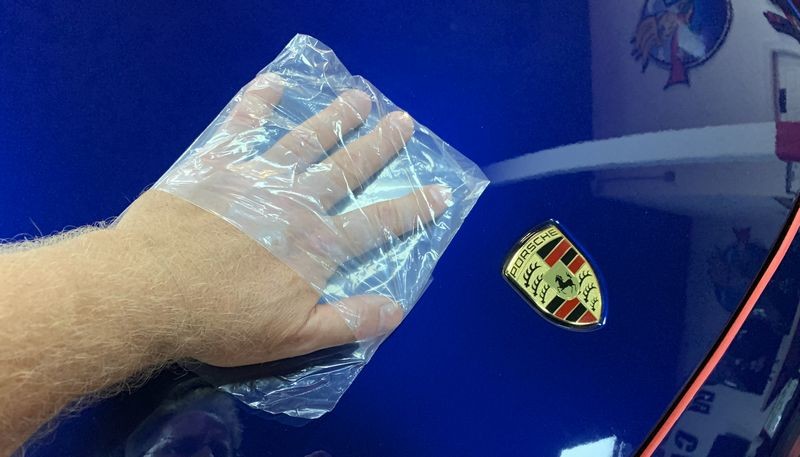
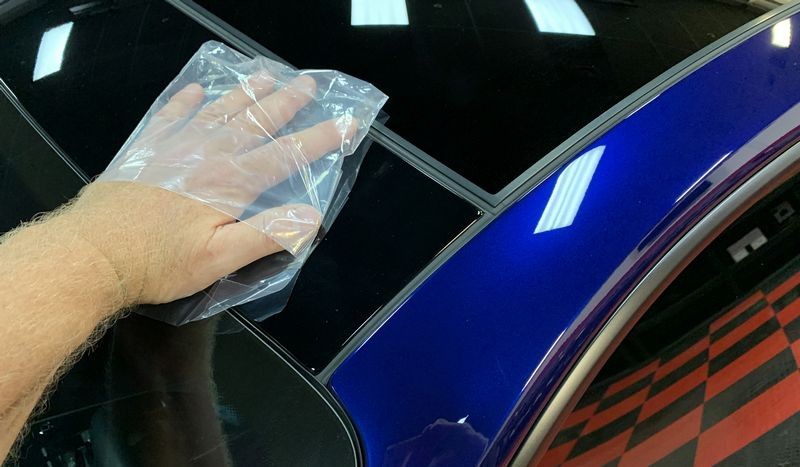
The Baggie Test
Being brand new, the lazy side of me was hoping the paint and the glass as well as the smooth plastic surfaces would pass the Baggie Test but NOPE - she's contaminated.


And claying or mechanical decontamination is one area you don't want to skip. You see, buffing with FOAM pads normally will NOT remove above surface bonded contaminants. The foam will simply GLIDE over the contaminants and likely make them shiny - but it will not remove them. So to do the job right you need to clay the paint, which I did. For this I used an ultra fine grade clay and SONAX Glass Cleaner.
Drizzle Stains on Glass
After I clayed the paint and the glass, the next thing I needed to do was machine polish the glass. All of the glass was covered with what I call Drizzle Stains.
What is a Drizzle Stain?
Great question, I'm glad you asked.
Drizzle Stains is a FILM on the glass with a pattern that shows how water, in the form of rain or any other source, like washing or sprinklers, etc., flush over the glass and over time, leave a visible stain-pattern ON THE GLASS. You normally cannot see Drizzle Staining on glass until you spray some type of liquid onto the glass and WIPE. Then for a brief moment - the drizzle staining shows up in the thin film of liquid on the surface immediately AFTER you've wiped a section of glass. In a matter of seconds - the visible drizzle stains will disappear as the liquid you wiped evaporates off the glass.
Drizzle Stains are difficult to capture with a camera - if it were easy - I would have taken a picture. But this type of photo-documentation is best done with 2 people. One person does the wiping of the glass while the other person takes the picture and alas - I was alone.
How to remove Drizzle Stains
Yancy and I recently conducted one of our LIVE Detailing Classes where we shared how to remove Wiper Marks, which are scratches IN the glass. I call these Sub-Surface Glass Defects. For this type of defect you must use special abrasive technology that has the ability to abrade glass while at the same time - not leaving it's own scratch behind in the glass. If the thing you're using to remove scratches out of glass at the same time puts scratches into the glass that's called a self-defeating process.
Drizzle Stains are NOT sub-surface glass defects but instead or TOPICAL defects in that they are a FILM build-up ON the glass. As such, you don't need the same type of specialized abrasive technology required for removing sub-surface defects. In fact, in most cases, when it comes to removing topical film-build staining off glass surfaces you can use any quality clearcoat-safe compound. For light cleaning, you can even use less aggressive clearcoat safe polishes.
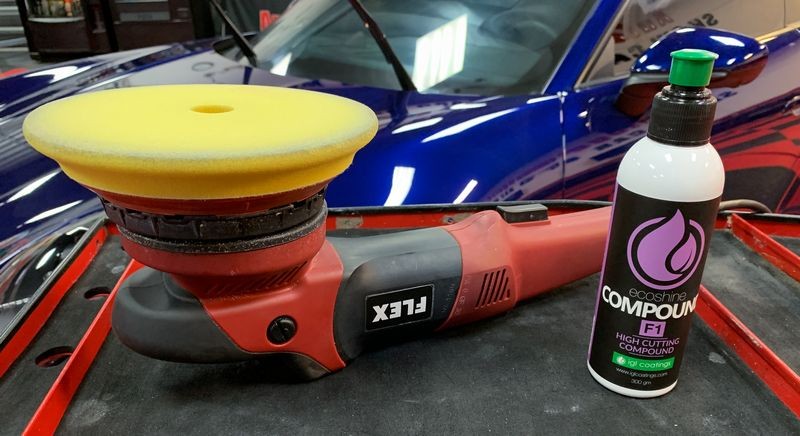
Because I planned to use the IGL Ecocoat Poly Ceramic Coating on the paint, I figured I'd keep this detailing project in the family and use the IGL Compound for the glass polishing. I'm happy to say the IGL Compound, paired with a RUPES contour profile yellow foam polishing pad on the FLEX Supa Beast did the trick.
NOTE: Before using the 7" pad to buff out the major portions of the glass windows I first did what I call EDGING. Edging is where I take the RUPES Nano Long Neck in Rotary Mode with a 1" pad and machine polish all the edges of the glass windows so I don't have to try to get the larger pad on the larger polisher close to the edge where the glass meets the paint. The reason I do this is because realistically - it's really difficult to remove all the drizzle staining in that strip of glass about 1" wide next to the framing around the glass. If I don't do this then you meaning the customer, can see perfectly clear glass EXCEPT all the outer edges of the glass. This is a little extra step I do as a professional. I could skip it and probably know one would know the difference, but in my world I treat customer's cars as if they were my own. I also teach this in all my classes, both how to edge and how to treat a customer's car as your own.
Here's a few pictures I took showing all the glass machine polished

This is the NEW RUPES contour profile yellow foam polishing pad and these are now my favorite pads for the Supa BEAST.
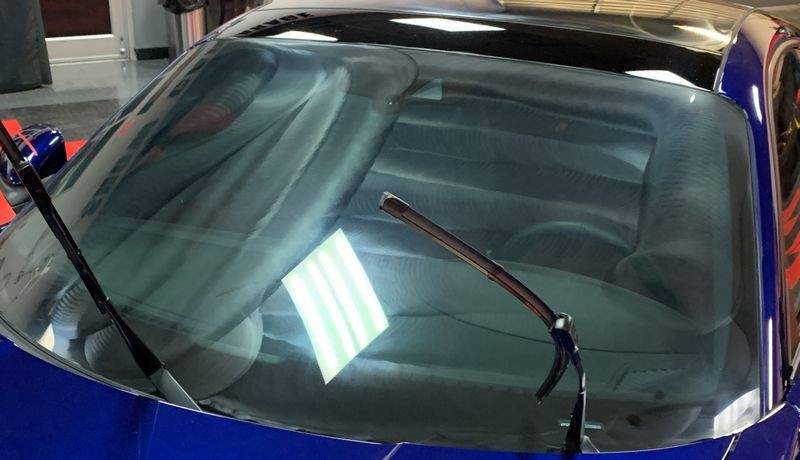


Here's the windows wiped clean and that's it. I have not started the paint correction to the paint yet.
Paint Correction
Why machine polish a brand new car Mike?
Great question, I'm glad you asked. Here's why,
I practice what I preach
What I preach in my classes is that ANYTIME - did you notice the word anytime is all CAPITAL letters?
ANYTIME you do any mechanical decontamination process to car paint you should have already factored-in at least one machine polishing step to remove any marring of the paint from the mechanical decontamination step.
What is mechanical decontamination?
Mechanical decontamination is when you rub detailing clay over paint. It's also when you use any clay substitute tool to remove above surface contamination. Rubbing clay and clay substitutes over scratch-sensitive clearcoat paints can and will mar the paint.
Marring and the word mar are the kind, fluffy nice words we us when what we really mean is scratch and scratching.
So if you're going to clay someone's car or even your own car, as a professional you always follow this with at least one machine polishing step to make sure there is no marring in the paint.
Perfect the paint before installing a paint coating
Besides removing any marring or potential marring, anytime you're going to install a ceramic coating - and especially for a cool car like this Porsche, you need to be sure the paint is not only free from any other previously applied waxes or sealants or even gloss enhances from car shampoos, but for a car like this you also want the paint to be perfect or perfected and that's where machine polishing comes into play.
Machine polishing will remove any previously applied products and also remove all the fine swirls and scratches that are in the paint from the time the popped out of the assembly plant, was transported to the dealership and was then handled/washed/wiped at the dealership.
The above are my own reasons for machine polishing the paint on a brand new car, you can adopt them as your own or find your own process. Some people will simply wash a car and then coat it, that's not for me. I want to know for sure the paint is completely bare-naked, or bare paint and I also want it to be as defect-free as possible before installing a coating. Installing a coating takes a few hours worth of time and work and the final results like a new custom paint job start with the proper prep-work.
Tape-off and Cover-up
Before I start, I'm going to machine polish all the paint. Before starting the machine polishing, if you ever work on one of these Porsche's - I'd highly recommend covering-over and taping off the rear air louvers or air grill over the engine. Mostly because they are a matte black finish and they will be a real pain in the butt to clean off any splatter dots. If you don't know what splatter dots are - you're new to machine polishing and this is okay -but try to learn from me in this little tidbit I'm sharing so you don't have to learn the hard way, why I cover stuff like this up.
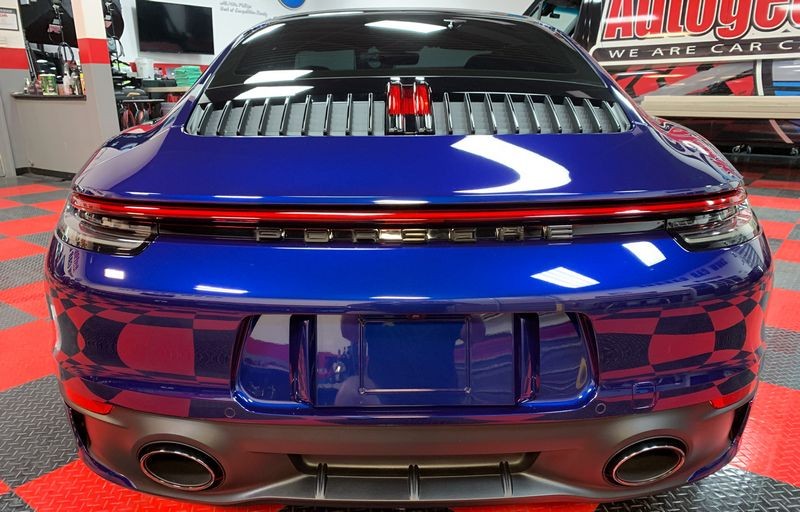
Here you can see where I've cover-over the rear air louvers for fresh air intake to the engine compartment. I did this using 3 microfiber towels and some 3M Painter's Tap. The strip of tape under the rear deck lid is to protect the PORSCHE lettering. This would be another area where it would be time-consuming to remove splatter dots of polish after the paint correction step.

Chemically Stripping the Paint
I'm not sure what other detailers in our industry call this step? I call it chemically stripping the paint because at it's core - this is what you're doing. You're using a SOLVENT to wipe and re-wipe the painted body panels to remove any trace polishing oils from the paint correction step so there is nothing on the paint that can interfere with the bonding of the coating to the paint. Most of the solvents for this step are generically referred to as Panel Wipes.
But it doesn't sound right to say,
Panel Wiping the Paint
So I say I'm going to chemically strip the paint as this is in fact what needs to be done. Then proceed to use a Panel Wipe to strip the paint. I don't see much of anyone else now days writing about car detailing thus I don't see anyone typing out these kinds of details via text. On YouTube you can be a lot sloppier as that is the nature of video.
Sorry no pictures of me chemically stripping the paint - you'll just have to take my word for it I used a bunch of these really nice IGL microfiber towels and about a half a bottle of IGL PRECOAT to wipe and then re-wipe every square millimeter of paint, plastic, glass and PPF on the car before coating all these areas.

Installing the IGL Ecocoat Poly Ceramic Paint Coating
Again - no pictures of me doing the work but it didn't' apply itself.
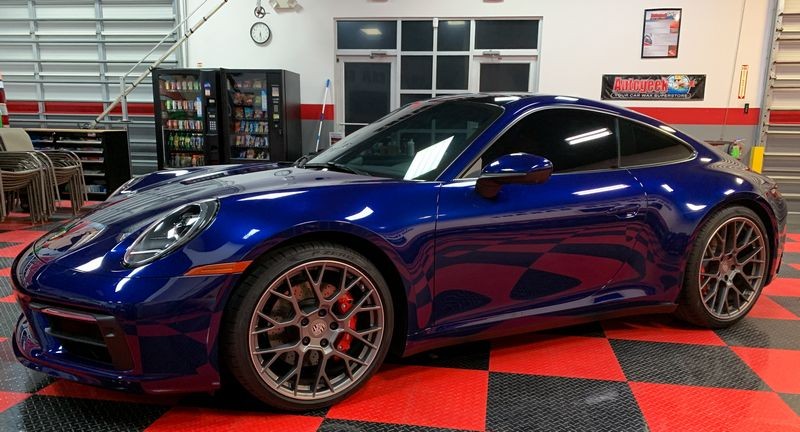
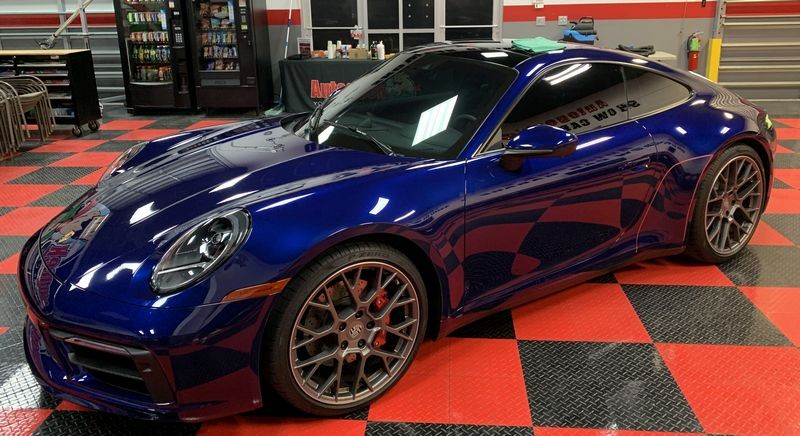
I took the picture below after installing 2 coats of the IGL Ecocoat Poly, which is the name for their consumer grade of ceramic coating. Don't let the words consumer grade taint your view, IGL is one of the TOP names in ceramic paint coating technology. Also for those that might not know, when you see me type or say the word installing a coating, this is coating jargon. In the old days you would say, apply a coat of wax, in today's world, it's the same idea only we say, install a coating. All it means is taking your human hand and applying the coating to the paint using a small foam block and a patch of soft microfiber cloth. Same idea - different words.

Here are the results...


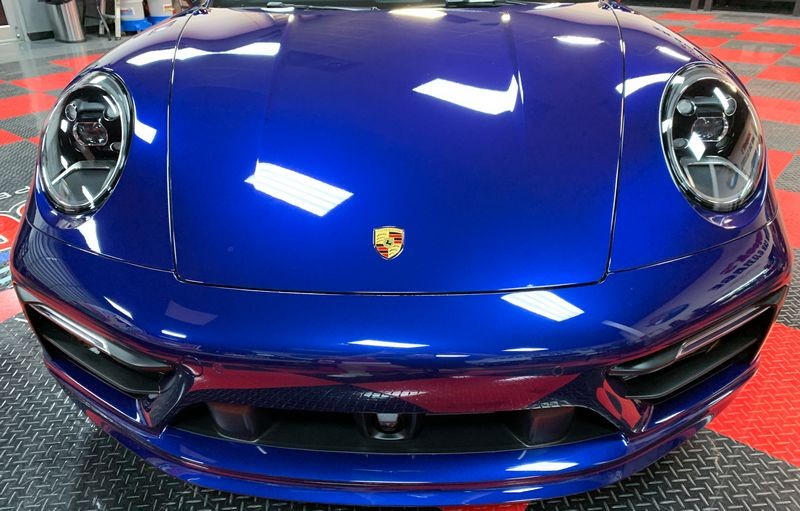
In this shot you can see the area I covered up and the lettering I placed painter's tape over


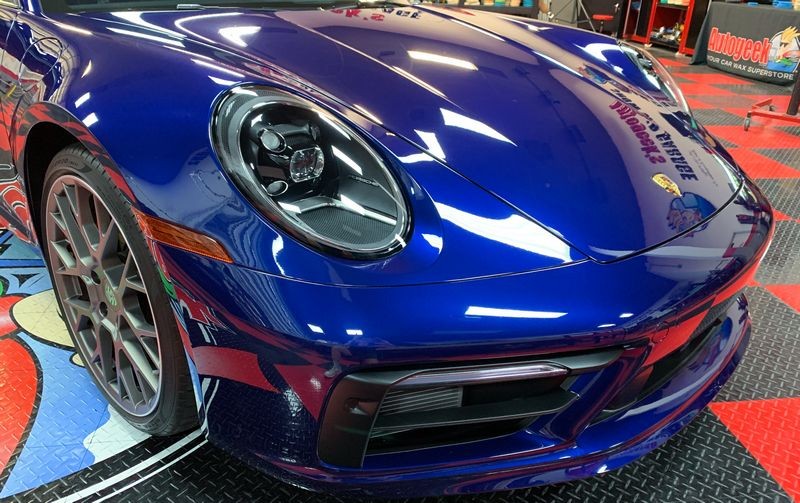
Here's the famous glass-like look that IGL Ecocoat Poly creates on perfectly polished and prepped paint...


Tools - Pads - Products
I know it's easy to think to "install" a ceramic paint coating on your car all you have to do is order the coating, as in order the tiny glass bottle of product. But that's a false reality. In the real-world, you're going to need a polisher, pads, products and lots of clean, un-contaminated microfiber towels to do the job right.
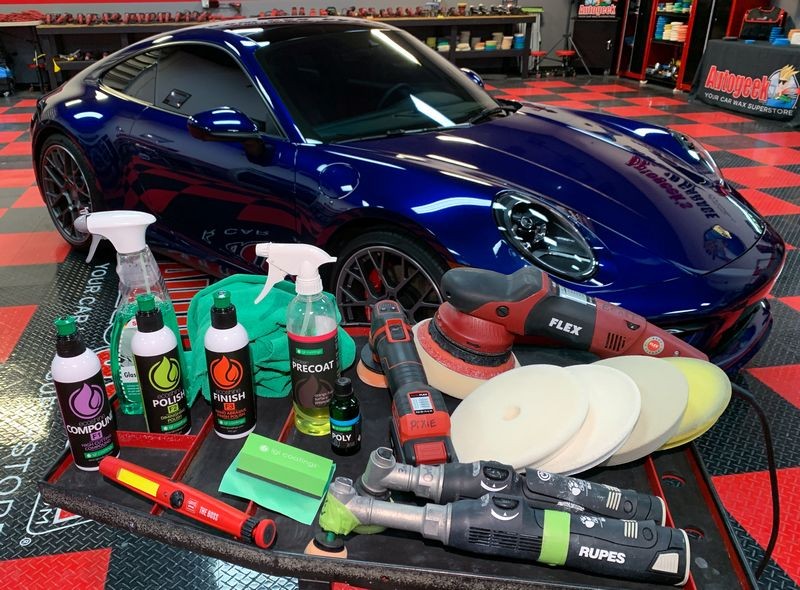
Here's a few pictures showing what I used to install a ceramic coating to a brand new Porsche.
Glass and Paint Polishing
SONAX Glass Cleaner for a waterless wash, clay lube and also as a glass cleaner. I used the F1 Compound for the glass and the F3 Finish for the paint. I did not use the F2 Polish but pictured it here so everyone that reads this write-up into the future knows it's available.

Glass and Paint Polishing
I used the FLEX Supa BEAST for both the glass polishing, (major portions of glass), and the paint polishing. The pad you see are the NEW RUPES 180mm Contour Profile Foam Pads in white and yellow. White for the paint and yellow for the glass. Also pictured is the FLEX PXE 80 or as I call it the FLEX PiXiE - I used this in 12mm free spinning random orbit mode for machine polishing thin panels and plastic areas on the car.

Chemically Striping the Paint and sealing the paint with a ceramic paint coating
This is the IGL PRECOAT, which is a Panel Wipe and a REALLY nice panel wipe at that. Citrus based, wipes really nice, leaves a clear, clean finish. The coating is pro-grade in my opinion. This bottle was a little over half full when I started. I also used this bottle for this review on Single Stage Paint. Also pictured is the foam block and microfiber patch of cloth used to apply the coating to the paint. (in case you're new to coatings)

Glass Polishing and Plastic Polishing
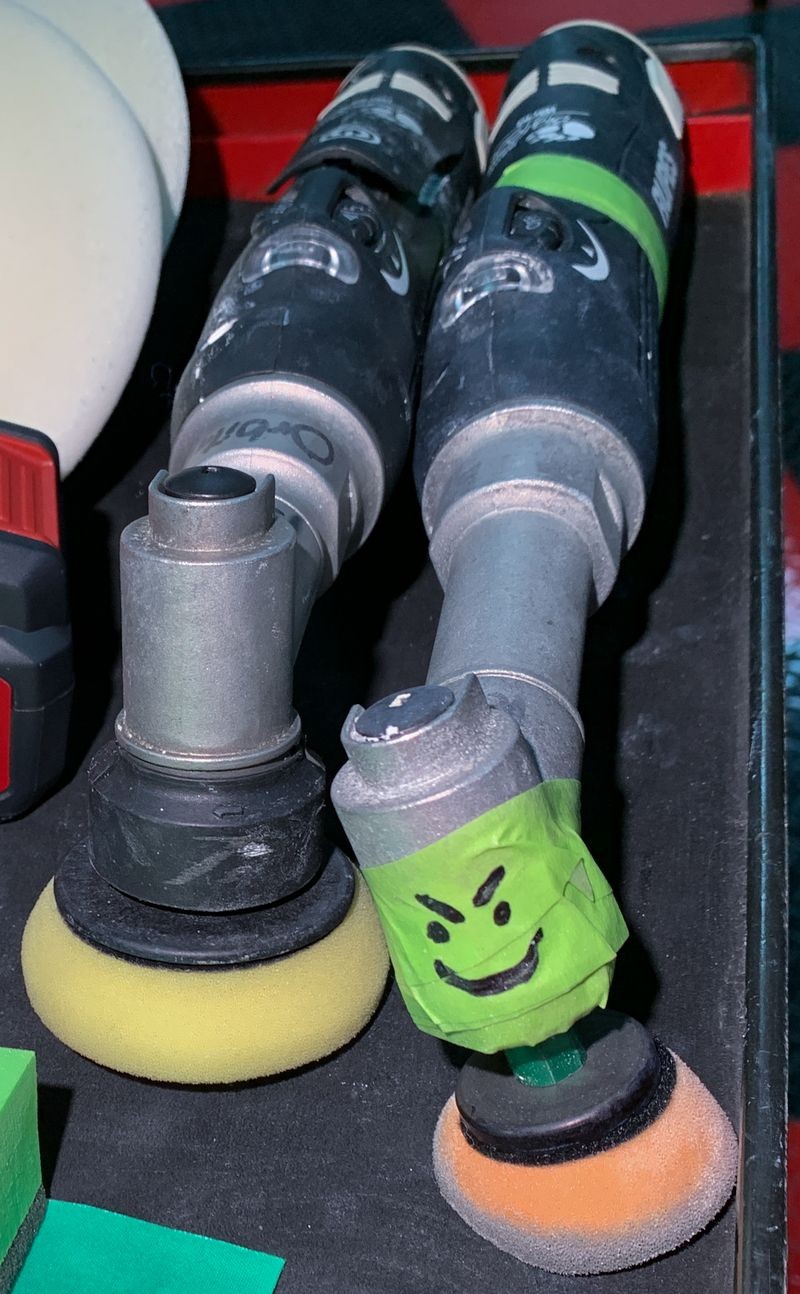
These are RUPES Nano micro-polishers. The short neck is set up for 3mm free spinning random orbit and I used it to machine polish some Piano Plastic on the back of the car around the fresh air intake louvers. The long neck is set up in rotary mode and I used this to edge all the glass to remove the drizzle stains.
High Spot Inspection
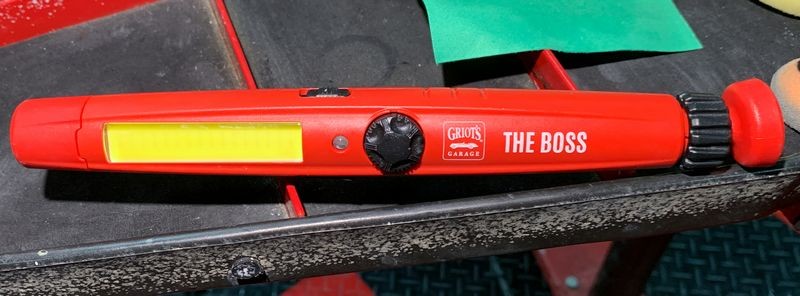
I really like the LED bar light on the Griot's BOSS Swirl Finder Light for inspecting for high spots after installing the coating. For those of you that are new to ceramic paint coatings, a HIGH SPOT is simply a patch of coating you didn't fully wipe-off and remove. You need a great hand-held light to find high spots and you MUST remove them before they fully dry and harden you they won't wipe off.
Altogether now...
I share pictures like this just to show the products and the car - I'm sure it makes it easier to believe the above write-up. If I just had a picture of a shiny car and another picture of some products... well who know what that would mean? Mock-up? :laughing:

Tires and Wheels
I wiped the wheels and the tires clean using the SONAX Glass Cleaner. (In case you haven't noticed, I use this a lot). Then I applied the PBL Wheel Coating to the MATTE finished wheels. And I applied the Pinnacle Natural Brilliance Vinyl & Rubber Cleaner & Conditioner to the tires. The owner, as near as I can tell is NOT into car detailing. For this reason I didn't want to put anything on the tires that would be oily or greasy. The Pinnacle Vinyl & Rubber Cleaner & Conditioner is water-soluble. It won't last and I don't want it to last. It will look good for when the owner picks up the car and then the tires will fade back to how they looked when the car arrived. My guess is the owner will never notice and this is why I chose to use something that won't last. It's called matching the products to the owner, not the detail. (I teach this in my classes too)
Pinnacle Black Label Wheel Coating

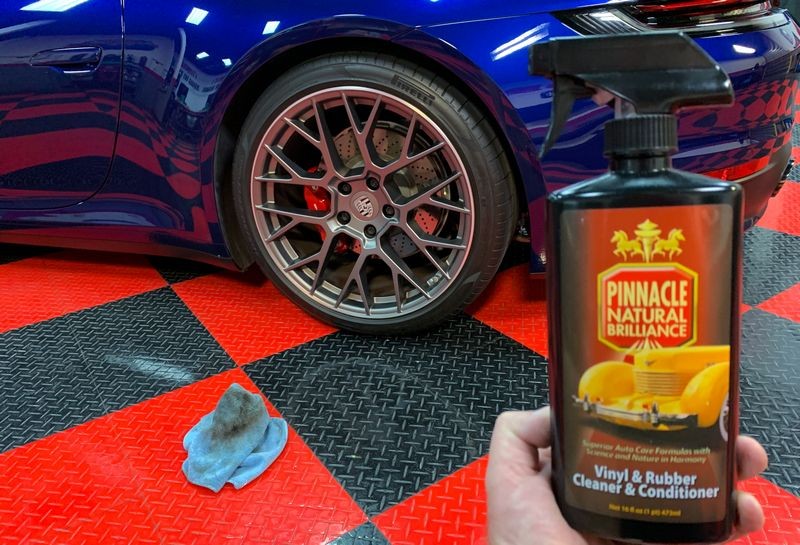
Pinnacle Natural Brilliance Vinyl & Rubber Cleaner & Conditioner
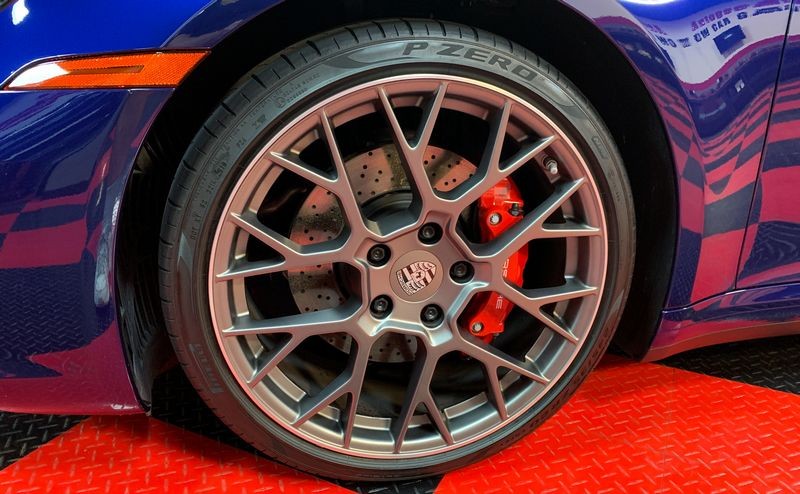
Cleaned, coated and detailed....

Review
IGL F1 Compound
Worked great as a topical glass polish. It also works great for removing serious paint defects in car paint.
IGL F3 Finish
This is a fine cut polish and perfect for times when you only need minor paint correction. IGL compounds and polishes use great abrasive technology and because they have 3 different products there's always the perfect product for the level of defects you're trying to remove.
IGL PRECOAT
This is a super nice panel wipe. There are a lot of panel wipes on the market and they all work. I like the way this one seems to really clean the surface without any leftover residue. Do keep in mind you need a lot of microfiber towels for this step to avoid cross-contamination.
IGL Ecocoat Poly Ceramic Paint Coating
This is a Rock Star in the paint coating world. There are a lot of paint coatings on the market and more and more being introduced daily. When people ask me,
What's a good ceramic coating?
I always say the same thing,
Go with an established brand
And IGL is an established brand that you can't go wrong with. When it comes to installing and wiping off a coating there's not too much to say except that this one spreads nice and wipes off easy. A poor quality coating will tend to wipe-on easy it's the wipe-off that can be either sticky or must be done quickly before the solid components start to set-up on the paint. With this coating, simply apply to a section about 2 feet by 2 feet at one time, wait about 30 to 45 seconds and then softly wipe the section. Wiping the section will act to further spread the product over the paint evenly and also remove any excess. It's really a nice choice for both experienced detailers and newbies alike.
Final comments....
While the car looked great when it first arrived - it has zero protection. It also did not have the very wet glassy look it has now after the coating installation. The paint is now protected from the elements and it will be dramatically less prone to micro-marring moving forward. Best of all, due to the hydrophobic nature of the coating, there will be a self-cleaning effect that takes place anytime it rains hard and it will wash and dry faster when the owner wants a clean looking car for the weekend.
On Autogeek.net
IGL Ecocoat Poly
IGL Ecoshine Compound F1 10 oz.
IGL Ecoshine Polish F2 10 oz.
IGL Ecoshine Finish F3 10 oz.
IGL Ecoclean PreCoat
IGL Coating Removal Towels - 10 Pack
FLEX Supa BEAST Part number = FLEX XCE 10-8 125 Corded Polisher
FLEX PXE 80
Rupes iBrid Nano Long Neck Starter Kit
Rupes iBrid Short Neck Starter Kit
RUPES D-A System 180mm or 7 Inch Pads
Griot's Garage THE BOSS LED Swirl-Finder Light
SONAX Glass Cleaner
Pinnacle Black Label Diamond Wheel Coating
Pinnacle Vinyl & Rubber Cleaner & Conditioner
")
This is IGL Poly Ceramic Coating or as we say in the industry.... the glassy look!
The back story...
So my friend buys a brand new Porsche and of course, he wants to get a ceramic coating installed to protect the paint. Here's the car and how it looked when it arrived, this is before I washed it, clayed the paint or did anything to it.
Not bad huh?
Close Inspection
The first thing I did was a waterless wash using SONAX Glass Cleaner. Sorry no pictures, pretty basic stuff. Wipe the car down to remove any loose dirt and road grime.
The Baggie Test
Being brand new, the lazy side of me was hoping the paint and the glass as well as the smooth plastic surfaces would pass the Baggie Test but NOPE - she's contaminated.
And claying or mechanical decontamination is one area you don't want to skip. You see, buffing with FOAM pads normally will NOT remove above surface bonded contaminants. The foam will simply GLIDE over the contaminants and likely make them shiny - but it will not remove them. So to do the job right you need to clay the paint, which I did. For this I used an ultra fine grade clay and SONAX Glass Cleaner.
Drizzle Stains on Glass
After I clayed the paint and the glass, the next thing I needed to do was machine polish the glass. All of the glass was covered with what I call Drizzle Stains.
What is a Drizzle Stain?
Great question, I'm glad you asked.
Drizzle Stains is a FILM on the glass with a pattern that shows how water, in the form of rain or any other source, like washing or sprinklers, etc., flush over the glass and over time, leave a visible stain-pattern ON THE GLASS. You normally cannot see Drizzle Staining on glass until you spray some type of liquid onto the glass and WIPE. Then for a brief moment - the drizzle staining shows up in the thin film of liquid on the surface immediately AFTER you've wiped a section of glass. In a matter of seconds - the visible drizzle stains will disappear as the liquid you wiped evaporates off the glass.
Drizzle Stains are difficult to capture with a camera - if it were easy - I would have taken a picture. But this type of photo-documentation is best done with 2 people. One person does the wiping of the glass while the other person takes the picture and alas - I was alone.
How to remove Drizzle Stains
Yancy and I recently conducted one of our LIVE Detailing Classes where we shared how to remove Wiper Marks, which are scratches IN the glass. I call these Sub-Surface Glass Defects. For this type of defect you must use special abrasive technology that has the ability to abrade glass while at the same time - not leaving it's own scratch behind in the glass. If the thing you're using to remove scratches out of glass at the same time puts scratches into the glass that's called a self-defeating process.
Drizzle Stains are NOT sub-surface glass defects but instead or TOPICAL defects in that they are a FILM build-up ON the glass. As such, you don't need the same type of specialized abrasive technology required for removing sub-surface defects. In fact, in most cases, when it comes to removing topical film-build staining off glass surfaces you can use any quality clearcoat-safe compound. For light cleaning, you can even use less aggressive clearcoat safe polishes.
Because I planned to use the IGL Ecocoat Poly Ceramic Coating on the paint, I figured I'd keep this detailing project in the family and use the IGL Compound for the glass polishing. I'm happy to say the IGL Compound, paired with a RUPES contour profile yellow foam polishing pad on the FLEX Supa Beast did the trick.
NOTE: Before using the 7" pad to buff out the major portions of the glass windows I first did what I call EDGING. Edging is where I take the RUPES Nano Long Neck in Rotary Mode with a 1" pad and machine polish all the edges of the glass windows so I don't have to try to get the larger pad on the larger polisher close to the edge where the glass meets the paint. The reason I do this is because realistically - it's really difficult to remove all the drizzle staining in that strip of glass about 1" wide next to the framing around the glass. If I don't do this then you meaning the customer, can see perfectly clear glass EXCEPT all the outer edges of the glass. This is a little extra step I do as a professional. I could skip it and probably know one would know the difference, but in my world I treat customer's cars as if they were my own. I also teach this in all my classes, both how to edge and how to treat a customer's car as your own.
Here's a few pictures I took showing all the glass machine polished
This is the NEW RUPES contour profile yellow foam polishing pad and these are now my favorite pads for the Supa BEAST.
Here's the windows wiped clean and that's it. I have not started the paint correction to the paint yet.
Paint Correction
Why machine polish a brand new car Mike?
Great question, I'm glad you asked. Here's why,
I practice what I preach
What I preach in my classes is that ANYTIME - did you notice the word anytime is all CAPITAL letters?
ANYTIME you do any mechanical decontamination process to car paint you should have already factored-in at least one machine polishing step to remove any marring of the paint from the mechanical decontamination step.
What is mechanical decontamination?
Mechanical decontamination is when you rub detailing clay over paint. It's also when you use any clay substitute tool to remove above surface contamination. Rubbing clay and clay substitutes over scratch-sensitive clearcoat paints can and will mar the paint.
Marring and the word mar are the kind, fluffy nice words we us when what we really mean is scratch and scratching.
So if you're going to clay someone's car or even your own car, as a professional you always follow this with at least one machine polishing step to make sure there is no marring in the paint.
Perfect the paint before installing a paint coating
Besides removing any marring or potential marring, anytime you're going to install a ceramic coating - and especially for a cool car like this Porsche, you need to be sure the paint is not only free from any other previously applied waxes or sealants or even gloss enhances from car shampoos, but for a car like this you also want the paint to be perfect or perfected and that's where machine polishing comes into play.
Machine polishing will remove any previously applied products and also remove all the fine swirls and scratches that are in the paint from the time the popped out of the assembly plant, was transported to the dealership and was then handled/washed/wiped at the dealership.
The above are my own reasons for machine polishing the paint on a brand new car, you can adopt them as your own or find your own process. Some people will simply wash a car and then coat it, that's not for me. I want to know for sure the paint is completely bare-naked, or bare paint and I also want it to be as defect-free as possible before installing a coating. Installing a coating takes a few hours worth of time and work and the final results like a new custom paint job start with the proper prep-work.
Tape-off and Cover-up
Before I start, I'm going to machine polish all the paint. Before starting the machine polishing, if you ever work on one of these Porsche's - I'd highly recommend covering-over and taping off the rear air louvers or air grill over the engine. Mostly because they are a matte black finish and they will be a real pain in the butt to clean off any splatter dots. If you don't know what splatter dots are - you're new to machine polishing and this is okay -but try to learn from me in this little tidbit I'm sharing so you don't have to learn the hard way, why I cover stuff like this up.
Here you can see where I've cover-over the rear air louvers for fresh air intake to the engine compartment. I did this using 3 microfiber towels and some 3M Painter's Tap. The strip of tape under the rear deck lid is to protect the PORSCHE lettering. This would be another area where it would be time-consuming to remove splatter dots of polish after the paint correction step.
Chemically Stripping the Paint
I'm not sure what other detailers in our industry call this step? I call it chemically stripping the paint because at it's core - this is what you're doing. You're using a SOLVENT to wipe and re-wipe the painted body panels to remove any trace polishing oils from the paint correction step so there is nothing on the paint that can interfere with the bonding of the coating to the paint. Most of the solvents for this step are generically referred to as Panel Wipes.
But it doesn't sound right to say,
Panel Wiping the Paint
So I say I'm going to chemically strip the paint as this is in fact what needs to be done. Then proceed to use a Panel Wipe to strip the paint. I don't see much of anyone else now days writing about car detailing thus I don't see anyone typing out these kinds of details via text. On YouTube you can be a lot sloppier as that is the nature of video.
Sorry no pictures of me chemically stripping the paint - you'll just have to take my word for it I used a bunch of these really nice IGL microfiber towels and about a half a bottle of IGL PRECOAT to wipe and then re-wipe every square millimeter of paint, plastic, glass and PPF on the car before coating all these areas.
Installing the IGL Ecocoat Poly Ceramic Paint Coating
Again - no pictures of me doing the work but it didn't' apply itself.
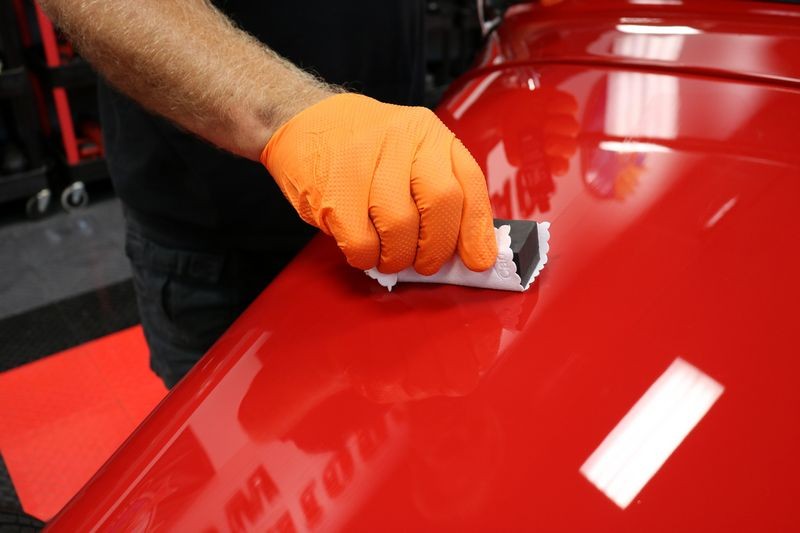
I took the picture below after installing 2 coats of the IGL Ecocoat Poly, which is the name for their consumer grade of ceramic coating. Don't let the words consumer grade taint your view, IGL is one of the TOP names in ceramic paint coating technology. Also for those that might not know, when you see me type or say the word installing a coating, this is coating jargon. In the old days you would say, apply a coat of wax, in today's world, it's the same idea only we say, install a coating. All it means is taking your human hand and applying the coating to the paint using a small foam block and a patch of soft microfiber cloth. Same idea - different words.
Here are the results...
In this shot you can see the area I covered up and the lettering I placed painter's tape over
Here's the famous glass-like look that IGL Ecocoat Poly creates on perfectly polished and prepped paint...
Tools - Pads - Products
I know it's easy to think to "install" a ceramic paint coating on your car all you have to do is order the coating, as in order the tiny glass bottle of product. But that's a false reality. In the real-world, you're going to need a polisher, pads, products and lots of clean, un-contaminated microfiber towels to do the job right.
Here's a few pictures showing what I used to install a ceramic coating to a brand new Porsche.
Glass and Paint Polishing
SONAX Glass Cleaner for a waterless wash, clay lube and also as a glass cleaner. I used the F1 Compound for the glass and the F3 Finish for the paint. I did not use the F2 Polish but pictured it here so everyone that reads this write-up into the future knows it's available.
Glass and Paint Polishing
I used the FLEX Supa BEAST for both the glass polishing, (major portions of glass), and the paint polishing. The pad you see are the NEW RUPES 180mm Contour Profile Foam Pads in white and yellow. White for the paint and yellow for the glass. Also pictured is the FLEX PXE 80 or as I call it the FLEX PiXiE - I used this in 12mm free spinning random orbit mode for machine polishing thin panels and plastic areas on the car.
Chemically Striping the Paint and sealing the paint with a ceramic paint coating
This is the IGL PRECOAT, which is a Panel Wipe and a REALLY nice panel wipe at that. Citrus based, wipes really nice, leaves a clear, clean finish. The coating is pro-grade in my opinion. This bottle was a little over half full when I started. I also used this bottle for this review on Single Stage Paint. Also pictured is the foam block and microfiber patch of cloth used to apply the coating to the paint. (in case you're new to coatings)
Glass Polishing and Plastic Polishing
These are RUPES Nano micro-polishers. The short neck is set up for 3mm free spinning random orbit and I used it to machine polish some Piano Plastic on the back of the car around the fresh air intake louvers. The long neck is set up in rotary mode and I used this to edge all the glass to remove the drizzle stains.
High Spot Inspection
I really like the LED bar light on the Griot's BOSS Swirl Finder Light for inspecting for high spots after installing the coating. For those of you that are new to ceramic paint coatings, a HIGH SPOT is simply a patch of coating you didn't fully wipe-off and remove. You need a great hand-held light to find high spots and you MUST remove them before they fully dry and harden you they won't wipe off.
Altogether now...
I share pictures like this just to show the products and the car - I'm sure it makes it easier to believe the above write-up. If I just had a picture of a shiny car and another picture of some products... well who know what that would mean? Mock-up? :laughing:
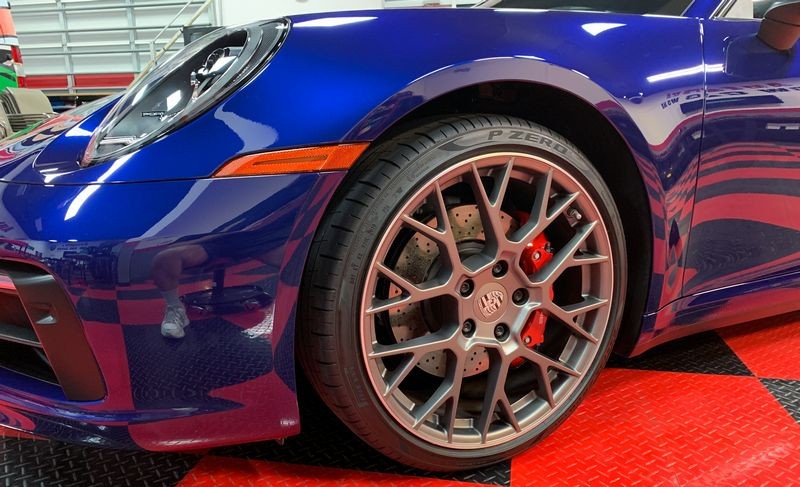
Tires and Wheels
I wiped the wheels and the tires clean using the SONAX Glass Cleaner. (In case you haven't noticed, I use this a lot). Then I applied the PBL Wheel Coating to the MATTE finished wheels. And I applied the Pinnacle Natural Brilliance Vinyl & Rubber Cleaner & Conditioner to the tires. The owner, as near as I can tell is NOT into car detailing. For this reason I didn't want to put anything on the tires that would be oily or greasy. The Pinnacle Vinyl & Rubber Cleaner & Conditioner is water-soluble. It won't last and I don't want it to last. It will look good for when the owner picks up the car and then the tires will fade back to how they looked when the car arrived. My guess is the owner will never notice and this is why I chose to use something that won't last. It's called matching the products to the owner, not the detail. (I teach this in my classes too)
Pinnacle Black Label Wheel Coating
Pinnacle Natural Brilliance Vinyl & Rubber Cleaner & Conditioner
Cleaned, coated and detailed....
Review
IGL F1 Compound
Worked great as a topical glass polish. It also works great for removing serious paint defects in car paint.
IGL F3 Finish
This is a fine cut polish and perfect for times when you only need minor paint correction. IGL compounds and polishes use great abrasive technology and because they have 3 different products there's always the perfect product for the level of defects you're trying to remove.
IGL PRECOAT
This is a super nice panel wipe. There are a lot of panel wipes on the market and they all work. I like the way this one seems to really clean the surface without any leftover residue. Do keep in mind you need a lot of microfiber towels for this step to avoid cross-contamination.
IGL Ecocoat Poly Ceramic Paint Coating
This is a Rock Star in the paint coating world. There are a lot of paint coatings on the market and more and more being introduced daily. When people ask me,
What's a good ceramic coating?
I always say the same thing,
Go with an established brand
And IGL is an established brand that you can't go wrong with. When it comes to installing and wiping off a coating there's not too much to say except that this one spreads nice and wipes off easy. A poor quality coating will tend to wipe-on easy it's the wipe-off that can be either sticky or must be done quickly before the solid components start to set-up on the paint. With this coating, simply apply to a section about 2 feet by 2 feet at one time, wait about 30 to 45 seconds and then softly wipe the section. Wiping the section will act to further spread the product over the paint evenly and also remove any excess. It's really a nice choice for both experienced detailers and newbies alike.
Final comments....
While the car looked great when it first arrived - it has zero protection. It also did not have the very wet glassy look it has now after the coating installation. The paint is now protected from the elements and it will be dramatically less prone to micro-marring moving forward. Best of all, due to the hydrophobic nature of the coating, there will be a self-cleaning effect that takes place anytime it rains hard and it will wash and dry faster when the owner wants a clean looking car for the weekend.
On Autogeek.net
IGL Ecocoat Poly
IGL Ecoshine Compound F1 10 oz.
IGL Ecoshine Polish F2 10 oz.
IGL Ecoshine Finish F3 10 oz.
IGL Ecoclean PreCoat
IGL Coating Removal Towels - 10 Pack
FLEX Supa BEAST Part number = FLEX XCE 10-8 125 Corded Polisher
FLEX PXE 80
Rupes iBrid Nano Long Neck Starter Kit
Rupes iBrid Short Neck Starter Kit
RUPES D-A System 180mm or 7 Inch Pads
Griot's Garage THE BOSS LED Swirl-Finder Light
SONAX Glass Cleaner
Pinnacle Black Label Diamond Wheel Coating
Pinnacle Vinyl & Rubber Cleaner & Conditioner


")