Mike Phillips
Active member
- Dec 5, 2022
- 51,004
- 6
Review: Pinnacle Black Label Ceramic Trim Restorer
Pinnacle Black Label Ceramic Trim Restorer

What it is?
A black dye infused ceramic coating for plastic trim.
What it does?
Restore ugly faded plastic trim to look new again. For those that want to be pro-active and NOT wait for the trim to get ugly in the first place then it's a GREAT maintenance product to apply while trim still is new or still looks new.
When to use it?
After thoroughly cleaning faded neglected trim or on trim in good shape as a pro-active way to keep it in good shape.
Why to use it?
Keeps your trim looking good so your car looks good. Maintains and protects the resale or trade-in value.
Important Information
It is vitally important the you first clean the surface to be treated as well as possible for 2 reasons.
1: Plastic does not easily absorb anything including liquids. The better you clean the surface the better the ceramic and pigments will be able to penetrate INTO the plastic and this is how you'll get the best results.
2: Ceramic coatings need a CLEAN surface to make a proper bond. After washing your car and cleaning any neglected trim as best as you can, then use the Pinnacle Black Label Diamond Surface Prep Spray to re-wipe the trim to ensure it's surgically clean.
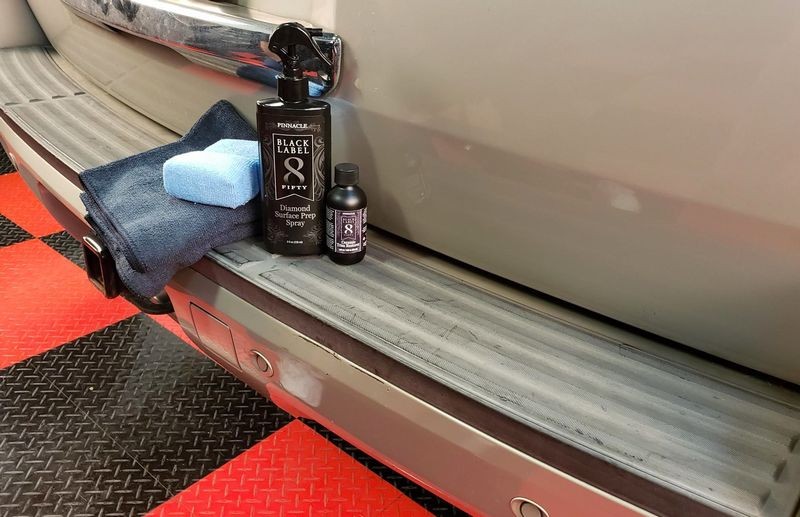
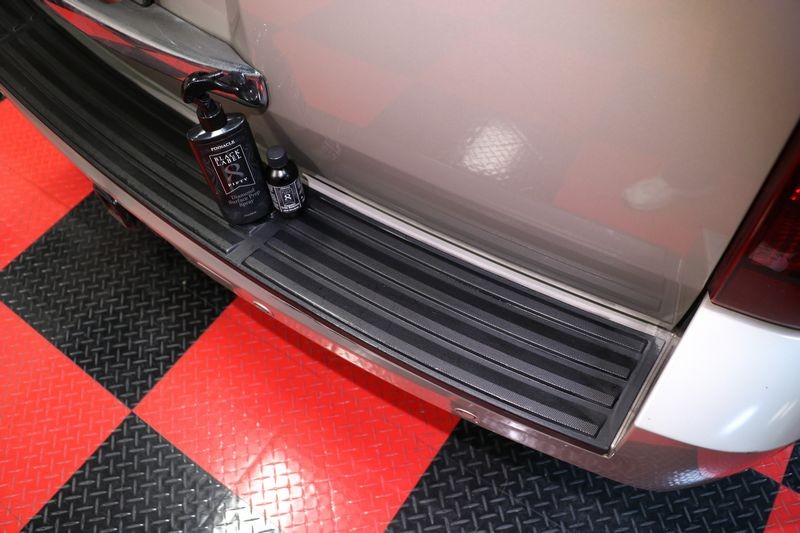
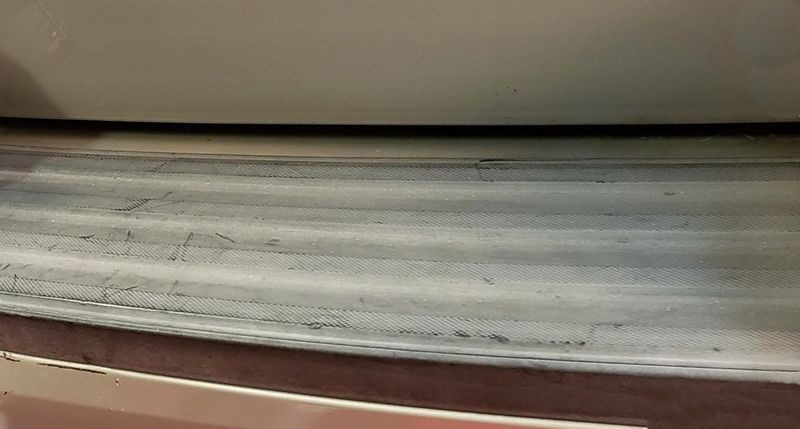
Here's our demo plastic trim - very neglected plastic trim on a Chevy Tahoe
Step-by-step directions
Step 1: After washing the vehicle and cleaning the trim in the wash process, next re-clean using the Pinnacle Black Label Surface Prep Spray. This is a panel wipe to prepare car paint for ceramic coatings that can also be used to prepare plastic for the Pinnacle Black Label Trim Restorer
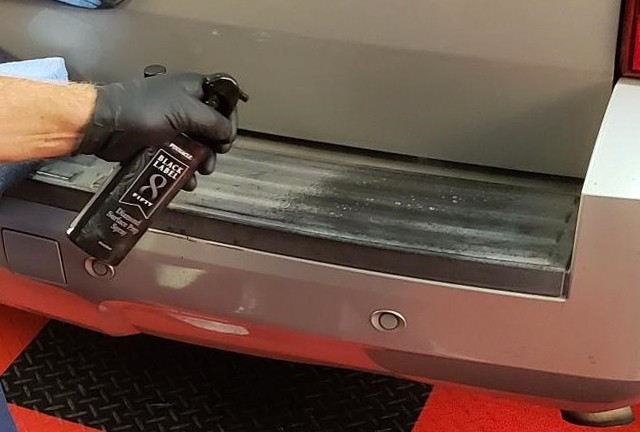
Step 2: Use a clean, microfiber towel to wipe off the prep spray.

Step 3: Apply some PBL Ceramic Trim Restorer to a clean, microfiber applicator pad. Be sure to wear gloves to avoid staining your skin.

Step 4: Apply the Ceramic Trim Restorer over the plastic. Thoroughly work the product into the plastic.

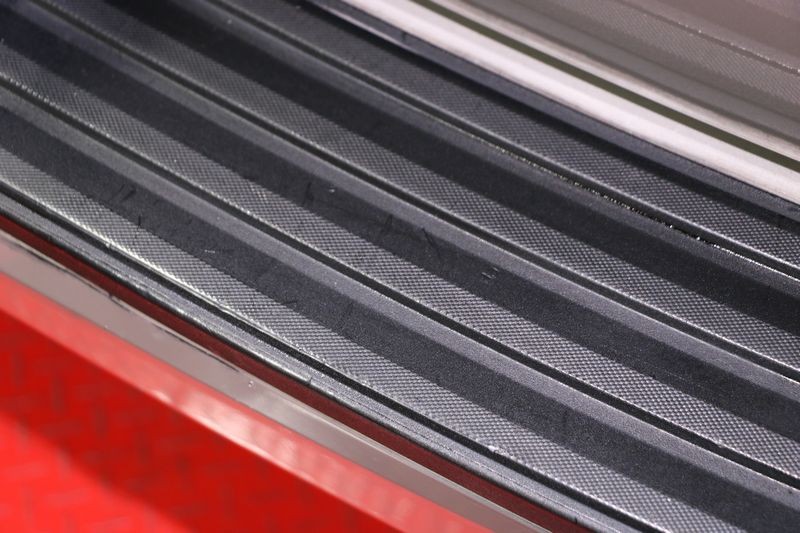
This is the real deal. This trim was ugly and with one application it's on it's way to looking brand new again.
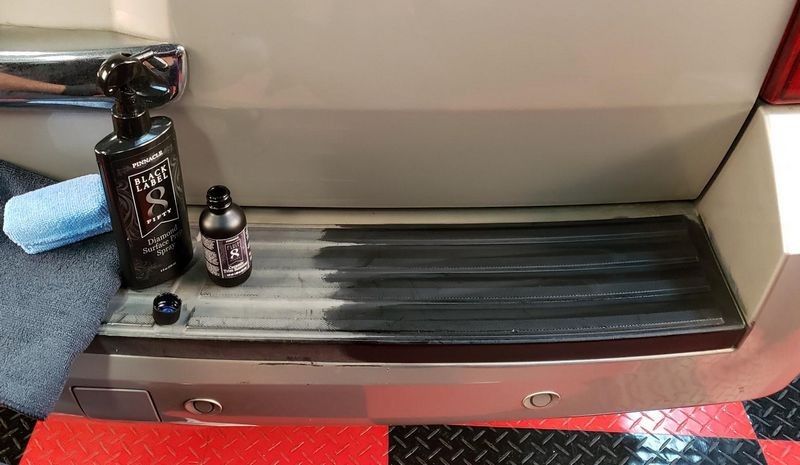
Finish applying to the entire piece of trim and after application, wipe any excess product off.


Just have to get that one little area in the middle....

There - completely coated and restored.

The factory appearance has been restored and the trim looks great! Now we just need to detail the rest of the SUV!
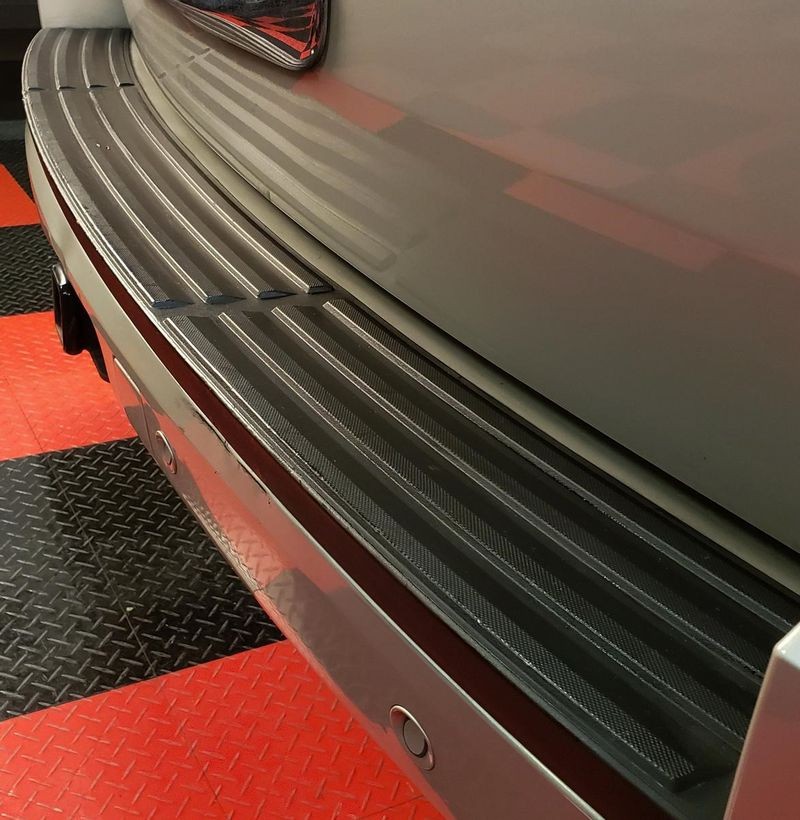

Nice!
BEFORE
AFTER

Review
Freaking amazing product. Not only will it restore a factory black appearance to faded ugly plastic, because it's a CERAMIC coating it will hold up to the elements and can last up to 2 years. My advice is don't wait 2 years to re-apply. Instead, be PRO-ACTIVE and re-apply 2-3 times a year. It's fast and simply and it will keep your car's plastic trim looking better than new.
Don't be the person that lets their trim become so neglected that NOTHING can fix it.
Also - it's VITAL that you get weathered, neglected plastic trim as clean as you can. Me? I machine scrub this stuff with either the cordless FLEX PE14 or the Mighty Mini using a strong APC when I'm washing the car. Both of these tools are cordless so you won't get shocked around water. I do this for my own cars and teach this in my car detailing classes. A clean surface is vital. And the prep spray or any quality panel wipe goes the extra mile to insure the surface is totally clean for best results.
On Autogeek.com
Pinnacle Black Label Ceramic Trim Restorer
")
Pinnacle Black Label Ceramic Trim Restorer
What it is?
A black dye infused ceramic coating for plastic trim.
What it does?
Restore ugly faded plastic trim to look new again. For those that want to be pro-active and NOT wait for the trim to get ugly in the first place then it's a GREAT maintenance product to apply while trim still is new or still looks new.
When to use it?
After thoroughly cleaning faded neglected trim or on trim in good shape as a pro-active way to keep it in good shape.
Why to use it?
Keeps your trim looking good so your car looks good. Maintains and protects the resale or trade-in value.
Important Information
It is vitally important the you first clean the surface to be treated as well as possible for 2 reasons.
1: Plastic does not easily absorb anything including liquids. The better you clean the surface the better the ceramic and pigments will be able to penetrate INTO the plastic and this is how you'll get the best results.
2: Ceramic coatings need a CLEAN surface to make a proper bond. After washing your car and cleaning any neglected trim as best as you can, then use the Pinnacle Black Label Diamond Surface Prep Spray to re-wipe the trim to ensure it's surgically clean.
Here's our demo plastic trim - very neglected plastic trim on a Chevy Tahoe
Step-by-step directions
Step 1: After washing the vehicle and cleaning the trim in the wash process, next re-clean using the Pinnacle Black Label Surface Prep Spray. This is a panel wipe to prepare car paint for ceramic coatings that can also be used to prepare plastic for the Pinnacle Black Label Trim Restorer
Step 2: Use a clean, microfiber towel to wipe off the prep spray.
Step 3: Apply some PBL Ceramic Trim Restorer to a clean, microfiber applicator pad. Be sure to wear gloves to avoid staining your skin.
Step 4: Apply the Ceramic Trim Restorer over the plastic. Thoroughly work the product into the plastic.
This is the real deal. This trim was ugly and with one application it's on it's way to looking brand new again.
Finish applying to the entire piece of trim and after application, wipe any excess product off.
Just have to get that one little area in the middle....
There - completely coated and restored.
The factory appearance has been restored and the trim looks great! Now we just need to detail the rest of the SUV!
Nice!
BEFORE
AFTER
Review
Freaking amazing product. Not only will it restore a factory black appearance to faded ugly plastic, because it's a CERAMIC coating it will hold up to the elements and can last up to 2 years. My advice is don't wait 2 years to re-apply. Instead, be PRO-ACTIVE and re-apply 2-3 times a year. It's fast and simply and it will keep your car's plastic trim looking better than new.
Don't be the person that lets their trim become so neglected that NOTHING can fix it.
Also - it's VITAL that you get weathered, neglected plastic trim as clean as you can. Me? I machine scrub this stuff with either the cordless FLEX PE14 or the Mighty Mini using a strong APC when I'm washing the car. Both of these tools are cordless so you won't get shocked around water. I do this for my own cars and teach this in my car detailing classes. A clean surface is vital. And the prep spray or any quality panel wipe goes the extra mile to insure the surface is totally clean for best results.
On Autogeek.com
Pinnacle Black Label Ceramic Trim Restorer