Mike Phillips
Active member
- Dec 5, 2022
- 51,004
- 6
Review: Pinnacle Black Label Diamond Ceramic Coating Pro
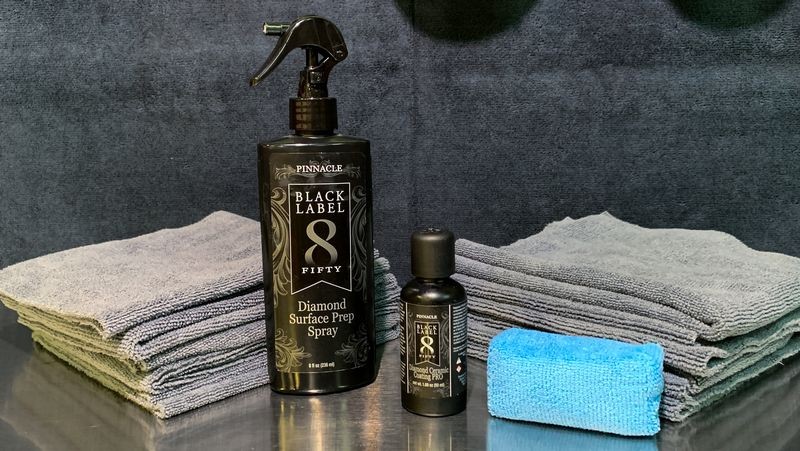
Pinnacle Black Label Diamond Ceramic Coating PRO

Pinnacle Black Label Diamond Ceramic Coating Pro
What is it?
Ceramic paint coating.
What does it do?
Seals and protects car paint while adding incredible gloss, depth and shine.Creates a 9H hardness finish to any car's paint to help resist marring and degradation. Provides both sheeting action and a hydrophobic surface, which creates a self-cleaning effect anytime it rains and washing and drying are faster and easier.
When do I use it?
After first washing and drying paint in new condition or after first doing any claying and paint correction to older cars.
Why should I use it?
To protect your car's finish with a pro grade ceramic coating that easily outlasts conventional car waxes and synthetic paint sealants while at the same time created incredible gloss and shine.
From the manufacturer
Pinnacle Black Label Diamond Ceramic Coating PRO is a 9H rated professional paint coating that provides an ultimate high gloss and long-lasting results. With a protection period of up to 4 years, Pinnacle Black Label Diamond Ceramic Coating PRO will minimize damage of chemical staining, UV rays, oxidation, and more on coated surfaces. Coated surfaces will sheet water and maintain a high gloss finish.
Directions
Work on cool surfaces out of direct sunlight.
If necessary, correct and polish paint to remove surface imperfections before coating application.
Continue around entirety of vehicle until all painted surfaces have been coated.
Allow to cure for approximately 12-24 hours – do not expose to moisture in that time.
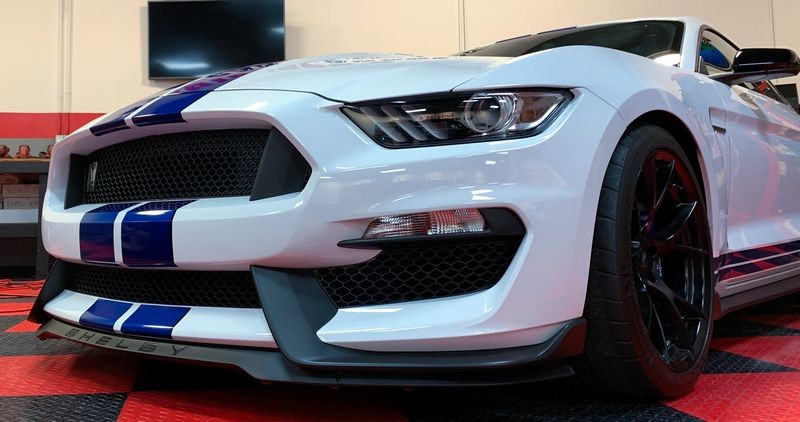
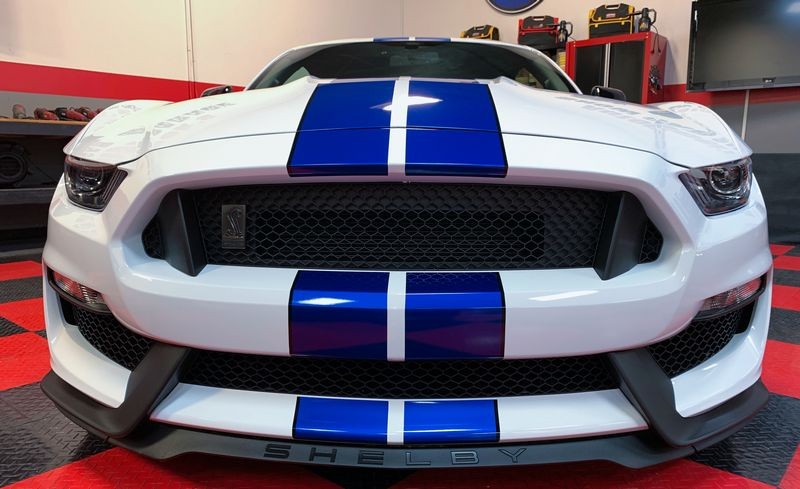
2017 Shelby Mustang GT350
My brother-in-law recently purchased this old 2-door Ford.

He said in the sun he could see swirlies. (his word not mine). Asked me if I thought I could do anything with it? I said "sure", I'll give you the family and friends discount, drop it off at the shop.
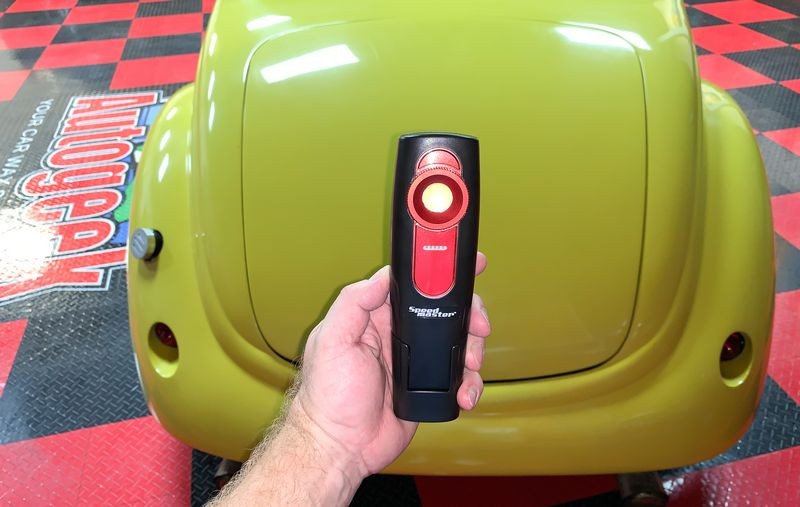
Paint Inspection
After the car arrived I inspected the paint. Using the baggie test I found it needed to be clayed. Using a swirl finder light I found it needed light paint correction.
Paint Correction
Step 1: Waterless wash
Step 2: Clayed paint using Pinnacle Ultra Poly Clay and Pinnacle Clay Lube
Step 3: Machine polished paint using Pinnacle Advanced Swirl Remover using the BEAST with RUPES 7" yellow foam polishing pads.
How to prep the paint and install the Pinnacle Black Label Diamond Ceramic Coating PRO
Step 1: Spray the Diamond Surface Prep Spray to a section of a panel and then using a clean, dry microfiber towel, spread the product over the section and then flip to a clean dry side and remove the spray residue.


IMPORTANT: It's important that you use plenty of clean, un-contaminated microfiber towels to avoid cross-contamination during this prep spray process.


Mike's Pro Technique Tip
Before you ever use any microfiber towels on your car's finish you should first visually and through your sense of touch, inspect the towels. Microfiber towels by their very nature are grabby. We love them because of how well they GRAB onto spray residues as well as compound, polish and wax residues, but in this same way they excel at removing unwanted substances off your car's finish they also excel at grabbing un-wanted contaminants onto them and into their weave. Things like sticks, leaves, dead bugs, etc. If you have not read this article or watched the video where I show how to correctly inspect your towels, take a moment to do so.
How, why & when to inspect your microfiber towels when detailing cars

Step 2: Install the coating working small sections at a time.
If you're new to ceramic coatings, the coating world has it's own lingo. The word install simply means to apply. I'm not sure who chose to coin the word install instead of simply using the word apply but as the saying goes, once the Genie is out of the bottle, it's kind of difficult to put the Genie back into the bottle. So don't be confused, you're going to APPLY the coating.")
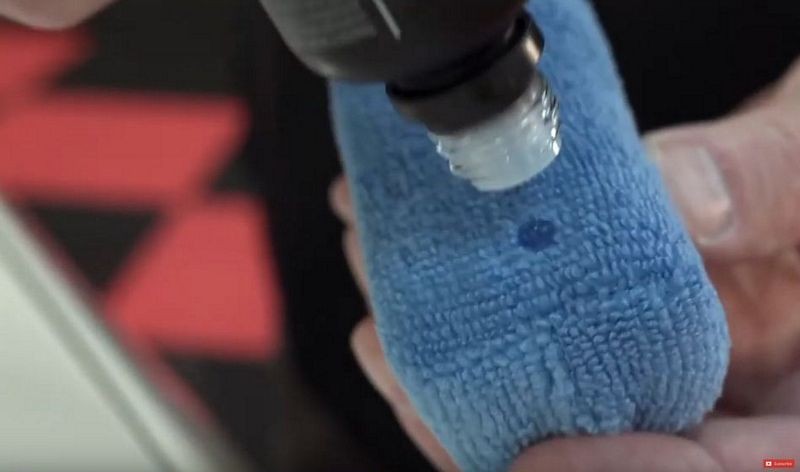
First place a row of drops across the face of one side of a coating applicator like this,

Apply the coating using a crosshatch motion
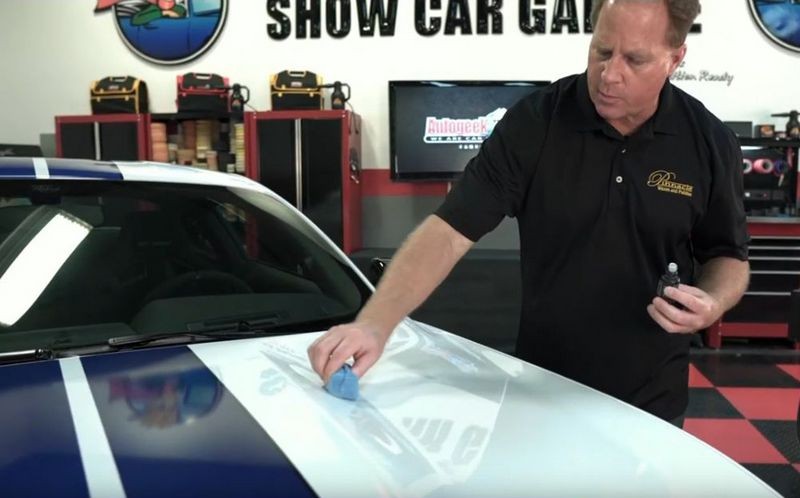
Then using a crosshatch pattern, apply and spread the coating to a section of paint no larger than around 2' by 2'. Basically divide larger panels like the roof, hood, doors and fenders into smaller sections. Then apply using a back-n-forth and side-to-side motion. Normally you make this crosshatch pattern 4 times over each section of paint and this is to ensure full and even coverage of the coating over the paint.
Here I'm moving the applicator front to back, that is away from me and then back towards me...

Next I'll move the applicator over the same section only side-to-side

Then I'll repeat the above two motions...
Until I've went over that one section of paint 4 times.
Step 3: Wait for about 30 to 60 seconds and then give this section of paint a final buff using a clean, soft dry microfiber towel.
For this coating, the flash time is less than a minute. The word flash is the word used instead of evaporate in coating lingo. There's also a visual aspect to the flashing of the coating or the evaporating of the carrying agents. As the carrying agents, (solvents), evaporate, if you look at the paint from the right angle you will see a RAINBOW appearance in what's left of the coating on the paint. At this point, it's safe to go ahead and wipe this section to remove any high spots. In coating lingo, high spots simply means excess coating.

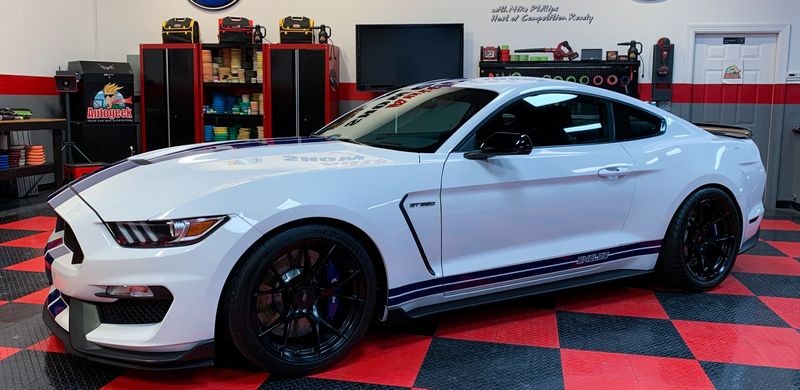
Here's the results....
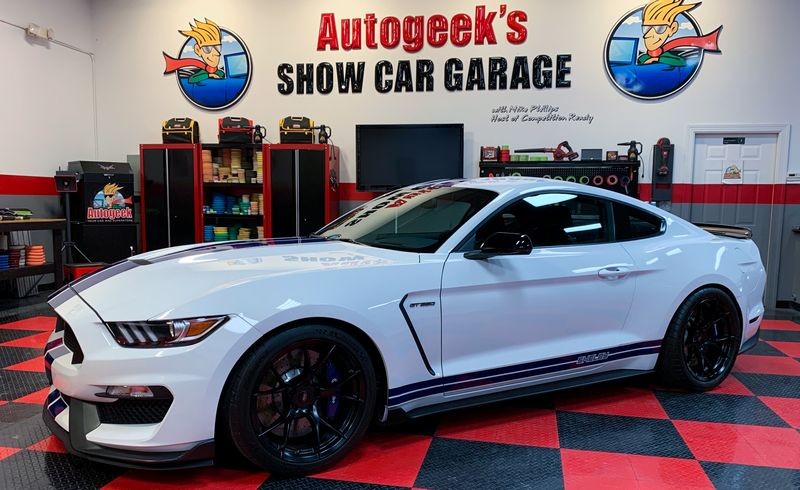


Ready to race!
(Of course, on a sanctioned race track)
Review
This is a SUPER easy to use coating. It's just as easy as you see in the pictures above. The hard part is always the paint correction steps, that is any claying, compounding or polishing that needs to be performed to remove any contamination, swirls, scratches, oxidation and/or water spots. If you car doesn't need any paint correction then you can simply wash and dry, then go right to Step 1 - that I outlined above.
Ample Flash Time
While the stated flash time is less than a minute, I found I could easily wait up to 2-3 minutes before the coating would start to become difficult to wipe-off. There's no need to wait this long as the coating bonds instantly to the paint once applied. It is nice to know you have a little window of time to make working around the car relaxing instead of hurried.
Easy wipe-off
Wipe-off is easy using clean, dry microfiber towels. The towels you see me using are one of my favorites for ANYTHING related to working on car paint. They have a flat weave so they are less likely to become contaminated over time. That's important to me. They are of course, soft and gentle to the paint but stout enough to work well for wiping off anything, from compounds to coatings. I'll include a link to a 12-pack below.
Easy application
The microfiber block applicator you see me using really makes applying, wait... I mean installing a paint coating easy. After you coat a couple of sections teh entire face of one side of the microfiber block will be wet with coating and then it will glide easier over the paint and make laying down an even layer faster and more effective. The next day, the side of the microfiber foam block that you used to apply the coating will be hard, like pumice. I wash these and then use the other 2 remaining sides. One side has a seam where the microfiber is sewn around the foam core and I don't use this side.
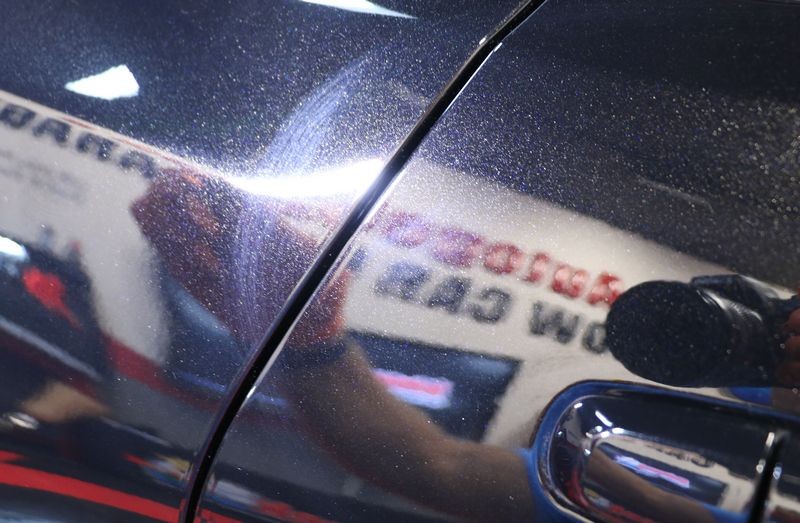
Super high gloss!
As you can see by this picture, this coating really makes the paint look wet and glossy.
9H hardness for long lasting, durable protection
The 9H hardness protection it leaves behind is tough as nails. In fact, if you leave any high spots by accident on your car's paint, you'll have to use a compound to buff off the high spots. So pay attention when installing this coating or any coating and simply be sure to 100% thoroughly wipe each section after installing the coating to make sure you remove any high spots or excess coating.
Faster washing and drying
Besides the gloss, the water beading is out of this world! This high water beading characteristic is caused by the incredible surface tension that is created by the coating and any water that lands on the car. This super water beading effect makes washing your car faster, easier and safer because not only does water want to get away from the surface but it will take everything with it, like soap suds and dirt.
Let Mother Nature wash your car
It's true, with a quality ceramic paint coating - when there's a hard rain, the rain will really wash your car. The impact of the rain hitting the coated surface will flush off the car and take any loose dirt with it. I use Mother Nature to wash my own cars simply by leaving the car outside when I know a rain storm is coming.
Super easy to use with show car results....
If you're interested in making the jump from car waxes and synthetic paint sealant to the world of ceramic paint coatings, the Pinnacle Black Label Diamond Ceramic Coating Pro will give you up to 4 years of paint protection in a professional grade product but with the ease-of-use that even a first-time can get pro results.
On Autogeek.com
Pinnacle Black Label Diamond Ceramic Coating Pro
Prep Spray
8 ounces is enough to wipe your car down but I would recommend getting a refill, (link below). I wish this came in a 16 ounce or 32 ounce bottle. When it comes to a Panel Wipe, more is better.
Pinnacle Black Label Diamond Surface Prep Spray 8 oz
Refill
Pinnacle Black Label Diamond Surface Prep Spray 32 oz
Storm Grey Edgeless Microfiber Towels
Below is the link to a 12-pack of the towels you see me using on the Shelby Mustang. Compared to a lot of towel options these are in-expensive. I strongly recommend getting TWO 12-packs for a total of 24 towels. This way you have more than enough PLUS you can wash them together (don't mix with other items), dry them and the store them together. It's really important to have nice towels and to also take care of your towels.
Cobra Storm Gray Edgeless Microfiber Polishing Cloth - 12 Pack
Microfiber Foam Applicator Blocks
I also recommend getting a few extra microfiber coating applicators. They work great and they are in-expensive. You can't find these at your local stores so stock up.
Blue Microfiber Coating Applicator

Pinnacle Black Label Diamond Ceramic Coating PRO
Pinnacle Black Label Diamond Ceramic Coating Pro
What is it?
Ceramic paint coating.
What does it do?
Seals and protects car paint while adding incredible gloss, depth and shine.Creates a 9H hardness finish to any car's paint to help resist marring and degradation. Provides both sheeting action and a hydrophobic surface, which creates a self-cleaning effect anytime it rains and washing and drying are faster and easier.
When do I use it?
After first washing and drying paint in new condition or after first doing any claying and paint correction to older cars.
Why should I use it?
To protect your car's finish with a pro grade ceramic coating that easily outlasts conventional car waxes and synthetic paint sealants while at the same time created incredible gloss and shine.
From the manufacturer
Pinnacle Black Label Diamond Ceramic Coating PRO is a 9H rated professional paint coating that provides an ultimate high gloss and long-lasting results. With a protection period of up to 4 years, Pinnacle Black Label Diamond Ceramic Coating PRO will minimize damage of chemical staining, UV rays, oxidation, and more on coated surfaces. Coated surfaces will sheet water and maintain a high gloss finish.
Directions
Work on cool surfaces out of direct sunlight.
If necessary, correct and polish paint to remove surface imperfections before coating application.
- After washing and drying vehicle, use Pinnacle Black Label Diamond Surface Prep Spray to remove any leftover oils from washing/paint correction.
- Apply 3-4 droplets of coating to a foam coating applicator and wipe onto the surface.
- Allow a moment for product to flash before wiping excess product away.
Continue around entirety of vehicle until all painted surfaces have been coated.
Allow to cure for approximately 12-24 hours – do not expose to moisture in that time.
2017 Shelby Mustang GT350
My brother-in-law recently purchased this old 2-door Ford.
He said in the sun he could see swirlies. (his word not mine). Asked me if I thought I could do anything with it? I said "sure", I'll give you the family and friends discount, drop it off at the shop.
Paint Inspection
After the car arrived I inspected the paint. Using the baggie test I found it needed to be clayed. Using a swirl finder light I found it needed light paint correction.
Paint Correction
Step 1: Waterless wash
Step 2: Clayed paint using Pinnacle Ultra Poly Clay and Pinnacle Clay Lube
Step 3: Machine polished paint using Pinnacle Advanced Swirl Remover using the BEAST with RUPES 7" yellow foam polishing pads.
How to prep the paint and install the Pinnacle Black Label Diamond Ceramic Coating PRO
Step 1: Spray the Diamond Surface Prep Spray to a section of a panel and then using a clean, dry microfiber towel, spread the product over the section and then flip to a clean dry side and remove the spray residue.
IMPORTANT: It's important that you use plenty of clean, un-contaminated microfiber towels to avoid cross-contamination during this prep spray process.
Mike's Pro Technique Tip
Before you ever use any microfiber towels on your car's finish you should first visually and through your sense of touch, inspect the towels. Microfiber towels by their very nature are grabby. We love them because of how well they GRAB onto spray residues as well as compound, polish and wax residues, but in this same way they excel at removing unwanted substances off your car's finish they also excel at grabbing un-wanted contaminants onto them and into their weave. Things like sticks, leaves, dead bugs, etc. If you have not read this article or watched the video where I show how to correctly inspect your towels, take a moment to do so.
How, why & when to inspect your microfiber towels when detailing cars
Step 2: Install the coating working small sections at a time.
If you're new to ceramic coatings, the coating world has it's own lingo. The word install simply means to apply. I'm not sure who chose to coin the word install instead of simply using the word apply but as the saying goes, once the Genie is out of the bottle, it's kind of difficult to put the Genie back into the bottle. So don't be confused, you're going to APPLY the coating.
First place a row of drops across the face of one side of a coating applicator like this,
Apply the coating using a crosshatch motion
Then using a crosshatch pattern, apply and spread the coating to a section of paint no larger than around 2' by 2'. Basically divide larger panels like the roof, hood, doors and fenders into smaller sections. Then apply using a back-n-forth and side-to-side motion. Normally you make this crosshatch pattern 4 times over each section of paint and this is to ensure full and even coverage of the coating over the paint.
Here I'm moving the applicator front to back, that is away from me and then back towards me...
Next I'll move the applicator over the same section only side-to-side
Then I'll repeat the above two motions...
Until I've went over that one section of paint 4 times.
Step 3: Wait for about 30 to 60 seconds and then give this section of paint a final buff using a clean, soft dry microfiber towel.
For this coating, the flash time is less than a minute. The word flash is the word used instead of evaporate in coating lingo. There's also a visual aspect to the flashing of the coating or the evaporating of the carrying agents. As the carrying agents, (solvents), evaporate, if you look at the paint from the right angle you will see a RAINBOW appearance in what's left of the coating on the paint. At this point, it's safe to go ahead and wipe this section to remove any high spots. In coating lingo, high spots simply means excess coating.
Here's the results....
Ready to race!
(Of course, on a sanctioned race track)
Review
This is a SUPER easy to use coating. It's just as easy as you see in the pictures above. The hard part is always the paint correction steps, that is any claying, compounding or polishing that needs to be performed to remove any contamination, swirls, scratches, oxidation and/or water spots. If you car doesn't need any paint correction then you can simply wash and dry, then go right to Step 1 - that I outlined above.
Ample Flash Time
While the stated flash time is less than a minute, I found I could easily wait up to 2-3 minutes before the coating would start to become difficult to wipe-off. There's no need to wait this long as the coating bonds instantly to the paint once applied. It is nice to know you have a little window of time to make working around the car relaxing instead of hurried.
Easy wipe-off
Wipe-off is easy using clean, dry microfiber towels. The towels you see me using are one of my favorites for ANYTHING related to working on car paint. They have a flat weave so they are less likely to become contaminated over time. That's important to me. They are of course, soft and gentle to the paint but stout enough to work well for wiping off anything, from compounds to coatings. I'll include a link to a 12-pack below.
Easy application
The microfiber block applicator you see me using really makes applying, wait... I mean installing a paint coating easy. After you coat a couple of sections teh entire face of one side of the microfiber block will be wet with coating and then it will glide easier over the paint and make laying down an even layer faster and more effective. The next day, the side of the microfiber foam block that you used to apply the coating will be hard, like pumice. I wash these and then use the other 2 remaining sides. One side has a seam where the microfiber is sewn around the foam core and I don't use this side.
Super high gloss!
As you can see by this picture, this coating really makes the paint look wet and glossy.
9H hardness for long lasting, durable protection
The 9H hardness protection it leaves behind is tough as nails. In fact, if you leave any high spots by accident on your car's paint, you'll have to use a compound to buff off the high spots. So pay attention when installing this coating or any coating and simply be sure to 100% thoroughly wipe each section after installing the coating to make sure you remove any high spots or excess coating.
Faster washing and drying
Besides the gloss, the water beading is out of this world! This high water beading characteristic is caused by the incredible surface tension that is created by the coating and any water that lands on the car. This super water beading effect makes washing your car faster, easier and safer because not only does water want to get away from the surface but it will take everything with it, like soap suds and dirt.
Let Mother Nature wash your car
It's true, with a quality ceramic paint coating - when there's a hard rain, the rain will really wash your car. The impact of the rain hitting the coated surface will flush off the car and take any loose dirt with it. I use Mother Nature to wash my own cars simply by leaving the car outside when I know a rain storm is coming.
Super easy to use with show car results....
If you're interested in making the jump from car waxes and synthetic paint sealant to the world of ceramic paint coatings, the Pinnacle Black Label Diamond Ceramic Coating Pro will give you up to 4 years of paint protection in a professional grade product but with the ease-of-use that even a first-time can get pro results.
On Autogeek.com
Pinnacle Black Label Diamond Ceramic Coating Pro
Prep Spray
8 ounces is enough to wipe your car down but I would recommend getting a refill, (link below). I wish this came in a 16 ounce or 32 ounce bottle. When it comes to a Panel Wipe, more is better.
Pinnacle Black Label Diamond Surface Prep Spray 8 oz
Refill
Pinnacle Black Label Diamond Surface Prep Spray 32 oz
Storm Grey Edgeless Microfiber Towels
Below is the link to a 12-pack of the towels you see me using on the Shelby Mustang. Compared to a lot of towel options these are in-expensive. I strongly recommend getting TWO 12-packs for a total of 24 towels. This way you have more than enough PLUS you can wash them together (don't mix with other items), dry them and the store them together. It's really important to have nice towels and to also take care of your towels.
Cobra Storm Gray Edgeless Microfiber Polishing Cloth - 12 Pack
Microfiber Foam Applicator Blocks
I also recommend getting a few extra microfiber coating applicators. They work great and they are in-expensive. You can't find these at your local stores so stock up.
Blue Microfiber Coating Applicator


 rops:
rops: