Mike Phillips
Active member
- Dec 5, 2022
- 51,004
- 7
Review: Pinnacle Black Label Reserve Wax
Pinnacle Black Label Reserve Wax
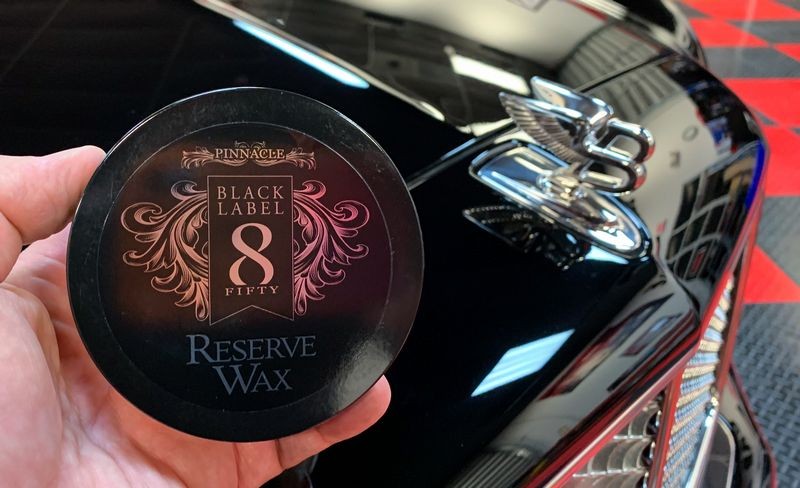
What it is?
A premium quality Carnauba Paste Wax
What it does?
Protects your car's paint while adding and with regular use, maintaining gloss, shine and protection.
When to use it?
After first cleaning the car via washing, rinseless or waterless wash.
Why to use it?
To protect the paint while creating a beautiful finish.
Special Instructions
This is what I call a show car wax or a finishing wax. This means it only offers beauty and protection. It is the OPPOSITE of a cleaner/wax or AIO in that it offers zero cleaning and zero defect removal. What this means is this wax is ONLY for paint that is already in good to excellent condition, specifically the paint must be clean and free from any ABOVE surface defects like oxidation and road grime. While it's really for car paint that is defect-0free you could apply it to paint that has swirls, scratches and water spots, defects that are in the paint not ON the paint but the type of car owner that would buy and use this product would also be the type of person that is savvy enough to either remove below surface paint defects themselves or hire the job out to a pro.
Important Information
While it shouldn't stain exterior plastic trim, it's a good practice to not get any carnauba paste wax or any synthetic sealant for that matter on plastic trim. Slow down, be careful, no risk and no regrets. If you want to work fast and sloppy then tape trim off first.
My comments...
This is as stated above an on the label, a premium quality carnauba paste wax. It's very waxy and oily and it performs exactly as I would expect a wax that is described as it is marketed. The paint on the Bentley was mostly swirl-free but it did have some water spots on the hood that I define as imprint rings. I could have machine polished the paint and removed the imprint rings but that was not the scope of my testing. My testing was to use the product like the average non-machine car owner would use it and that's what I did. For these test parameters it performed flawlessly. If you own a nice car with paint in good to excellent condition that also passes the baggie test, and if you prefer to hand-wax your cars, then you will love this wax. Just apply as thin of a coat as you can and then use clean, soft uncontaminated microfiber towels to remove the dried wax and you will love the results.
2018 Continental GTR3 Le Mans Edition
Here's my test car. I don't know the owner as this car belongs to a friend of Yancy. I didn't talk to the owner so I don't know what his expectations are for the paint on this car. When it arrived it was mostly clean but had some light traffic film on it so I used the Pinnacle Waterless Wash to clean her up. I then inspected the paint using a swirl finder light and to my surprise the paint was actually very swirl-free. Except for the imprint rings on the hood I would say the paint was n very good condition overall. If it were my car I would machine polish the paint to remove the imprint rings and whatever light swirls were in the paint. The baggie test showed very light contamination but because I was not going to machine polish the paint I did not clay the paint. My own personal rule for car detailing is I do not clay paint that I'm not already planning on doing at least one machine polishing step. So no polishing means no claying. This is okay though because this gave me a chance to hand wax the paint on this car like the average person, not a member of this forum, would do on a Saturday. (although the average person probably isn't going to be driving or detailing a car that cost about a half million dollars)
For those that read our forum you also saw that I used this car to test out and review the new Pinnacle Black Label Leather Balm. You can find that review here.
Working by hand
Anyone that's attended any detailing class I've ever taught in the last 30+ years knows I'm a machine guy. My joke I share at all my classes is that over the course of the class I'm going to show how to use dozens of machines and that's because here at Autogeek, we sell machines... we don't sell hands. :laughing:
I can't even remember the last time I hand waxed a car. I always use an orbital polisher. The last time I hand POLISHED a car was when I did the paint restoration on Wayne Carini's recently acquired 1953 Hudson Hornet with the original paint. But even after hand polishing I then machine applied the wax. Here's a picture of me hand polishing the original paint as Wayne watches nervously. I used Pinnacle Advanced Finishing Polish and a microfiber applicator pad and tell you what... that was a LOT of work in the way of true elbow grease.
Skill Challenge
So I looked at this review as a chance to test my skills and re-visit the idea of working by hand. Not for me, but for all the people that contact me, usually on the forum, and ask me how to detail their car and then let me know they are doing all the work by hand.
Pictures
I practice documenting all my work because there's always a handful of trolls on the Internet and all they do is go negative. So down below I took pictures showing the entire car with a coat of wax on it and "yes" I did it all myself, at no time did I request a stunt double or a detailer double. :laughing: I don't do mock-up very well.
Time
I was curious to see how long it would take me to hand apply the wax and in some respects even more important, remove the wax. As long as the car is clean applying the wax is pretty straight forward. I use and teach using an overlapping circular motion to spread a wax out and lay down a uniform layer. If the car is clean and your wax applicator is clean there's really little chance of screwing up this part.
The riskier part is wiping the wax off. If a SINGLE abrasive particle finds its way onto your microfiber towel and buries itself in the weave of the towel, at the same time you are wiping the wax off you will be putting swirls and scratches into the paint. I call this,
working backwards
In a follow-up post to this review I'll share the link to what I consider is the most important article I've ever written. It has to do with how and why to inspect your microfiber towels. Look for it below and do yourself a huge favor - click the link and read it and also watch the video.
Step-by-step directions
Anytime you're applying a wax to car paint the car must be clean and free from all loose dirt and dust. Everyone reading this should be able to handle this part. If you have questions, post them below and I'll be glad to share your options, tips and techniques. For this car I used a waterless wash as it was raining outside and the car was already parked inside for video work.
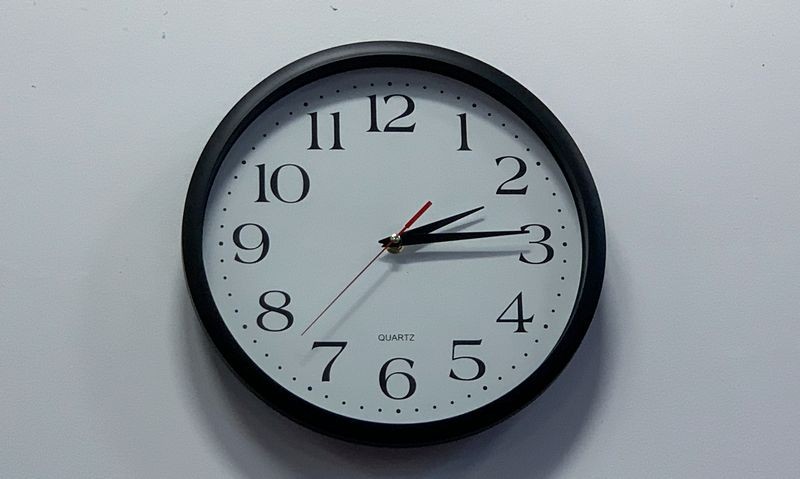
Start time
I started at 2:00pm, Monday, June 17th and took a picture after applying the wax to 100% of the car and another picture after removing 100% of the wax off the car.

Step 1: Start at the top and work your way down and around the car
There's no hard rule that you have to start at the top, that's normally a "machine" best practice so start where you want. I did start at the top but to prove I was in the flesh and doing the work I had Yancy take this "action shot" of me applying the wax to the hood.

Pad Gripping Technique
Note how I'm holding the wax pad?
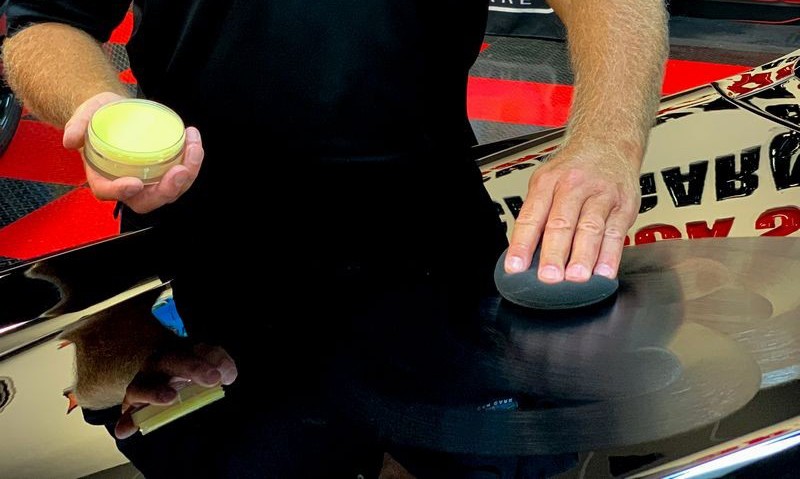
That's a very basic grip for holding a wax pad, that is sandwiching it between my thumb, (under the pad), and my 4 fingers on the top of the pad. When I move to the vertical panels I switched over to a different gripping style and I'll share that below too.
That took me about 15 minutes to apply the wax to the entire car. Faster than I thought it would take.
Step 2: Allow the wax to dry to a haze
When I apply finishing waxes, I start at the top then work my way down and around the car and usually by the time I've went over the entire car I can start where I started and then follow my PATH-OF-TRAVEL, (how do you like that term), and by doing this the wax where I applied it first is ready to go and by following my path-of-travel the wax will be dry and ready to remove as I get to it.
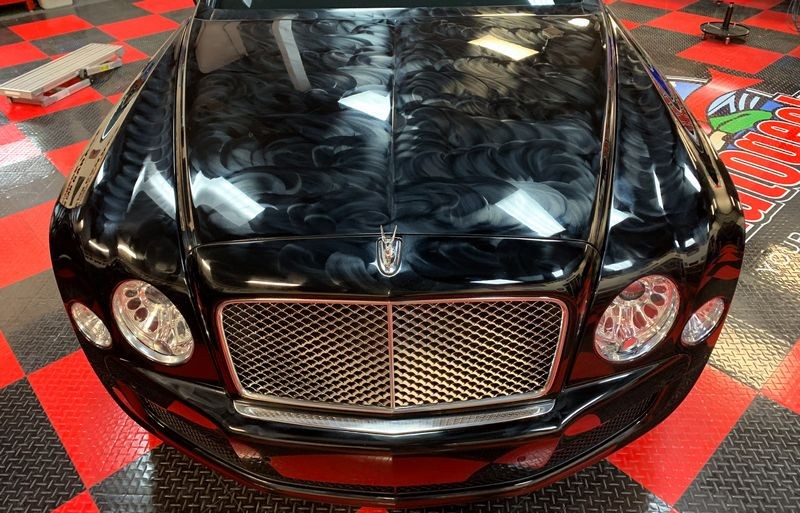


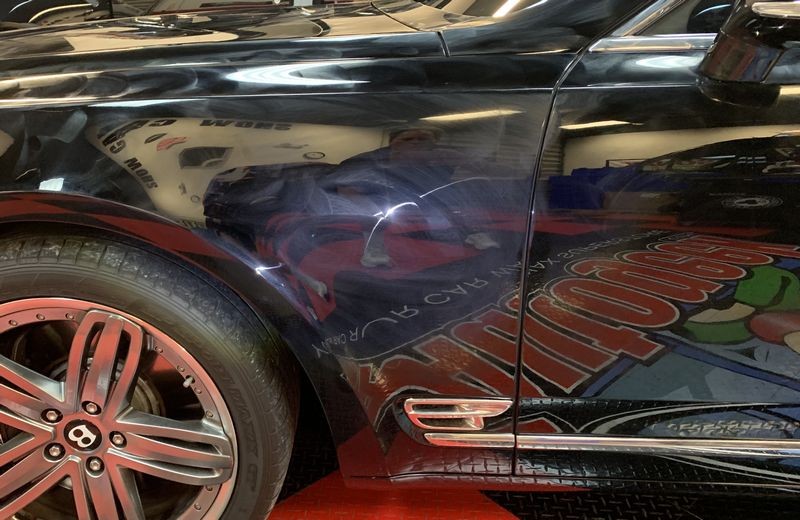
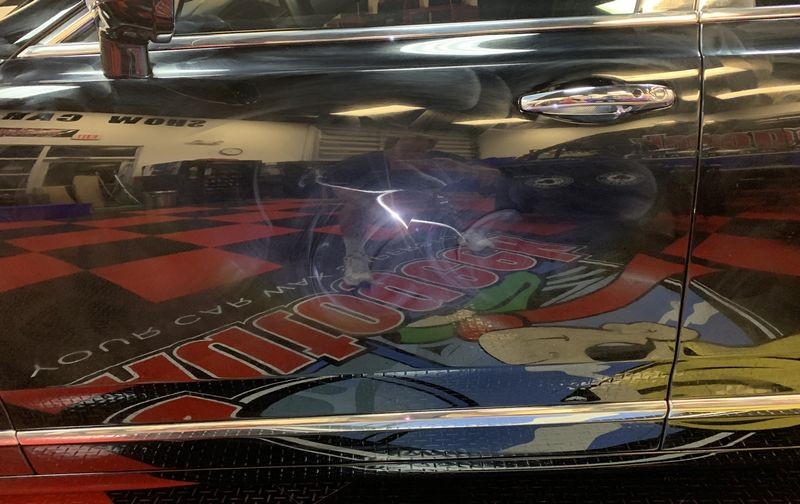

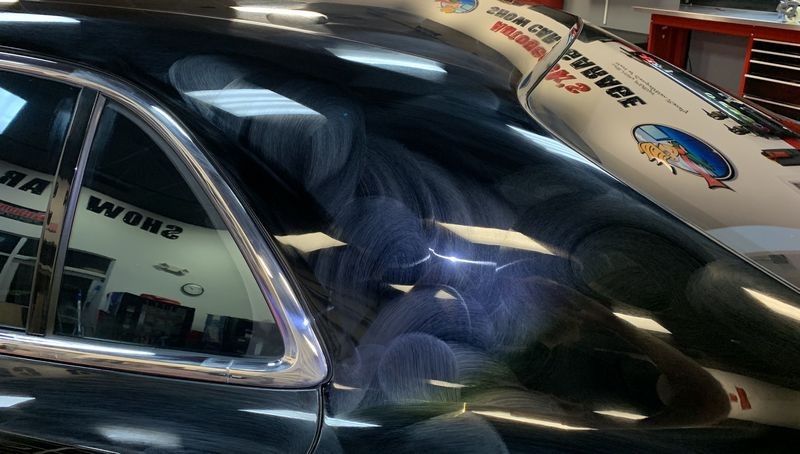
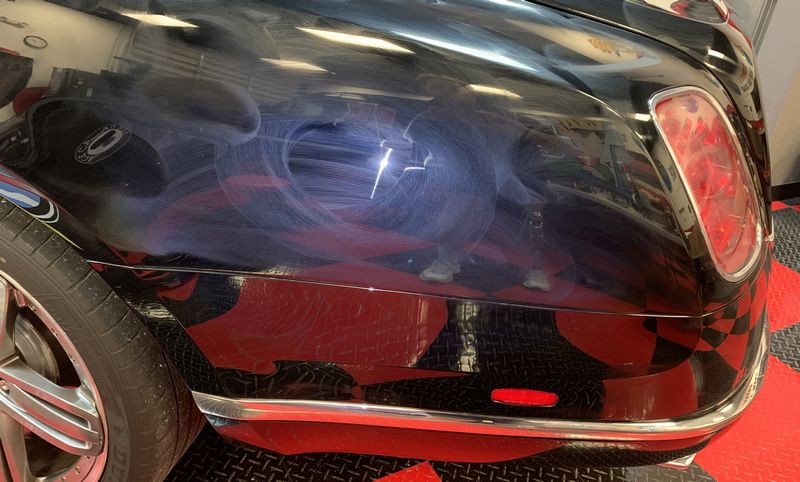
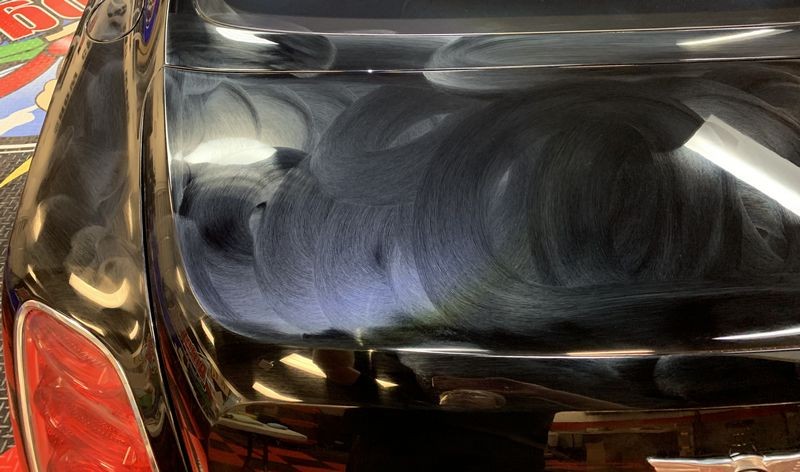
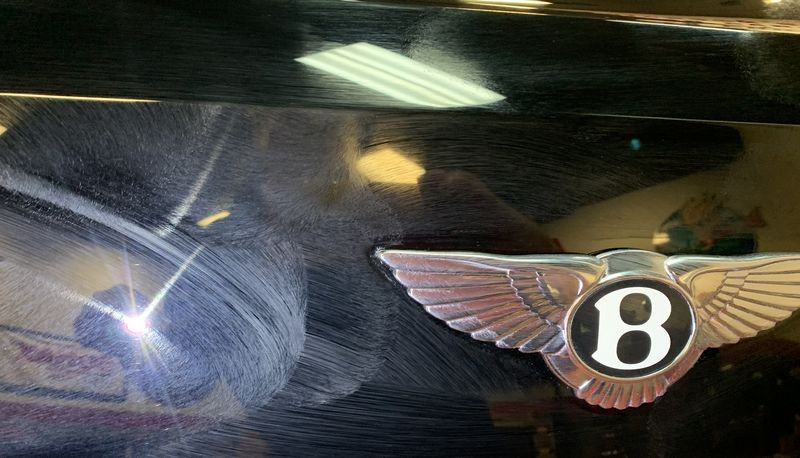

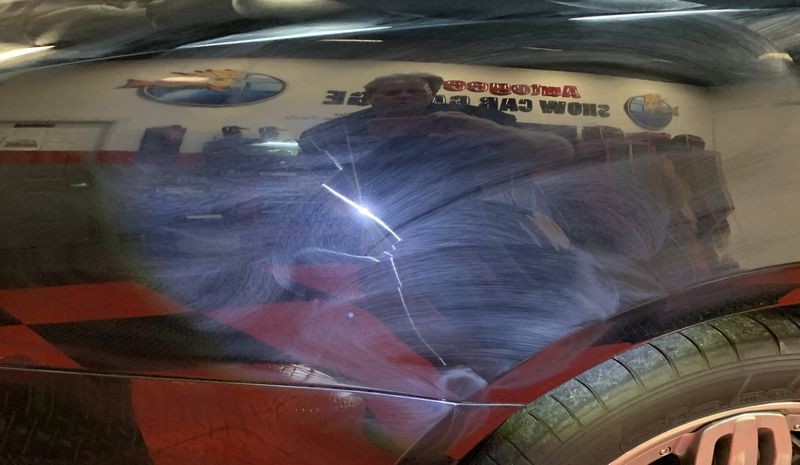
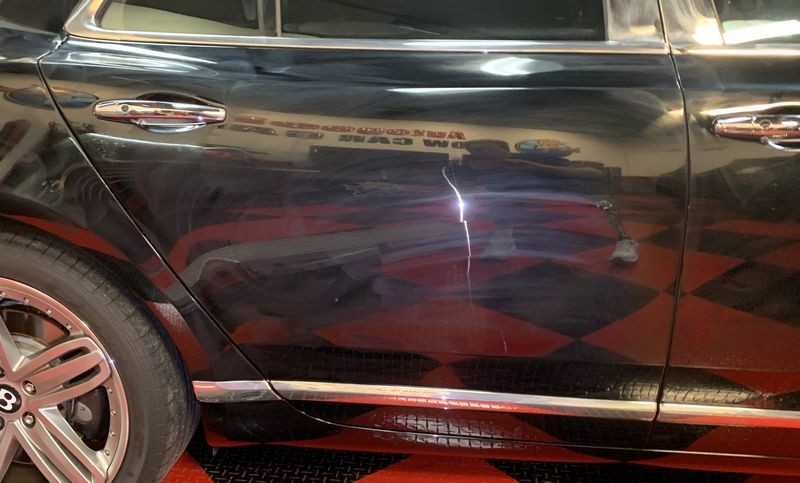


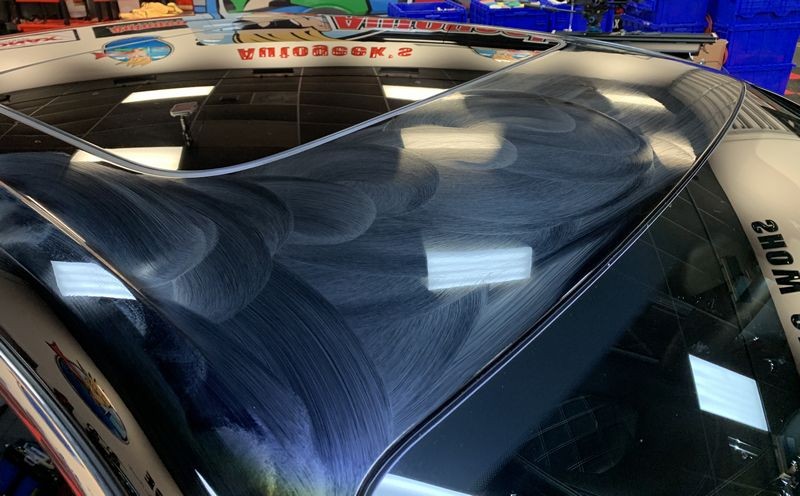


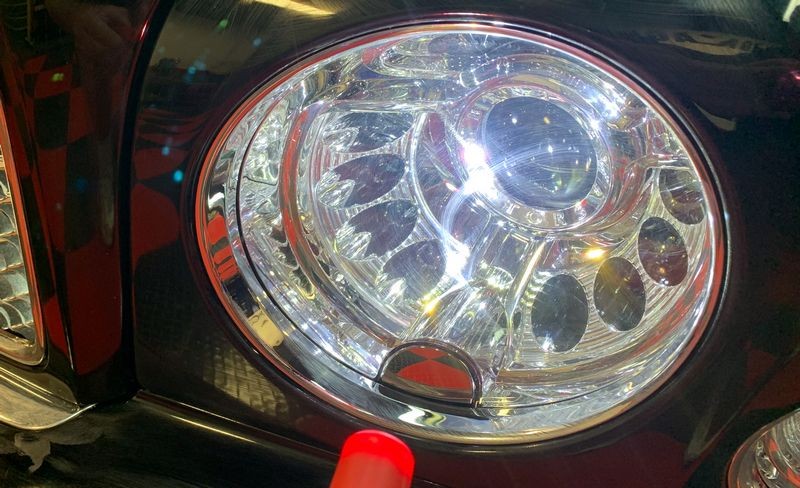
Step 3: Using a clean, soft microfiber towel, remove the dried wax.
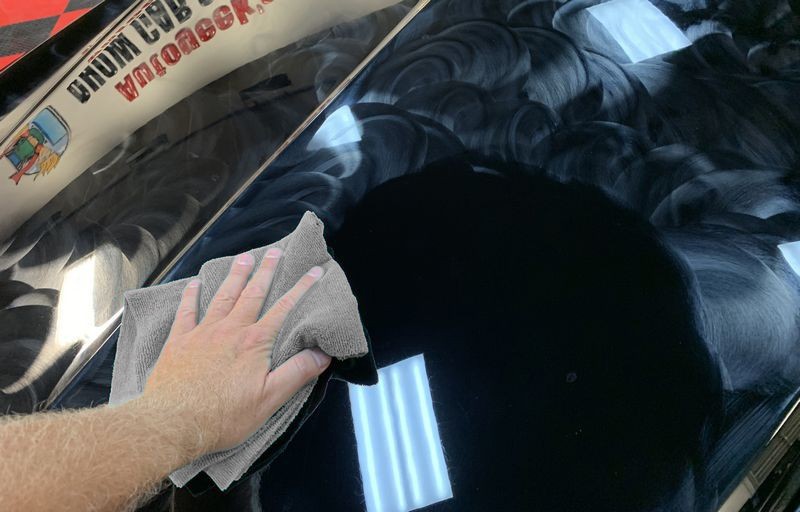
My favorite paint care towels at this point in time are the Forrest Green Edgeless Towels. I like these for a number of reasons. One reason is that it is edgeless, that's pretty obvious. Another reason is that it has a short flat weave. This means there's less risk for contaminants to burry into the towel and this means a towel less likely to become contaminated and also easier and faster for me to inspect.

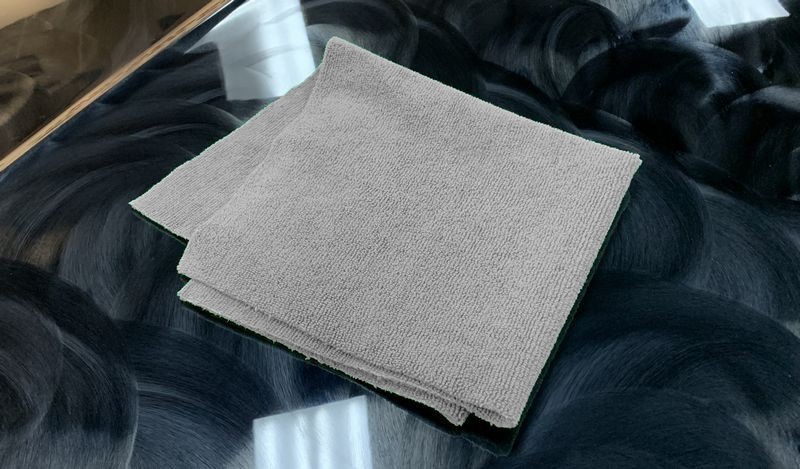

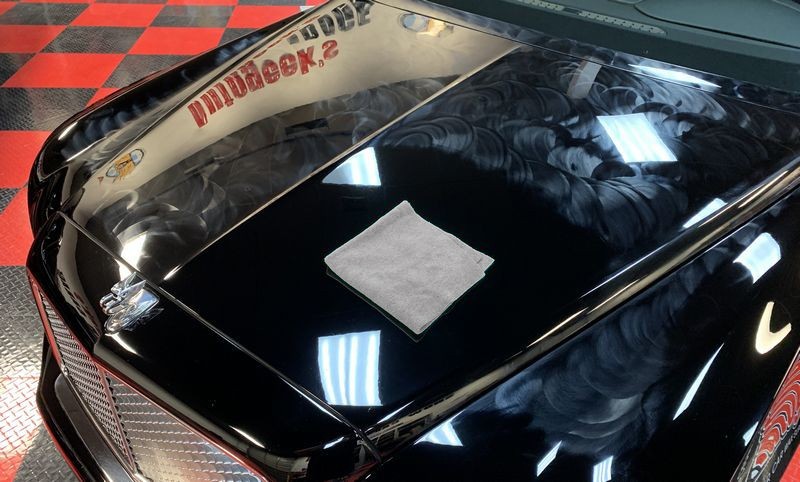

Done
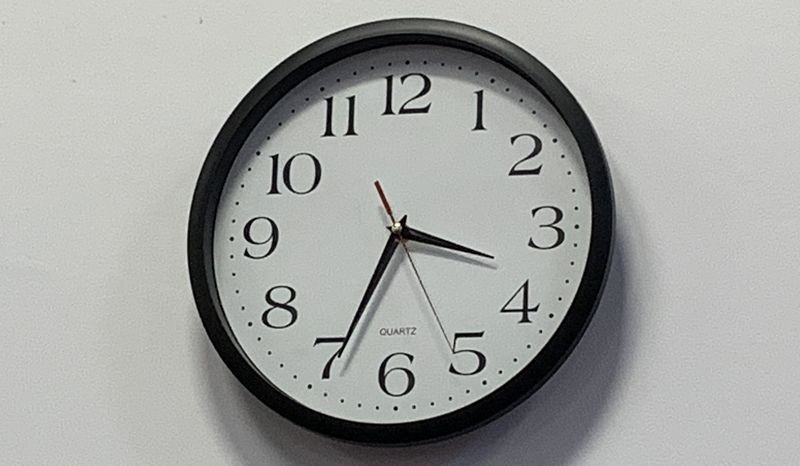
It took me an hour and 15 minutes to wipe the wax off. When this wax dries it's not hard to wipe off but it also doesn't fly off the paint. You need to use your towel to break-open the wax on a panel and then using overlapping passes, creep out or move out from the area you broke open and do so GENTLY. If you rub like a crazy man you tire yourself out, look stupid and you'll probably put swirls and scratches back into the paint. So take your time and enjoy the experience.
3 levels of wiping
Level 1: For the upper portions, roof, hood, trunk lid, window frames and tops of fenders and stood as I wiped these areas.
Level 2: For the middle panels I sat on a Speed Master Rolling Detailer's Cart and rolled around the car removing what I can reach.
Level 3: For the lowest parts I sat my butt on the ground and scooted around the car. I did this to make sure I removed all of the wax out of the lowest parts, which are also harder to see unless you at that level looking across from those lower panels. This just goes with what I always say about detailing cars and that is,
There's no glory in detailing cars
Much of the time you're sitting on your butt. For example washing wheels and tires. Hard to look cool when you're sitting on your butt cleaning your car's wheels and tires or your customer's car's wheels and tires.
So with three levels of wiping and being careful I guess that's why it took me an hour to carefully remove the wax. I will admit I though that took a long time but I don't know if I would do it any faster on paint like on this Bentley.
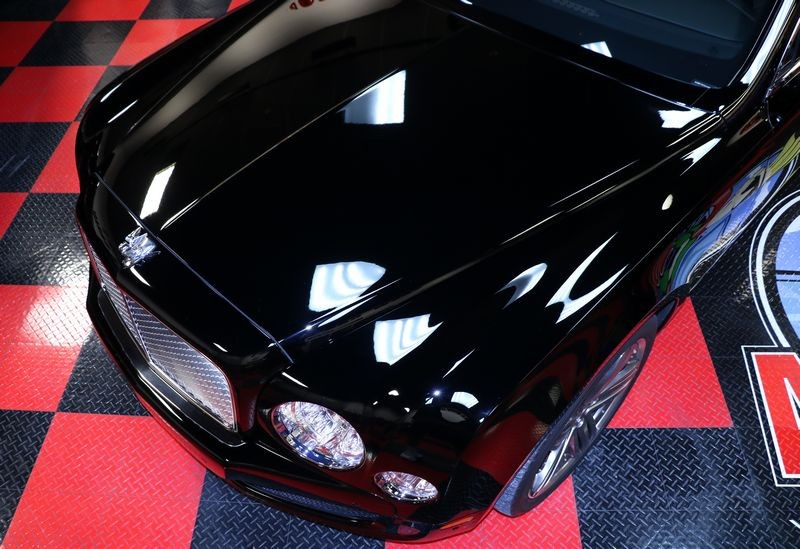
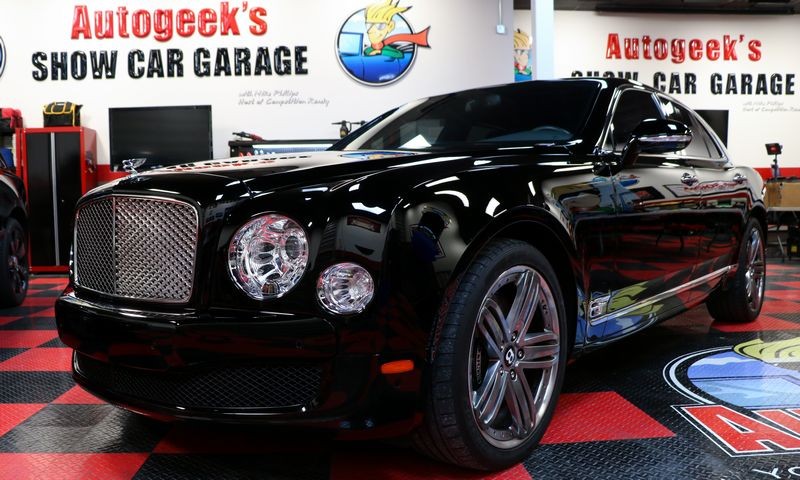
Beauty shots....




Review
This is a really nice carnauba wax. The price point is such that you would expect a premium quality product and it delivers. It has a real waxy feel and substance to it that you find with other high-end carnauba waxes. There are no harsh solvent odors and there's really not any noticeable scent. It smells good but not in an artificial way. It spreads out like a high end wax and feels very slippery on the surface during application. I would attribute this to the wax content plus the natural fruit oils the label states are included in the formula. After you let it dry it leaves a substantial waxy film on the surface as you would expect and even hope for from a product that claims to be a carnauba wax. I point this out because some waxes don't feel waxy during application or during wipe-off but feel more like a synthetic sealant, kind of choppy while wiping off.
I would not call this a true "Hard Wax", some older people would know what I'm talking about, but it's also not a pre-softened wax by any means. It's right in the middle making it a professional grade product, not something I would recommend for the person that looks at waxing their car as a chore they feel compelled to do as a right of car ownership.
After wipe-off it leaves the paint as I would expect and that is slippery. The aesthetics are also pure to the eye, great gloss, shine and depth. Of course these are characteristics a quality wax creates on paint that is in good to excellent condition. If your car's paint isn't already shiny after washing and it doesn't pass the baggie test then this isn't the right wax for you. You would be happier with a bottle of Nu-Finish or better yet, BLACKFIRE One Step. Cleaner/waxes, also called AIOs are for neglected paint. This new PBL Reserve Wax is for show cars or cars that look like show cars, (could be a well-kept Toyota Prius), and are also treated like show cars, that is carefully and regularly washed and kept nice looking.
I'm not the kind of guy to hand wax a car. You can blindfold me and hand me any quality orbital polisher and I'm much more at home machine applying a finishing wax than hand applying it. But for those of you that own something cool... something you enjoy taking care and take pride in driving, AND you are a hand-waxer, then you'll love this product. Just be sure the paint is washed, dry and clean and passes the baggie test and then also have plenty of clean, inspected microfiber towels for the removal of the wax. Also, a good hand held light comes in handy when you're all done to do a final inspection to make sure you have not left any missed spots.
On Autogeek.com
Pinnacle Black Label Reserve Wax
What I used to wash the car
Pinnacle Liquid Crystal Waterless Wash with Carnauba 32 ounce bottle
Towels
You can NEVER have too many high quality paint towels - I strongly recommend you get two 12 packs
12 Pack Forrest Green Edgeless Microfiber Polishing Cloths
Tires
Pinnacle Vinyl & Rubber Cleaner & Conditioner < I used this on the tires because it CLEANS.
I scrubbed the Pinnacle Vinyl & Rubber Cleaner & Conditioner onto the tire sidewall using terrycloth as my cheater method to make tires look good/better when I don't actually "wash" the car. If you don't wash a car with running water it's a tick more difficult to do a great job of cleaning wheels and tires so I cheat.
Products used on this car,

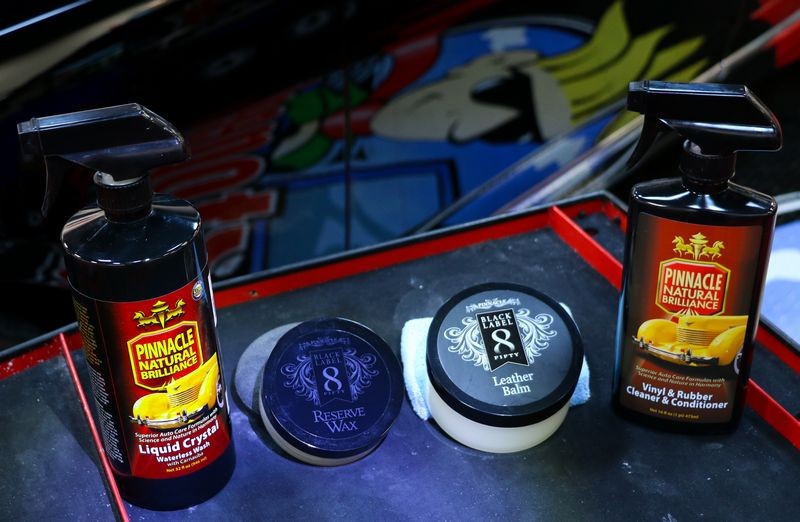

Pinnacle Black Label Reserve Wax
What it is?
A premium quality Carnauba Paste Wax
What it does?
Protects your car's paint while adding and with regular use, maintaining gloss, shine and protection.
When to use it?
After first cleaning the car via washing, rinseless or waterless wash.
Why to use it?
To protect the paint while creating a beautiful finish.
Special Instructions
This is what I call a show car wax or a finishing wax. This means it only offers beauty and protection. It is the OPPOSITE of a cleaner/wax or AIO in that it offers zero cleaning and zero defect removal. What this means is this wax is ONLY for paint that is already in good to excellent condition, specifically the paint must be clean and free from any ABOVE surface defects like oxidation and road grime. While it's really for car paint that is defect-0free you could apply it to paint that has swirls, scratches and water spots, defects that are in the paint not ON the paint but the type of car owner that would buy and use this product would also be the type of person that is savvy enough to either remove below surface paint defects themselves or hire the job out to a pro.
Important Information
While it shouldn't stain exterior plastic trim, it's a good practice to not get any carnauba paste wax or any synthetic sealant for that matter on plastic trim. Slow down, be careful, no risk and no regrets. If you want to work fast and sloppy then tape trim off first.
My comments...
This is as stated above an on the label, a premium quality carnauba paste wax. It's very waxy and oily and it performs exactly as I would expect a wax that is described as it is marketed. The paint on the Bentley was mostly swirl-free but it did have some water spots on the hood that I define as imprint rings. I could have machine polished the paint and removed the imprint rings but that was not the scope of my testing. My testing was to use the product like the average non-machine car owner would use it and that's what I did. For these test parameters it performed flawlessly. If you own a nice car with paint in good to excellent condition that also passes the baggie test, and if you prefer to hand-wax your cars, then you will love this wax. Just apply as thin of a coat as you can and then use clean, soft uncontaminated microfiber towels to remove the dried wax and you will love the results.
2018 Continental GTR3 Le Mans Edition
Here's my test car. I don't know the owner as this car belongs to a friend of Yancy. I didn't talk to the owner so I don't know what his expectations are for the paint on this car. When it arrived it was mostly clean but had some light traffic film on it so I used the Pinnacle Waterless Wash to clean her up. I then inspected the paint using a swirl finder light and to my surprise the paint was actually very swirl-free. Except for the imprint rings on the hood I would say the paint was n very good condition overall. If it were my car I would machine polish the paint to remove the imprint rings and whatever light swirls were in the paint. The baggie test showed very light contamination but because I was not going to machine polish the paint I did not clay the paint. My own personal rule for car detailing is I do not clay paint that I'm not already planning on doing at least one machine polishing step. So no polishing means no claying. This is okay though because this gave me a chance to hand wax the paint on this car like the average person, not a member of this forum, would do on a Saturday. (although the average person probably isn't going to be driving or detailing a car that cost about a half million dollars)
For those that read our forum you also saw that I used this car to test out and review the new Pinnacle Black Label Leather Balm. You can find that review here.
Working by hand
Anyone that's attended any detailing class I've ever taught in the last 30+ years knows I'm a machine guy. My joke I share at all my classes is that over the course of the class I'm going to show how to use dozens of machines and that's because here at Autogeek, we sell machines... we don't sell hands. :laughing:
I can't even remember the last time I hand waxed a car. I always use an orbital polisher. The last time I hand POLISHED a car was when I did the paint restoration on Wayne Carini's recently acquired 1953 Hudson Hornet with the original paint. But even after hand polishing I then machine applied the wax. Here's a picture of me hand polishing the original paint as Wayne watches nervously. I used Pinnacle Advanced Finishing Polish and a microfiber applicator pad and tell you what... that was a LOT of work in the way of true elbow grease.
Skill Challenge
So I looked at this review as a chance to test my skills and re-visit the idea of working by hand. Not for me, but for all the people that contact me, usually on the forum, and ask me how to detail their car and then let me know they are doing all the work by hand.
Pictures
I practice documenting all my work because there's always a handful of trolls on the Internet and all they do is go negative. So down below I took pictures showing the entire car with a coat of wax on it and "yes" I did it all myself, at no time did I request a stunt double or a detailer double. :laughing: I don't do mock-up very well.
Time
I was curious to see how long it would take me to hand apply the wax and in some respects even more important, remove the wax. As long as the car is clean applying the wax is pretty straight forward. I use and teach using an overlapping circular motion to spread a wax out and lay down a uniform layer. If the car is clean and your wax applicator is clean there's really little chance of screwing up this part.
The riskier part is wiping the wax off. If a SINGLE abrasive particle finds its way onto your microfiber towel and buries itself in the weave of the towel, at the same time you are wiping the wax off you will be putting swirls and scratches into the paint. I call this,
working backwards
In a follow-up post to this review I'll share the link to what I consider is the most important article I've ever written. It has to do with how and why to inspect your microfiber towels. Look for it below and do yourself a huge favor - click the link and read it and also watch the video.
Step-by-step directions
Anytime you're applying a wax to car paint the car must be clean and free from all loose dirt and dust. Everyone reading this should be able to handle this part. If you have questions, post them below and I'll be glad to share your options, tips and techniques. For this car I used a waterless wash as it was raining outside and the car was already parked inside for video work.
Start time
I started at 2:00pm, Monday, June 17th and took a picture after applying the wax to 100% of the car and another picture after removing 100% of the wax off the car.
Step 1: Start at the top and work your way down and around the car
There's no hard rule that you have to start at the top, that's normally a "machine" best practice so start where you want. I did start at the top but to prove I was in the flesh and doing the work I had Yancy take this "action shot" of me applying the wax to the hood.
Pad Gripping Technique
Note how I'm holding the wax pad?
That's a very basic grip for holding a wax pad, that is sandwiching it between my thumb, (under the pad), and my 4 fingers on the top of the pad. When I move to the vertical panels I switched over to a different gripping style and I'll share that below too.
That took me about 15 minutes to apply the wax to the entire car. Faster than I thought it would take.
Step 2: Allow the wax to dry to a haze
When I apply finishing waxes, I start at the top then work my way down and around the car and usually by the time I've went over the entire car I can start where I started and then follow my PATH-OF-TRAVEL, (how do you like that term), and by doing this the wax where I applied it first is ready to go and by following my path-of-travel the wax will be dry and ready to remove as I get to it.
Step 3: Using a clean, soft microfiber towel, remove the dried wax.
My favorite paint care towels at this point in time are the Forrest Green Edgeless Towels. I like these for a number of reasons. One reason is that it is edgeless, that's pretty obvious. Another reason is that it has a short flat weave. This means there's less risk for contaminants to burry into the towel and this means a towel less likely to become contaminated and also easier and faster for me to inspect.
Done
It took me an hour and 15 minutes to wipe the wax off. When this wax dries it's not hard to wipe off but it also doesn't fly off the paint. You need to use your towel to break-open the wax on a panel and then using overlapping passes, creep out or move out from the area you broke open and do so GENTLY. If you rub like a crazy man you tire yourself out, look stupid and you'll probably put swirls and scratches back into the paint. So take your time and enjoy the experience.
3 levels of wiping
Level 1: For the upper portions, roof, hood, trunk lid, window frames and tops of fenders and stood as I wiped these areas.
Level 2: For the middle panels I sat on a Speed Master Rolling Detailer's Cart and rolled around the car removing what I can reach.
Level 3: For the lowest parts I sat my butt on the ground and scooted around the car. I did this to make sure I removed all of the wax out of the lowest parts, which are also harder to see unless you at that level looking across from those lower panels. This just goes with what I always say about detailing cars and that is,
There's no glory in detailing cars
Much of the time you're sitting on your butt. For example washing wheels and tires. Hard to look cool when you're sitting on your butt cleaning your car's wheels and tires or your customer's car's wheels and tires.
So with three levels of wiping and being careful I guess that's why it took me an hour to carefully remove the wax. I will admit I though that took a long time but I don't know if I would do it any faster on paint like on this Bentley.
Beauty shots....
Review
This is a really nice carnauba wax. The price point is such that you would expect a premium quality product and it delivers. It has a real waxy feel and substance to it that you find with other high-end carnauba waxes. There are no harsh solvent odors and there's really not any noticeable scent. It smells good but not in an artificial way. It spreads out like a high end wax and feels very slippery on the surface during application. I would attribute this to the wax content plus the natural fruit oils the label states are included in the formula. After you let it dry it leaves a substantial waxy film on the surface as you would expect and even hope for from a product that claims to be a carnauba wax. I point this out because some waxes don't feel waxy during application or during wipe-off but feel more like a synthetic sealant, kind of choppy while wiping off.
I would not call this a true "Hard Wax", some older people would know what I'm talking about, but it's also not a pre-softened wax by any means. It's right in the middle making it a professional grade product, not something I would recommend for the person that looks at waxing their car as a chore they feel compelled to do as a right of car ownership.
After wipe-off it leaves the paint as I would expect and that is slippery. The aesthetics are also pure to the eye, great gloss, shine and depth. Of course these are characteristics a quality wax creates on paint that is in good to excellent condition. If your car's paint isn't already shiny after washing and it doesn't pass the baggie test then this isn't the right wax for you. You would be happier with a bottle of Nu-Finish or better yet, BLACKFIRE One Step. Cleaner/waxes, also called AIOs are for neglected paint. This new PBL Reserve Wax is for show cars or cars that look like show cars, (could be a well-kept Toyota Prius), and are also treated like show cars, that is carefully and regularly washed and kept nice looking.
I'm not the kind of guy to hand wax a car. You can blindfold me and hand me any quality orbital polisher and I'm much more at home machine applying a finishing wax than hand applying it. But for those of you that own something cool... something you enjoy taking care and take pride in driving, AND you are a hand-waxer, then you'll love this product. Just be sure the paint is washed, dry and clean and passes the baggie test and then also have plenty of clean, inspected microfiber towels for the removal of the wax. Also, a good hand held light comes in handy when you're all done to do a final inspection to make sure you have not left any missed spots.
On Autogeek.com
Pinnacle Black Label Reserve Wax
What I used to wash the car
Pinnacle Liquid Crystal Waterless Wash with Carnauba 32 ounce bottle
Towels
You can NEVER have too many high quality paint towels - I strongly recommend you get two 12 packs
12 Pack Forrest Green Edgeless Microfiber Polishing Cloths
Tires
Pinnacle Vinyl & Rubber Cleaner & Conditioner < I used this on the tires because it CLEANS.
I scrubbed the Pinnacle Vinyl & Rubber Cleaner & Conditioner onto the tire sidewall using terrycloth as my cheater method to make tires look good/better when I don't actually "wash" the car. If you don't wash a car with running water it's a tick more difficult to do a great job of cleaning wheels and tires so I cheat.
Products used on this car,