Mike Phillips
Active member
- Dec 5, 2022
- 51,004
- 6
Review: SONAX Profiline Headlight Restoration Kit
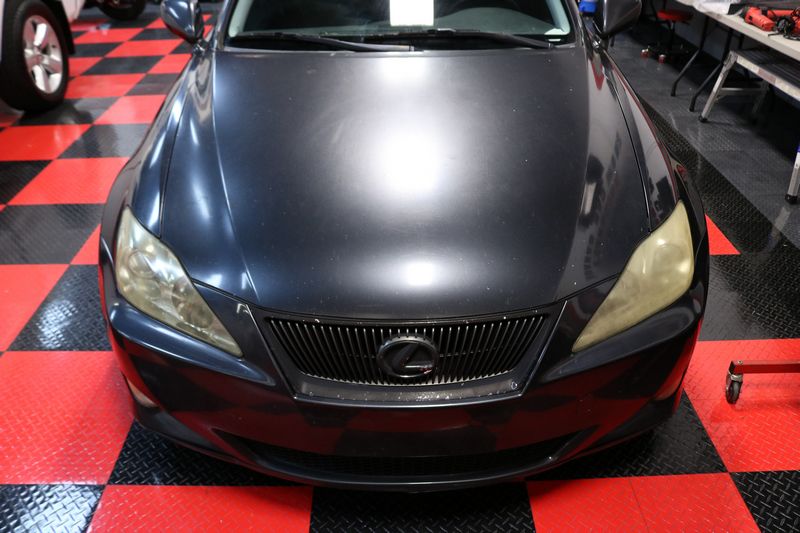
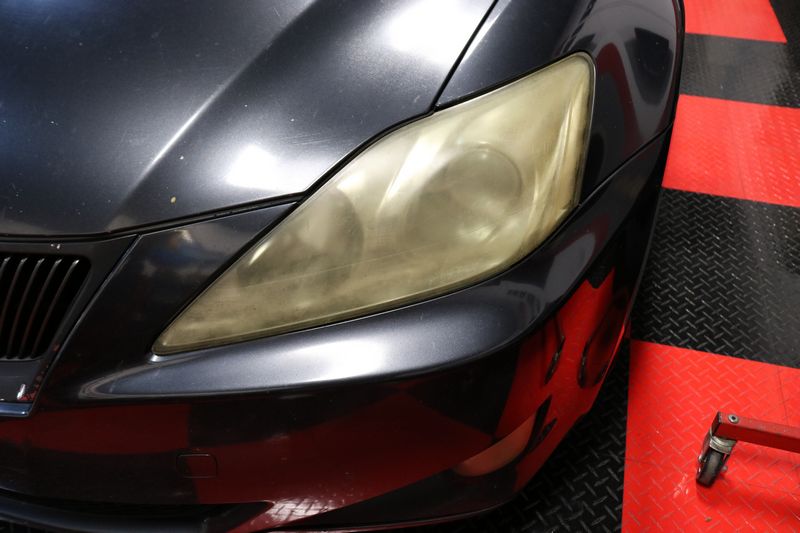
Cloudy oxidized and yellowed headlights are a problem and they are likely going to always be a problem do to the nature of plastic and the environment our cars are exposed to. So you have a 3 options,
In my experience, doing it yourself is the most cost-effective option and with a complete kit like the SONAX Profiline Headlight Restoration Kit you get everything you need to do the job right the first time.
This kit includes:
Directions:
1. Wash and dry your headlights.
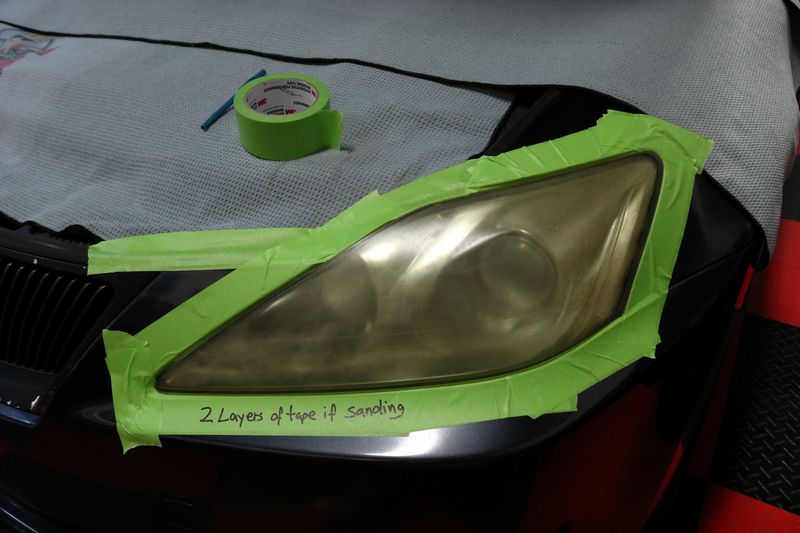
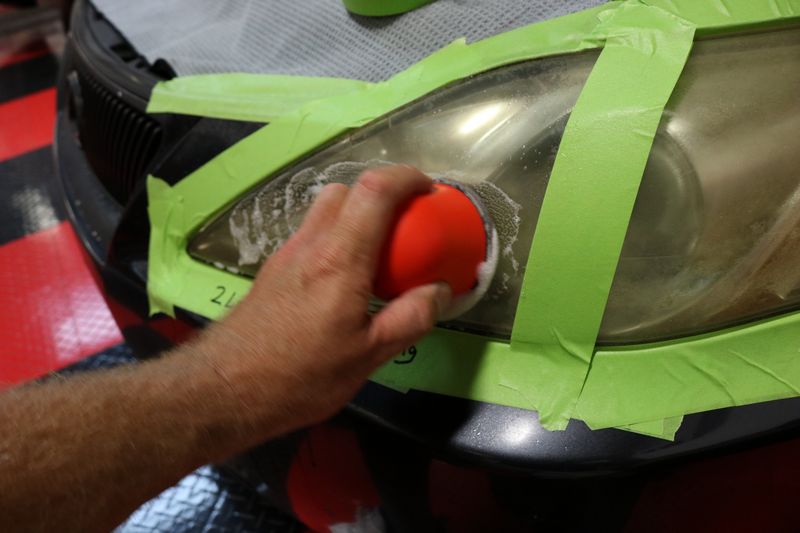
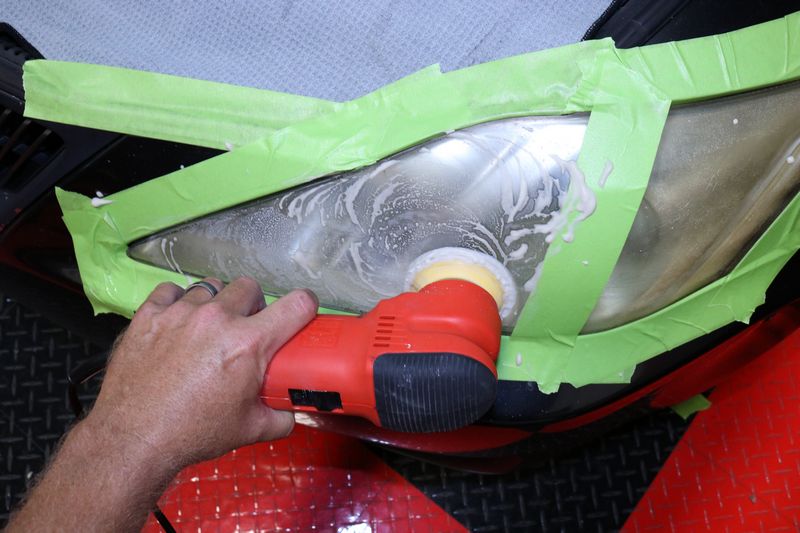
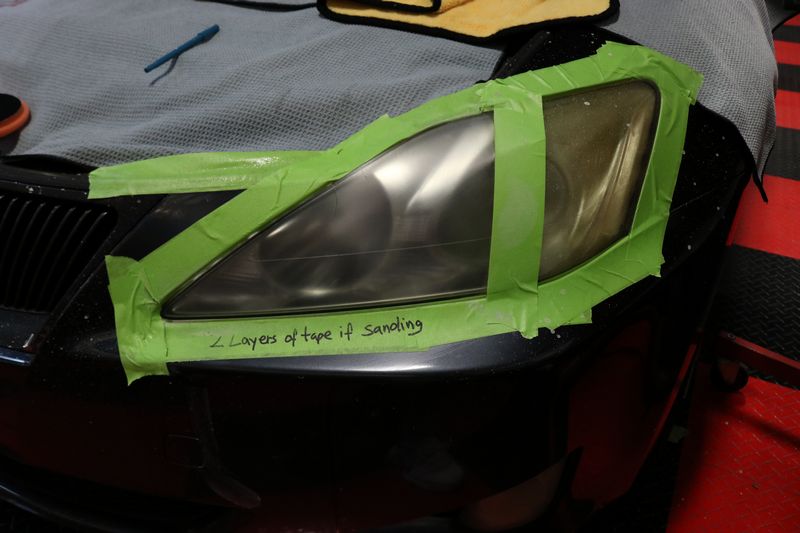
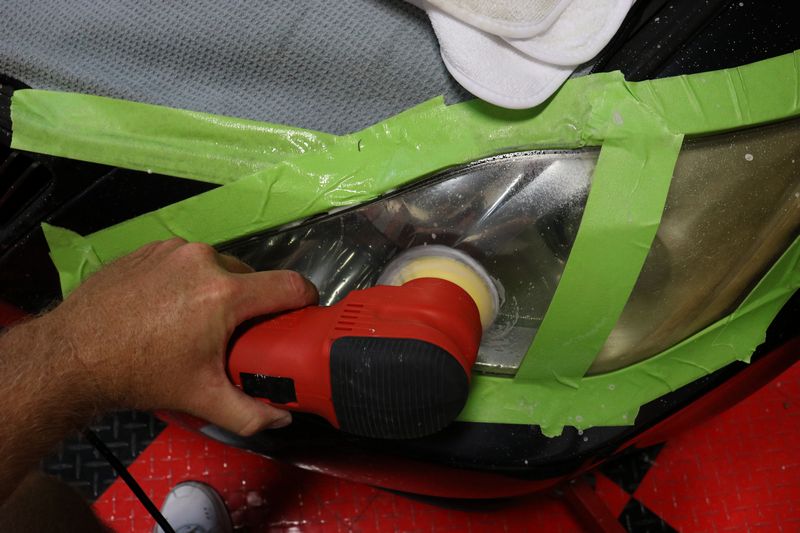
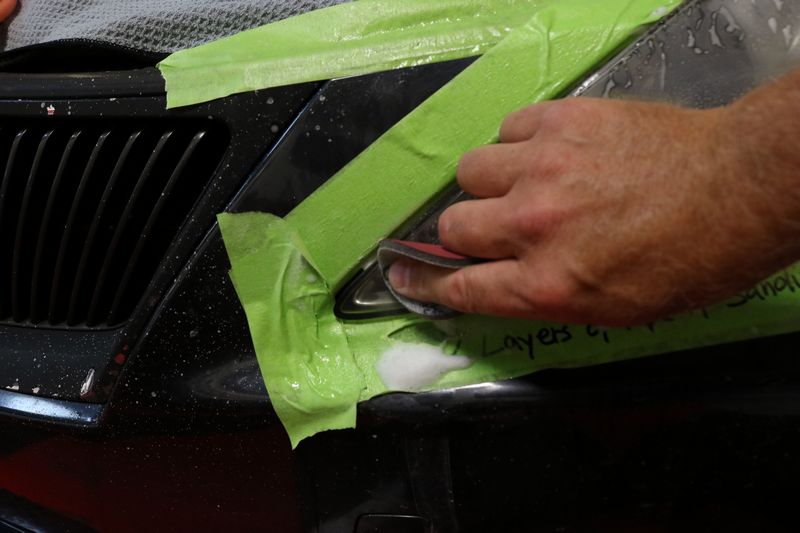
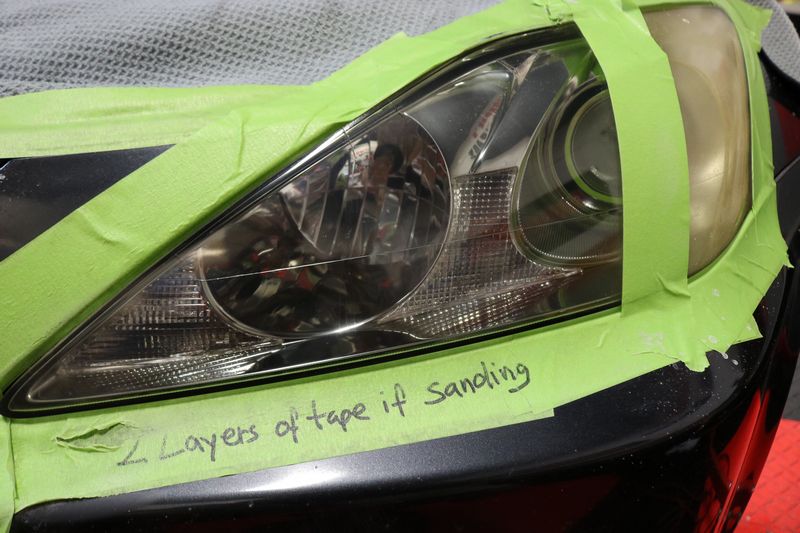
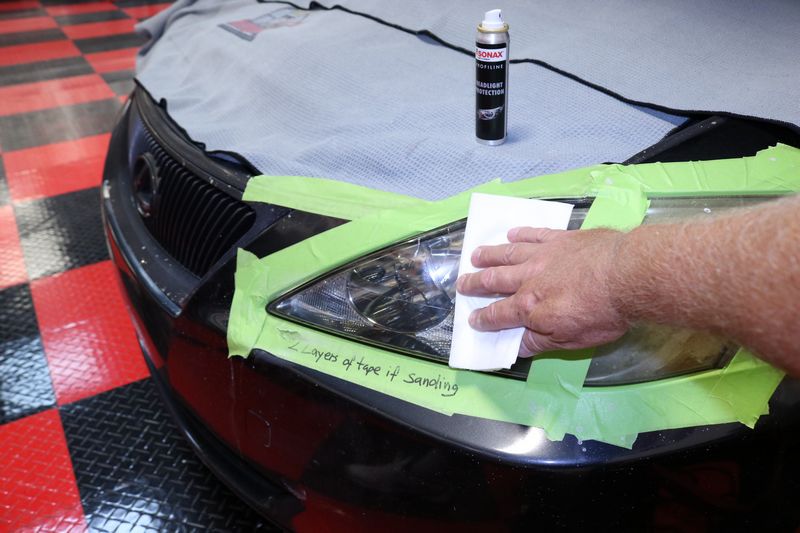
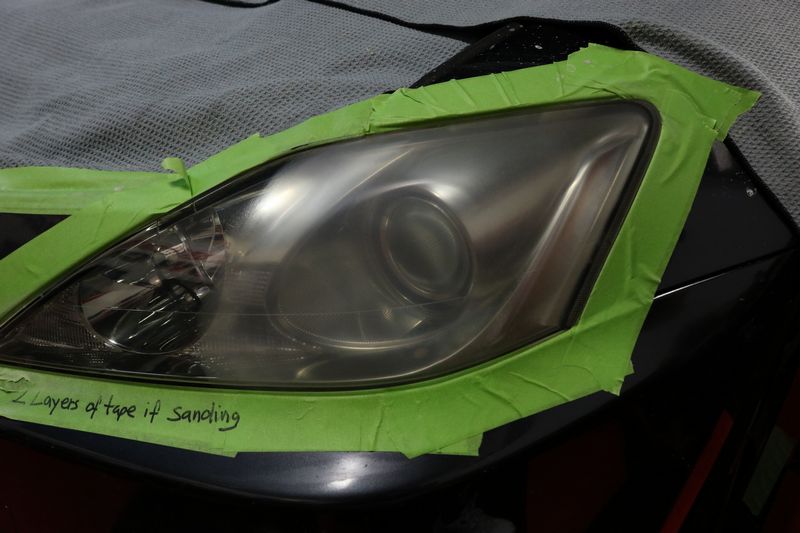
2. Tape off the areas surrounding your headlights with masking tape to avoid splash and overspray.
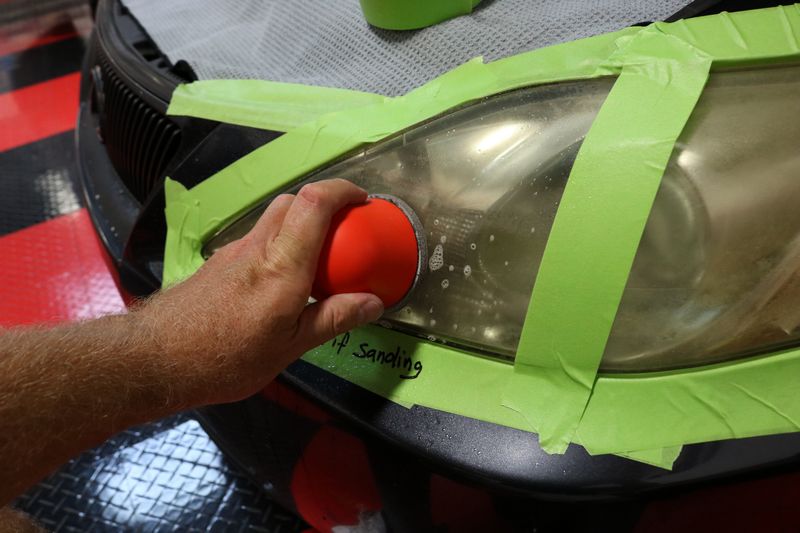
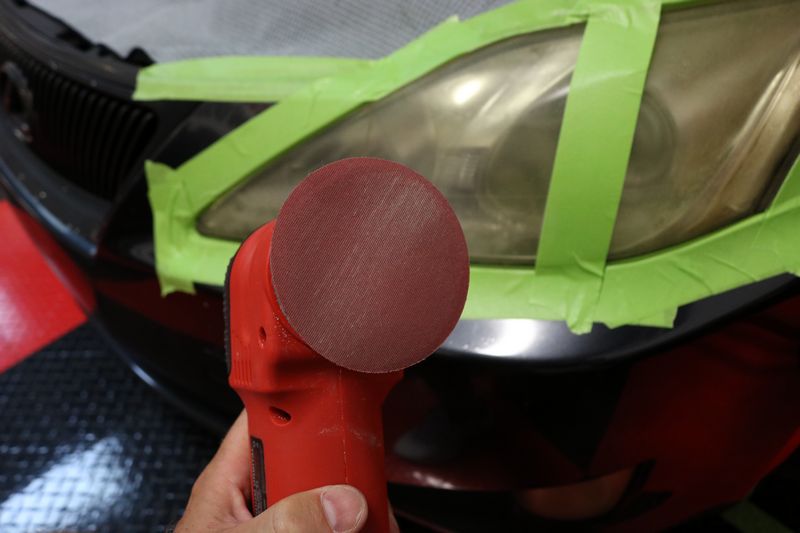
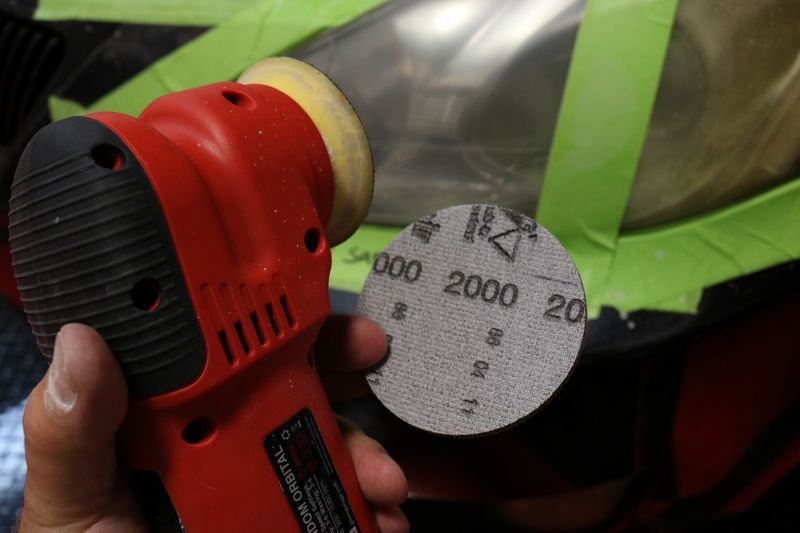
3. If your headlights are in particularly rough condition, use the SONAX Wet-Sanding discs (starting with the P1000 and following with the P2000) in combination with the SONAX P-Ball to wet-sand them. Make sure to wipe off any abrasive residue using a cloth before continuing.
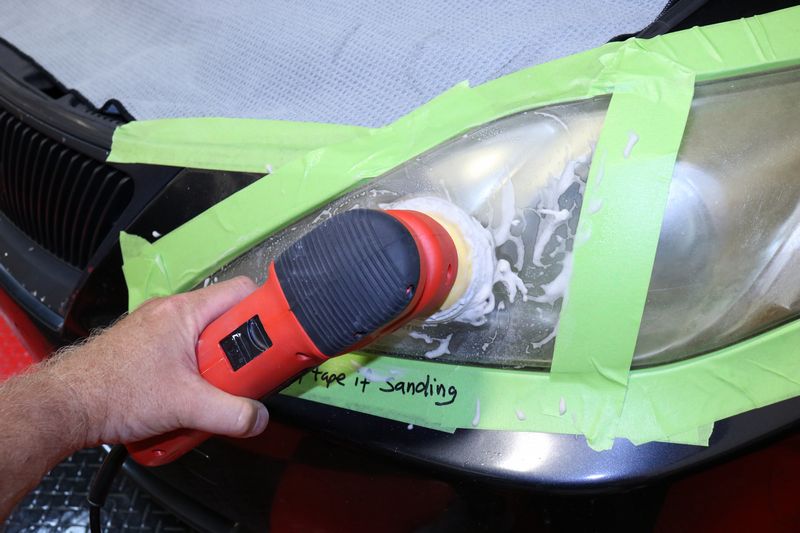
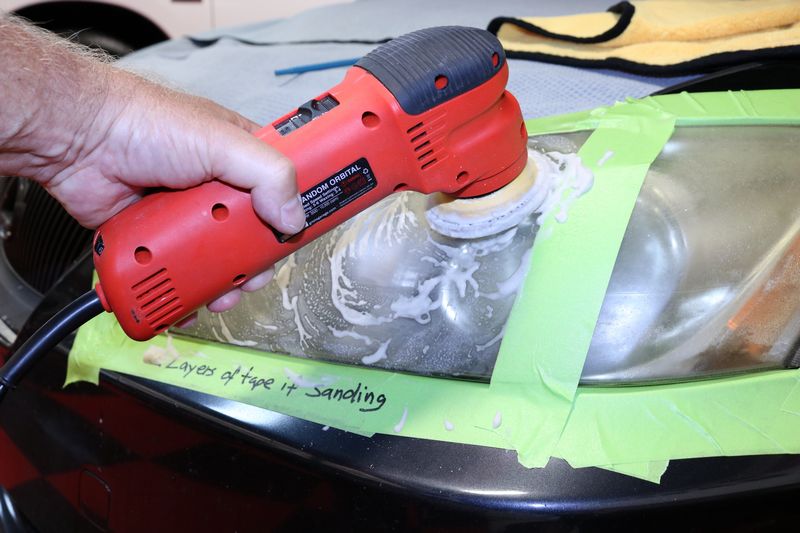
4. Lightly moisten the SONAX Lambskin Pad and attach it to either the SONAX P-Ball or your preferred rotary polisher.
5. Apply the SONAX Headlight Polish directly onto the SONAX Lambskin Pad and polish the surface of your headlights until the plastic appears clear. Wipe any remaining residue off using the shallow nap side of the SONAX Microfiber Cloth.
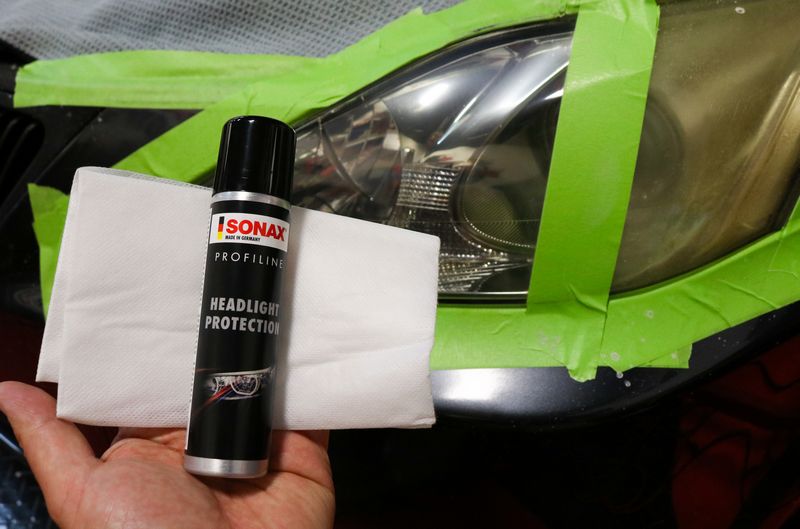
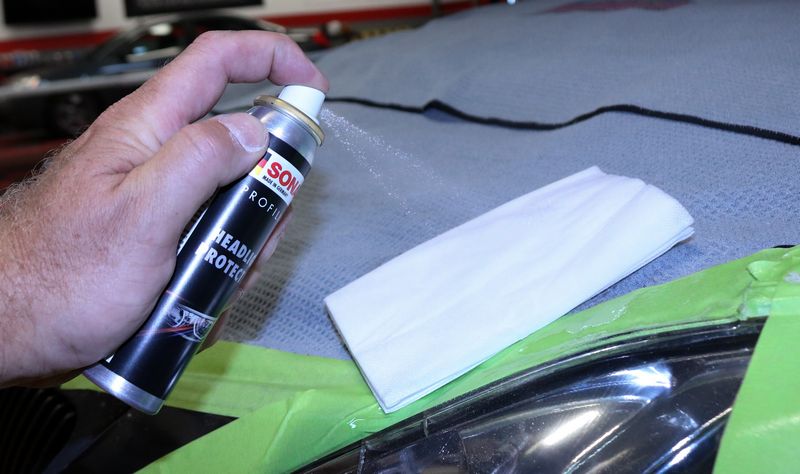
6. Spray SONAX Profiline Headlight Protection onto a SONAX Polishing Cloth and apply a thin layer of product to your headlight.
7. After the SONAX Profiline Headlight Protection has almost evaporated completely, apply a second layer of product using the same method as before (make sure to use a fresh SONAX Polishing Cloth).
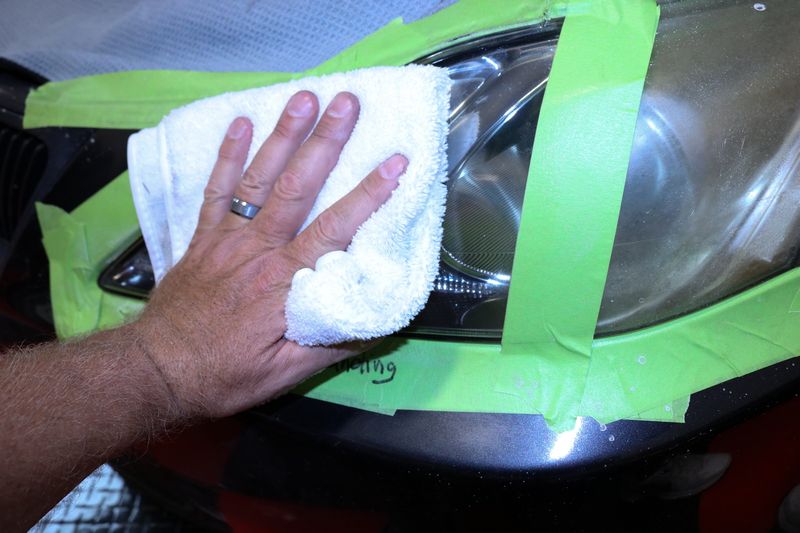
8. Once the second layer of SONAX Profiline Headlight Protection has almost evaporated completely, use the soft, longer napped side of the SONAX Microfiber Cloth to buff the surface of your headlight.
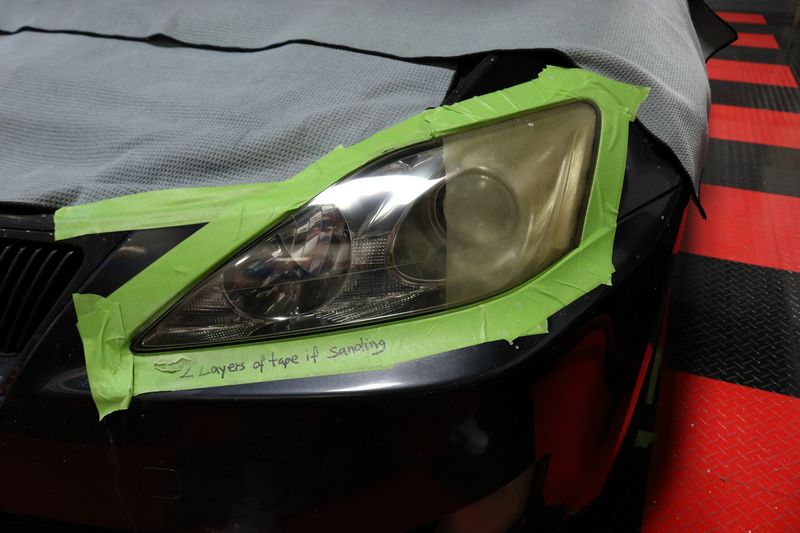
9. Allow the SONAX Profiline Headlight Protection approximately an hour to cure completely. Make sure that the headlights are not exposed to any moisture during this time.
Before storing your SONAX Profiline Headlight Protection, turn the can upside-down and briefly spray until the valve is empty. This will prevent the product from curing inside the valve and clogging it.
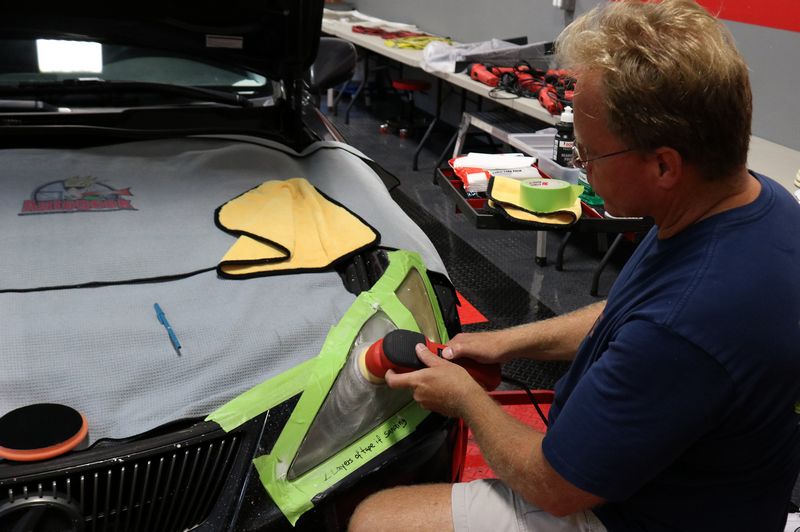
So I followed the instructions above but gave the sanding portion a little tweak as I tend to be a "Machine Guy" plus here at Autogeek, we don't sell hands.
See the pictures down below...
On Autogeek.net
Review: SONAX Profiline Headlight Restoration Kit
")
Cloudy oxidized and yellowed headlights are a problem and they are likely going to always be a problem do to the nature of plastic and the environment our cars are exposed to. So you have a 3 options,
- Trade in the old car when the headlights become oxidized - kind of spendy but it fixes the problem for a few years.
- Hire someone to restore your headlights.
- Do-it-yourself.
In my experience, doing it yourself is the most cost-effective option and with a complete kit like the SONAX Profiline Headlight Restoration Kit you get everything you need to do the job right the first time.
This kit includes:
- SONAX P-Ball
- SONAX Wet-Sanding Discs
- SONAX 3.5 in. Wool Lambskin Pad
- SONAX Headlight Polish
- SONAX Profiline Headlight Protection
- SONAX Polishing Cloths
- SONAX Microfiber Cloth
Directions:
1. Wash and dry your headlights.
2. Tape off the areas surrounding your headlights with masking tape to avoid splash and overspray.
3. If your headlights are in particularly rough condition, use the SONAX Wet-Sanding discs (starting with the P1000 and following with the P2000) in combination with the SONAX P-Ball to wet-sand them. Make sure to wipe off any abrasive residue using a cloth before continuing.
4. Lightly moisten the SONAX Lambskin Pad and attach it to either the SONAX P-Ball or your preferred rotary polisher.
5. Apply the SONAX Headlight Polish directly onto the SONAX Lambskin Pad and polish the surface of your headlights until the plastic appears clear. Wipe any remaining residue off using the shallow nap side of the SONAX Microfiber Cloth.
6. Spray SONAX Profiline Headlight Protection onto a SONAX Polishing Cloth and apply a thin layer of product to your headlight.
7. After the SONAX Profiline Headlight Protection has almost evaporated completely, apply a second layer of product using the same method as before (make sure to use a fresh SONAX Polishing Cloth).
8. Once the second layer of SONAX Profiline Headlight Protection has almost evaporated completely, use the soft, longer napped side of the SONAX Microfiber Cloth to buff the surface of your headlight.
9. Allow the SONAX Profiline Headlight Protection approximately an hour to cure completely. Make sure that the headlights are not exposed to any moisture during this time.
Before storing your SONAX Profiline Headlight Protection, turn the can upside-down and briefly spray until the valve is empty. This will prevent the product from curing inside the valve and clogging it.
So I followed the instructions above but gave the sanding portion a little tweak as I tend to be a "Machine Guy" plus here at Autogeek, we don't sell hands.
See the pictures down below...
On Autogeek.net
Review: SONAX Profiline Headlight Restoration Kit