PreludeVTEC01
New member
- Jan 31, 2014
- 248
- 0
This past weekend I restored the headlights on my parent's van. It's a 2005 Ford Freestar and has over 250K miles on the clock!!! The van has never seen a proper car wash a day in it's life. So it is truly rough in every way, shape, and form! Funny story... the van is a semi big part of what made me take the leap into detailing. I wanted to try and get as much life back into the van as possible. So I have been studying and taking notes on here for good products/techniques to get for the job. Plus the van is a perfect vehicle to test products on as it sees nearly 100+ miles a day here in metro Atlanta. Anyhow onto the review...
3M Headlight Lens Restoration System (39008) 3M Headlight Lens Restoration System, headlight polishing kit, restore yellow headlights, 3M plastic polish

*This kit does require the use of a drill, however there is another 3M kit out there were you don't need a drill

Retails: $19.99
Packaging: Small. Simple, easy to open plastic. Everything packaged neatly inside.
Includes: Backing plate for drill
6 - 500Grit Pads
4 - 800Grit Pads
1 - Foam 3000Grit Pad (for wet sanding)
1 - Orange Foam "polishing" pad
1 - Sample size of 3M rubbing compound
1 - Instructions
I must say the instructions were very easy to follow and had great pictures to detail each step. Even when you might panic with how things are going, the instructions let you know that is OK, and you are doing everything as needed.
Onto the test subject... as I stated.. 2005 Ford Freestar

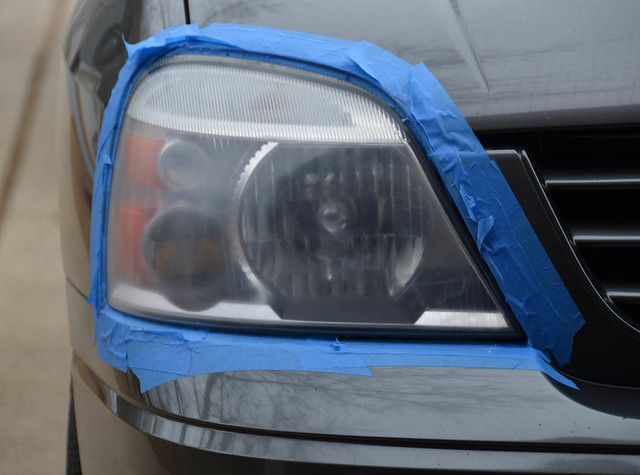
As can be seen the headlights are in such bad shape. Can hardly see anything at night. A BIG safety hazard!
Passenger Side:


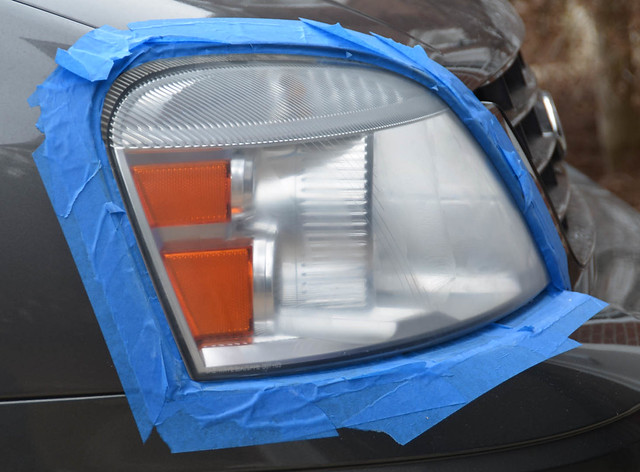
Driver Side:


All of that hazing, scratches, and yellowing!

The kit all laid out before use.

Passenger Side Tapped Up. (Sadly the kit doesn't provide any tape)


Driver Side Tapped Up.


Step 1: Is using the 500 grit pads. It takes a little getting used to (using the drill on the headlight) but once you get the hang of it, it's simple!

This is were someone could panic. The headlights look 50x worse than they did before. You gotta go to the bottom to get to the top! rops: Hah

A very nice "sandy" haze!

Step 2: Is now using the 800 grit pads and sand the headlights.


Notice how there is a fine powdery like substance on the surface of the headlight now.

Step 3: Is the wet sanding part of the process. Apply the 3000 grit disc and spray it lightly with water. Then spray the headlight and keep it wet while sanding.

While doing this there will be a white, soupy, liquid that is generated. This is normal (as noted in the instructions)


Already looking MUCH better!

After drying there is still a slight haze. This is from all the micro scratches that were needed to get that awful looking layer of plastic off the headlight.


Step 4: Polishing

The pad included is very nice and firm. Also the package of 3M rubbing compound is only 1oz however is was more than enough to do both headlights.
The rubbing compound "rubbed" in.

Step 5: Whip the rubbing compound off and enjoy the results! :dblthumb2:


Still some tiny, hairline scratches but such an improvement and I will work on those scratches at a later time.

Passenger Side - Done //////////////////////////////\\\\\\\\\\\\\\\\\\\\\\\\\\ Driver Side - Not Done

The passenger side, the first one I did, took me about an hour to do. Then the driver side took me around 45 minutes. The longest "step" is applying the tape.

Driver Side All Done!!


Before and Afters
Both

Passenger Side

Driver Side


A cool step by step collage

I had a little spare time left over that afternoon to do a simple hand polish with Meguair's ScratchX 2.0 and PlasticX. Both of which added a nice finishing touch.


Pros: Affordable. With the price of a new set of headlights in the hundreds.. $19.99 is an extremely reasonable price! Easy enough for anyone to use.
Cons: Need a drill. Doesn't include painters tape
Final thought: Fantastic! It works just as I could have hoped. It was easy to use and nearly came with everything needed for the job. When you think about the savings in buying the kit vs purchasing a new set of headlights... well it's a no brainer!
A scale of 1-10 ........ I would give it a 9.5
3M Headlight Lens Restoration System (39008) 3M Headlight Lens Restoration System, headlight polishing kit, restore yellow headlights, 3M plastic polish
*This kit does require the use of a drill, however there is another 3M kit out there were you don't need a drill
Retails: $19.99
Packaging: Small. Simple, easy to open plastic. Everything packaged neatly inside.
Includes: Backing plate for drill
6 - 500Grit Pads
4 - 800Grit Pads
1 - Foam 3000Grit Pad (for wet sanding)
1 - Orange Foam "polishing" pad
1 - Sample size of 3M rubbing compound
1 - Instructions
I must say the instructions were very easy to follow and had great pictures to detail each step. Even when you might panic with how things are going, the instructions let you know that is OK, and you are doing everything as needed.
Onto the test subject... as I stated.. 2005 Ford Freestar
As can be seen the headlights are in such bad shape. Can hardly see anything at night. A BIG safety hazard!
Passenger Side:
Driver Side:
All of that hazing, scratches, and yellowing!
The kit all laid out before use.
Passenger Side Tapped Up. (Sadly the kit doesn't provide any tape)
Driver Side Tapped Up.
Step 1: Is using the 500 grit pads. It takes a little getting used to (using the drill on the headlight) but once you get the hang of it, it's simple!
This is were someone could panic. The headlights look 50x worse than they did before. You gotta go to the bottom to get to the top!
rops: HahA very nice "sandy" haze!
Step 2: Is now using the 800 grit pads and sand the headlights.
Notice how there is a fine powdery like substance on the surface of the headlight now.
Step 3: Is the wet sanding part of the process. Apply the 3000 grit disc and spray it lightly with water. Then spray the headlight and keep it wet while sanding.
While doing this there will be a white, soupy, liquid that is generated. This is normal (as noted in the instructions)
Already looking MUCH better!
After drying there is still a slight haze. This is from all the micro scratches that were needed to get that awful looking layer of plastic off the headlight.
Step 4: Polishing
The pad included is very nice and firm. Also the package of 3M rubbing compound is only 1oz however is was more than enough to do both headlights.
The rubbing compound "rubbed" in.
Step 5: Whip the rubbing compound off and enjoy the results! :dblthumb2:
Still some tiny, hairline scratches but such an improvement and I will work on those scratches at a later time.
Passenger Side - Done //////////////////////////////\\\\\\\\\\\\\\\\\\\\\\\\\\ Driver Side - Not Done
The passenger side, the first one I did, took me about an hour to do. Then the driver side took me around 45 minutes. The longest "step" is applying the tape.
Driver Side All Done!!
Before and Afters
Both
Passenger Side
Driver Side
A cool step by step collage
I had a little spare time left over that afternoon to do a simple hand polish with Meguair's ScratchX 2.0 and PlasticX. Both of which added a nice finishing touch.
Pros: Affordable. With the price of a new set of headlights in the hundreds.. $19.99 is an extremely reasonable price! Easy enough for anyone to use.
Cons: Need a drill. Doesn't include painters tape
Final thought: Fantastic! It works just as I could have hoped. It was easy to use and nearly came with everything needed for the job. When you think about the savings in buying the kit vs purchasing a new set of headlights... well it's a no brainer!
A scale of 1-10 ........ I would give it a 9.5
