I purchased a 2017 Chevy Colorado off lease. There are a few longer scratches that look like they might have been repaired with a touch up pen. I was thinking of wet sanding them and then buffing them out. Do you think I can make an improvement doing that or should I just leave them alone?
Navigation
Install the app
How to install the app on iOS
Follow along with the video below to see how to install our site as a web app on your home screen.
Note: This feature may not be available in some browsers.
More options
Style variation
You are using an out of date browser. It may not display this or other websites correctly.
You should upgrade or use an alternative browser.
You should upgrade or use an alternative browser.
Scratch Repair possibilities
- Thread starter tae111
- Start date
- Thread starter
- #2
I guess I should have started out with a little background. I
'm 66 years old and while I have kept my cars fairly clean over the years I decided to get more into paint correcting, polishing, and detailing. I'm not going into business just trying to learn for myself.
Getting started I read a lot of articles and watched many of the video's on here and elsewhere.
I did purchase a DA polisher and some of the pads and products suggested here. My first attempt is going to be a 2017 Chevy Colorado LT that I purchased from a lease return. It's pretty shiny but since it was a lease car it probably never even had a coat of wax or anything other than running it through a car wash since new.
I am going to clay, compound, polish, and wax it.
There were a few scratches that look like someone made a an attempt to repair. The question I have is should I go after these or is the end result not going to be much better then if I just compound, polish, and wax it.
Also if I'm successful with the truck I'm going to go after the wife's Audi next.
")
'm 66 years old and while I have kept my cars fairly clean over the years I decided to get more into paint correcting, polishing, and detailing. I'm not going into business just trying to learn for myself.
Getting started I read a lot of articles and watched many of the video's on here and elsewhere.
I did purchase a DA polisher and some of the pads and products suggested here. My first attempt is going to be a 2017 Chevy Colorado LT that I purchased from a lease return. It's pretty shiny but since it was a lease car it probably never even had a coat of wax or anything other than running it through a car wash since new.
I am going to clay, compound, polish, and wax it.
There were a few scratches that look like someone made a an attempt to repair. The question I have is should I go after these or is the end result not going to be much better then if I just compound, polish, and wax it.
Also if I'm successful with the truck I'm going to go after the wife's Audi next.
vobro
Active member
- Jun 25, 2012
- 1,162
- 0
The scratches on the right look too deep to go after, hard to tell the ones in left pic. What I do notice though is both areas appear to be on edges which means if you use a large pad you may get into more trouble. If you decide to go after it you may not totally eliminate them but you may be able to make them less visible. Again I would use caution hitting them edges
vobro
Active member
- Jun 25, 2012
- 1,162
- 0
- Thread starter
- #5
Thanks. I wasn't planning on getting too aggressive and never thought I would be able to make them 100%.
The one on the left is near an edge. The one on the right looks that way in the pic but it is not. It's on a pretty flat area just above the rear wheel well.
I will say that even if I can't get them out I can find a way to almost make them invisible. I say this because the dealer that sold the truck did something that made the left one barley visible and the right one completely invisible.
I had the truck sitting in my driveway for a week after I bought it. I was going over it pretty well and never even noticed the right one until we had a few hard rain storms. That one surprised me.
This is what it looked like when I brought it home so it looks pretty good at 10 ft. It will look much better once I can spend a day on it.
Mike Phillips
Active member
- Dec 5, 2022
- 51,004
- 7
Nice looking truck.

To me - the touch-up work already performed doesn't look half bad. I would tend to go ahead and detail the truck and move on. It is a daily driver.
If the repairs did look shoddy, then that's another thing.
The problems you get into I share here,
Wetsanding removes paint - Compounding removes paint - Polishing removes a little paint
vobro
Active member
- Jun 25, 2012
- 1,162
- 0
- Thread starter
- #9
I had a Nissan Titan since 2006.
I wanted a midsize truck with a long bed to cart my fishing kayak around.
View attachment 70070
I wanted a midsize truck with a long bed to cart my fishing kayak around.
View attachment 70070
Mike Phillips
Active member
- Dec 5, 2022
- 51,004
- 7
Hey tae111,
I'm back in the office, off vacation and behind my normal work computer where it's a lot easier for me to do things like this....
Share your pictures full size.


And like I said previously, I've seen some very scrappy looking touch-up paint repairs and neither of these look that bad. My guess is - if you simply wash, clay, machine polish they will be even more invisible.
If you want to remove the touch-up paint and start over you can use acetone finger nail polish remover and simply dab some onto the paint and then wipe. Take your time and you can remove it all and then start over.
See this recent write-up I shared....
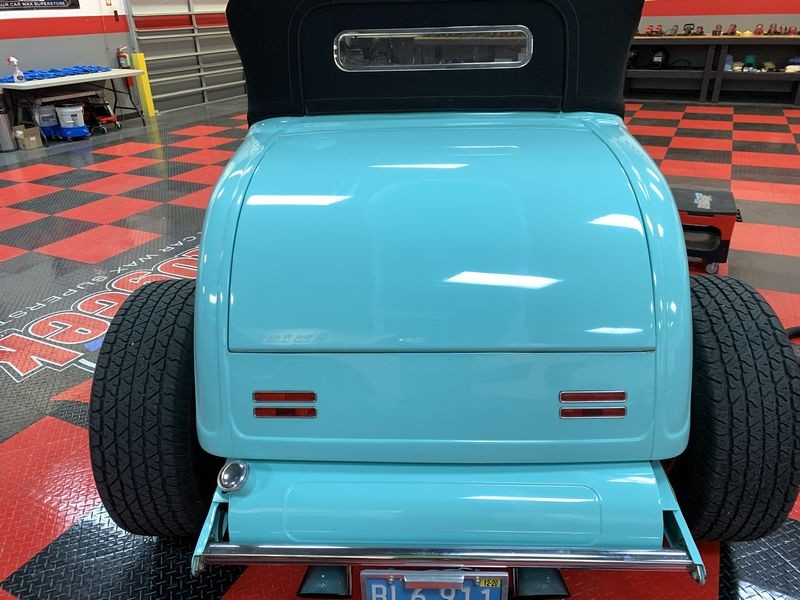
Ceramic Coating & Paint Correction 1932 Ford Roadster
Next - Remove the pinstripes off of the body panel under the Rumble Seat.
(I removed the pinstripes off the Rumble Seat before taking any pictures of the process)

This was some fairly thick paint.

I had to soften some of it with some Nail Polish Remover.

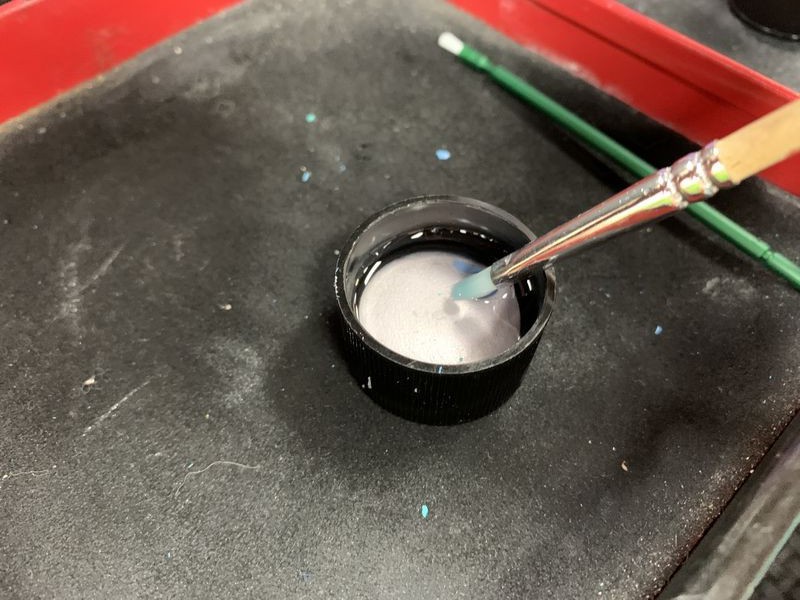
Using a paint touch-up brush I carefully paint some Nail Polish Remover onto the pinstripe paint.

BOOM! Done.
If you look carefully, you can see where I compounded JUST the paint on the Rumble Seat where I removed the pinstripes. The paint was not only contaminated with some type of overspray or other bonded contaminants but it was also STAINED. Before buffing out the car there was a brownish color over the paint. After buffing the car out the dirt staining was removed to reveal a much brighter color of blue.

I'm back in the office, off vacation and behind my normal work computer where it's a lot easier for me to do things like this....
Share your pictures full size.
And like I said previously, I've seen some very scrappy looking touch-up paint repairs and neither of these look that bad. My guess is - if you simply wash, clay, machine polish they will be even more invisible.
If you want to remove the touch-up paint and start over you can use acetone finger nail polish remover and simply dab some onto the paint and then wipe. Take your time and you can remove it all and then start over.
See this recent write-up I shared....
Ceramic Coating & Paint Correction 1932 Ford Roadster
Next - Remove the pinstripes off of the body panel under the Rumble Seat.
(I removed the pinstripes off the Rumble Seat before taking any pictures of the process)
This was some fairly thick paint.
I had to soften some of it with some Nail Polish Remover.
Using a paint touch-up brush I carefully paint some Nail Polish Remover onto the pinstripe paint.
BOOM! Done.
If you look carefully, you can see where I compounded JUST the paint on the Rumble Seat where I removed the pinstripes. The paint was not only contaminated with some type of overspray or other bonded contaminants but it was also STAINED. Before buffing out the car there was a brownish color over the paint. After buffing the car out the dirt staining was removed to reveal a much brighter color of blue.
- Thread starter
- #11
Thanks I am going to wash, clay, and buff with Blackfire one step and see how it turns out. Of course I'll do a test area first. It is a daily driver or in my case since I'm retired whenever I use the truck. I just got this from a lease return with pretty low mileage. I got a great deal and knew it wasn't going to be perfect. Many people who lease don't do anything to those vehicles since they are going to return them. I am going to bring it back to as good as new as possible and actually add some protection to the paint. I have no doubt it will look pretty good when I'm done.
Mike Phillips
Active member
- Dec 5, 2022
- 51,004
- 7
Thanks I am going to wash, clay, and buff with Blackfire one step and see how it turns out.
Cool. You'll need some sunglasses to look at your truck when you're done.
:buffing:
vobro
Active member
- Jun 25, 2012
- 1,162
- 0
Nice job! As for the splatter it’s a result of too much product, lifting the pad while in motion or getting product on the outside edge of pad. The few times I use the drill attachment I rub the product into the pad and it won’t splatter
Is that a long bed?
Is that a long bed?
Mike Phillips
Active member
- Dec 5, 2022
- 51,004
- 7
First time using the DA or any machine really.
Hit the problem areas with the Griots 3" drill kit and cutting pad. Did anyone say splatter?
Went back over with the DA then wax. Came out pretty good for a virgin.
Yeah - the "Drill Kit" is basically the same as using a ROTARY BUFFER and that's what happens with rotary buffers - they tend to sling splatter dots everywhere. Once you get some expereince you figure out how to prevent that.
Truck looks good!
After this - do you still feel like re-doing the touch-up paint areas?
OR
Drive it like you stole it!
- Thread starter
- #17
I'm probably not going to re-do the touch up areas. The only one that is noticeable is the one just above the drivers side headlight. In the future I might try filling that with a little more touch up paint and clear coat then 3000 grit wet sand and compound and polish. Or maybe I might just let it be. Depends on how much it bugs me down the road.
Mike Phillips
Active member
- Dec 5, 2022
- 51,004
- 7
More....
Here's a how-to article written by a guy named richy.
Here's a how-to article written by a guy named richy.
Sad to say - all his pictures are missing in the article so it's not as much help as when the pictures were visible. This is the problem when people use PHOTOBUCKET. I probably have 3, 4 maybe 5 articles on why NOT to use Photobucket but hey - no one listens or takes what I have to say in these articles serious. As you read through ANY forum you'll find post after post with missing Photobucket pictures.
Sad. :dunno:
I'm happy to say that my contribution to his article is still there in post #28 of page 3 and what I wrote is still just as accurate today as when I wrote it.
Couple of comments to anyone ever attempting to do this kind of repair...
1. When possible, let the paint dry longer. You want the touch up paint as dry and hard as possible before you start sanding and buffing on it.
The problem you can run into when you start buffing on touch-up paint is when you warm it up, especially when using a rotary buffer, you can actually pull the touch-up paint right out of the scratch or rock chip if you're attempting to do this to a rock chip. Then you're back to where you started only now you've got sanding marks in the surrounding paint.
2. Touch-up paint will always be softer than the factory paint surrounding the repair, here's how this affects the buffing process. When you go to buff out your sanding marks, they will buff out quickly and easily out of the touch-up paint because this paint is softer, especially if it's only dried a short time. The surrounding paint will be harder and thus it will be harder or more difficult to remove your sanding marks out 100%
It's easy to sand paint as at it's core that's putting scratches into the paint... the tricky part is getting the ALL out...
When doing touch-up repair work on clear coat paints, what I've seen and experienced is the sanding marks come out of the touch-up paint quickly and easily but not so with the factory clear.
So what a person does is continue buffing the sanding marks in the surrounding clear paint and what happens is you heat the panel up and your buffing pad will literally pull the touch-up paint out of the scratch or chip.
3. You really need a rotary buffer to remove sanding marks 100%
Can you do it with a DA or Flex or even Cyclo? Sure but it will take longer. Again the sanding marks will come out of the touch-up paint quickly and easily, it's the surrounding factory baked-on clear coat that you'll need to be concerned with.
Try to finish sand with #3000 or higher before buffing.
:xyxthumbs: