DLB
New member
- Jul 13, 2009
- 1,211
- 0
This is my mom’s daily driver. Lucky for me, mom is almost as DO about her car as I am. She has only done hand washes on it with quality car soap, dries it after washing, wipes the jambs, and keeps the interior extremely clean (even after hauling the grandkids). So, this wasn’t too bad a job, but you can always make one look better. This is its first in-depth detail of any kind since she bought it new 70,000 miles ago. It just hasn’t needed one that badly with regular upkeep/waxing. I wasn’t trying to achieve a perfect/swirl free finish on this, just get it clean. She wants me to correct it totally at a later date (when there is time).
Products/Methods:
Exterior Wash
•2 Bucket Method, Grit Guard’s in each
•Lake Country Blue Sponge
•Mother’s California Gold Wash
•Meg’s APC+ on tires (4:1) and wheel barrels (10:1 - agitated with Daytona Speed Master), and wheel wells (10:1). APC+ also used with smaller brushes to get the plastic trim cleaned properly.
Jambs/Hatch Area
[FONT="]•[/FONT]Optimum No Rinse Wash
•Microfiber Wash Media
•Various Brushes
•Finished with Lucas Slick Mist
Clay
•Pinnacle XMT Speed Clay
•Optimum No Rinse at proper dilution used as lube
Engine Bay
•Meg’s APC+ 4:1
•Pressure Washer
•Various Brushes
•Finished off with 303 Aerospace Protectant
Exterior Finish/Correction
•Minor correction work (this wasn’t on the slate to do, but wanted to try this product) – Ardex Smart Cut (sample from a friend)
•Pinnacle XMT 360 via PCXP and White LC CCS @ speed 5
•Pinnacle XMT 180 Carnuba by hand - foam pad
•Trim – Poorboy’s World Trim Restore
•Tires – Surf City Garage Beyond Black
•Wheels – Wheel Wax
•Wheel Wells – Meguiar’s Natural Shine Protectant (experiment)
•Lights – 3rd Brake Light 3M Headlight Resto Kit, tails polished with mini orange pad and Meg’s PlastX
Interior
Since the interior was clean to start with, there wasn’t much work performed here. Kind of strange for me, as most of my details revolve around the interior instead of the exterior.
•Cleaning – DP Total Interior Cleaner and Folex on carpet (Spot as needed)
•Protectant – DP Total Interior Protectant
•Glass – Surf City Garage Glass Cleaner, with window WW and Glass Master Pro
On to the pictures:
Since this vehicle wasn’t in horrible shape, and being that it is white, I didn’t take any overall before’s. The difference in the details on this is what makes the difference, not the amount of dirt I washed off. And like I said before, the interior wasn’t bad to start with, so nothing special. Apologies for picture quality…old camera.
A few of the dirty spots on the interior…
Before

After:


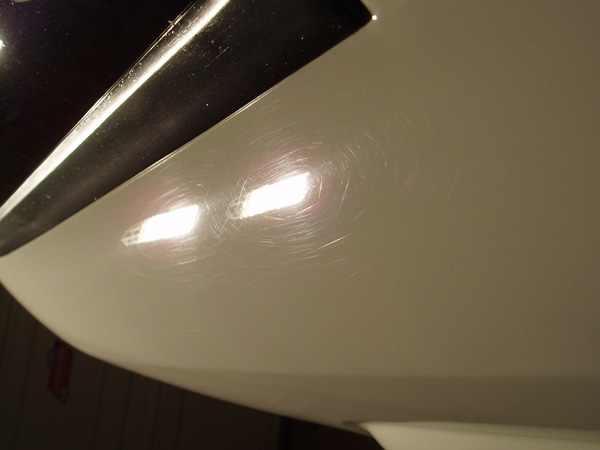
Before:

After:

Rear area after:

3rd Brake Light Before:

After:

Engine (first detail ever on the engine)…
Before:

After:

Before:

After:

Before:

After:

Before:

After:

Trim…
Before:

After:

Before:


After:

Rear hatch…
Before:

After:

(I couldn’t get some of the stuff stuck behind the seal without removing it…)

Before:

After:

Wheel Before:

After:

Products/Methods:
Exterior Wash
•2 Bucket Method, Grit Guard’s in each
•Lake Country Blue Sponge
•Mother’s California Gold Wash
•Meg’s APC+ on tires (4:1) and wheel barrels (10:1 - agitated with Daytona Speed Master), and wheel wells (10:1). APC+ also used with smaller brushes to get the plastic trim cleaned properly.
Jambs/Hatch Area
[FONT="]•[/FONT]Optimum No Rinse Wash
•Microfiber Wash Media
•Various Brushes
•Finished with Lucas Slick Mist
Clay
•Pinnacle XMT Speed Clay
•Optimum No Rinse at proper dilution used as lube
Engine Bay
•Meg’s APC+ 4:1
•Pressure Washer
•Various Brushes
•Finished off with 303 Aerospace Protectant
Exterior Finish/Correction
•Minor correction work (this wasn’t on the slate to do, but wanted to try this product) – Ardex Smart Cut (sample from a friend)
•Pinnacle XMT 360 via PCXP and White LC CCS @ speed 5
•Pinnacle XMT 180 Carnuba by hand - foam pad
•Trim – Poorboy’s World Trim Restore
•Tires – Surf City Garage Beyond Black
•Wheels – Wheel Wax
•Wheel Wells – Meguiar’s Natural Shine Protectant (experiment)
•Lights – 3rd Brake Light 3M Headlight Resto Kit, tails polished with mini orange pad and Meg’s PlastX
Interior
Since the interior was clean to start with, there wasn’t much work performed here. Kind of strange for me, as most of my details revolve around the interior instead of the exterior.
•Cleaning – DP Total Interior Cleaner and Folex on carpet (Spot as needed)
•Protectant – DP Total Interior Protectant
•Glass – Surf City Garage Glass Cleaner, with window WW and Glass Master Pro
On to the pictures:
Since this vehicle wasn’t in horrible shape, and being that it is white, I didn’t take any overall before’s. The difference in the details on this is what makes the difference, not the amount of dirt I washed off. And like I said before, the interior wasn’t bad to start with, so nothing special. Apologies for picture quality…old camera.
A few of the dirty spots on the interior…
Before
After:
Before:
After:
Rear area after:
3rd Brake Light Before:
After:
Engine (first detail ever on the engine)…
Before:
After:
Before:
After:
Before:
After:
Before:
After:
Trim…
Before:
After:
Before:
After:
Rear hatch…
Before:
After:
(I couldn’t get some of the stuff stuck behind the seal without removing it…)
Before:
After:
Wheel Before:
After:
Last edited: