I washed and clayed a pretty swirled black hood and the proceeded to compound with meguiars ultimate compound using an orange LC pad with DA at setting 5. Most the swirls gt out and then finished with a green pad and Mrguiars 205 finishing polish. It looks good except for some reason the light seems to reflect strangely off the hood with lines now.. Any ideas on how to fix this or what I did wrong? Thanks!
Navigation
Install the app
How to install the app on iOS
Follow along with the video below to see how to install our site as a web app on your home screen.
Note: This feature may not be available in some browsers.
More options
Style variation
You are using an out of date browser. It may not display this or other websites correctly.
You should upgrade or use an alternative browser.
You should upgrade or use an alternative browser.
Strange light reflection after compound and polish?
- Thread starter l0aded
- Start date
zmcgovern45
New member
- Sep 5, 2012
- 3,443
- 0
I washed and clayed a pretty swirled black hood and the proceeded to compound with meguiars ultimate compound using an orange LC pad with DA at setting 5. Most the swirls gt out and then finished with a green pad and Mrguiars 205 finishing polish. It looks good except for some reason the light seems to reflect strangely off the hood with lines now.. Any ideas on how to fix this or what I did wrong? Thanks!
Is there any way you can capture this in a photo?
It could be light marring caused by wiping away the product with your towel. Would you say your paint was particularly soft? Were you using good quality, premium microfiber? Are you certain the towel was clean?
It could also be residual oils on the paint. Did you wipe the area with CarPro Eraser or IPA afterwards to remove any remaining oils?
Do these "lines" go away if you polish the area lightly again?
- Thread starter
- #3
Is there any way you can capture this in a photo?
It could be light marring caused by wiping away the product with your towel. Would you say your paint was particularly soft? Were you using good quality, premium microfiber? Are you certain the towel was clean?
It could also be residual oils on the paint. Did you wipe the area with CarPro Eraser or IPA afterwards to remove any remaining oils?
Do these "lines" go away if you polish the area lightly again?
I'll see if I can capture on camera later (it is my friends car and he is currently at work). I did not clear any residual oils on the paint with IPA, I only washed with ONR beforehand, and clayed with Meguiars 34 as lubricant. Is there any other reason that could cause these light streaks? Between compounding and polishing I did not wash it with anything but Meguiars 34 again and a microfiber, could this have caused a problem?
I did try hitting it again with a green LC pad and M205 ultra finishing polish but it did not get rid of it 100%. We started losing sunlight so was not sure how much help it did. This is on a relatively new car (less than 1 month old) that was pretty darn swirled from sitting on the dealer lot for months, not sure if that matters at all.
zmcgovern45
New member
- Sep 5, 2012
- 3,443
- 0
Did you see these streaks/lines after this process & before the correction phase?I'll see if I can capture on camera later (it is my friends car and he is currently at work). I did not clear any residual oils on the paint with IPA, I only washed with ONR beforehand, and clayed with Meguiars 34 as lubricant. Is there any other reason that could cause these light streaks?
From what I understand, #34 is not a surface cleanser like IPA or Eraser. According to AGO product page, #34 contains gloss enhancing properties and therefore must leave its own residue on the surface. I suppose it is possible this created streaking, but it certainly should have been removed if you polished this area again.Between compounding and polishing I did not wash it with anything but Meguiars 34 again and a microfiber, could this have caused a problem?
Are they deeper scratches that were not removed with compounding?I did try hitting it again with a green LC pad and M205 ultra finishing polish but it did not get rid of it 100%. We started losing sunlight so was not sure how much help it did. This is on a relatively new car (less than 1 month old) that was pretty darn swirled from sitting on the dealer lot for months, not sure if that matters at all.
Sounds like you should've noticed this during testing and evaluated your process then.
- Thread starter
- #5
Did you see these streaks/lines after this process & before the correction phase?
From what I understand, #34 is not a surface cleanser like IPA or Eraser. According to AGO product page, #34 contains gloss enhancing properties and therefore must leave its own residue on the surface. I suppose it is possible this created streaking, but it certainly should have been removed if you polished this area again.
Are they deeper scratches that were not removed with compounding?
Sounds like you should've noticed this during testing and evaluated your process then.
It was after compounding I first noticed it and assumed it was from compounding leaving behind an uneven surface and that the M205 finishing polish would take care of it. I then hit it with the M205 and it did not so I assumed I just did a bad job and tried again. Still nothing =/. I will try giving it an IPA wipe down and hit it again with the M205 and green pad and see if it helps.
zmcgovern45
New member
- Sep 5, 2012
- 3,443
- 0
Try to get a photo... that will help a ton.
- Thread starter
- #7
Try to get a photo... that will help a ton.
I swapped cars with him. Here is a pic, I put arrows at the streaks. Thanks!
Too large for forums:
http://i.imgur.com/UQ0h6d2.jpg
zmcgovern45
New member
- Sep 5, 2012
- 3,443
- 0
Here is the photo for others to see...

Are you using a DA or rotary?
It is difficult to tell from that distance... upon close inspection with an LED light do you see micro marring left from the compounding portion (or even the polishing step if you have soft paint)?
Have you wiped with IPA to ensure you have a clean, residue free surface?
- Thread starter
- #10
Here is the photo for others to see...
Are you using a DA or rotary?
It is difficult to tell from that distance... upon close inspection with an LED light do you see micro marring left from the compounding portion (or even the polishing step if you have soft paint)?
Have you wiped with IPA to ensure you have a clean, residue free surface?
After reading into it it seems I have this: http://www.autogeekonline.net/forum...-swirls-micro-marring-da-haze-tick-marks.html
Rotary Buffer Swirls.
I used a DA. I did not use IPA to wipe down before polishing. Upon close inspection I cannot find any kind of scratches. If it is "rotery buffer swirls" from using a DA, would polishing again with a lighter polish help?
DARK HORSE
New member
- Sep 14, 2009
- 2,537
- 0
Those look like small buffer trails to me. Is it possible they were there before you worked on the hood? I'm wondering if someone installed them before you got to the vehicle and you didn't remove them. Do you have any other compounds/polishes/pads? If so, (and after trying the advice above [great advice and insight]) if still no help; you may want to try compounding again with another compound or medium cut polish and a fresh, CLEAN pad. If no other compounds, try the UC again w/ a fresh clean pad. Be sure to hold the polisher flat to the paint, and move it with slow and steady arm speed. Check out this old thread I posted a few years ago, it may give you some insight as to what you may be dealing with (do any of these pictures look somewhat like what you are seeing)?...http://www.autogeekonline.net/forum/show-n-shine/42273-hack-job-corrected.html
- Thread starter
- #12
Those look like small buffer trails to me. Is it possible they were there before you worked on the hood? I'm wondering if someone installed them before you got to the vehicle and you didn't remove them. Do you have any other compounds/polishes/pads? If so, (and after trying the advice above [great advice and insight]) if still no help; you may want to try compounding again with another compound or medium cut polish and a fresh, CLEAN pad. If no other compounds, try the UC again w/ a fresh clean pad. Be sure to hold the polisher flat to the paint, and move it with slow and steady arm speed. Check out this old thread I posted a few years ago, it may give you some insight as to what you may be dealing with (do any of these pictures look somewhat like what you are seeing)?...http://www.autogeekonline.net/forum/show-n-shine/42273-hack-job-corrected.html
My friend swears they were not there before I used the DA on it. I guess I'll list out what I did to make it more thorough.
1) Wash, clay, IPA wipe down.
2) DA with orange pad and ultimate compound at speed 5. From here I noticed the holograms already.
3) DA with green pad and M205 at speed 5
After it was done the holograms were still there so I hit it with the green pad and M205 at speed 3, still there so I tried black LC pad at speed 4 with M205, also still there =/. The way front after I hit it with the green pad with M205 seemed to have gotten better though.
I am also suspecting that the hood was extremely hot since the car is a GTI and black on a sunny day. Could high heat have caused the issue? Could it be leftover polish causing the issue (how do I remove leftover polish completely)? Worst case scenario I'll probably hit it with a green pad and UC?
The tools in my garage are UC, M205, LC black green and orange pads. along with various washes waxes and detailers.
swanicyouth
New member
- Mar 3, 2011
- 9,388
- 0
You can get buffer trails / holograms from a DA. Is it common? No. Likely? No. However, it can happen - and that what it looks like to me. You can call it hazing or marring that looks like holograms. It could be caused by a number of things, but my guess would be there was contamination on the pad, on the paint, or in the polish.
I'm not saying you did something wrong per se. Sometimes stuff just happens. You should be able to clean it up with a polishing pad and polish.
Dry buffing could cause this as well - so heat can be the issue also.
I'm not saying you did something wrong per se. Sometimes stuff just happens. You should be able to clean it up with a polishing pad and polish.
Dry buffing could cause this as well - so heat can be the issue also.
- Thread starter
- #15
Based on the photo, i tend to lean towards Dark Horses call. They look like slight buffer trails and if so, can be easily cleaned up with another light product/pad/method.
I'll try hitting it longer with black and m205. When I did it the first time I gave up quickly. Can you recommend a speed?
swanicyouth
New member
- Mar 3, 2011
- 9,388
- 0
I'll try hitting it longer with black and m205. When I did it the first time I gave up quickly. Can you recommend a speed?
To remove any defects you usually need speed 5-6. Remember to use about 15lbs of downward pressure and move the polisher 1-2" a second. You can't polish effectively a black car in the sun - so you gotta work indoors or get some shade.
Keep firm downward pressure on the polisher head the whole buffing cycle, don't "lighten up" for the last pass or 2. I'm confident this can be remedied. Also, don't forget to prime your pad.
- Thread starter
- #17
To remove any defects you usually need speed 5-6. Remember to use about 15lbs of downward pressure and move the polisher 1-2" a second. You can't polish effectively a black car in the sun - so you gotta work indoors or get some shade.
Keep firm downward pressure on the polisher head the whole buffing cycle, don't "lighten up" for the last pass or 2. I'm confident this can be remedied. Also, don't forget to prime your pad.
I usually prime my pad with meguiars 34 one spray. Is this OK?
swanicyouth
New member
- Mar 3, 2011
- 9,388
- 0
I usually prime my pad with meguiars 34 one spray. Is this OK?
That's fine. But, you want to check out the Kevin Brown Method of pad priming. Basically, you want to coat the whole front contact area with a LIGHT coating of your polish before it touches paint. Once coated, some will wipe any "extra" off with a towel. I just make sure the coating is light. Then, add 3 or 4 pea size drops of "working polish".
This ensures the whole pad is lubricated and doing correction work from the moment it touches the paint. Dry areas of the pad can cause paint marring most noticeable on dark colors. I've made that mistake before.
For some reason, this is not required or advantageous with the Rupes system (foam).
DARK HORSE
New member
- Sep 14, 2009
- 2,537
- 0
You can get buffer trails holograms from a DA/ . Is it common? No. Likely? No. However, it can happen - and that what it looks like to me. You can call it hazing or marring that looks like holograms. It could be caused by a number of things, but my guess would be there was contamination on the pad, on the paint, or in the polish.
I'm not saying you did something wrong per se. Sometimes stuff just happens. You should be able to clean it up with a polishing pad and polish.
Dry buffing could cause this as well - so heat can be the issue also.
^^ :iagree: Great points! This may also be the case. This is why I recommended trying a fresh CLEAN pad and different polish as well. And as mentioned above, be sure to prime your pad thoroughly with you polish.
Mike Phillips
Active member
- Dec 5, 2022
- 51,004
- 6
Here's how to prime your pad.... be sure to ALWAYS clean the face of a dry pad with a nylon pad cleaning brush, a toothbrush will work. This is to make sure no dirt got on it while it wasn't in use.
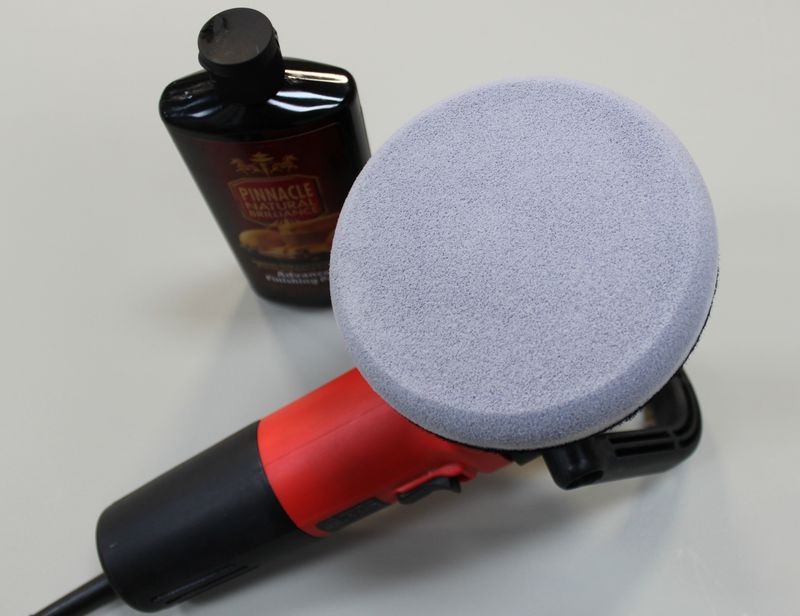
How to prime a foam pad when using a DA Polisher
Here are 3 ways to apply product to your pad.
1. Priming the pad then adding product to work with
Priming a clean, dry pad is considered the best approach for using a DA Polisher because it ensures that 100% of the working surface of the pad is wet with product and working at maximum efficiency when you turn the polisher on. I originally learned of this technique from my friend Kevin Brown.
Priming the pad also ensures that you don't have any dry portion of the pad working over the paint un-lubricated. This really isn't a risk because since you're just starting out you're going to be removing defects a lot more serious than would be caused by any portion of the pad that is dry and spinning against the paint.
Plus, after just a few passes, the product you apply to specific areas of the face of the pad will migrate over the entire face of the pad and it will do this rather quickly when you're on the higher speed settings.
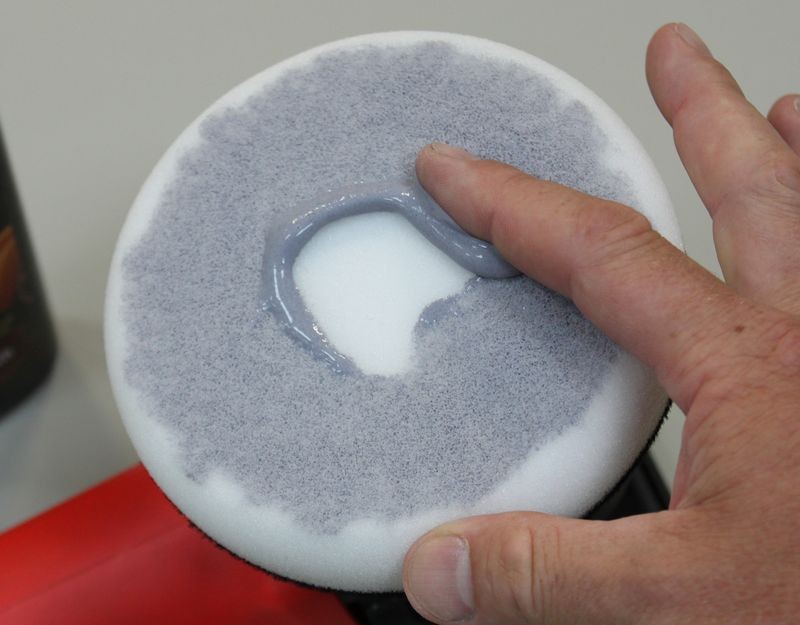
Priming the Pad - For clean, dry pads
Start with a clean, dry pad and add some fresh product to be spread out to the face of the pad. Using your finger, spread the product out over the pad and then using your finger work it into the pores of the pad. Don't saturate the pad, just use enough product to make sure that 100% of the working face of the pad has product coverage.


Work the product around the face of the pad and into the pores
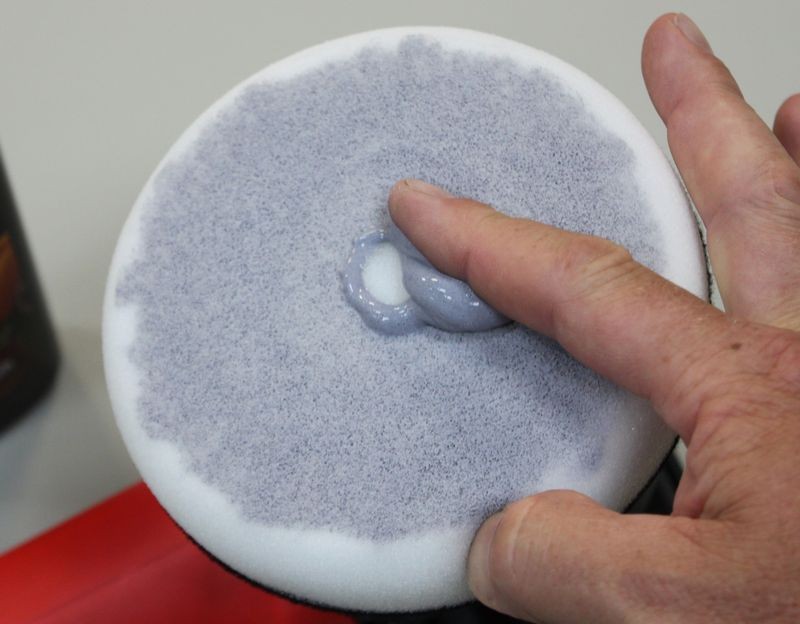
Any extra, take and apply to the outer edge until 100% of the working face of the pad is primed with product.

As an option you can also prime the outer edge. This helps if you're buffing around convex curves or around panels that the edge of your buffing pad may come into contact with, like spoilers, side mirror housings, curved panels etc.

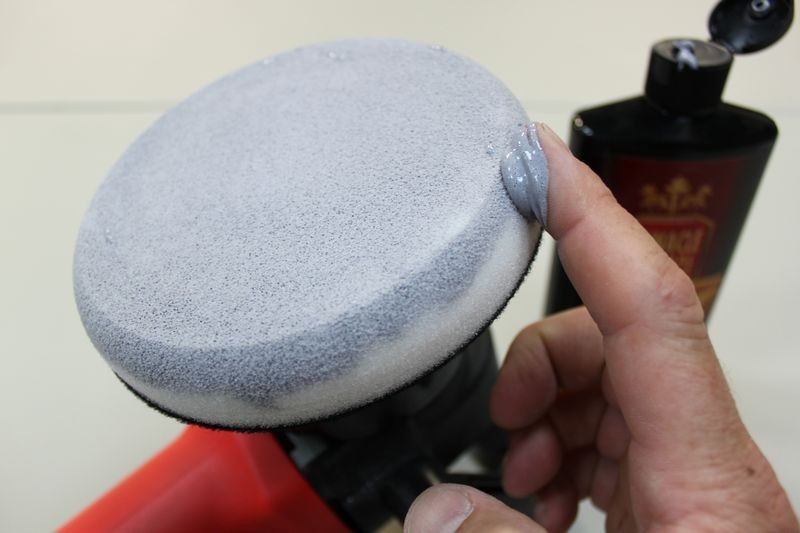
Primed and ready to add "Working Product" to.
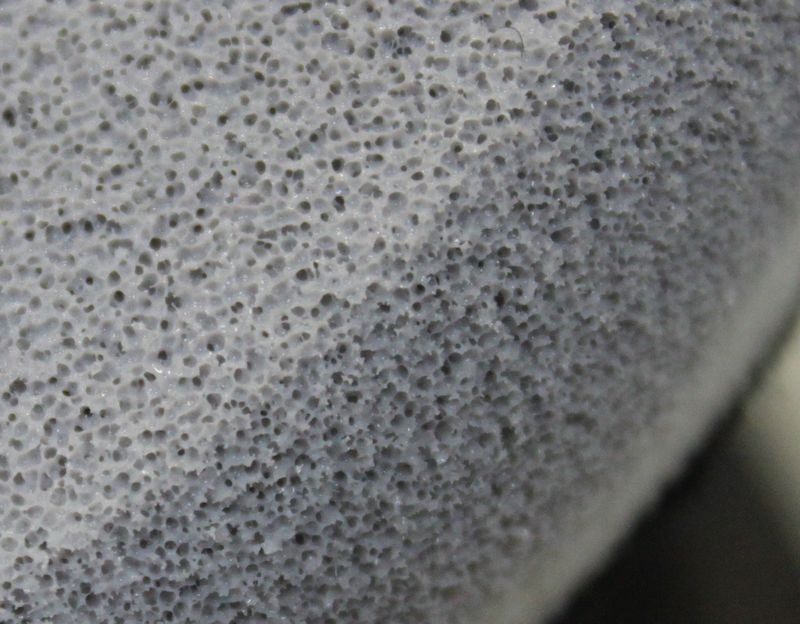
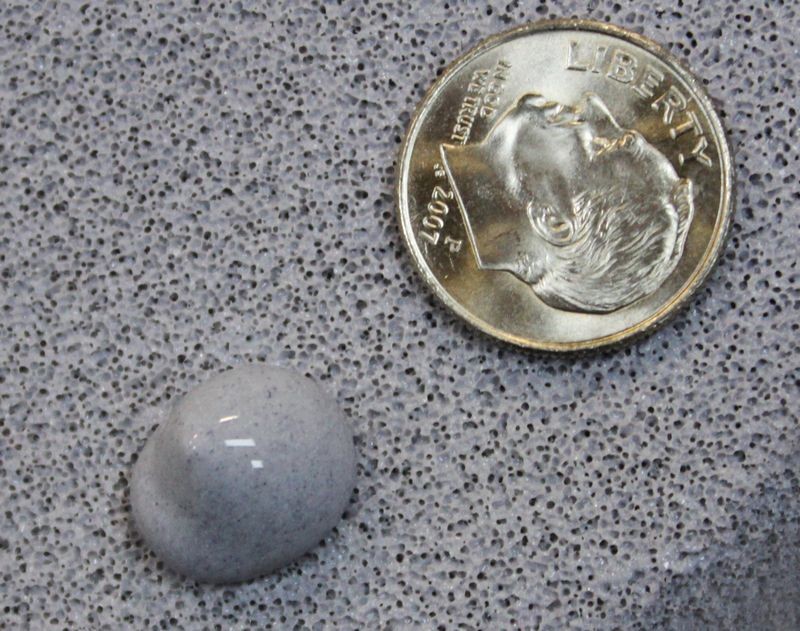
Adding "Working Product" to the primed pad
Some people will recommend 3 to 4 pea size drops of product as the proper amount of product to use and this can be correct for concentrated products or working small sections and if you follow this advice make sure you are not under-lubricating the surface being worked.
Pea size drops of product

For some products and paint conditions, you may want more product on the surface working for you. Here's an example of dime size drops of product.
Dime size drops of product


How much product to use after priming
Ample
You want an AMPLE amount of product when first starting out because you pad is dry and some of the product is going to seep into the pad leaving less on the surface to LUBRICATE and ABRADE the paint
Cut down on the amount of product AFTER pad is broken-in...
After your pad is broken in with product, clean your pad after each section pass and when you apply fresh product you can cut down on the amount of product you actually apply to the face of your pad.
Too Little Product
Under-using product reduces lubricity and will make it more difficult for your pad to rotate efficiently.
Too Much Product
Using too much product will hyper-lubricate or over-lubricate the pad and will interfere with the abrasives ability to abrade the paint.
Keep in mind that you want enough product on the surface so you have,
How to prime a foam pad when using a DA Polisher
Here are 3 ways to apply product to your pad.
1. Priming the pad then adding product to work with
Priming a clean, dry pad is considered the best approach for using a DA Polisher because it ensures that 100% of the working surface of the pad is wet with product and working at maximum efficiency when you turn the polisher on. I originally learned of this technique from my friend Kevin Brown.
Priming the pad also ensures that you don't have any dry portion of the pad working over the paint un-lubricated. This really isn't a risk because since you're just starting out you're going to be removing defects a lot more serious than would be caused by any portion of the pad that is dry and spinning against the paint.
Plus, after just a few passes, the product you apply to specific areas of the face of the pad will migrate over the entire face of the pad and it will do this rather quickly when you're on the higher speed settings.
Priming the Pad - For clean, dry pads
Start with a clean, dry pad and add some fresh product to be spread out to the face of the pad. Using your finger, spread the product out over the pad and then using your finger work it into the pores of the pad. Don't saturate the pad, just use enough product to make sure that 100% of the working face of the pad has product coverage.
Work the product around the face of the pad and into the pores
Any extra, take and apply to the outer edge until 100% of the working face of the pad is primed with product.
As an option you can also prime the outer edge. This helps if you're buffing around convex curves or around panels that the edge of your buffing pad may come into contact with, like spoilers, side mirror housings, curved panels etc.
Primed and ready to add "Working Product" to.
Adding "Working Product" to the primed pad
Some people will recommend 3 to 4 pea size drops of product as the proper amount of product to use and this can be correct for concentrated products or working small sections and if you follow this advice make sure you are not under-lubricating the surface being worked.
Pea size drops of product
For some products and paint conditions, you may want more product on the surface working for you. Here's an example of dime size drops of product.
Dime size drops of product
How much product to use after priming
Ample
You want an AMPLE amount of product when first starting out because you pad is dry and some of the product is going to seep into the pad leaving less on the surface to LUBRICATE and ABRADE the paint
Cut down on the amount of product AFTER pad is broken-in...
After your pad is broken in with product, clean your pad after each section pass and when you apply fresh product you can cut down on the amount of product you actually apply to the face of your pad.
Too Little Product
Under-using product reduces lubricity and will make it more difficult for your pad to rotate efficiently.
Too Much Product
Using too much product will hyper-lubricate or over-lubricate the pad and will interfere with the abrasives ability to abrade the paint.
Keep in mind that you want enough product on the surface so you have,
- Abrasives working for you.
- A lubricating film between the paint and the pad.