Teach me basics of clay barring, waxing, paint correction, etc.

BEEMDUB

New member
Joined
May 7, 2013
Messages
5
Reaction score
0
Hey guys, haven't posted on here really but I read a lot. I have a 2007 tahoe that I got about 4 months ago, that I wash every sunday (weather providing). I've got it down pretty well two bucket method washing, and I dry with like 5 microfibers but I am about to order The Guzzler Combo kit to replace all that. I've got down washing my truck pretty well but I've always been curious and kind of frustrated trying to learn about the more advanced parts to detailing. My paint is black and is definitely not in the best of condition, lots of scratches and scuffs, and swirl marks. I want to get down a schedule of buffing/waxing to make my truck paint look better, and also want to know what methods people use for paint correction. I guess the most confusing thing is that I hear people talking about clay bar, polish, sealant, waxing, all this different stuff and I'm just wondering what I should be doing. All I want is for my paint to look the best it possibly can. Yes I'm a noob to detailing but I'm eager to learn about it and get good.
 
Hi and welcome to AutogeekOnline! :welcome:

Click the below link and read through it and absorb all the information, It will walk you through each step you want to do and there are plenty of other videos and links included.

How To Detail Your Brand New Car by Mike Phillips


Doesn't matter if your car is brand new or not as you would do the same types of things for an older car.


:)

Thanks a lot for that, looks like I have a lot to read while I'm at work today :D

So basically from what I've gathered it seems like a good process for me next time I wash my car, is to (correct me if wrong)

1. Wash
2. Dry
3. Clay bar
4. Polish
5. Wax
?
 
Thanks a lot for that, looks like I have a lot to read while I'm at work today :D

So basically from what I've gathered it seems like a good process for me next time I wash my car, is to (correct me if wrong)

1. Wash
2. Dry
3. Clay bar
4. Polish
5. Wax
?


Yep, the above is the basics for any car, you can get as deep as you want or keep it simple.

Best thing to do after you get your car back to where you like it is to regularly maintain it.

Frequent car care is easy and FAST car care.


:)
 
Given your truck is an 07, you are probably going to need to work the paint a little bit before you move to the polish stage. If you don't have a random orbital buffer, I would recommend getting one. The Griot's Garage 6" is affordable and a great unit. I would recommend:

wash with dawn or Chemical Guys Citrus Wash
clay
wash or at least rinse to remove clay residue then dry well
Meguiars Ultimate Compound with Orange LC pad (Here's a link to the pads I use on my 6" Griots Garage: CCS 6.5 inch foam pads, Lake country ccs foam pads, porter cable pads, ccs polishing pads, ccs pads, lake country ccs pads)

This should get you to a pretty clean surface to apply your polish and seal steps. I like:

Blackfire Total Polish & Seal or Blackfire Gloss Enhancing Polish with White LC pad
Blackfire Wet Diamond All Finish Paint Protection with Blue LC pad (wait 12 hours before next step)
Blackfire Crystal Seal with microfiber hand applicator (2 coats 4 hours apart)

This will get a good seal on your paint. If you want to go to another level, apply 1-2 coats Blackfire Midnight Sun paste wax.

You can go straight to a sealant or wax right after you polish if you want. I do the multiple steps to get multiple layers of the Blackfire polymers working together. I have 3 black cars and this process works great!
 
Welcome to the forum!

First you will want to inspect your vehicles paint and determine the condition:
http://www.autogeekonline.net/forum/off-topic/38689-what-condition-paint-your-vehicles.html

Next you will need to ask yourself, "What would you like the paint to look like once finished?"

Once you do this then its time to do a wash on your vehicle to clean the paint of any loose dirt, grime, dust and so on.

Once you do the drying of your paint its time to do the baggie test. This test will help you feel the above surface bonded contaminants on the vehicles paint.
http://www.autogeekonline.net/forum...nspect-above-surface-bonded-contaminants.html

Once that is completed it time to clay your paint.
[ame=http://www.youtube.com/watch?v=gfxAesk4Po4]Part 1 - How to use detailing clay - YouTube[/video]
[ame=http://www.youtube.com/watch?v=opfK408uIxM]Part 2 - How to use detailing clay - YouTube[/video]

Nice you need to determine whether or not you need to compound and polish or just polish for that its the very important Test Spot:

http://www.autogeekonline.net/forum/how-articles/50162-how-do-test-spot.html

Once you have gone throughout all the compounding and or polishing its time to seal. There are so many options for this it will make your head spin so its all in what your looking for.
 
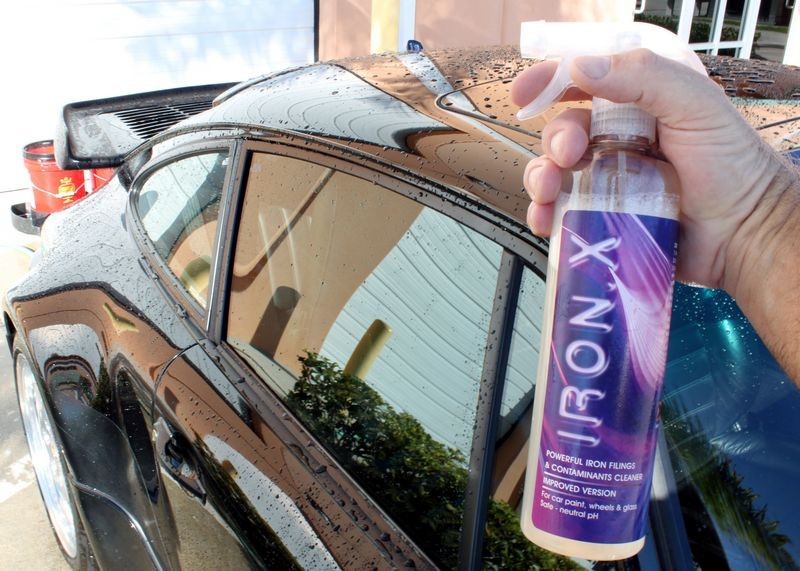
It sounds like you need a polisher. The steps basically are as above. Only thing I can add to that is prior to claying, you may want to use an iron decontamination product on the paint and wheels, like IronX. This will remove any iron stuck in the paint from the environment. Iron in your paint? Sounds crazy, but its actually pretty common.

You may want to buy some brushes to clean your wheels, as spotless wheels really make a car standout. I'd recommend at least a Daytona Brush and a Montana Boars Hair Wheel Brush. But it is possible to clean wheels without special brushes well, it just takes longer.

If you want to keep it simple (but not cheap) I would get one of the Rupes polisher kits. I say this because they make the polisher, pads, and polishes all to work together. They even make what to use with what the same color (pads & polish lids) so you don't even have to remember that.

Actually the price of the kit isn't too bad considering all you get. The Rupes polishers are considered state of the art, both noobs and pros can use them.

If that's a little above what your willing to spend you can get a DA polisher, pads, and polishes all separately. Only thing is, there is so many good products out there, there are an infinite number of combinations and recommendations. Its hard to make a decision what to get, because ten different guys will give you 11 different recommendations.

One way to go about it it pickled a car care line, and just decide to use all of your products from that line. BlackFire, Optimum, Megiuars, CarPro, Chemical Guys, etc... All make a line of most of the products you will need (minus the machine).

Good luck, and don't forget to post pics!
 
Given your truck is an 07, you are probably going to need to work the paint a little bit before you move to the polish stage. If you don't have a random orbital buffer, I would recommend getting one. The Griot's Garage 6" is affordable and a great unit. I would recommend:

wash with dawn or Chemical Guys Citrus Wash
clay
wash or at least rinse to remove clay residue then dry well
Meguiars Ultimate Compound with Orange LC pad (Here's a link to the pads I use on my 6" Griots Garage: CCS 6.5 inch foam pads, Lake country ccs foam pads, porter cable pads, ccs polishing pads, ccs pads, lake country ccs pads)

This should get you to a pretty clean surface to apply your polish and seal steps. I like:

Blackfire Total Polish & Seal or Blackfire Gloss Enhancing Polish with White LC pad
Blackfire Wet Diamond All Finish Paint Protection with Blue LC pad (wait 12 hours before next step)
Blackfire Crystal Seal with microfiber hand applicator (2 coats 4 hours apart)

This will get a good seal on your paint. If you want to go to another level, apply 1-2 coats Blackfire Midnight Sun paste wax.

You can go straight to a sealant or wax right after you polish if you want. I do the multiple steps to get multiple layers of the Blackfire polymers working together. I have 3 black cars and this process works great!

It sounds like you need a polisher. The steps basically are as above. Only thing I can add to that is prior to claying, you may want to use an iron decontamination product on the paint and wheels, like IronX. This will remove any iron stuck in the paint from the environment. Iron in your paint? Sounds crazy, but its actually pretty common.

You may want to buy some brushes to clean your wheels, as spotless wheels really make a car standout. I'd recommend at least a Daytona Brush and a Montana Boars Hair Wheel Brush. But it is possible to clean wheels without special brushes well, it just takes longer.

If you want to keep it simple (but not cheap) I would get one of the Rupes polisher kits. I say this because they make the polisher, pads, and polishes all to work together. They even make what to use with what the same color (pads & polish lids) so you don't even have to remember that.

Actually the price of the kit isn't too bad considering all you get. The Rupes polishers are considered state of the art, both noobs and pros can use them.

If that's a little above what your willing to spend you can get a DA polisher, pads, and polishes all separately. Only thing is, there is so many good products out there, there are an infinite number of combinations and recommendations. Its hard to make a decision what to get, because ten different guys will give you 11 different recommendations.

One way to go about it it pickled a car care line, and just decide to use all of your products from that line. BlackFire, Optimum, Megiuars, CarPro, Chemical Guys, etc... All make a line of most of the products you will need (minus the machine).

Good luck, and don't forget to post pics!


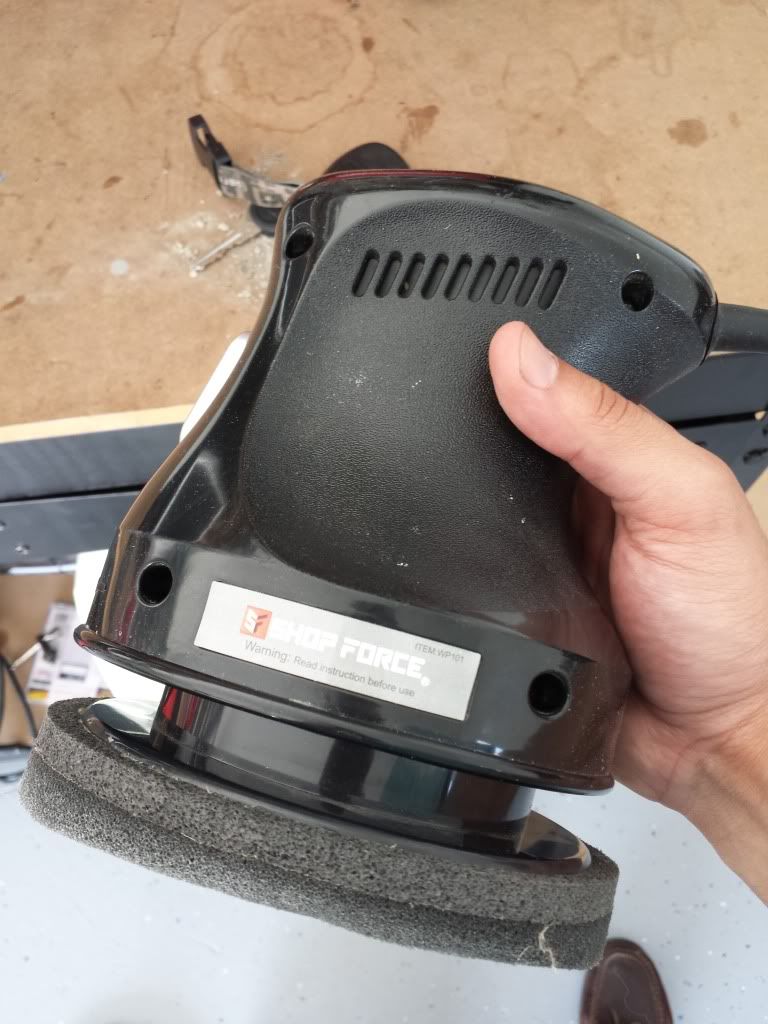
Thanks for all your answers guys....also I found this in my garage cabinet could I use this? Or is it laughable and probably do more harm than good? lol


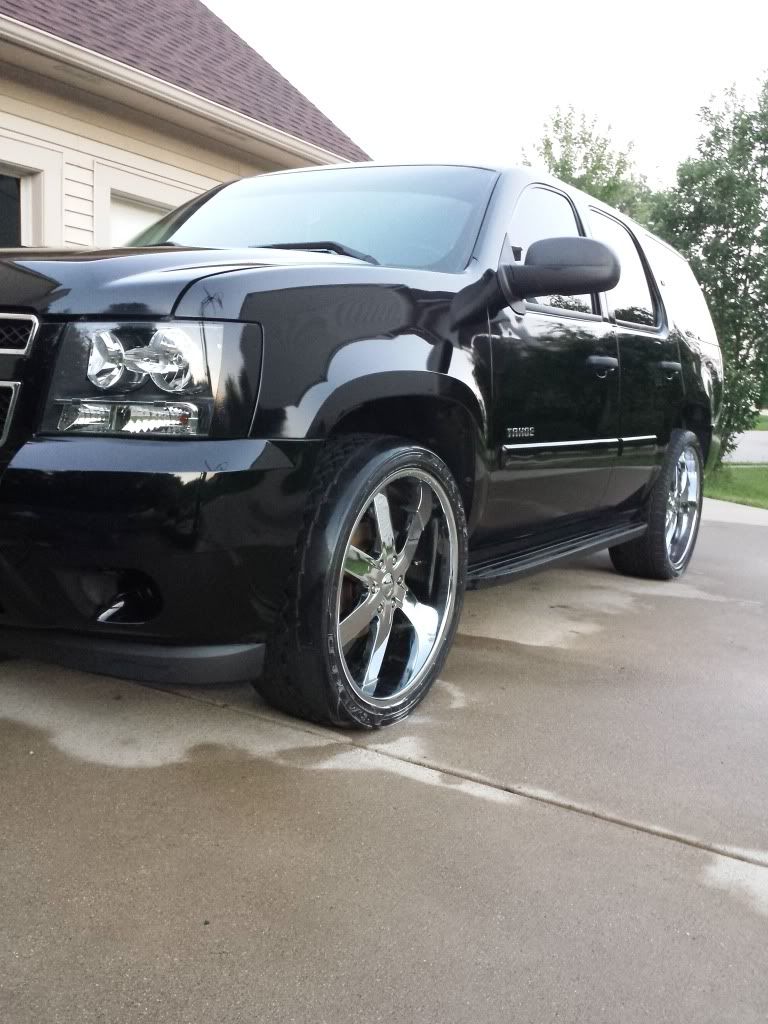
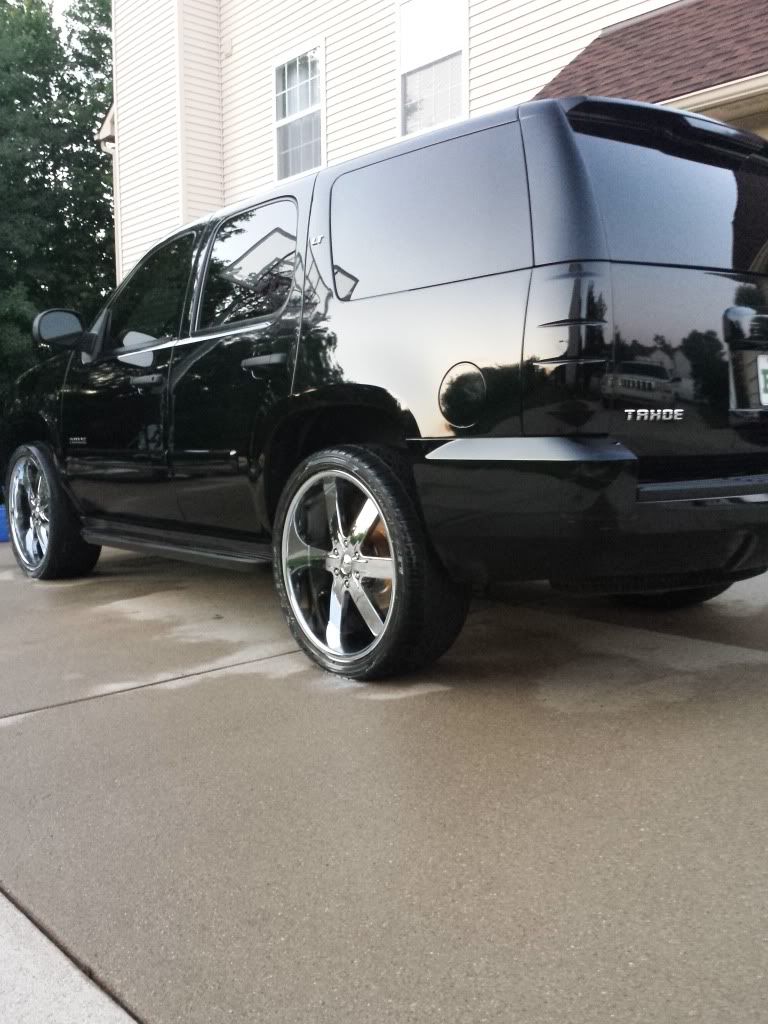
Also heres pics of the truck, as of a week ago. (Yes the horrible worn front drivers side tire has been replaced lol)


That's just a random orbital polisher or better known as a wax spreader. You can use that to apply your wax if you like.
 
Hi, and welcome to the forum.

A very nice looking SUV. As you can see from my Avatar, I've a Tahoe myself.

The little Orbital "Waxer" you illustrate is not totally without some worth, and use. They can save the hands a good amount of wear and tear, can save some time when waxing, making shorter work of both applying, and removing waxes, cleaner waxes, glazes, and will offer a very slight limited amount of correction to the paint. But usually not enough, and that's where they fall short.

This will depend on a few factors, such as what products being used with it, the time you wish to spend per panel.

But they are hampered by poor rotation, just not enough power to be a efficient tool for paint correction processes.

I came to that conclusion back in October when I joined this forum, and I'll explain what I did. I do have similar machines to like the one you illustrate, plus a good Milwaukee Rotary Buffer-Polisher, but knew very quickly I needed to step up my variety of tools, and step into the 21st century. A rotary machine is a good tool, but one can into trouble quickly, burn, and do irreversible damage to the paint. The D/A machines are much more gentle, and forgiving.

Meaning, I needed a good D/A Polisher. My choice was the Porter Cable 7424XP, and I am happy with it. The 3rd generation Griots Garage D/A is also highly liked, is slightly more powerful than the PC Machine, and with a lifetime warrantee, it probably is the best one to get, and basically a no brainer.

You made mention of having your paint, and vehicle looking the best it can. This can be accomplished with a D/A machine. With this type of machine, the right chemical products, and techniques, this will be the best, and safest way to do it.

My recommendations, would be the 6" Griots with a 5", and 3-1/2" Lake County Backing Plates, a good assortment of 5.5", and 4" Lake County Flat Low profile Pads. The colors Orange, White, and Blue or Red will cover all basic bases. I would suggest having 1/2 dozen of each in the 5.5" size, and perhaps a few of each in the 4" size.

The smaller size backing plate, and pads will be a huge aid to polishing bumpers, roof pillars, around mirrors, and other smaller areas, like the roof in between protective runner strips, roof racks, etc.

The Wolfgang Twins (Total Swirl Remover and Finishing Glaze) are great products, easy to use, I like them. Other Polishes such as Menzerna FG400, and or Meguiars 105 might be good to have on hand as well to deal with possible deeper scratches-marring.

Again, a nice sealant, such as Wolfgang, Duragloss, Menzerna, Blackfire, are all superb, offer extreme gloss-reflectivity, and are all long lasting-durable products.

Throw in some good quick detailer sprays, a few good hand applicators, a good quantity of good quality Microfiber Towels, and other ancilliaries like Pad Cleaning products, interior-exterior trim protective products, which there are many greats ones here on the site, and you'll be basically all set to extract the very best from your vehicle.

You'll probably be around or near the $500 mark, but you'll look back, and say the purchases were worth every penny. I know this vehicle you have cost some good dollars, they deserve good quality products, and the time spent to make them look their best, and to protect them to maximize your costly investment.

Again, welcome, and enjoy the forum, I think you'll like this place a lot!
I sure do!
Mark
 
Here is one of me sealing, it can be done by hand amd you're choice of sealant but I really love Griot's

[ame=http://www.youtube.com/watch?v=9bFRmanvLhI]Sealing my car - YouTube[/video]
 
Here is one of me sealing, it can be done by hand amd you're choice of sealant but I really love Griot's

[ame=http://www.youtube.com/watch?v=9bFRmanvLhI]Sealing my car - YouTube[/video]

Subscribed to your videos HateSwirls
 
My recommendations, would be the 6" Griots with a 5", and 3-1/2" Lake County Backing Plates, a good assortment of 5.5", and 4" Lake County Flat Low profile Pads. The colors Orange, White, and Blue or Red will cover all basic bases. I would suggest having 1/2 dozen of each in the 5.5" size, and perhaps a few of each in the 4" size.
Mark

Which 4" pad is this? I'm trying to find one comparable to the LC 5 1/2" flat and all I find are the hydro-tech and a CSS 4"spot buffing pad.

Lake Country Hydro-Tech 4 x 1.25 Inch Foam Pads, Hydro Tech Foam Buffing Pads, spot polishing pads, pads for water based polishes
Spot Buffing 4 inch pads, Lake country 4 inch pads, 4 inch foam pads, 4 inch ccs pads, ccs foam pads

Thanks.
 

I have those LC Hydro Tech, and CCS Pads you mention. They're fair in the realm of things, and why that AG-Autopia, and others don't open their mouths, since they buy truckloads of these pads, and come out with regular flat low profile pads in sizes that we want, I have not a shred of an idea?

This has been discussed time and time again here, and nothing materializes, NADA! Come on Mike!

As for a 4" flat Pad, that you can usually easily get, and is a match made in heaven with the LC 3.5" Backing Plate?

The 4" Megs Power DA Pads. Many Wally Worlds sell them, Autozone, etc etc. They come in three flavors, burgundy, yellow, and black. Slip one of these on, and you'll ask youself, where the hell has Lake County been filling this niche?
 
The four inch pad you see me using is an Adam's pad.
Chemical Guys also has them and cheaper:xyxthumbs:


It sounds like you need a polisher. The steps basically are as above. Only thing I can add to that is prior to claying, you may want to use an iron decontamination product on the paint and wheels, like IronX. This will remove any iron stuck in the paint from the environment. Iron in your paint? Sounds crazy, but its actually pretty common.


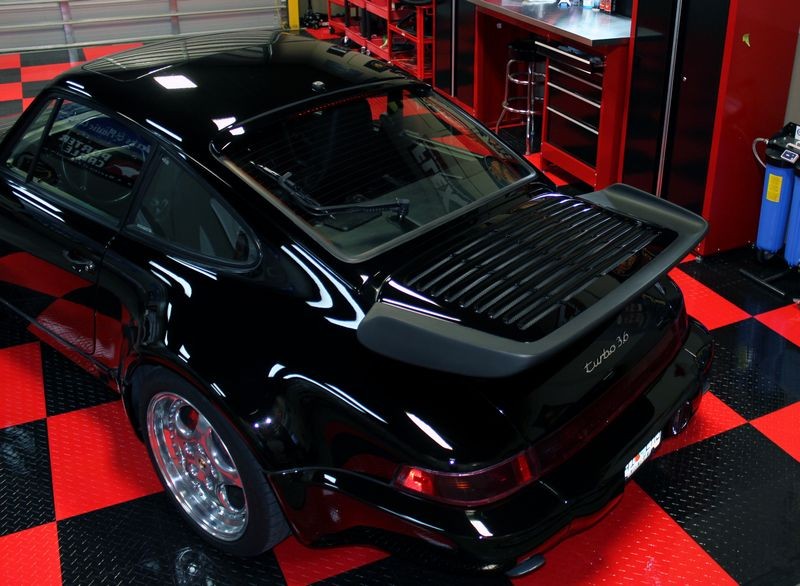
Here's what he's talking about on a very rare black Porsche...

1994 Porsche 964 Turbo 3.6 - Modeled by Janna and Amy


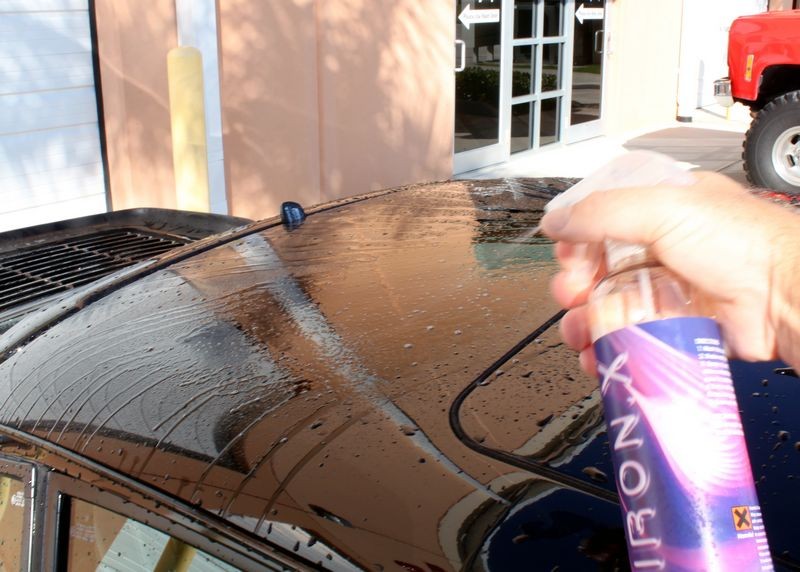
Next up... decontaminate the body panels using Iron X
94PorscheCTW19.jpg


94PorscheCTW20.jpg


After allowing the product to dwell for a few minutes I gently re-washed the paint and then rinsed all the residue off...
94PorscheCTW21.jpg


First step was to remove swirls, water spots and scratches, for this we Used Wolfgang Total Swirl Remover with Hydro-Tech Tangerine Polishing pads followed by Wolfgang Finishing Glaze using Hydro-Tech Crimson Finishing Pads.


94PorscheCTW36.jpg


Done...

94PorscheCTW47.jpg


You may want to buy some brushes to clean your wheels, as spotless wheels really make a car standout. I'd recommend at least a Daytona Brush and a Montana Boars Hair Wheel Brush. But it is possible to clean wheels without special brushes well, it just takes longer.

Actually did the wheels and tires first on the Porsche above, I explain why to wash wheels and tires first in my how-to book.


First up... wash the wheels and tires... soft Boar's Hair Brush, lug nut brush and Wolfgang Tire and Wheel Cleaner
94PorscheCTW08.jpg


The Lug nut brush works really well for cleaning the barrels
94PorscheCTW09.jpg


Bristles are flexible to get into intricate areas and agitate cleaner with roadgrime and brake dust
94PorscheCTW10.jpg


Daytona Speedmaster Wheel Brush for getting behind the wheel and into tight areas...
94PorscheCTW11.jpg


First wheel cleaned and rinsed...
94PorscheCTW12.jpg


Sprayed on Iron X and let dwell, as you can see the wheels were actually pretty free of any iron contamination... that's a good thing although I know everyone wants to see a lot of color running off the rim... (that would mean the wheel was in fact embedded with iron filings.
94PorscheCTW13.jpg


After agitating I rinsed...
94PorscheCTW14.jpg


Perfectly clean and contamination free... I repeated the same procedure to the other three wheels and tires...
94PorscheCTW15.jpg


If you want to keep it simple (but not cheap) I would get one of the Rupes polisher kits. I say this because they make the polisher, pads, and polishes all to work together. They even make what to use with what the same color (pads & polish lids) so you don't even have to remember that.

Actually the price of the kit isn't too bad considering all you get. The Rupes polishers are considered state of the art, both noobs and pros can use them.


Complete overview of the Rupes system here,


The RUPES LHR21ES Random Orbit Polisher and Polishing System by Mike Phillips


RUPES COMPLETE PAINT POLISHING SYSTEM

RUPES offers a complete polishing system to go with their polishers including 4 different liquid with color matching caps to go with forum different foam buffing pads offering different levels of aggressiveness or non-aggressiveness.

Rupes_21_027.jpg


RUPES Bigfoot Polishing System at Autogeek.net
[video=youtube_share;IoganIRQcHU&hd=1"]RUPES Bigfoot Polishing System at Autogeek.net -...[/video]​


[video=youtube_share;P7q-a9P7xZg&hd=1"]RUPES Bigfoot Polishing System at Autogeek.net -...[/video]​


This has been discussed time and time again here, and nothing materializes, NADA!

Come on Mike!

Hi Mark,

Do you have a copy of either edition of my how-to book?

If so, see page 78 on the first edition, the blue text recommendation and in the new, second edition, see page 91.

Detailing How-To Book and Detailing How-To E-book by Mike Phillips


:xyxthumbs:
 
Back
Top