The Marble or wrinkle effect...Pics inside

bbcivic

New member
Joined
May 1, 2009
Messages
14
Reaction score
0
Hello everyone from auto geek, i dont know if this post belongs here but i wantd to ask/show u guys something.

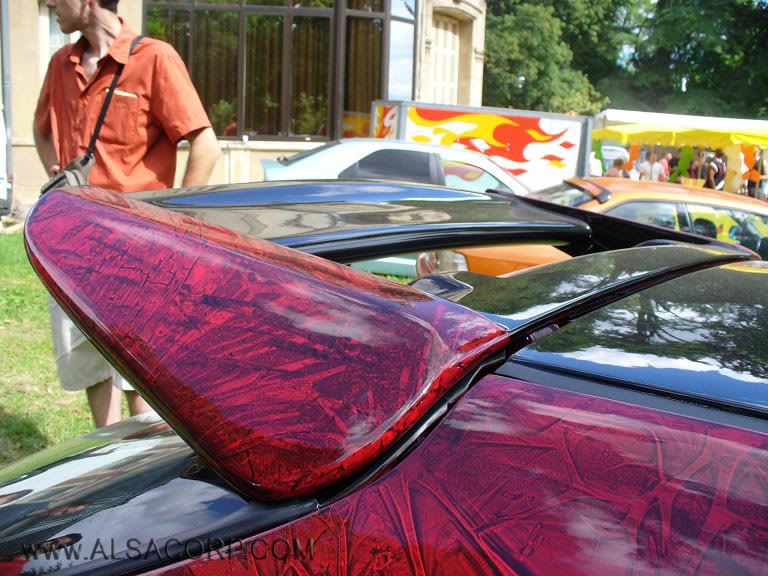
I went to a car show on saturday and i saw this 99 honda civic with this amazing paint job
heres some pics of it

l_cea1c404adfb4469868bb13cce96f5ed.jpg


l_cea1c404adfb4469868bb13cce96f5ed.jpg


l_cea1c404adfb4469868bb13cce96f5ed.jpg


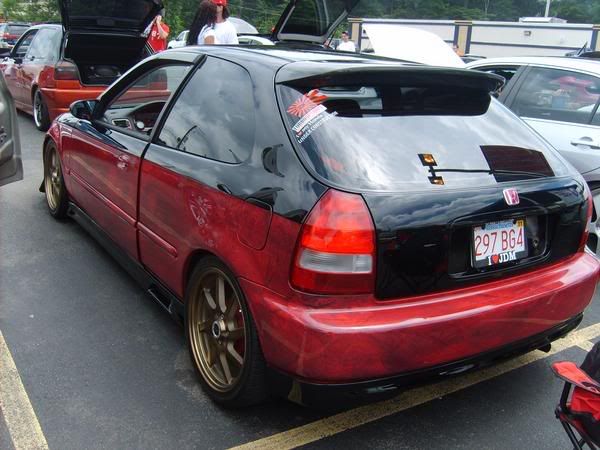
i started doing some research based on what he told me which was, u lay down a base coat then u lay a wet color coat, and b4 the color or top coat starts to cure u take a plastic bag and u lay it on top,then mess with and lift the bag up and there u have it,well i tryd it myself and i dont have pic of my first few attempts but im starting to get it, but i cant match it up to his though, his paint ob looks more of a blend but this is what i got

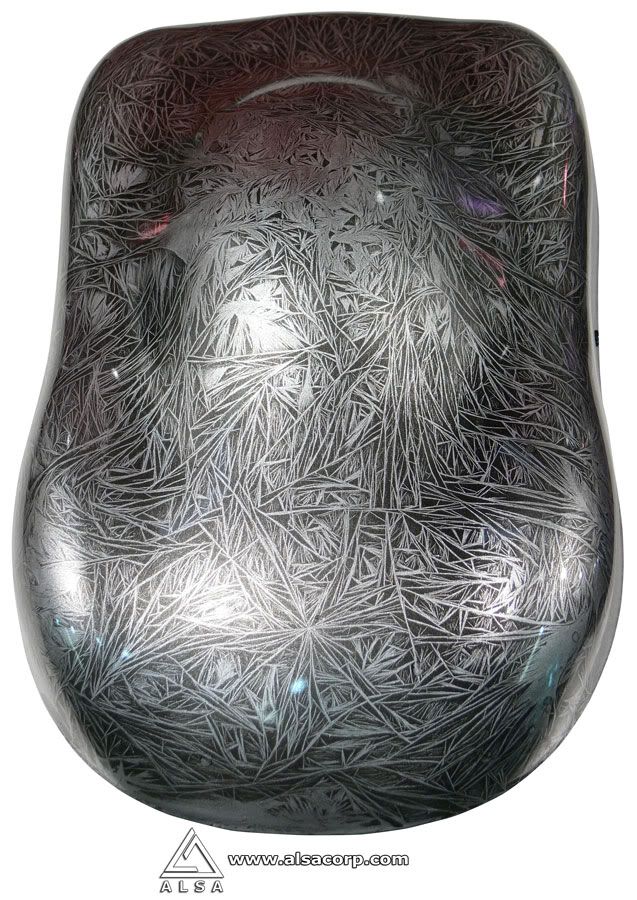
base with color coat on top already hit with the bag
1245866117390.jpg


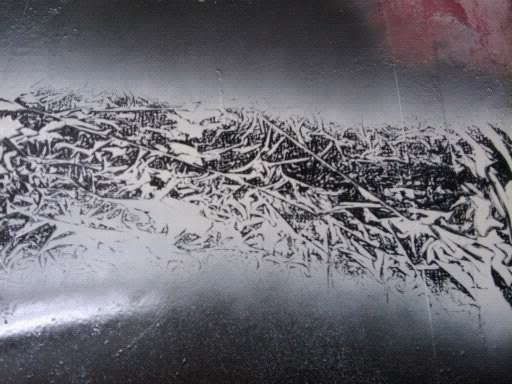
and this is applying the color over the bag wrinkles
1245866301590.jpg


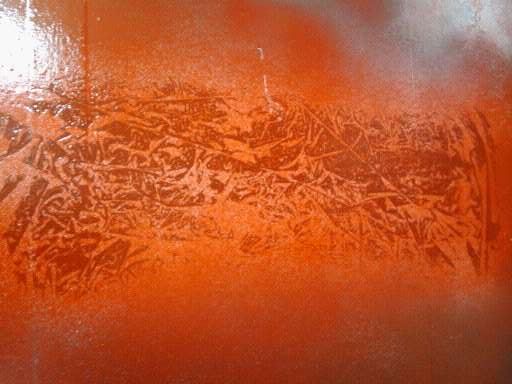
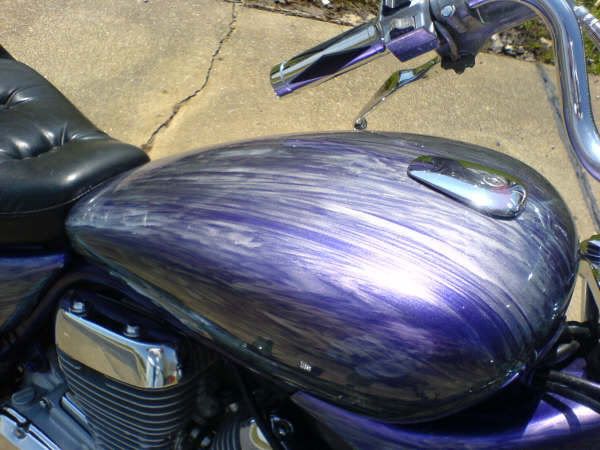
but the wrinkle effect dosnt look like his car's paint job at least to me it dont, anyone know how to do that type of job? any write ups or possible sites because i tryd looking and nothing came up.
 
I saw this on one of those Speed TV shows, maybe Pimp My Ride or something. They used saran wrap , kinda cool.
 
It is possible that he sanded out some of the paint after the paint dried after the bag was applied. That would make the detail look less pronounced. I would try that, if I were you.
 
id give that a go, but what do u guys think of that style of paint ? if u guys saw that how i did,not what the red civic has, which one would be more impressive ??

also do u guys know the name of that type of paint job?
 
id give that a go, but what do u guys think of that style of paint ? if u guys saw that how i did,not what the red civic has, which one would be more impressive ??

also do u guys know the name of that type of paint job?
I think it could look really great if you put the wrinkle in a pearl metallic and you went for a look that was in between your work and the Honda. The Honda is just a bit drab, while yours has a little too much detail. I would try to reduce your detail by 20% and see how it looks. You could try sanding it out to 50%, too. A wrinkle effect in a gold or silver base with a coat of Alsa's Prizmacoat, topped with a candy of your choice would look REALLY impressive. You would have the basic gold or silver marble look, with the color shifting prismatic effect of the Prizmacoat, topped with a candy offering really deep color and richness. It could look awesome. However, that kind of custom painting would really only be right for a show car, or one that goes to parades or hardly gets driven at all, because matching the paint when you touch up paint chips will be impossible, and seriously detract from the paint's appearance.
 
Last edited:
yea thats 1 huge problem, tuching it up because thats all people would stare at.

For this paint job u have to apply a candy color ontop right? and when u guys say to reduce by 25% to 50%.

By sanding the dryd wrinkly layer it would bring it back to its base color right? then when i hit it with the candy color it should all look fine? or would i still see the scratches from the snading?

When you sand the dried wrinkle layer, it will reveal more of the base color layer, yes. You don't have to sand it evenly. You can sand just those sections you want to deemphasize.
To be clear, you will need a base color, a color you will spray on top of that to use as the wrinkle finish, which you will sand away to the base color to get it to the level of subtlety you want. The more you sand away, the more of a ghost the wrinkles will look. You can use any two colors you want for these coats that you want. Solid, metallic, pearl, or metal deposition, which would require a special clear on top of the base color, before the wrinkle coat. After the wrinkle coat, you can use a prismatic coat that can color shift depending upon the angle, if you so desire, which will still maintain the look of the wrinkles that you have achieved. Then, you add the candy layer on top of all of this.

You COULD put clear on top of all of this, but remember that the depth of the shade candy coat will be determined by it's thickness. There is only so much paint you can put on a car before it will crack like a dry riverbed in a few months.
Needless to say, you want to practice refining your technique on scrap parts before you paint your own car. Painting like this involves a learning curve, but once you get the hang of it, you can produce very rewarding results.
The best thing to do is to experiment, and see what you like. You might produce something totally new that can really impress people. There is even glow in the dark paint and paint that changes color with temperature, too, as well as paint that feels like suede or skin.
Custom paints have come a long way in the past ten years. The metal deposition paint looks just like polished metal, almost like chrome plating. You can put candy on that, and then have a gold metal, red metal, or whatever colored metal base coat. The possibilities are practically without limit.
 
Hello

That paint is called "Crazer" and you can see it at this next link...
Alsa Corp | Crazer: Product Information

The way to do that is with the plastic wrap, yes....but you are getting very sharp lines to your pattern.

You can get the more "flowing" look to the paint by taking the plastic wrap off sooner.

If you let the Crazer dry completely, and then take off the wrap, you get those sharp, distinct edges.

If you remove the plastic wrap right away after applying it, the paint will "flow out" a little bit, and the edges will soften.

This car looks as though he did not "crinkle" the wrap at all....but rather, left it pretty flat, and just sort of squished it around a bit.

I hope that helps!

Regards,

[email protected]
 
Thanks for the tip man, i check that site out and they sayd that u can use diff texturing tool what else could u use besides a plastic bag to make a design,heres the link

but what do u guys think i can use to get the effects like those on this website pic gallery

I just did a sheet of metal and it looks really good, i think im geting the hang of it, ill post pics of it tonight
 
Hello

Well, I have seen ALL KINDS of "texturing tools".

Combs, brushes, sponges, Etc..... ANYTHING that will leave a texture behind in the paint. You can get pretty creative with that part right there. LOL

That purple motor cycle in the link you provided. was done by brushing the wet crazer, and leaving those streaks in it. Like with a large soft brush.

If you are the experimental type.......you will like get some REALLY unique results from time to time, experimenting with different items for texture.

I know of one person that rolled a large branch across the surface, and left the impression of the BARK in the paint.

Glad to hear you are getting the hang of it. Please let us know if you need any assistance.

Glad to help.

Regards,

[email protected]
 
man thanks for the help, the info is great, but just one question.

once u get the design on the top coat do u have to cover it with a candy color??

from the 2 video's that i seen (i guess not too many practice this effect)they have a black base, and white base with the texture on the black base and they hit it with a candy color and seal it up with the clear

is that you must do it? or could u just reduce those steps to just base with base texture and clear??
 
Hello

No, you do not HAVE to use candies. You can just top coat with a regular clear.

When you put a candy over it, it changes all the colors usually. Like a red candy over a green Crazer.....now that green looks blue. Red + Green = Blue.

So, it can get a bit tricky trying to reverse engineer some of these candy jobs. Very hard to say for sure what the true color is, under all that candy.

As for the base, you can use ANY color you want. All you are doing is creating a contrasting pattern between 2 colors. The base coat color, and the Crazer color.

We shoot all the Crazers here over black because all colors stand out well against black, and we are trying to show the specific Crazer colors.

Let me know if you have more questions.

Regards,

[email protected]
 
WOW Garyp, thanks for the info man, im just re-cap to see if i got all of it.

You could use any base coat but black tends to bring out the pattern on the top layer, and the top layer which has the pattern which i been calling the marble/wrinkle effect is really called the crazer effect right.U can use any color u want for the pattern layer as you not limited to just white (well for my case).

I think i got it :) but there is 2 questions though...

1.why use candy color? dos it give a deeper pattern look? and for candy colors u have to use a white pattern layer so that the candy could take effect?

2.For the pattern layer, iv experimented with a plastic bag but some members from this forum have told me that u can also use other items to create a patten layer, but i was wondering what do u guys use?

im interested in learning for myself, how could i do these effect...btw i got these pics off of alsacorp.com

what material would u use to create this effect
1-1.jpg


this is also a great design pattern
11.jpg


have no clue what could create this effect
2-1.jpg


this looks like the bag trick that im trying to get
7.jpg


and this looks like a brush was used
6.jpg


could this be air brushd? looks like water drops
4.jpg


but thats about it, do u know how these patterns where created ? and also is there any other patterns ?
 
any idea on how these are created? because mines look very boring??
 
any idea on how these are created? because mines look very boring??
Looks like the guitar might have been made with an inflated plastic bag, smooshed against the paint. Looks like the gas tank was made by dragging something across it, like a towel or something.
 
yea, i agree on both, im going to try next the inflated bag n see how that comes out, any other idea's
 
Hello

All of those pictures were done with plastic, yes.

Except for 2 of them.

The metal looking one, with the criss-cross pattern, was actually done using a product called "CrystalFX" that has been discontinued.

The other one....the Blue one that looks like brush strokes....actually is brush strokes.
They just used a large brush, and "brushed" those streaks into the crazer.

Regards,
[email protected]
 
The Blue hood is plastic wrap also.

By now you should be seeing that there are a LOT of different looks from the plastic wrap method.......this all has to do with how much or how little that you "crinkle" the wrap.

To me....that blue hood looks like they did not really crinkle the wrap at all, but just sort of draped the plastic over the piece, and then just sort of pressed it down in a few places.

I think that has a blue candy over it also......If i had to guess, I would say that it a black base coat, with silver Crazer over it, and a blue candy over that. I am 90% sure on that.

Regards,

[email protected]
 
Back
Top