Mike Phillips
Active member
- Dec 5, 2022
- 51,004
- 6
Tips and Tricks for using detailing clay
The below is taken from a full write-up on detailing a 2008 Lexus IS 250 To read the entire article, click the below link.
2008 Lexus IS 250 - Pinnacle Detail - August 14th, 2009
Begin excerpt...
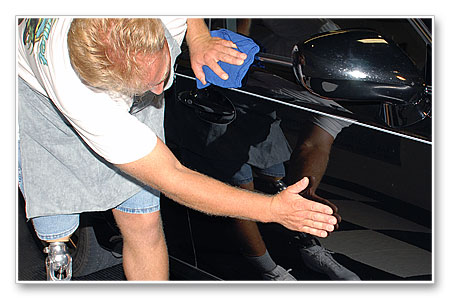
Now that the car is clean and dry we can inspect the paint by feeling the horizontal surfaces for above surface bonded contaminants as well as inspect it visually for defects like swirls, scratches and etchings.
Usually only the horizontal surfaces need to be clayed because that's where air-borne contaminants will land and accumulate over time and if not removed within a day or two, at least some contaminants will bond to the surface.

You can if you like inspect the vertical surfaces too as it is possible to accumulate contaminants like air-borne paint overspray, highway paint, tar and tree sap on these panels.
Inspection Results
After feeling all the major panels, our inspection revealed that there was only light contaminants bonded to the surface and nothing real noticeable on the vertical panels so we'll clay the horizontal panels using the Pinnacle Ultra Poly-Clay which is a very mild clay completely safe for frequent use on cars that are well kept and parked inside or under cover at least part of each day.
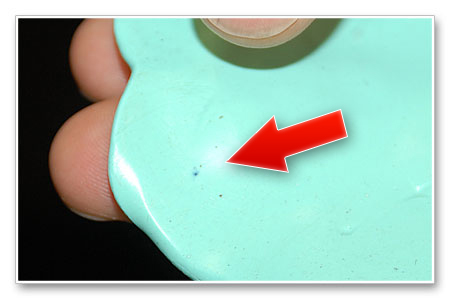
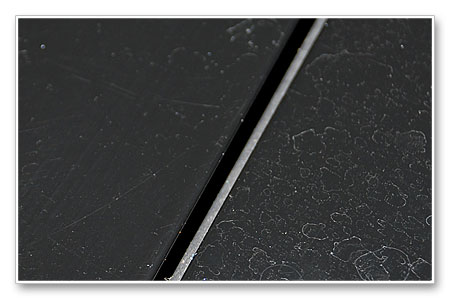
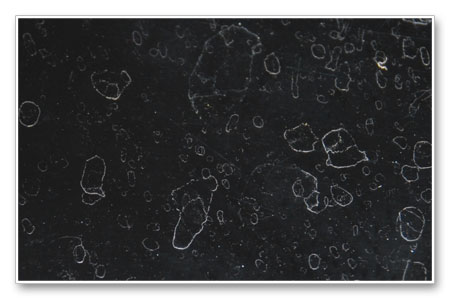
After inspecting the paint for above surface bonded contaminants we visually inspected the paint for swirls, scratches and etchings. These two photos were taken before the car was washed and most of the spots you see on the paint are mineral deposits sitting on the surface as well as some scratches (RIDS), and light swirls.

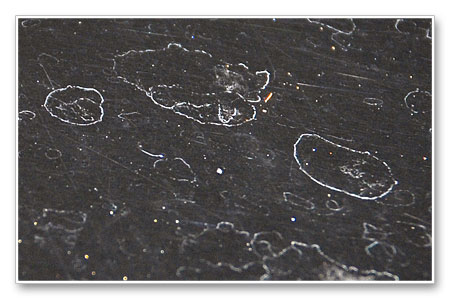
(Down below I'll post what this area looked like after claying)
After washing the car, most of the mineral deposits washed off but some did remain and claying will remove any mineral deposits still sitting on top the surface. If after claying you still see the outline of where the spots were this means the water spots actually etched the surface which means the spots are also a Type II water spot and you'll have to use a compound or swirl mark remover to remove a little paint surrounding the etchings or spots to level the surface smooth again.
Pinnacle Ultra Fine Detailing Clay can be purchased as a single 4 ounce clay bar or two 4 ounce clay bars. 4 ounces is approximately 114 grams which is very healthy chunk of clay that you can easily break into two pieces. Use one piece and save the other for another project.
Remove the cellophane wrapper

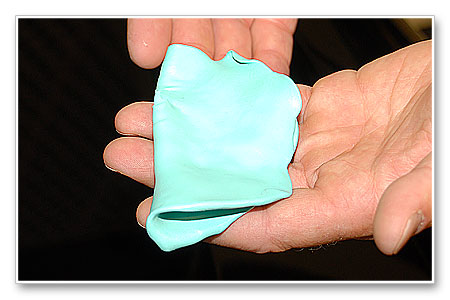
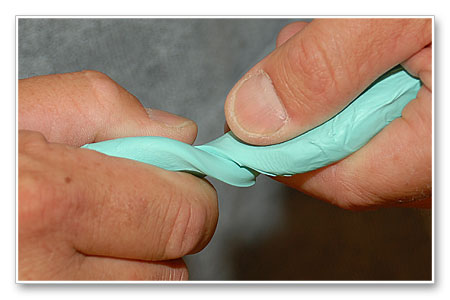
Tear the clay bar into two pieces
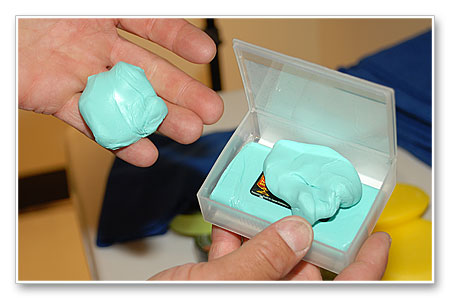
You can store your clay in the plastic container it comes in or some people like to squirt a little quick detailer into a Zip-lock baggie and store it this way as the clay can stick to the plastic container over time.
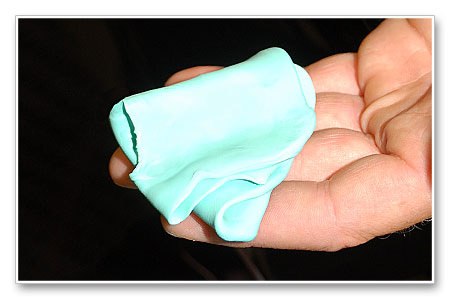
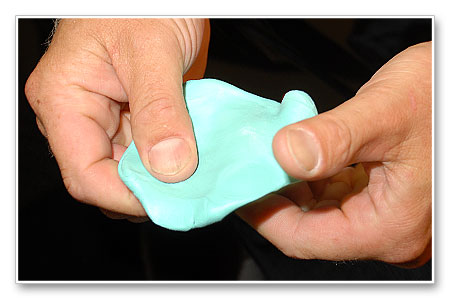
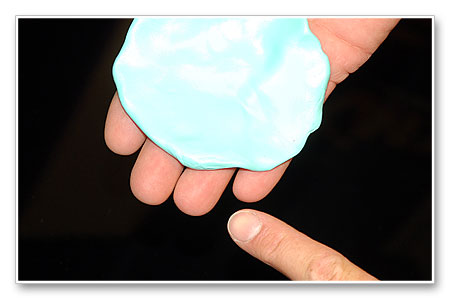
Knead the clay into a flat patty kind of like a small pancake
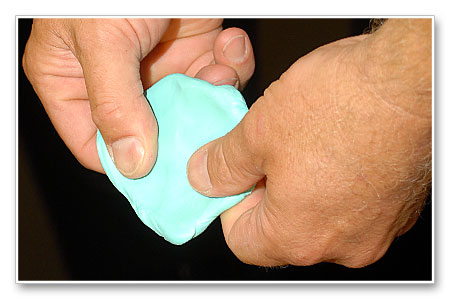
Usually a round patty of clay about 4 to 4.5 inches in diameter works well for most people.

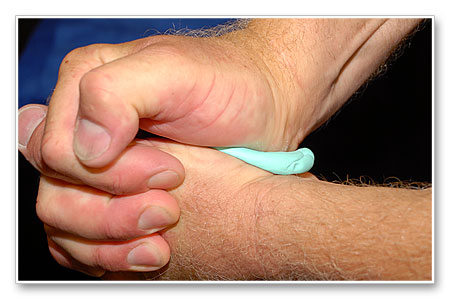
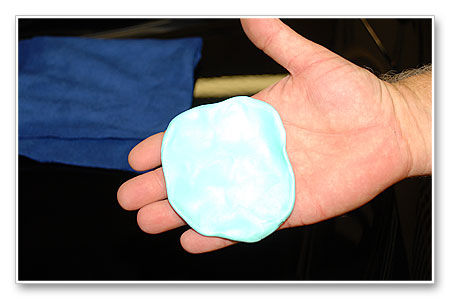
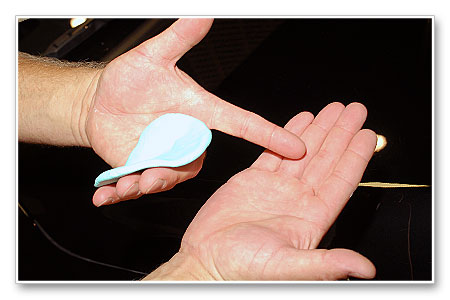
Here's a tip, place the clay patty in you hand with your fingertips extended past the edge of the patty like, I'll explain why down below.
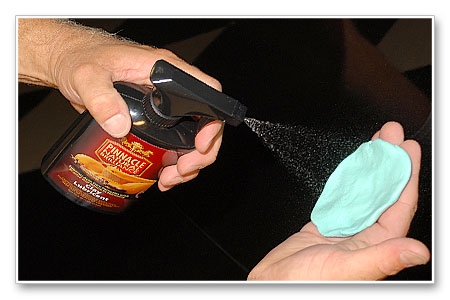
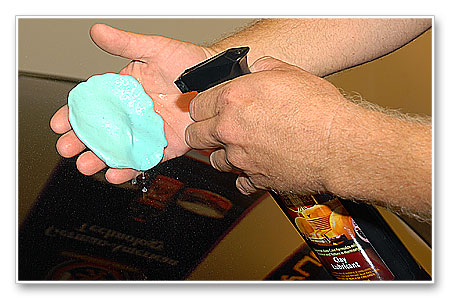
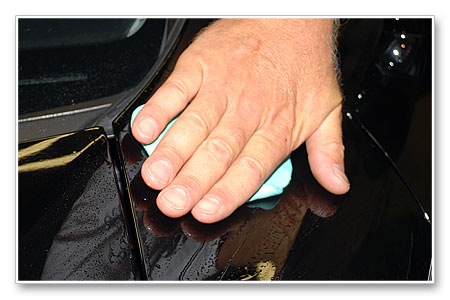
When you're ready to start claying, first mist your clay lubricant onto the face of the clay patty, in this example we're using Pinnacle Clay Lubricant.
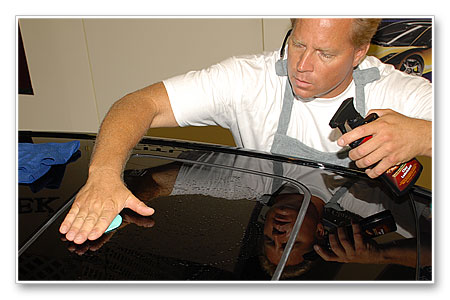
Next, spray the section you're going to clay, this is usually a section about 16" to 20" squarish in size, you don't want to tackle too large of an area at one time because you want to be thorough in your claying passes, so stick with a manageable section.
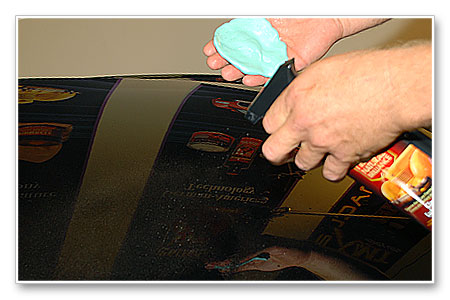
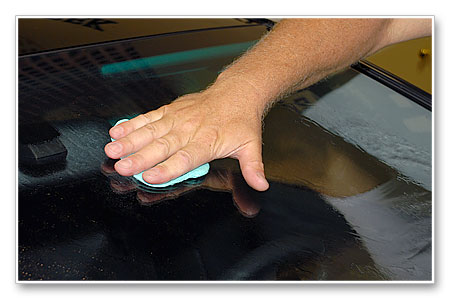
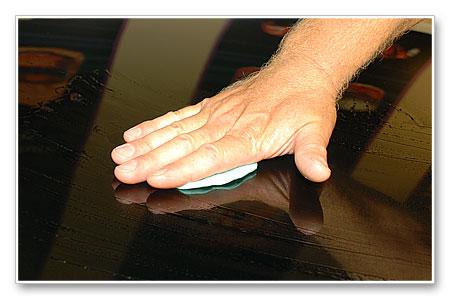
Next, using light pressure for a light light build-up of contaminants, begin moving the clay patty over the paint. You can move your hand in straight-lines or circles or a combination of both if you like. Because this detailing clay is non-abrasive to the paint, as long as everything is clean, it doesn't matter which way you move your hand because you're not instilling scratches into the paint.
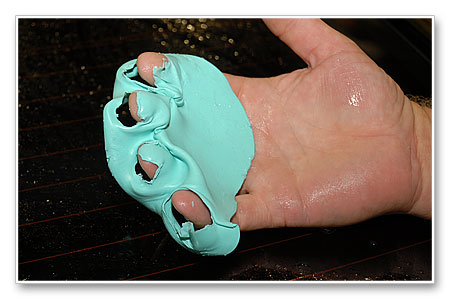
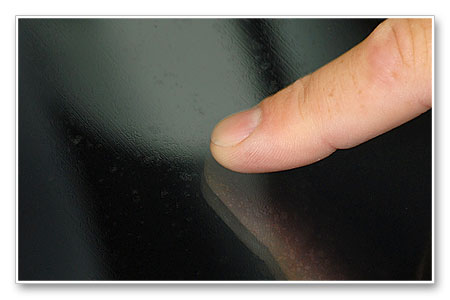
In some cases you will feel the clay try to drag as you move the clay patty over the surface, this is and indicator of the clay abrading the contaminants. As the clay removes the bonded contaminants you'll notice a decrease in drag and the clay will begin to glide effortlessly over the paint. This is an indicator that this section of paint is now clean and smooth and you can stop at this time.
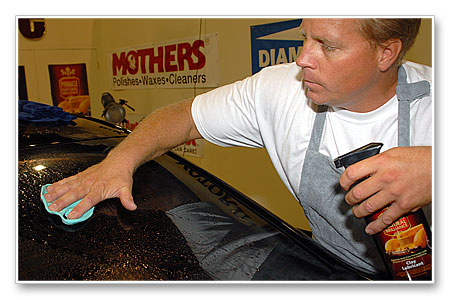
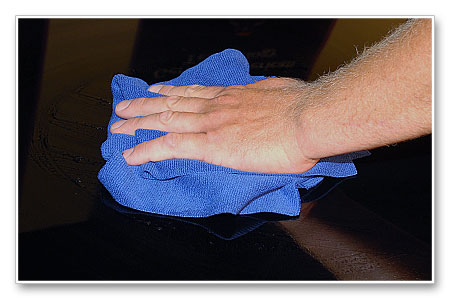
After you're finished claying this section, wipe-off the excess residue from the surface before moving on to new territory. This means having a few clean microfibers on hand and someplace clean and accessible next to the car.
After you wipe the section clean and it's dry, check the surface with a clean dry hand to insure it is in fact smooth and glassy feeling, if it is, try to remember how long you clayed the section or approximately how many strokes you used and then lock this into your memory and duplicate this to each new section you clay. Keep in mind that some bonded contaminants are more stubborn than others and may take more effort to remove or a more aggressive clay formula.
Repeat the above until you've clayed all the panels that felt contaminated wiping the clay lube residue off after claying each section.
")
The below is taken from a full write-up on detailing a 2008 Lexus IS 250 To read the entire article, click the below link.
2008 Lexus IS 250 - Pinnacle Detail - August 14th, 2009
Begin excerpt...
Now that the car is clean and dry we can inspect the paint by feeling the horizontal surfaces for above surface bonded contaminants as well as inspect it visually for defects like swirls, scratches and etchings.
Usually only the horizontal surfaces need to be clayed because that's where air-borne contaminants will land and accumulate over time and if not removed within a day or two, at least some contaminants will bond to the surface.
You can if you like inspect the vertical surfaces too as it is possible to accumulate contaminants like air-borne paint overspray, highway paint, tar and tree sap on these panels.
Inspection Results
After feeling all the major panels, our inspection revealed that there was only light contaminants bonded to the surface and nothing real noticeable on the vertical panels so we'll clay the horizontal panels using the Pinnacle Ultra Poly-Clay which is a very mild clay completely safe for frequent use on cars that are well kept and parked inside or under cover at least part of each day.
After inspecting the paint for above surface bonded contaminants we visually inspected the paint for swirls, scratches and etchings. These two photos were taken before the car was washed and most of the spots you see on the paint are mineral deposits sitting on the surface as well as some scratches (RIDS), and light swirls.
(Down below I'll post what this area looked like after claying)
After washing the car, most of the mineral deposits washed off but some did remain and claying will remove any mineral deposits still sitting on top the surface. If after claying you still see the outline of where the spots were this means the water spots actually etched the surface which means the spots are also a Type II water spot and you'll have to use a compound or swirl mark remover to remove a little paint surrounding the etchings or spots to level the surface smooth again.
Pinnacle Ultra Fine Detailing Clay can be purchased as a single 4 ounce clay bar or two 4 ounce clay bars. 4 ounces is approximately 114 grams which is very healthy chunk of clay that you can easily break into two pieces. Use one piece and save the other for another project.
Remove the cellophane wrapper
Tear the clay bar into two pieces
You can store your clay in the plastic container it comes in or some people like to squirt a little quick detailer into a Zip-lock baggie and store it this way as the clay can stick to the plastic container over time.
Knead the clay into a flat patty kind of like a small pancake
Usually a round patty of clay about 4 to 4.5 inches in diameter works well for most people.
Here's a tip, place the clay patty in you hand with your fingertips extended past the edge of the patty like, I'll explain why down below.
When you're ready to start claying, first mist your clay lubricant onto the face of the clay patty, in this example we're using Pinnacle Clay Lubricant.
Next, spray the section you're going to clay, this is usually a section about 16" to 20" squarish in size, you don't want to tackle too large of an area at one time because you want to be thorough in your claying passes, so stick with a manageable section.
Next, using light pressure for a light light build-up of contaminants, begin moving the clay patty over the paint. You can move your hand in straight-lines or circles or a combination of both if you like. Because this detailing clay is non-abrasive to the paint, as long as everything is clean, it doesn't matter which way you move your hand because you're not instilling scratches into the paint.
In some cases you will feel the clay try to drag as you move the clay patty over the surface, this is and indicator of the clay abrading the contaminants. As the clay removes the bonded contaminants you'll notice a decrease in drag and the clay will begin to glide effortlessly over the paint. This is an indicator that this section of paint is now clean and smooth and you can stop at this time.
After you're finished claying this section, wipe-off the excess residue from the surface before moving on to new territory. This means having a few clean microfibers on hand and someplace clean and accessible next to the car.
After you wipe the section clean and it's dry, check the surface with a clean dry hand to insure it is in fact smooth and glassy feeling, if it is, try to remember how long you clayed the section or approximately how many strokes you used and then lock this into your memory and duplicate this to each new section you clay. Keep in mind that some bonded contaminants are more stubborn than others and may take more effort to remove or a more aggressive clay formula.
Repeat the above until you've clayed all the panels that felt contaminated wiping the clay lube residue off after claying each section.