Mike Phillips
Active member
- Dec 5, 2022
- 51,004
- 6
Topping - Definition - How to Top also called Topping
Note: This is a updated version of the original article I wrote in July of 2004
I don't know when the practice of topping was first started, it could go back as far as the early days of car wax with some guys applying Blue Coral over Simonize or visa-versa, applying Simonize over Blue Coral to squeeze out every little bit of shine possible on their Model T or Model A.
Don't kid yourself, Car Guys are Car Guys whether they were waxing their cars back in the old days or here in the present. If we're doing it now days you know they were probably doing it back in the old days.
Vintage Blue Coral Wax

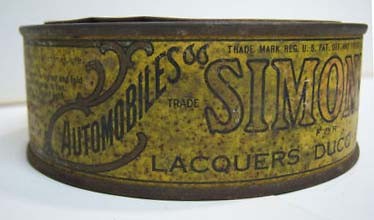
Vintage Simonize Wax
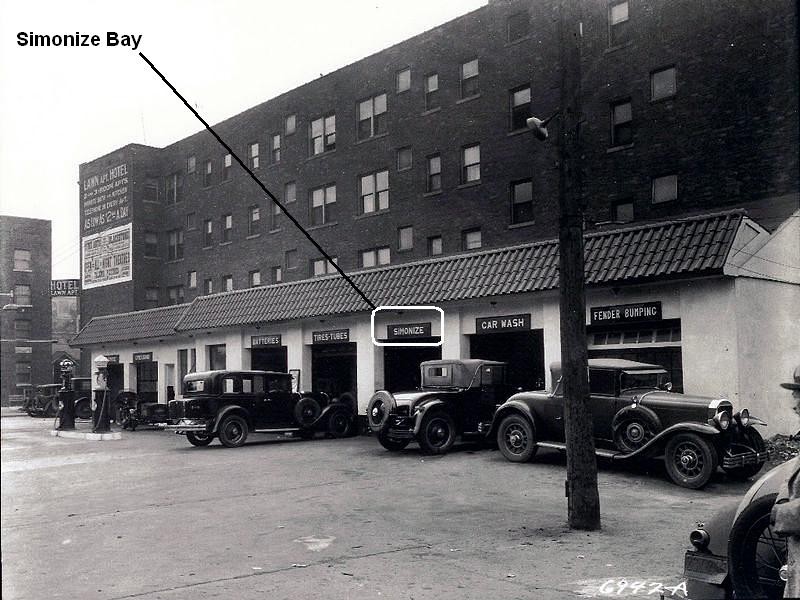
An early car wash and detail shop

An early auto repair shop that offers detailing
Topping in my detail business
I began topping in the early 1990's before the Internet was introduced so I didn't know what I was doing was called topping I just did it because in my brain it seemed to make sense, that is lay down a layer of a long lasting synthetic paint sealant for protection and then over it apply a second coating using a different product to both protect the first layer from wear-n-tear but to also create a true swirl-free, show car finish and depending upon the second product, perhaps create a different look to the end-results.
In my case, I was applying Meguiar's M20 Polymer Sealant first and then topping it with M16 Professional Paste Wax. Whether in reality this practice worked or not I don't know, what I do know is all my work came out looking just like I wanted it to look and that was a swirl-free, show car finish under any lighting conditions.
The tipping point
The practice of topping became popular in the online detailing world a few years after detailing forums came into existence which is around the year 2002 or so for actual GUI software and not Usenet Newsgroups. Point being is that through the ability of discussion forums to quickly spread information to the masses, techniques like jewelling, edging or topping can go from obscurity to mainstream overnight.
Discussion Forums - A relatively "new" invention...
How to correctly top one product with another product
Step 1 - Apply the synthetic sealant
The normal and accepted practice of topping means to first seal the paint using a synthetic paint sealant. Before applying the paint sealant be sure to read and follow the manufactures directions. Some manufactures recommend that their product only be applied after any polishing oils or fillers have been removed and this is done by either washing the car using a detergent car wash soap or by chemically stripping the paint using something like IPA, Mineral Spirits or a dedicated product just for this procedure.
See these two articles for more information on the topic of preparing paint for a synthetic paint sealant, car wax or paint coating.
How to Mix IPA for Inspecting Correction Results
Miscible and Immiscible - Wax and Paint Sealant Bonding
Synthetic Paint Sealant first, Carnauba Wax second
Because the established forum consensus on the topic of wax bonding is that a synthetic paint sealant needs a surgically clean surface in order for the protection ingredients to properly bond, the normal practice of topping is done by first applying the synthetic paint sealant.
Whether it's true or not that the paint must be stripped down to a clean base in order for "all" paint sealants to properly bond is an emotional topic that will start a "Wax War" on a discussion forums if you're not careful. Of course like many procedures related to car detailing, most of what anyone does is due to personal preference and personal opinion.
This is why I state above to follow the manufactures recommendation, not some anonymous form member posting under a fictitious nickname as the manufacture tends to know their product best. Then make your own decision whether or not to chemically strip the paint before applying your choice of synthetic paint sealant.
Since the primary concern at this first step it for the synthetic paint sealant to bond to the paint and there really is no other consideration, it is my personal opinion that it doesn't matter if the synthetic paint sealant, (or hybrid), is a non-cleaning sealant or a pure sealant. It is however important that the second product to be used offers no cleaning ability but it really doesn't matter for the first product.
Step 2 - Allow first product to fully dry or cure
After you have applied your first choice of product, follow the manufactures directions for drying or curing time before moving onto the next step. Some manufacturers recommend a window of time for their protection ingredients to fully set-up and bond to the paint. Some manufacturers use the term crosslinking but we shouldn't use that specific term for all synthetic paint sealants as not all companies share how their protection ingredients do their magic and stick to the paint.
For example I've heard of the term hydrogen bonding as a method that some protection ingredients use to bond to paint.
Step 3 - Remove residue from paint sealant
After the recommended time has passed for your first paint sealant to dry and cure go ahead and wipe any residue off carefully. At this level of the game you want to avoid instilling any toweling marks. Now you're ready to apply your topper.
Step 4 - Test your Topper
If you've never tried topping before and are thinking you would like to apply a topper over your first choice of protection product, here's a friendly tip... test to a small area before your top the entire finish.
Before you apply your choice of a topper over the entire car, first do a side-by-side test so you can inspect and compare the results between the two different sections of paint to ensure that the test area does in fact look better than the first product by itself.
It's possible, your choice of a topper might not improve the appearance results created by the first product but if you apply your choice of a topper to the entire car without comparing, you will never know if your choice of topper improved or dulled the results created by the first product all by itself.
So based upon my experience in topping, I would strongly recommend testing your choice for a topper to one small area before applying to the entire vehicle.
Step 5 - Inspect the results
Now you want to inspect the two areas under different lighting conditions. Different lighting conditions will allow your eyes to see the different dimensions of your finish, such as richness, gloss, shine and clearness or clarity.
View the two areas from different angles, from directly overhead, and with a light source centered in the area, like the sun. You may also want to have some friends compare the two areas also, a second set of fresh eyes may see something you miss, especially after you've been working on the finish and staring at the paint for hours.
After doing this side-by-side comparison test in one small area, your eyes tell you whether or not the paint that has been topped looks worse, the same or better and at this point you can then decide if you want to continue with applying the topper to the entire finish.
Step 6 - Apply your topper to the entire finish
If you like the appearance results created by topping your first choice of product by your topper then the next step is to apply the topper to the entire finish.
Key point...
Unless you test first to a small section and then inspect and compare the results, there's no way to tell if your choice for a topper took the results created from the first product to a higher appearance level, remained the same or for some reason diminished or dulled the results from the first product, so test first.
And that's how you do what's called topping...
Hope this helps...

Note: This is a updated version of the original article I wrote in July of 2004
Topping - Definition
The practice of applying a different type of wax or paint sealant over a first application of a wax or paint sealant to either create a thicker and more durable layer of protection or to create a deep, wet-look shine and normally both.
The normal practice is to apply a synthetic paint sealant first to lay down a long lasting layer of protection and then follow this with an application of a Carnauba Wax to add yet another layer, (of wax), to protect the layer of synthetic paint sealant and to also give the paint the warmth, depth and richness of color that Carnauba waxes are famous for creating in the show car circuit.
Topping requires that the second product not have any type of cleaning agents, be they chemical cleaners, abrasives or even harsh solvents as these types of ingredients will act to remove the first layer of sealant, which would defect the purpose of topping.
I don't know when the practice of topping was first started, it could go back as far as the early days of car wax with some guys applying Blue Coral over Simonize or visa-versa, applying Simonize over Blue Coral to squeeze out every little bit of shine possible on their Model T or Model A.
Don't kid yourself, Car Guys are Car Guys whether they were waxing their cars back in the old days or here in the present. If we're doing it now days you know they were probably doing it back in the old days.
Vintage Blue Coral Wax
Vintage Simonize Wax
An early car wash and detail shop
An early auto repair shop that offers detailing
Topping in my detail business
I began topping in the early 1990's before the Internet was introduced so I didn't know what I was doing was called topping I just did it because in my brain it seemed to make sense, that is lay down a layer of a long lasting synthetic paint sealant for protection and then over it apply a second coating using a different product to both protect the first layer from wear-n-tear but to also create a true swirl-free, show car finish and depending upon the second product, perhaps create a different look to the end-results.
In my case, I was applying Meguiar's M20 Polymer Sealant first and then topping it with M16 Professional Paste Wax. Whether in reality this practice worked or not I don't know, what I do know is all my work came out looking just like I wanted it to look and that was a swirl-free, show car finish under any lighting conditions.
The tipping point
The practice of topping became popular in the online detailing world a few years after detailing forums came into existence which is around the year 2002 or so for actual GUI software and not Usenet Newsgroups. Point being is that through the ability of discussion forums to quickly spread information to the masses, techniques like jewelling, edging or topping can go from obscurity to mainstream overnight.
Discussion Forums - A relatively "new" invention...
How to correctly top one product with another product
Step 1 - Apply the synthetic sealant
The normal and accepted practice of topping means to first seal the paint using a synthetic paint sealant. Before applying the paint sealant be sure to read and follow the manufactures directions. Some manufactures recommend that their product only be applied after any polishing oils or fillers have been removed and this is done by either washing the car using a detergent car wash soap or by chemically stripping the paint using something like IPA, Mineral Spirits or a dedicated product just for this procedure.
See these two articles for more information on the topic of preparing paint for a synthetic paint sealant, car wax or paint coating.
How to Mix IPA for Inspecting Correction Results
Miscible and Immiscible - Wax and Paint Sealant Bonding
Synthetic Paint Sealant first, Carnauba Wax second
Because the established forum consensus on the topic of wax bonding is that a synthetic paint sealant needs a surgically clean surface in order for the protection ingredients to properly bond, the normal practice of topping is done by first applying the synthetic paint sealant.
Whether it's true or not that the paint must be stripped down to a clean base in order for "all" paint sealants to properly bond is an emotional topic that will start a "Wax War" on a discussion forums if you're not careful. Of course like many procedures related to car detailing, most of what anyone does is due to personal preference and personal opinion.
This is why I state above to follow the manufactures recommendation, not some anonymous form member posting under a fictitious nickname as the manufacture tends to know their product best. Then make your own decision whether or not to chemically strip the paint before applying your choice of synthetic paint sealant.
Since the primary concern at this first step it for the synthetic paint sealant to bond to the paint and there really is no other consideration, it is my personal opinion that it doesn't matter if the synthetic paint sealant, (or hybrid), is a non-cleaning sealant or a pure sealant. It is however important that the second product to be used offers no cleaning ability but it really doesn't matter for the first product.
Example of the right order
Back when I use to practice topping I would apply M20 first to the paint I just finished polishing without first chemically stripping the paint. M20 Polymer Sealant is a "light" cleaner/wax or cleaner/sealant for the D.O. among us and I found the light cleaners to help clean the surface of any excess polishing oils from the polishing step plus help the polymers to bite or better bond onto the polished paint. After allowing the M20 to dry I would then remove it and apply the M16 Professional Paste Wax.
Step 2 - Allow first product to fully dry or cure
After you have applied your first choice of product, follow the manufactures directions for drying or curing time before moving onto the next step. Some manufacturers recommend a window of time for their protection ingredients to fully set-up and bond to the paint. Some manufacturers use the term crosslinking but we shouldn't use that specific term for all synthetic paint sealants as not all companies share how their protection ingredients do their magic and stick to the paint.
For example I've heard of the term hydrogen bonding as a method that some protection ingredients use to bond to paint.
Step 3 - Remove residue from paint sealant
After the recommended time has passed for your first paint sealant to dry and cure go ahead and wipe any residue off carefully. At this level of the game you want to avoid instilling any toweling marks. Now you're ready to apply your topper.
Step 4 - Test your Topper
If you've never tried topping before and are thinking you would like to apply a topper over your first choice of protection product, here's a friendly tip... test to a small area before your top the entire finish.
Before you apply your choice of a topper over the entire car, first do a side-by-side test so you can inspect and compare the results between the two different sections of paint to ensure that the test area does in fact look better than the first product by itself.
It's possible, your choice of a topper might not improve the appearance results created by the first product but if you apply your choice of a topper to the entire car without comparing, you will never know if your choice of topper improved or dulled the results created by the first product all by itself.
So based upon my experience in topping, I would strongly recommend testing your choice for a topper to one small area before applying to the entire vehicle.
How to test your topper
Find a nice flat panel like the hood or trunk lid, you want to use a panel that you can look down on the finish while standing over it.
Test using a small section
Apply your choice of a topper to a small section of paint about one foot square being careful to do so in a way as to have a very distinct section with only the topper in this section.
Allow the topper to dry according to the manufacturer's instructions and the remove using a clean, dry microfiber polishing towel.
After you have carefully applied and removed your choice of a topper it's time to inspect the results.
Step 5 - Inspect the results
Now you want to inspect the two areas under different lighting conditions. Different lighting conditions will allow your eyes to see the different dimensions of your finish, such as richness, gloss, shine and clearness or clarity.
View the two areas from different angles, from directly overhead, and with a light source centered in the area, like the sun. You may also want to have some friends compare the two areas also, a second set of fresh eyes may see something you miss, especially after you've been working on the finish and staring at the paint for hours.
After doing this side-by-side comparison test in one small area, your eyes tell you whether or not the paint that has been topped looks worse, the same or better and at this point you can then decide if you want to continue with applying the topper to the entire finish.
Step 6 - Apply your topper to the entire finish
If you like the appearance results created by topping your first choice of product by your topper then the next step is to apply the topper to the entire finish.
Key point...
Unless you test first to a small section and then inspect and compare the results, there's no way to tell if your choice for a topper took the results created from the first product to a higher appearance level, remained the same or for some reason diminished or dulled the results from the first product, so test first.
And that's how you do what's called topping...
Hope this helps...
")
