Navigation
Install the app
How to install the app on iOS
Follow along with the video below to see how to install our site as a web app on your home screen.
Note: This feature may not be available in some browsers.
More options
Style variation
You are using an out of date browser. It may not display this or other websites correctly.
You should upgrade or use an alternative browser.
You should upgrade or use an alternative browser.
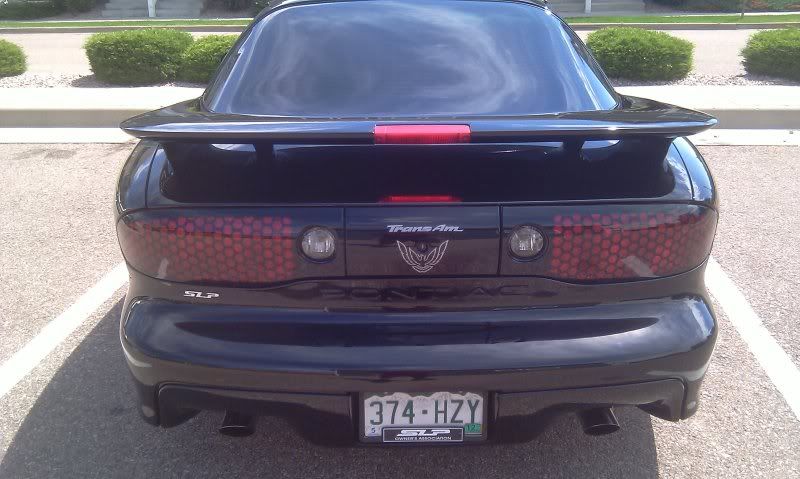
Trans AM Decal
- Thread starter TA-JIM
- Start date
Setec Astronomy
Well-known member
- Aug 31, 2010
- 16,842
- 1,170
Wow that's a great question. My first reaction is paint products aren't going to work, I would think something like Wolfgang Exterior Trim Sealant or Ultima Tire and Trim Guard would be your best bet, but I'm just guessing. Interested to hear if other members have brought back any of these vinyl decals/stripes.
Is it on the back filler panel in between the tail lights? Or on the front license plate cover?
There's places online that sell both. If its the back piece, sand off the old one, polish, then apply a new decal. I sanded and polished mine and left it off for more of a cleaner look.
There's places online that sell both. If its the back piece, sand off the old one, polish, then apply a new decal. I sanded and polished mine and left it off for more of a cleaner look.
HateSwirls
New member
- Jun 24, 2013
- 3,632
- 0
I polished a Z-71 decal with a fine machine polish as it made a big difference.
Love to see a pic of it though.
Love to see a pic of it though.
sharpreflection
New member
- Feb 21, 2013
- 307
- 0
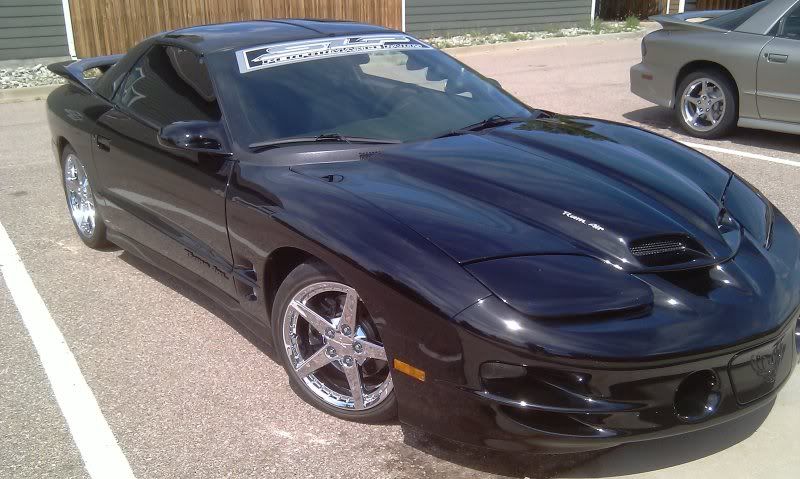
you could do what I did when I had my trans am. on ebay they sell a sticket decal that you can get in any color. Here is mine in silver


hernandez.art13
New member
- Apr 8, 2013
- 6,958
- 0
you could do what I did when I had my trans am. on ebay they sell a sticket decal that you can get in any color. Here is mine in silver
This car is beautiful... I can only imagine how TA-JIM looks like, I have seen decals for my Dodge on Ebay as well.
Mike Phillips
Active member
- Dec 5, 2022
- 51,004
- 6
Read this...
http://www.autogeekonline.net/forum...ke-phillips/26533-vinyl-stripe-polishing.html
I think we used Wolfgang Exterior Trim Sealant on this project and it came out great...
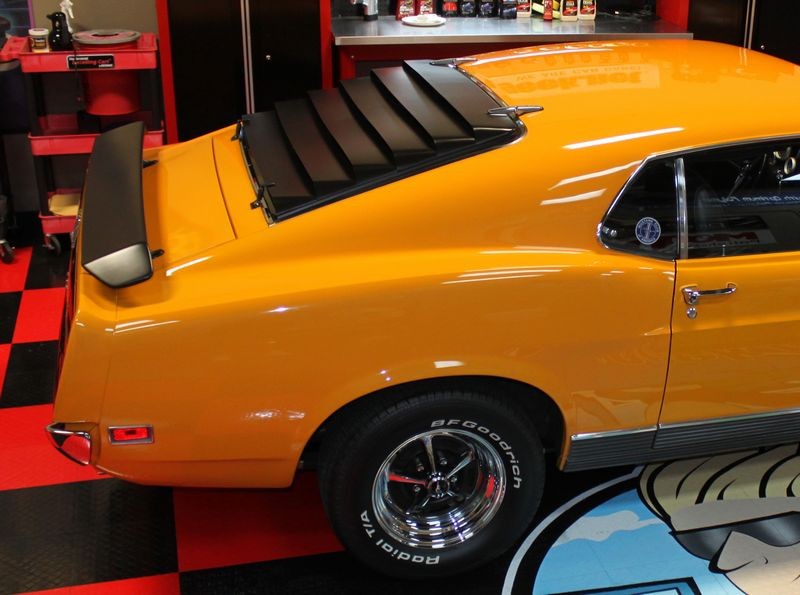
Video and Pictures - 1970 Mustang Mach 1 Detailing Clinic at AutogeekOnline.net
We rubbed down all the vinyl graphics, the reardeck spoiler and the louvers on this all original Munstang. I think we show this in the video too...

:xyxthumbs:
http://www.autogeekonline.net/forum...ke-phillips/26533-vinyl-stripe-polishing.html
I think we used Wolfgang Exterior Trim Sealant on this project and it came out great...
Video and Pictures - 1970 Mustang Mach 1 Detailing Clinic at AutogeekOnline.net
We rubbed down all the vinyl graphics, the reardeck spoiler and the louvers on this all original Munstang. I think we show this in the video too...
:xyxthumbs:
Mike Phillips
Active member
- Dec 5, 2022
- 51,004
- 6
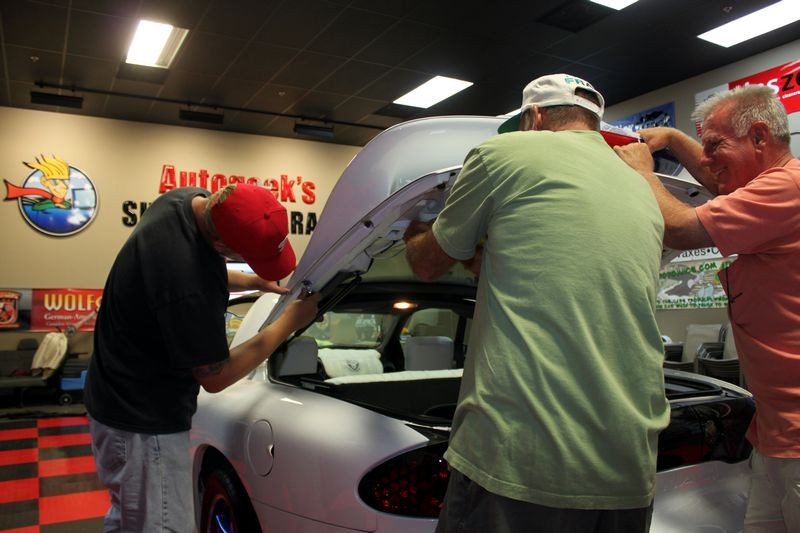
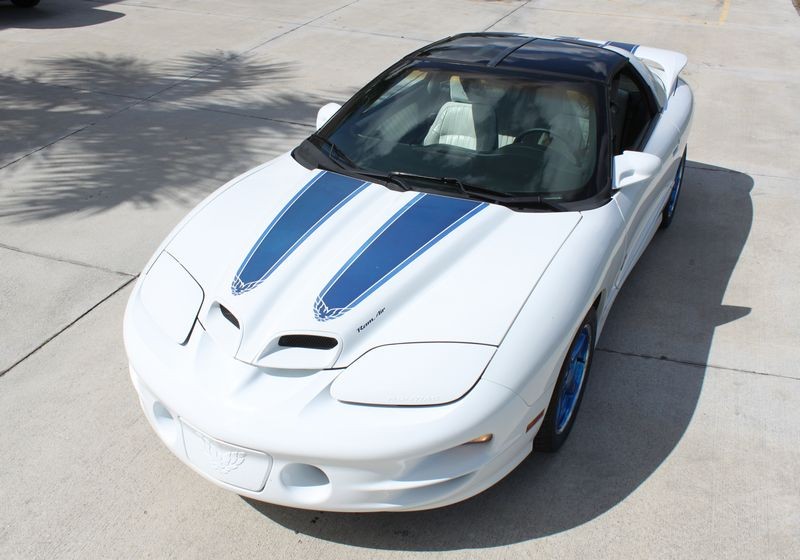
We replaced the Firechicken on this car...
M101 Foam Cut Compound - 1999 Trans Am Extreme Makeover at Autogeek
Here's an after shot....

Here's the process.... not sure I've ever seen this type of thing on any other forum...
For anyone that's never removed old, dried-out, cracked and baked-on vinyl graphics, I have enough pictures to make a pretty good how-to article. For now here's a few pictures to give you an idea. It took about 2 hours to remove all the vinyl graphics and then rub and scrub all the adhesive left behind off the paint AND do it in a way that did not harm the original paint.
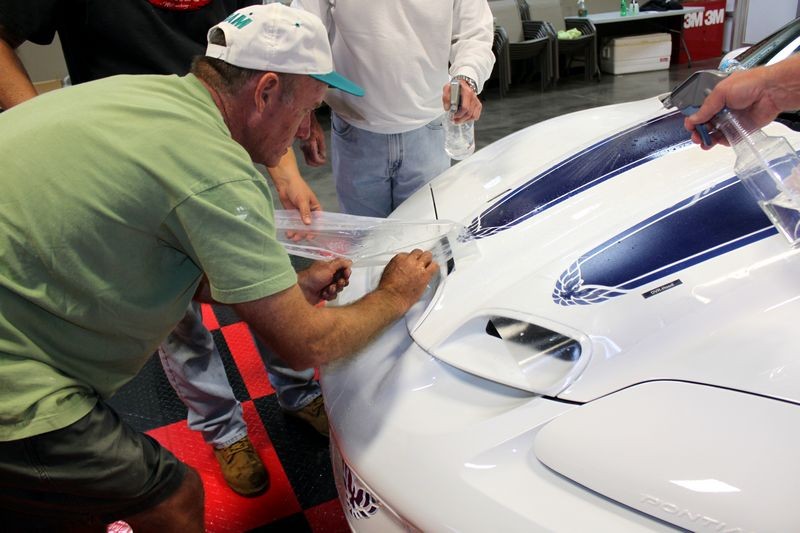
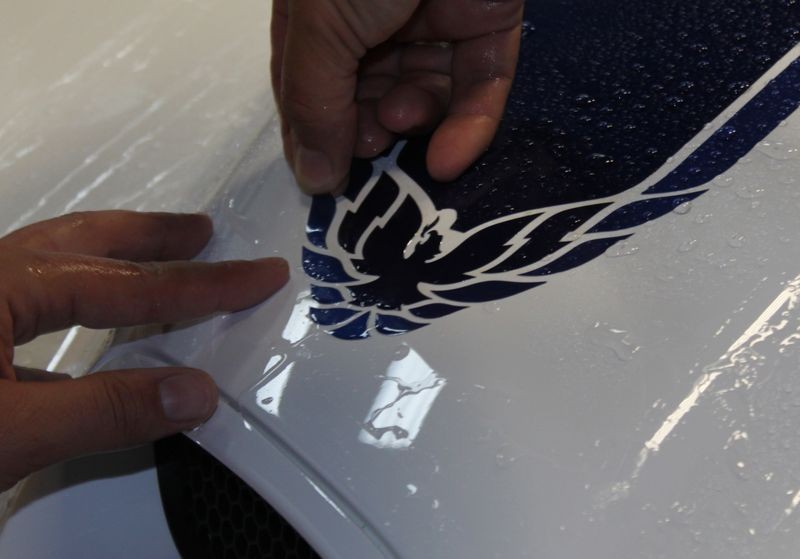
Re-applying all of the new vinyl graphics took at around 3 hours...
We didn't just buff this car out, we first removed all the graphics, then buffing it out, polished it and sealed it with a synthetic paint sealant and then applied all of the new graphics... just another furn project on AutogeekOnline.net!
Here's one picture, hang tight for a few more...
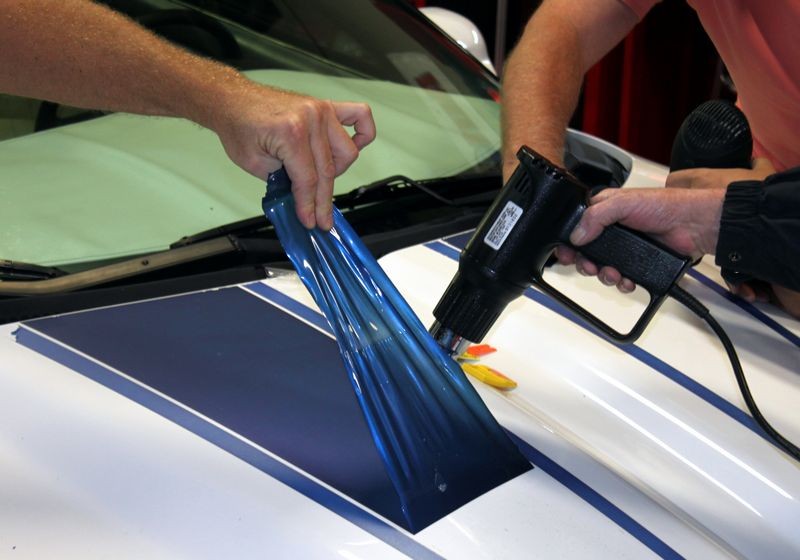
Jay heating the vinyl graphics up using a simple Conair Hair Blow Dryer...

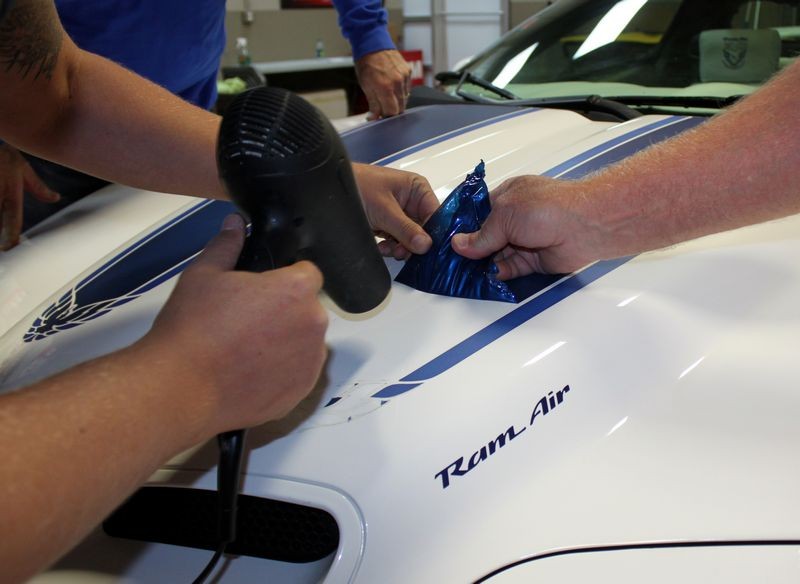
Here's Ken and I using a Heat Gun, when using a Heat Gun instead of a hair dryer you really need to be careful that you don't get the paint itself too hot...
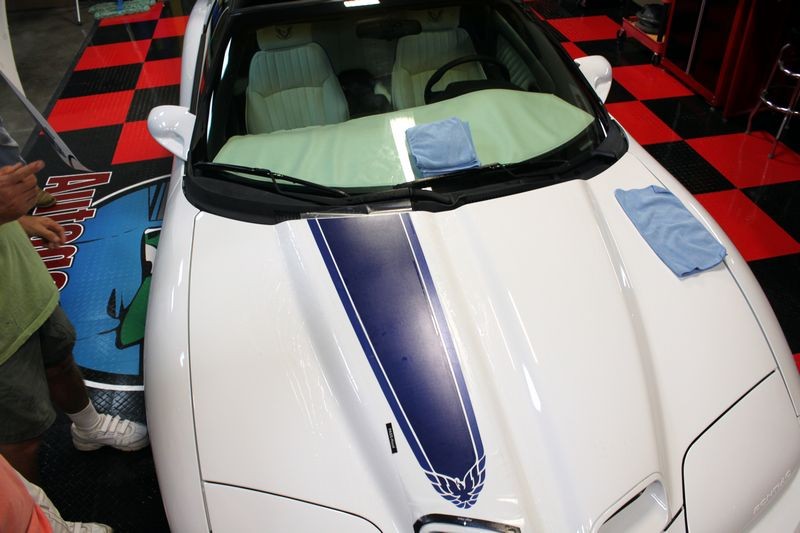
New graphics going on... this was hours later after we meticulously buffed the hood to remove most of the Ghosting and all of the adhesive residue...


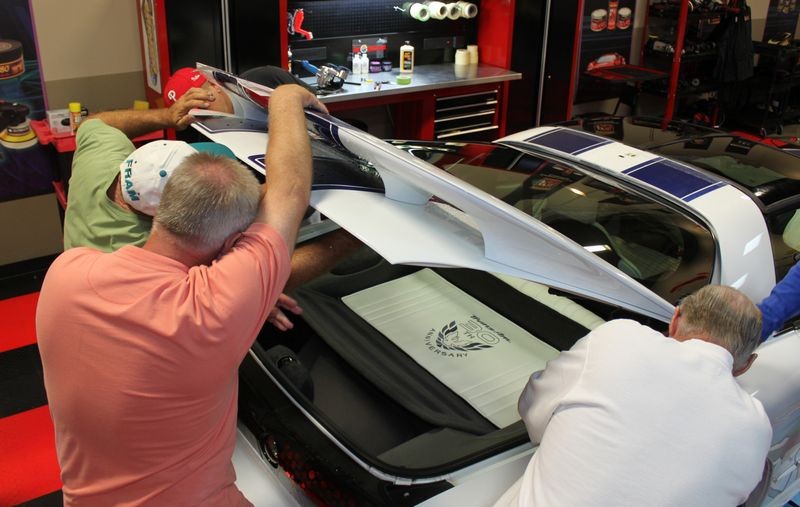
Here you can see that we removed the rear spoiler in order to apply the racing stripes to the deck lid...
After putting he racing stripes on the spoiler we're not re-attaching it...
One thing for sure, everyone has a lot of fun during these types of cool projects, makes new friends and gets the chance to use new tools, pads and yes... products like Meguiar's M101 Foam Cut Compound...

Carefull.... easy does it....
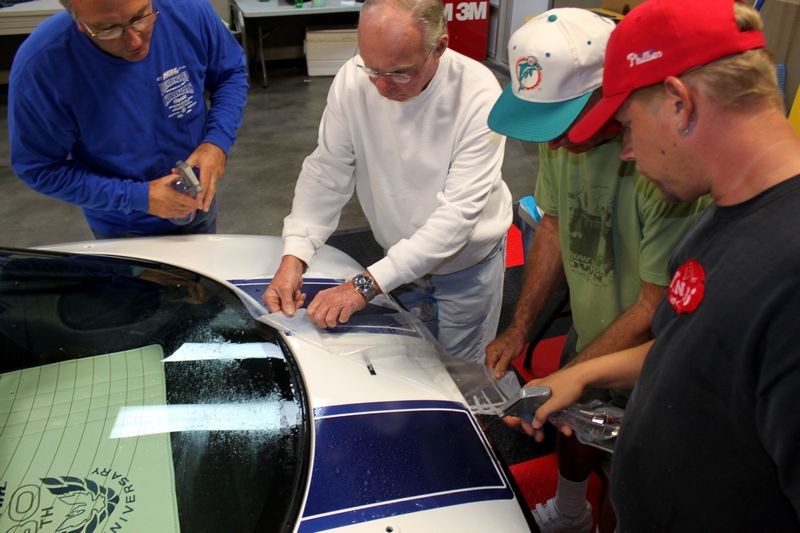
Jay installing all the lettering...

Windshield graphics going on....


Here's the wrecking crew, from left to right...
Paul, Ken, Jay, Tim and John...

Not pictures are Jeff Bell and my co-worker, Jeff Dexheimer who both needed to leave early or find themselves in the dog house with their better half...
My comments...
This was a HUGE undertaking and I would recommend to most people to only tackle the removal of graphics and the restoration of the paint for one day and then after getting some rest tackle re-applying the new graphics.
I don't remember what Jay said the graphics kit cost but you don't want to make a mistake simply because you're tired...
You can't see from my pictures but Jay also had a new interior installed to really bring this classic back to life.
:dblthumb2:
M101 Foam Cut Compound - 1999 Trans Am Extreme Makeover at Autogeek
Here's an after shot....
Here's the process.... not sure I've ever seen this type of thing on any other forum...
For anyone that's never removed old, dried-out, cracked and baked-on vinyl graphics, I have enough pictures to make a pretty good how-to article. For now here's a few pictures to give you an idea. It took about 2 hours to remove all the vinyl graphics and then rub and scrub all the adhesive left behind off the paint AND do it in a way that did not harm the original paint.
Re-applying all of the new vinyl graphics took at around 3 hours...
We didn't just buff this car out, we first removed all the graphics, then buffing it out, polished it and sealed it with a synthetic paint sealant and then applied all of the new graphics... just another furn project on AutogeekOnline.net!
Here's one picture, hang tight for a few more...
Jay heating the vinyl graphics up using a simple Conair Hair Blow Dryer...
Here's Ken and I using a Heat Gun, when using a Heat Gun instead of a hair dryer you really need to be careful that you don't get the paint itself too hot...
New graphics going on... this was hours later after we meticulously buffed the hood to remove most of the Ghosting and all of the adhesive residue...
Here you can see that we removed the rear spoiler in order to apply the racing stripes to the deck lid...
After putting he racing stripes on the spoiler we're not re-attaching it...
One thing for sure, everyone has a lot of fun during these types of cool projects, makes new friends and gets the chance to use new tools, pads and yes... products like Meguiar's M101 Foam Cut Compound...
Carefull.... easy does it....
Jay installing all the lettering...
Windshield graphics going on....
Here's the wrecking crew, from left to right...
Paul, Ken, Jay, Tim and John...
Not pictures are Jeff Bell and my co-worker, Jeff Dexheimer who both needed to leave early or find themselves in the dog house with their better half...
My comments...
This was a HUGE undertaking and I would recommend to most people to only tackle the removal of graphics and the restoration of the paint for one day and then after getting some rest tackle re-applying the new graphics.
I don't remember what Jay said the graphics kit cost but you don't want to make a mistake simply because you're tired...
You can't see from my pictures but Jay also had a new interior installed to really bring this classic back to life.
:dblthumb2:
Mike Phillips
Active member
- Dec 5, 2022
- 51,004
- 6
This car was wiped out when it arrived to Autogeek's Show Car Garage...
Before


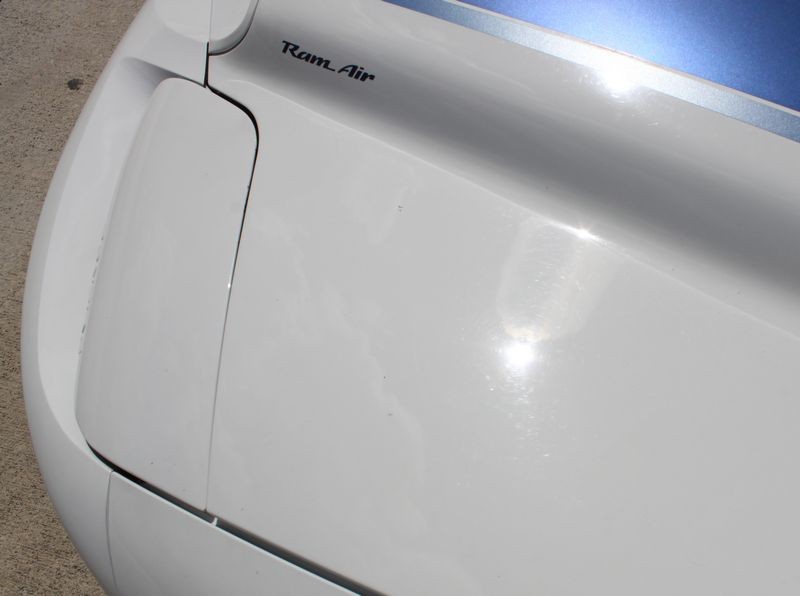
Close-up next to the hideaway headlight bucket -
Tip: Use a body line to help your camera lens to focus on the paint.

This is also the car I referenced in this video when I talked about my buddy Jay selling it for big bucks to a collector in Texas....
Questions about Meguiar's M105, M101 and M100 Compounds? Watch this video!
:xyxthumbs:
Before
Close-up next to the hideaway headlight bucket -
Tip: Use a body line to help your camera lens to focus on the paint.
This is also the car I referenced in this video when I talked about my buddy Jay selling it for big bucks to a collector in Texas....
Questions about Meguiar's M105, M101 and M100 Compounds? Watch this video!
Meguiar's M105, M101 and M100 Compounds Round Table Discussion at Autogeek with Mike Phillips
[video=youtube_share;Ugl35QexkkQ"]Meguiar's M105, M101 and M100 Compounds Round...[/video]
[video=youtube_share;Ugl35QexkkQ"]Meguiar's M105, M101 and M100 Compounds Round...[/video]
:xyxthumbs:
Mike Phillips
Active member
- Dec 5, 2022
- 51,004
- 6
Any ideas on freshening up the decal on my Trans Am it is the original bird and starting to fade a little. Any help appreciated.
I've had good luck with both Meguiar's Trim Detailer and Wolfgang Exterior Trim Sealant, the key is to use a soft foam pad and work either product in like applying a skin lotion to dry skin.
Then wipe off any excess gently with a clean, microfiber towel and be careful around all the tips of the graphics.
And welcome to AutogeekOnline!
:welcome: