02nissanISR
New member
- Mar 2, 2009
- 260
- 0
Let me start by saying I'm not a professional painter so I'm sure there are things that I could have done better. So dont rip me too bad if you see any errors. Second, this is my personal vehicle, the same one in my avatar. So no customers were harmed in the repairing of this clear coat.
The point of this is I've seen some try, or talk about trying, to use other products to repair clear coat failure. Opti Coat for example. All be it temporary just to protect the base color. Well this got me thinking how hard would it be to do a more permanent repair? If someone were reasonably skilled at wet sanding, spray painting, and polishing, could they perform a decent repair on there own if say we cant afford a repaint. So this is what I did. There was no risk here at all, the clear had failed so it needed repainted anyway so if i screwed up, it still needs to be repainted. But if I dont then ive saved myself some money. You pros can chime in as to how much one would save.
NOTE: This is a relatively small area if you have clear coat failure all over your car this repair may not be feasible.
Products used:
1: A plastic light switch cover to chip off loose clear.(hey use what you got no plastic razor blades on hand)
2: Meguiars 2500 grit wet sand paper
3: Dupli color perfect match clear coat spray can
4: meguiars 105/205
5: yellow solo wool pad/grey solo foam pad
6: Flex 603vvb rotary
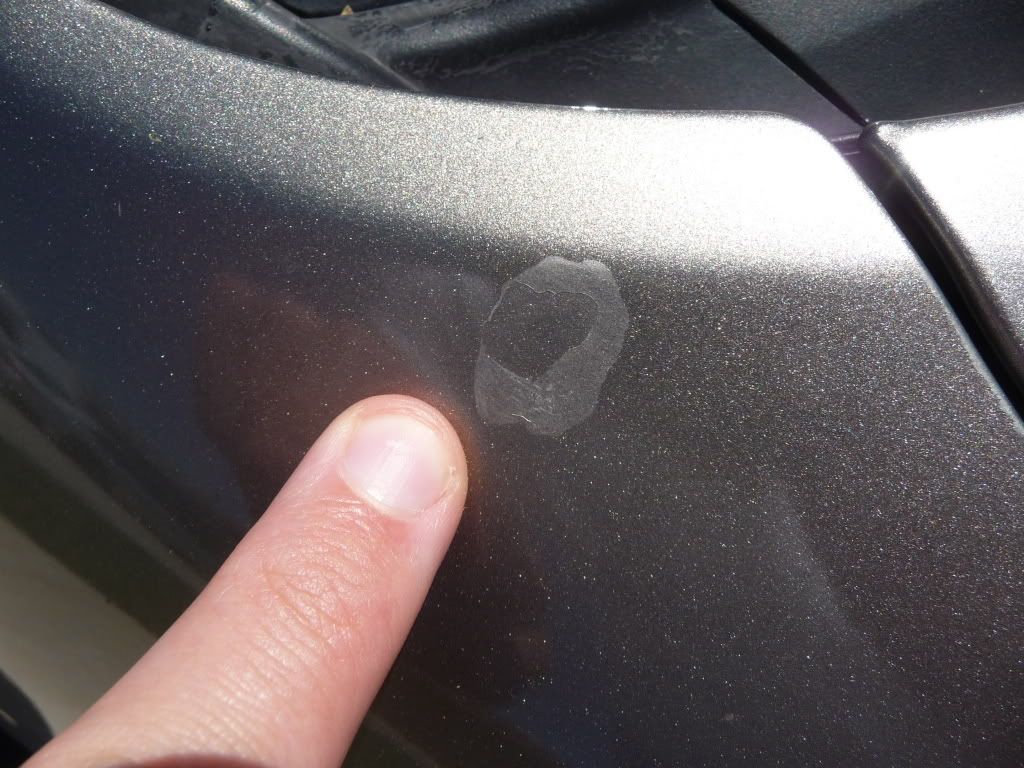
Ok i noticed some brown spots on my fender a while back tried to remove them but nothing worked paint cleaner, clay, washing, nothing eventually it started to blister and this is the result...

The spots were most of the way down the fender and the clear seemed to be failing in the same areas...

I started by getting all the loose clear off, then I wet sanded with 2500 grit megs paper to try an level things out.

Here are those pesky spots.


I ended up having to sand through the clear to remove them in some places. This is because as I sanded little pin holes would form in the clear where these spots were so the clear was about ready to go anyway.
Ready for fresh clear coat

One note I was very careful when wet sanding not put to much pressure over the unprotected paint. And using 2500 grit paper ensured I would not remove too much too fast. All sanding was buy hand.

Here you can see the extent of the failure

First coat of clear I think some call this a wet coat. very light.

After 4 coats of clear

You can still see the outline of the failure in this spot. this was the worst area. I will wet sand to try to even things out some.
Here is the only problem I ran into because I taped off the way I did and then sprayed 4 coats of clear I had a nice ridge. Now I have sand this down to blend it without going through the clear somewhere else.


i got everything pretty smooth and even though you can still see the out line of the new clear i couldn't really feel a ridge anymore


Next I grabbed the Meguiars Solo yellow wool pad and 105with the Flex then 205 on the grey foam


Overall I was very pleased with the result. If you don't know its there you wont see it. You have to be pretty close to tell but, hey, my clear coat isn't flaking anymore and the car is shiny again what more could I ask for. Oh and I don't know how much but I think I saved some money doing this repair myself.Im the MAN
Thanks for taking the time to look and comment. Any advice on the painting process is welcome like how to blend that better as to not have a ridge. Hope this was helpful, i had alot of fun doing it. happy detailing.:buffing:
Second, this is my personal vehicle, the same one in my avatar. So no customers were harmed in the repairing of this clear coat.The point of this is I've seen some try, or talk about trying, to use other products to repair clear coat failure. Opti Coat for example. All be it temporary just to protect the base color. Well this got me thinking how hard would it be to do a more permanent repair? If someone were reasonably skilled at wet sanding, spray painting, and polishing, could they perform a decent repair on there own if say we cant afford a repaint. So this is what I did. There was no risk here at all, the clear had failed so it needed repainted anyway so if i screwed up, it still needs to be repainted. But if I dont then ive saved myself some money. You pros can chime in as to how much one would save.
NOTE: This is a relatively small area if you have clear coat failure all over your car this repair may not be feasible.
Products used:
1: A plastic light switch cover to chip off loose clear.(hey use what you got no plastic razor blades on hand)
2: Meguiars 2500 grit wet sand paper
3: Dupli color perfect match clear coat spray can
4: meguiars 105/205
5: yellow solo wool pad/grey solo foam pad
6: Flex 603vvb rotary
Ok i noticed some brown spots on my fender a while back tried to remove them but nothing worked paint cleaner, clay, washing, nothing eventually it started to blister and this is the result...
The spots were most of the way down the fender and the clear seemed to be failing in the same areas...
I started by getting all the loose clear off, then I wet sanded with 2500 grit megs paper to try an level things out.
Here are those pesky spots.
I ended up having to sand through the clear to remove them in some places. This is because as I sanded little pin holes would form in the clear where these spots were so the clear was about ready to go anyway.
Ready for fresh clear coat
One note I was very careful when wet sanding not put to much pressure over the unprotected paint. And using 2500 grit paper ensured I would not remove too much too fast. All sanding was buy hand.
Here you can see the extent of the failure
First coat of clear I think some call this a wet coat. very light.
After 4 coats of clear
You can still see the outline of the failure in this spot. this was the worst area. I will wet sand to try to even things out some.
Here is the only problem I ran into because I taped off the way I did and then sprayed 4 coats of clear I had a nice ridge. Now I have sand this down to blend it without going through the clear somewhere else.
i got everything pretty smooth and even though you can still see the out line of the new clear i couldn't really feel a ridge anymore
Next I grabbed the Meguiars Solo yellow wool pad and 105with the Flex then 205 on the grey foam
Overall I was very pleased with the result. If you don't know its there you wont see it. You have to be pretty close to tell but, hey, my clear coat isn't flaking anymore and the car is shiny again what more could I ask for. Oh and I don't know how much but I think I saved some money doing this repair myself.Im the MAN
Thanks for taking the time to look and comment. Any advice on the painting process is welcome like how to blend that better as to not have a ridge. Hope this was helpful, i had alot of fun doing it. happy detailing.:buffing:
 rops:
rops: ) but a few years down the road it looks terrible.