Using Pad Washer while detailing

kris636

New member
Joined
Dec 24, 2013
Messages
4
Reaction score
0
First post on this wonderful forum.

Ive recently got into the detail world after I bought a new 2013 Soft Clear Coat Honda Accord in black metallic pearl.

I purchased the Griots 6 inch Da along with 3 of each Hex Logic 6.5 inch pads. I also puchased the chemical guys grit guard pad washer link here ----> Chemical Guys IAI_507_3 - Grit Guard Universal Pad Washer with Pad and Wool Cleaner

So my question is about how dry do the pads have to be before I reuse them. Using the chemical guys pad washer works great but I never can seem to get the pad completly dry. Is a little bit of dampness okay ? Or is the polish going to be comprismised ? If its not okay what are your suggestions ?
 
Welcome AGO

I never have to worry if my pads are dry because I have many of them.
Being damp isn't the end of the world, the thing that worries me is that the heat on a damp pad could come apart with the generated heat from the machine.

Also if the pad is too damp it seems to get messy when you push down on the unit slinging everywhere.
But no one says you can't use a damp pad if that's all you have to work with, doesn't take long to dry when using it.
If slightly damp it won't change the results, some spritz a little water on the pad for longer work times.
 
Thanks for the reply.

At what point do you switch pads? After 2 section passes ?
 
Ever roll the pad up while wrapped in a towel?

This will take a ton of dampness out of a foam pad.
 
I use at least 4 pads when compounding and on avg. two pads for my second step.
I clean them with a brush after each section.
Twice when working n the hood.


Thanks for the reply.

At what point do you switch pads? After 2 section passes ?
 
Ever roll the pad up while wrapped in a towel?

This will take a ton of dampness out of a foam pad.
:xyxthumbs:
This is the ticket. I run about three pads in rotation. I usually get about three to four section passes before I have to clean the pad. After the "spin dry" I roll it up in a dry terry towel and let sit out. By the time I need the cleaned pad, it is dry enough to use.

I tried a two pad rotation, but three seems to be the magic number.
 
Ever roll the pad up while wrapped in a towel?

This will take a ton of dampness out of a foam pad.


Like this...


How to dry a foam pad after hand washing

After washing your foam buffing pads by hand the question often comes up,

How do I dry my foam pads?

Here's one way to dry your foam pads, please feel encouraged to find a way that works best for you.

Using a clean, dry cotton terry cloth towel or clean, dry microfiber waffle weave towel or any clean microfiber towel, roll your washed and rinsed pad up inside the towel.

WringOutWater01.jpg


WringOutWater02.jpg


Press the towel into the foam as you're folding the pad into the towel.
WringOutWater03.jpg


WringOutWater04.jpg


WringOutWater05.jpg


Then squeeze, squish and wring the towel which will force any excess water out of the foam and into the towel.
WringOutWater06.jpg


WringOutWater07.jpg


Afterwards, place your foam buffing pads upside down some place where they will stay clean where air can circulate around them and moisture can evaporate out of them.
WringOutWater08.jpg


Not a perfect method but it works...


:)
 
Another good way...

How to clean your foam pad on the fly


Video: How to clean your pad on the fly

Here's a technique I've been showing for years on how to clean your pad quickly so you can get back to buffing out your car.


How to clean your pad on the fly
[video=youtube_share;NuyrBrqz_YU&hd=1"]How To Clean Your Pad..." target="_blank">How To Clean Your Pad...[/video]​


The above technique works with any of the below DA Polishers,

Porter Cable DA Polisher
Meguiar's DA Polisher
Griot's Garage DA Polisher
Shurhold DA Polisher


If it works for you after watching the video, please post a comment to the thread for the video in the included link above.

Thank you.


When using a dual action polisher to remove below surface defects with any type of abrasive product you’re going to have two things building up on the face of the foam pad that you need to clean off.
  • Spent residue - From the product you’re using.
  • Paint - Small particles of paint that are coming off the car as you abrade the surface
If you’re working on a clear coat finish then keep in mind you won’t see the paint residue building up on the pad because the clear coat paint is clear. :idea:

Make sense?


If you’re working on a clearcoat finish, all you're going to see is the color of the product that you’re using. For example if you’re using a white colored polish you’ll see white residue building-up on the pad.

Now if you’re working on as single stage paint then you’ll see the color of the paint on the car on the face of your foam pad,. For example if you’re working on a single stage yellow paint system then you’ll see yellow paint on the face of your foam pad.

The important thing to understand is that as you work on the car with your polisher you’re going to be removing a little paint and there’s going to be used-up product and paint building-up on the face of the foam pad. It's important to clean this gunk off your pad often.

So the question is, how to you clean this gunk off the pad?


The answer is there’s a number of ways to clean your foam pad, the three most common are,
  • Pad Washer
  • Nylon Brush or Pad Cleaning Brush
  • Terry Cloth Towel
Out of the 3 options listed above, cleaning your pad on the fly is probably the most popular because it’s fast, and most people have a terry cloth towel in the linen closet that they can use to clean the pad.

The best way to clean a pad is with a pad washer but before you can use a pad washer you must first own one. Pad washers are worth their weight in gold if you buff cars out with any kind of regularity. If however you’re just buffing out your own personal cars, then chances are you don’t own a pad washer but chances are very good you do own a terry cloth towel or two that you can use to clean your pads on the fly.

Brushes work good if you’re using a rotary buffer but the only way you can use one with DA Polisher is to turn the polisher off, hold the polisher and pad in such a way that the pad won’t spin and then rub the brush over the face of the pad to scrape off the residue.

While this works, it means turning the polisher off, (now you're not buffing out the car, remember the time issue?) and grabbing your brush and then brushing the pad. Nothing wrong with this but when you consider how long it already takes to do the cleaning step, (about 4-6 hours for an average size car and that’s if your good at this and if you work fast and don’t take any breaks. So stopping the polisher and using a brush to clean the pad works but it’s not as fast or effective as using a terry cloth towel.

The whole idea and success behind the cleaning your pad on the fly technique is in that it allows you to clean your pad quickly, (that’s the on the fly part), and then quickly get back to work.

Again, buffing out an entire car using a dual action polisher from start to finish is an all day job. There is no time for lollygagging. If you lollygag or take long breaks, you either won’t get the job done in one day or you’ll sacrifice doing a quality job during the cleaning step in order to get to the waxing step so you can put the car back into service. :dunno:


So let’s take a look at how-to clean your pad on the fly

Cleaning your pad on the fly is where you take a terry cloth towel, usually a medium size hand towel works best, you fold it in two and then simply hold the towel against the face of the pad and then turn the polisher on and use your hand that’s holding the towel to push the towel into the foam. This will act to draw any excess liquid out of the foam and any excess residue off of the face of the pad.


This is me using the Clean your Pad on the Fly Technique to clean my pad on the fly as we removed the oxidation off this Neon.

EODodgeNeon010.jpg


EODodgeNeon011.jpg


EODodgeNeon012.jpg


EODodgeNeon013.jpg


:xyxthumbs:
 
Why it's important to clean your pads often...


ANYTIME you're abrading the surface whether you're using an aggressive cutting compound of an ultra fine polish, you have two things building up on the face of your buffing pad...
  • Spent product
  • Removed paint
You need to remove both of these substances from the face of the pad and the panel you're working on before you apply fresh product. If you don't,
  • Adding fresh product to spent product and removed paint adulterates the fresh product, it also dilutes it.
  • Buffing with a dirty pad will be more difficult.
  • The product will cake-up on the face of the pad.
  • The product will become gummy on the paint and hard to wipe off.
How to clean your pads and other options to make buffing clean again...
  • You can scrub the face of the pad with a nylon brush like a pad conditioning brush or even a nylon toothbrush
  • If using a Dual Action Polisher or a Rotary Buffer you can clean your pad on the fly with a terry cloth towel
  • You can wash your pads in a bucket of water
  • You can wash your pads in a sink under running water
  • You can wash your pads in a pad washer
  • You can switch to a clean, dry pad
  • You can switch to a brand new pad
I just buffed out half the hood on an oxidized 1959 Cadillac and used the technique along with a nylon brush and it works adequately enough to allow me to work clean and get back to work quickly.


That's the whole idea behind cleaning your pad on the fly... you can remove a majority of the spent product and removed paint and then get back to running the buffer... buffing out an entire car already takes a l-o-n-g time... stopping to do some kind of pad cleaning procedure that isn't quick and easy keeps you from buffing on the paint.


Fast methods include,
  • Pad Washers
  • Cleaning your pad on the fly with a terry cloth towel
  • Using a nylon pad conditioning brush
  • Using a Spur if you're using a wool pad on a rotary buffer

Slow methods, (they might work well but they take you away from buffing on the car)
  • You can wash your pads in a bucket of water
  • You can wash your pads in a sink under running water

:)
 
I dry mine by setting them on top of a DRY folded towel, then folding the other end of the towel over the top of them.......and step on them a few times to get them as dry as possible. Seems to work well with 3 pads in rotation.
 
I always use a rotary buffer in my pad washer on speed 1 then I take it out and slowly work my way up to speed 6 and spin dry my pads.
 
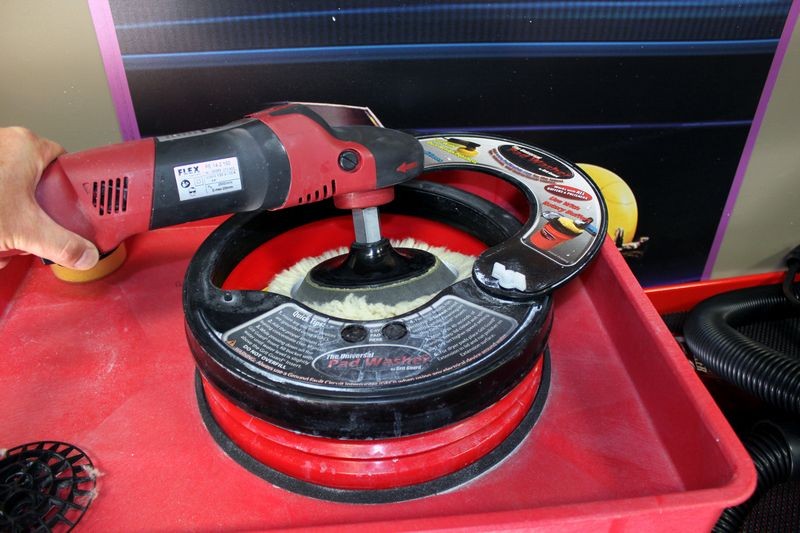
Using the chemical guys pad washer works great but I never can seem to get the pad completely dry.

Is a little bit of dampness okay ?

Or is the polish going to be compromised ? If its not okay what are your suggestions ?


You know... this topic came up just recently. Using the search term,

centrifugal


I found the thread...

Are Lake County CCS pads ok for the Flex 3401 or is there a better choice


Here's post #22 but the entire thread is worth reading through...


Thanks for your input Mike!

One few more question about the pad washer and pads.....

1. If using a pad cleaning powder with a water mixer, do you rinse the pad with fresh water after cleaning it in the pad washer?


I don't. Some people might. It would add a LOT of time to the overall time it would take you to buff out a car.

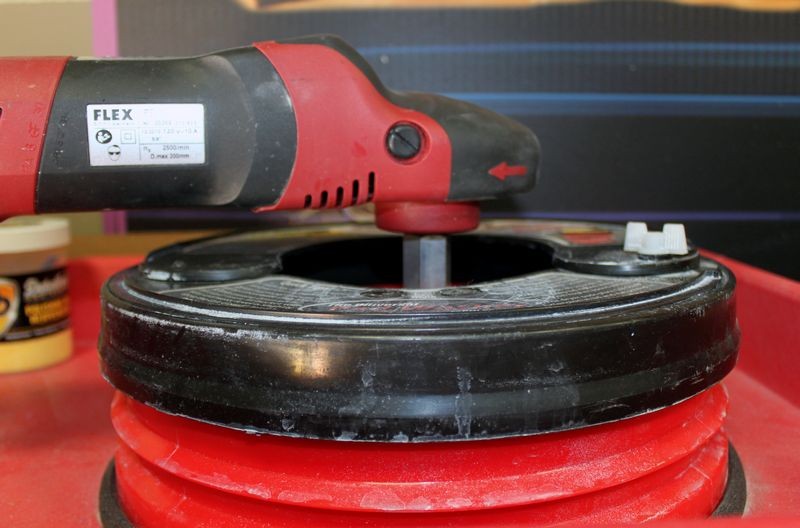
Ideally, you hold the polisher up a little while still inside the pad washer and with the Splash Guard Lid still closed and then run the polisher at a higher speed and this should sling out most of the water/cleaning solution via centrifugal force.

This works best with a rotary but all the polishers will sling out most of the water.

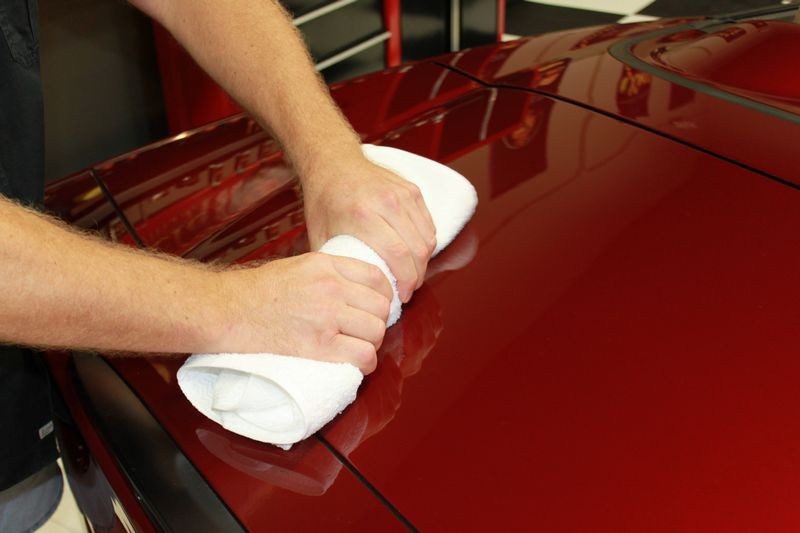
Then, if you really want to make sure most of the water is out of the pad, hold a clean, terry cloth hand towel against the pad and extract any extra water via absorption/capillary action.


Your question is good and the most anal retentive among us will ponder such topics but if you really want to drill down deep and I can drill down as far as anyone and usually farther, most of the time when you're using a pad washer it's during the heaviest correction step.

Right?

That's when two things are building up on the face of your pad.

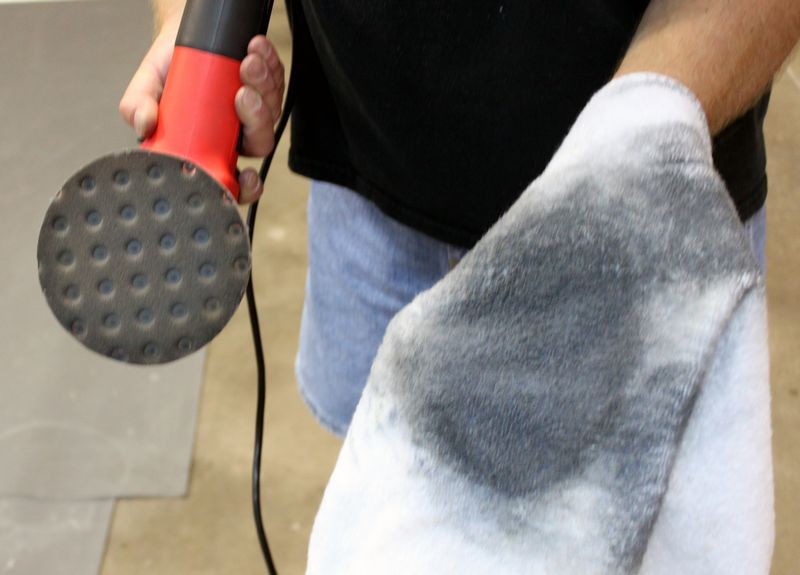
Spent product - that is the used up compound or polish at the END of the buffing cycle for the application of product either applied to the paint or the face of the pad to work a section.

Removed paint - Or isn some cases, removed gel-coat if you're buffing out a boat.

Anytime you're abrading the surface by hand or machine you have these two things building up on the face of your applicator pad or buffing pad and they build up MOST when you're using the most aggressive compounds or polishes and thus they build up most for what I call the "Heavy Correction Step" in my how-to books.

Because most of us are going to do a secondary polishing step after the heavy correction step, if there's ANY type of issue caused to the paint because you didn't get 100% of the cleaning solution out of the buffing pad after cleaning the pad in a pad washer with the cleaning solution "in" the water, these issue will be addressed during the polishing step.

Make sense?

Now here's the good news... the point or potential for a little tiny bit of cleaning solution to affect whatever compounding or polishing step you're doing is so minuscule, it's not a point at all and I've never had an instance where anything I've ever buffed out was somehow negatively affected due to the cleaning solution being in the water instead of sprayed onto to the face of the pad with only clean water in the pad washer.


So it's a moot point in my opinion.


If you really wanted to get what I call "detail oriented", (I like this better than anal retentive but you get the idea), you could,

Place clean water in your pad washer.
Use a spray on pad cleaner to get cleaning solution to the face of the pad.
After spraying face of pad with spray-on pad cleaner, place pad/buffer in pad washer and clean pad.

After each pad you clean empty the water that is now contaminated with spent product and removed paint with fresh clean water.

Of course you can already see how much time this would add to buffing out a car.

You could do the above and then pick an arbitrary number like 12 and clean 12 pads like this and then clean the water. It's all up to you.

For me I place the cleaning solution in the bucket, I usually only use a half of a scoop and use the Detailer's Pad Reconditioning Cleaner. Sometimes I add warm water to the bucket since we have a water heater next to the garage with a water hose hooked up to it.

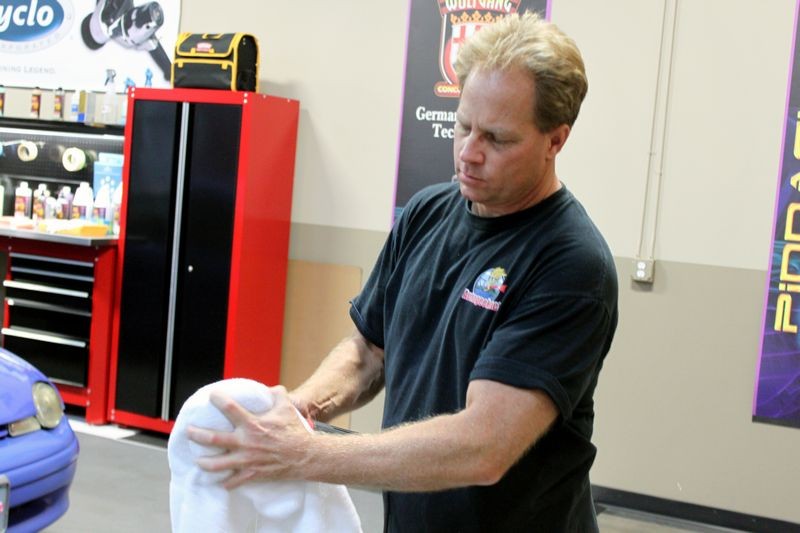
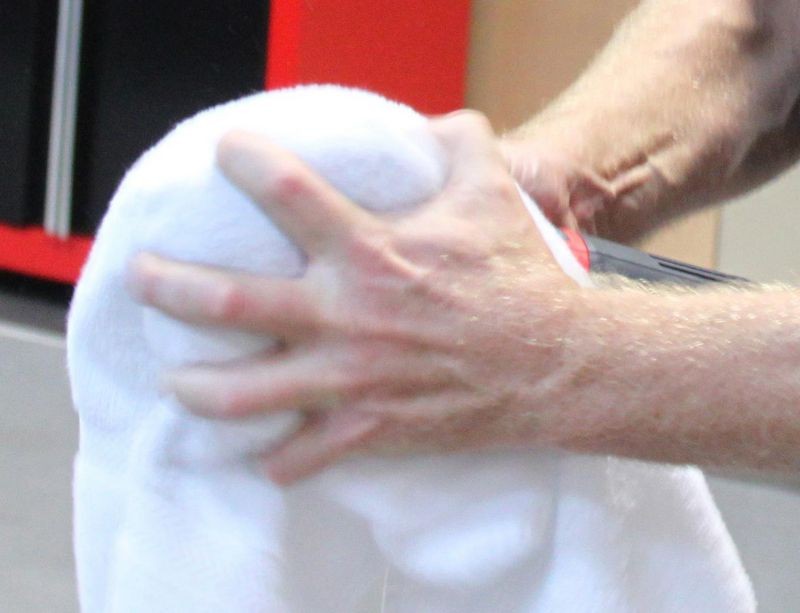
I clean my pads in the pad washer, then sling out as much excess water as possible.

For wool pads on a rotary I then use a spur to further clean, dry and most important fluff the fibers.

For foam pads on a DA I'll pat them with a dry, terry cloth towel or simply switch to a clean, dry pad.


All kinds of ways to tackle cleaning your pad I tend to favor the fastest and simplest ways so I can get back to work. Buffing out an entire car or boat already takes a long time... I try to do things in a way to decrease the time while maintaining quality.


2. When the pads are "clean", do you use them right away to use less pads for the job, or let the dry over night?

Thanks,
Michael

Another good question....

In a perfect world, you would have enough pads to use a single pad till you judge it needs to be clean then clean it and set it aside to dry and switch to a clean, dry unused pad.

By doing this you maximize the performance of the tool, the pad, the product and your time.

If you don't have enough pads to do this then what most people do is clean the pad, sling out any excess water and get back to work. Depending upon the tool and the pad this either works pretty well or less well.


More pads is better...


:)
 
I always use a rotary buffer in my pad washer on speed 1 then I take it out and slowly work my way up to speed 6 and spin dry my pads.

Video: Tip for cleaning pads in a pad washer

I took this picture some time ago to show how you can use an adapter or extension on a rotary buffer to make cleaning a pad easier when cleaning pads in a pad washer.

BackingPlateExtension01.jpg


How it works
When using the Grit Guard Universal Pad Washer, the correct technique is to pump the pad up and down against the Grit Gard Insert as this causes the spring loaded water pumps to pump or inject water and/or water and cleaning solution into the face of the pad.

By using an extension you make it easier to pump or move the rotary buffer up and down inside the pad washer without the body of the rotary buffer bumping into the Splash Guard Lid.

BackingPlateExtension02.jpg


This video uses a when cleaning a pad but it shows and explains how the water pumps work and how to pump any polisher up and down against the Grit Guard Insert inside the pad washer.


How to use a Grit Guard Universal Pad Washer
[video=youtube_share;TulZhDuDbqE"]How To clean your Buffing..." target="_blank">How To clean your Buffing...[/video]​


On Autogeek.net

Lake Country Double-Sided Pad Rotary Buffer Adapter
LakeCountryRBExtension.jpg


Optimum Double-Sided Pad Rotary Buffer Adapter
OptimumyRBExtension.jpg


:xyxthumbs:
 
Back
Top