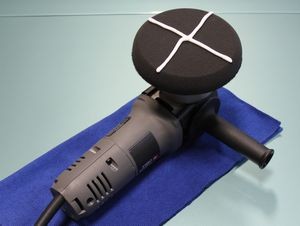
What am I doing wrong?

rogergoochman

New member
Joined
Aug 3, 2014
Messages
16
Reaction score
0
I'm totally new to polishing. My first attempt was with porter cable with orange CG hex logic pads. I had all 3 pads detach from the Velcro and fall apart.

Could I be over saturating the pad? Caused by heat? I cleaned on the fly with a terry cloth towel like mike Phillips shows after other section. I watched about 50 different videos before attempting to polish. I also was using an x pattern with compound. Just trying to learn how to keep my pads intact cause looks like I'll be placing another order for pads now.

Also even with 1 spray of pad conditioner on a fresh pad it slings product everywhere for the first section. Thanks for the tips and suggestions.
 
I had a couple of white cg hex logic pads come apart on me as well. I believe the two things that killed my pads were over heating them and spinning the pads when they weren't in contact with the paint. They do seem to be a little delicate so the next batch I worked with a little more mechanical sympathy and they survived.
 
There is such a thing as matching Velcro, that is where the hook is matched to the loop. If you use a backing plate made by one company and buy pads from a different company it's completely possible for the hook and loop to NOT match and have poor attachment and in cases like these pads can fly off.

I cover this in my how-to book.

This is also in my how-to book as well as on the forum and I recommend everyone new to machine polishing read it FIRST to avoid all the common mistakes.

Take a read-through and see if technique or factor jumps out at you....


DA Polisher Trouble Shooting Guide


Tyler, age 15 removing swirls using a Porter Cable 7424XP Dual Action Polisher
1965Plymouth035.jpg


When you're first starting out machine polishing and learning to use a DA Polisher it's common to have questions about your results and your results are directly tied to your technique.

Here's a list of the most common problems,
1. Trying to work too large of an area at one time.

2. Moving the polisher too fast over the surface.

3. Using too low of speed setting for removing swirls.

4. Using too little downward pressure on the head of the polisher.

5. Using too much downward pressure on the head of the polisher so the pad quits rotating.

6. Not holding the polisher in a way to keep the pad flat while working your compound or polish.

7. Using too much product or using too little product.

8. Not cleaning the pad often enough.
Here's a list of the solutions in matching order,

1. Trying to work too large of an area at one time.
Shrink the size of your work area down. You can't tackle to large of an area at one time. The average size work area should be around 20" by 20". Most generic recommendations say to work an area 2' by 2' but for the correction step, that's too large. You have to do some experimenting, (called a Test Spot), to find out how easy or how hard the defects are coming out of your car's paint system and then adjust your work area to the results of your Test Spot. The harder the paint the smaller the area you want to work.


2. Moving the polisher too fast over the surface.
For removing defects out of the paint you want to use what we call a Slow Arm Speed. It's easy and actually natural for most people new to machine polishing to move the polisher quickly over the paint but that's the wrong technique. One reason I think people move the polisher too quickly over the paint is because they hear the sound of the motor spinning fast and this has psychological effect which causes them to match their arm movement to the perceived fast speed of the polisher's motor.

Another reason people move the polisher too quickly over the paint is because they think like this,

"If I move the polisher quickly, I'll get done faster"

But it doesn't work that way. Anytime you're trying to remove swirls, scratches, water spots or oxidation using a DA Polisher you need to move the polisher s-l-o-w-l-y over the paint.


3. Using too low of speed setting for removing swirls.
When first starting out many people are scared of burning or swirling their paint, so they take the safe route of running the polisher at too low of a speed setting but this won't work. The action of the polisher is already g-e-n-t-l-e, you need the speed and specifically the pad oscillating and rotating over the paint as well as the combination of time, (slow arm speed), together with the abrasives, the pad aggressiveness, and the downward pressure to remove small particles of paint which is how your remove below surface defects like swirls or scratches.

Removing below surface defects is a leveling process where you need the abrasives to take little bites out of the paint and to get the abrasives to take these little bites with a tool that uses a Free Floating Spindle Bearing Assembly you need all of the above factors working for you including a high speed setting.


4. Using too little downward pressure on the head of the polisher.
For the same reason as stated in #3, people are scared, or perhaps a better word is apprehensive, to apply too much downward pressure to the polisher and the result of too little pressure is no paint is removed thus no swirls are removed.


5. Using too much downward pressure on the head of the polisher so the pad quits rotating.
If you push too hard you will slow down the rotating movement of the pad and the abrasives won't be effectively worked against the paint. You need to apply firm pressure to engage the abrasives against the paint but no so much that the pad is barely rotating. This is where it's a good idea to use a permanent black marker to make a mark on the back of your backing plate so your eyes can easily see if the pad is rotating or not and this will help you to adjust your downward pressure accordingly.

Correct technique means finding a balance of applying enough downward pressure to remove defects but not too much downward pressure as to stop the rotating movement of the pad.

This balance is affected by a lot of factors like the lubricity of the product you're using, some compounds and polishes provide more lubrication than others and this makes it easier to maintain pad rotation under pressure.

Another factor that can affect pad rotation are raised body lines, edges and curved surfaces as anytime you have uneven pressure on just a portion of the face of the pad it can slow or stop pad rotation. This is where experience comes into play and experience comes from time spent behind the polisher.


6. Not holding the polisher in a way to keep the pad flat while working your compound or polish.
Applying pressure in such a way as to put too much pressure to one edge of the pad will cause it to stop rotating and thus decrease abrading ability.


7. Using too much product or using too little product.
Too much product hyper-lubricates the surface and the result is that abrasives won't effectively bite into the paint but instead will tend to skim over the surface. Overusing product will also accelerate pad saturation as well increase the potential for slinging splatter onto adjacent panels.

Too little product will means too little lubrication and this can interfere with pad rotation.

Again there needs to be a balance between too much product and too little product and finding this balance comes from reading articles like this one, watching videos an most important, going out into the garage and putting in time behind the polisher and as you're buffing with specific product and pad combinations, pay attention to pad rotation.


8. Not cleaning the pad often enough.
Most people simply don't clean their pad often enough to maximize the effectiveness of their DA Polisher. Anytime you're abrading the paint you have two things building up on the face of your buffing pad,
  • Removed paint
  • Spent product
As these to things build up on the face of the pad they become gummy and this has a negative affect on pad rotating plus makes wiping the leftover residue on the paint more difficult. To maintain good pad rotation you want to clean your pad often and always wipe-off any leftover product residue off the paint after working a section. Never add fresh product to your pad and work a section that still has leftover product residue on it.


Pad Cleaning Articles

Why it's important to clean your pads often...

How to clean your foam pad on the fly


:xyxthumbs:
 
Using the X pattern after priming will usually lead to pad saturation, which can cause overheating and pad failure

Mike P has some great advice on using a PC effectively in the How to Section at the top of the page

Basically, apply enough product to coat the surface of the pad with a thin layer of product. Then apply three dime sized dots for each section. Cleaning on the fly after each section. Change pads after every 3-4 panels.
 
Large thick pads, when they become wet with product, (this is called pad saturation), have more MASS and thus if you hold the tool in the air with the pad spinning at high speed it's completely normal for the pad to go flying off.

Never hold the polisher in the air with the motor running.

When polishing, after buffing a section, turn the polisher off and allow the pad to slow down and even stop spinning BEFORE you lift it off the surface.


:)
 
I was typing and Mike was pasting...

Follow his advice above to the letter and you are assured success
 
Using the X pattern after priming will usually lead to pad saturation, which can cause overheating and pad failure

It's not so much the actual physical shape of the product on the face of the pad, i.e. "lines" of product, it's more the amount.

A person can cause pad saturation putting dime sized drops on the face of a pad if they put too many dime sized drops of product on the pad.

Pad Saturation is a normal effect of the cause and this is why I'm always telling people,

More pads are better

(Let your budget be your guide).


This is also in my how-to books


How to prime a foam pad when using a DA Polisher


Here are 3 ways to apply product to your pad.

1. Priming the pad then adding product to work with

Priming a clean, dry pad is considered the best approach for using a DA Polisher because it ensures that 100% of the working surface of the pad is wet with product and working at maximum efficiency when you turn the polisher on. I originally learned of this technique from my friend Kevin Brown.

Priming the pad also ensures that you don't have any dry portion of the pad working over the paint un-lubricated. This really isn't a risk because since you're just starting out you're going to be removing defects a lot more serious than would be caused by any portion of the pad that is dry and spinning against the paint.

Plus, after just a few passes, the product you apply to specific areas of the face of the pad will migrate over the entire face of the pad and it will do this rather quickly when you're on the higher speed settings.


Priming the Pad - For clean, dry pads
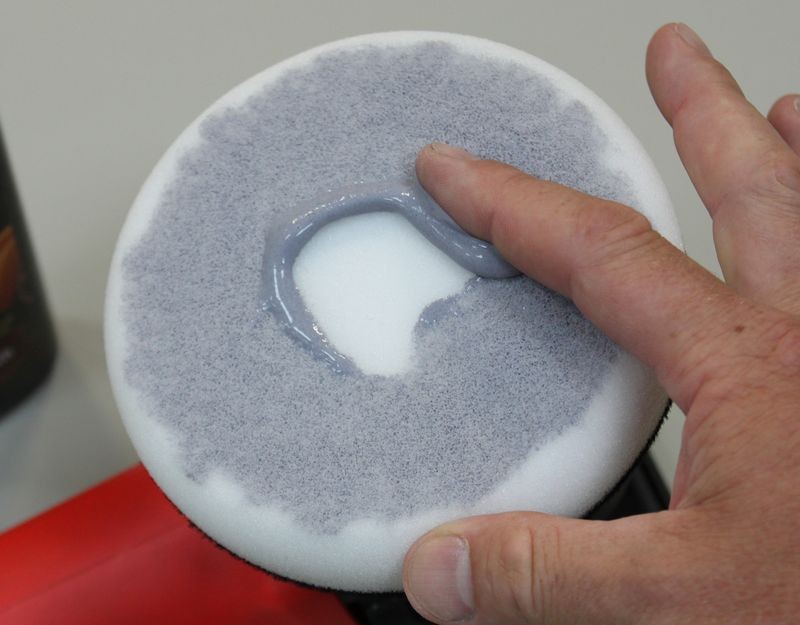
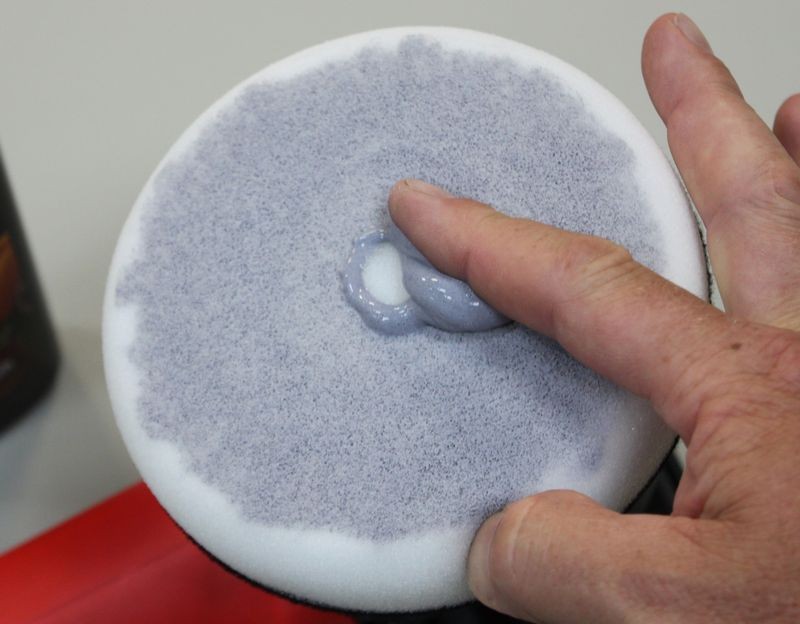
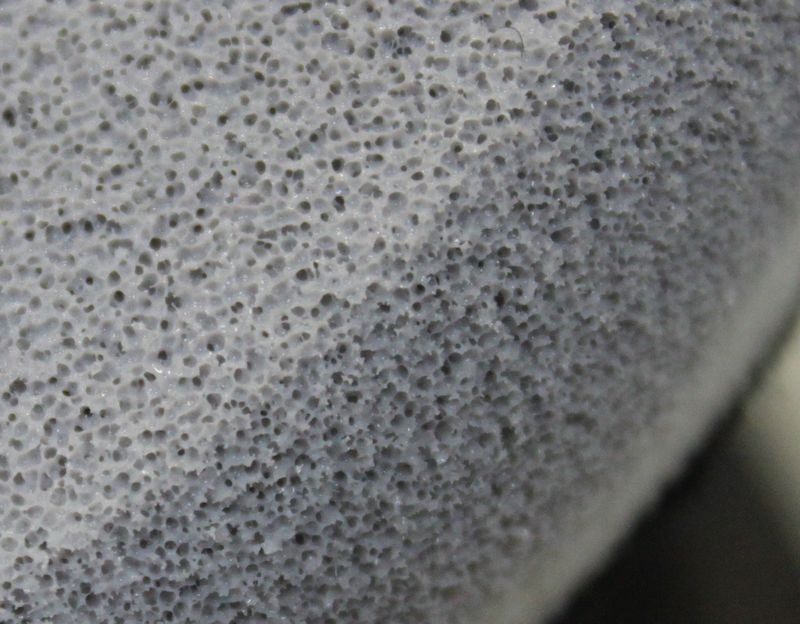
Start with a clean, dry pad and add some fresh product to be spread out to the face of the pad. Using your finger, spread the product out over the pad and then using your finger work it into the pores of the pad. Don't saturate the pad, just use enough product to make sure that 100% of the working face of the pad has product coverage.

PrimingPad01.jpg


PrimingPad02.jpg


Work the product around the face of the pad and into the pores
PrimingPad03.jpg


PrimingPad04.jpg


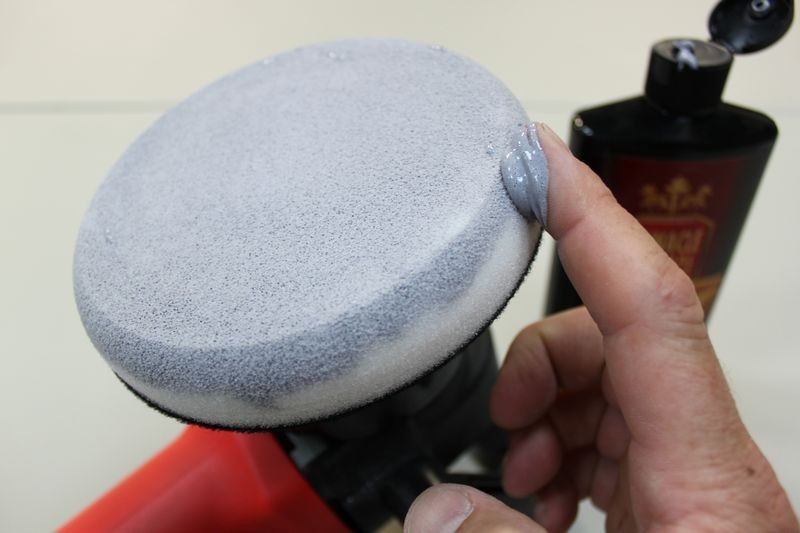
Any extra, take and apply to the outer edge until 100% of the working face of the pad is primed with product.
PrimingPad05.jpg


As an option you can also prime the outer edge. This helps if you're buffing around convex curves or around panels that the edge of your buffing pad may come into contact with, like spoilers, side mirror housings, curved panels etc.

PrimingPad06.jpg


PrimingPad07.jpg


Primed and ready to add "Working Product" to.
PrimingPad09.jpg


PrimingPad08.jpg


Adding "Working Product" to the primed pad
Some people will recommend 3 to 4 pea size drops of product as the proper amount of product to use and this can be correct for concentrated products or working small sections and if you follow this advice make sure you are not under-lubricating the surface being worked.

Pea size drops of product
PrimingPad10.jpg


PrimingPad11.jpg


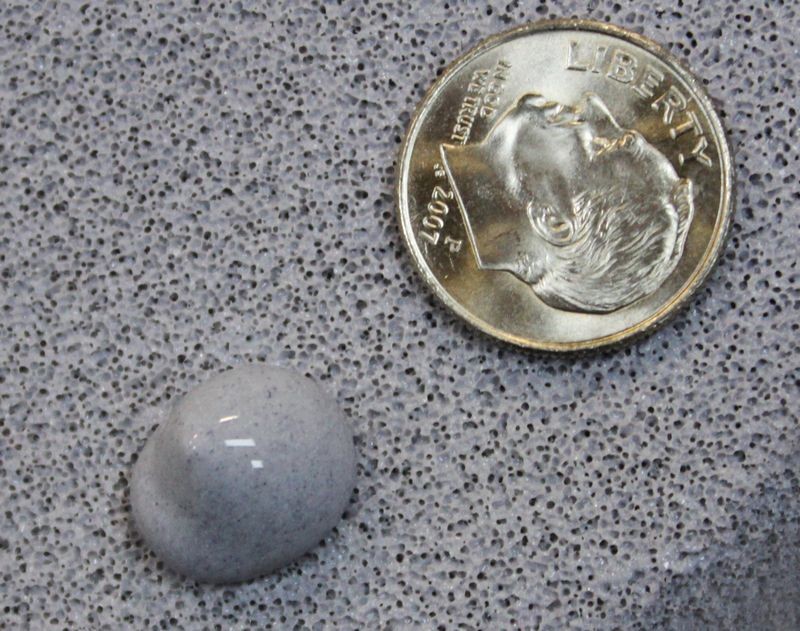
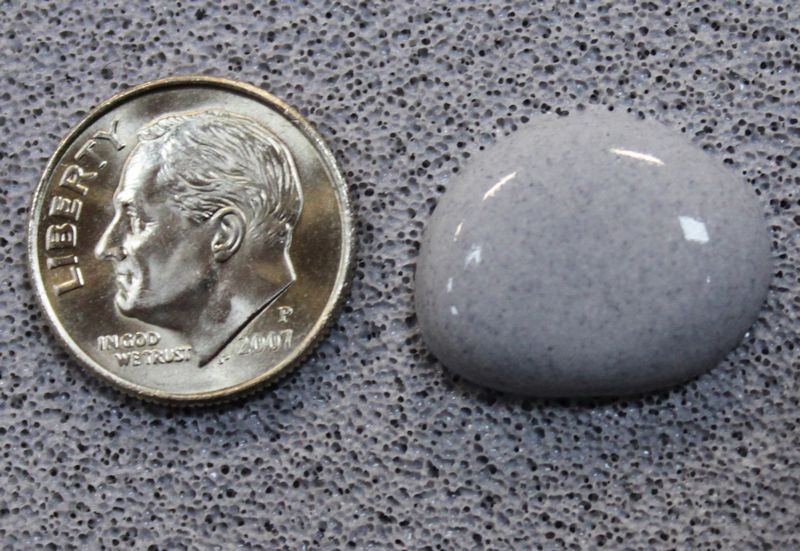
For some products and paint conditions, you may want more product on the surface working for you. Here's an example of dime size drops of product.

Dime size drops of product
PrimingPad12.jpg


PrimingPad13.jpg


How much product to use after priming

Ample
You want an AMPLE amount of product when first starting out because you pad is dry and some of the product is going to seep into the pad leaving less on the surface to LUBRICATE and ABRADE the paint

Cut down on the amount of product AFTER pad is broken-in...
After your pad is broken in with product, clean your pad after each section pass and when you apply fresh product you can cut down on the amount of product you actually apply to the face of your pad.


Too Little Product
Under-using product reduces lubricity and will make it more difficult for your pad to rotate efficiently.

Too Much Product
Using too much product will hyper-lubricate or over-lubricate the pad and will interfere with the abrasives ability to abrade the paint.


Keep in mind that you want enough product on the surface so you have,
  • Abrasives working for you.
  • A lubricating film between the paint and the pad.
Often times if you don't have enough product to work with you'll end up buffing to a dry buff. When you lose lubrication, friction increase and this can lead to micro-marring or hazing.


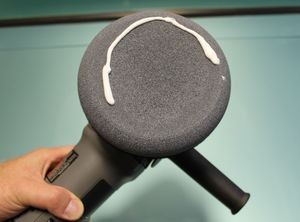
2. Applying a Circle Pattern of Product


Benefits to a Circle Pattern
As you work around the car you'll find that your product will migrate to the center on it's own. This can lead to pad saturation starting at the center of the pad where most of the heat is generated.

This can cause problems because wet foam will hold in heat better than dry foam and over time this can accelerate de-lamination between the hook & loop material and either the foam of the pad or the backing material on the backing plate.

Knowing this... I don't help the problem by using an X pattern as using an X-pattern means putting product onto the middle of the face of the pad.

If you're placing pea or dime sized amounts of product to the face of your pad then it's also a good idea to avoid placing the product directly in the center of the pad.

Circle Pattern on a clean dry pad and then worked for a Section Pass
AmpleProduct01.jpg
AmpleProduct02.jpg


After working the circle of product over a section, you can see it spread the product out over the entire face of the pad without having to spread it with your finger. The pad is now equally primed with residual product.


Cut down on product after your first section pass
At this point you could clean your pad or add fresh product and when you add fresh product you can adjust how much product you apply.

In this example I used half a circle of product since 100% of the face of the pad is now primed from the previously applied and worked product.
AmpleProduct03.jpg
AmpleProduct04.jpg


3. Applying an X-Pattern of Product
Applying your product to the face of your buffing pad using an X-pattern is a fast and simple way way to get product out of the bottle and onto the pad in a measured way that's easy to teach others and a method that's easy to duplicate over and over again.

X-Pattern on a clean dry pad and then worked for a Section Pass
AmpleProduct05.jpg
AmpleProduct02.jpg


Cut down on product after your first section pass
After making a thorough Section Pass. The pad is now equally primed with residual product. At this point you could clean your pad or add fresh product and when you add fresh product you can adjust how much product you apply. In this example I used half an X-Pattern, or a single strip of product since the pad is already primed.

AmpleProduct08.jpg
AmpleProduct09.jpg


Wet Buffing Technique

Maintain a wet film on the surface
The key is to have enough product on the surface as you're working a section to have a wet film of product that you can see on the surface behind the polisher as you move the polisher over the paint.
AmpleProduct10.jpg


:xyxthumbs:
 
I find that an "x" shape puts too much product in the center of the pad, where two things occur.

1. The product is drawn to the center of the pad during use.

2. The is is where most of the heat is concentrated, thus expediting negative consequences.

If you are repeatedly using an "x" pattern to successively apply more functioning product, you will end up compounding the issue. (Puns?��)

I like Hex Logic pads myself, but as far as orange pads go, I give the Lake Country CCS the nod. The Orange Hex Logic foam reminds me of memory foam, and seems to get "mushy", where the CCS pad holds it's rigidity.

I like and use the yellow, and green for compounding, blue for polishing, red for waxing, and grey for cleaner wax type products.- In the Hex Logic range.

Conversely, I use all of the colors in the CCS line. I just wish these companies would do a flat red pad. I like the face designs on my compounding and polishing pads, but not so much for my waxing.
 
I find that an "x" shape puts too much product in the center of the pad, where two things occur.

1. The product is drawn to the center of the pad during use.

2. The is is where most of the heat is concentrated, thus expediting negative consequences.

If you are repeatedly using an "x" pattern to successively apply more functioning product, you will end up compounding the issue. (Puns?��)


Totally agree.

In fact, I use to teach people NOT to use an X-pattern but the Circle Pattern for the sole purpose of doing everything a person could do to avoid pad saturation at the center of the pad. I actually taught this in my Meguiar's classes when their normal practice was to show the X-pattern, at least years ago.


The product is going to migrate to the center back of the pad where it causes a problem so why do anything to help it?


:xyxthumbs:
And, I learned the circle technique from your tutorials!

I still prefer it for open cell pad designs, where I prime with something like m34.

For the denser foams (think yellow, orange and white CCS), I like priming with product. Another technique I learned in you videos. :)
 
Mike Phillips said:
"The product is going to migrate to the center back of the pad where it causes a problem so why do anything to help it?"

I still can't understand what laws of Physics could lead to this phenomenon

Centrifugal force should be moving whatever is on the pad out towards the edges


I have seen mentioned that the oscillation of the pad, sort of "reaches out" and grabs the polish, but if the pad is flat to the surface...the edge of the pad would be collecting any polish from the surface of the paint...not the center of the pad


I hypothesize that the center of the pad appears to gather more polish because it is loosing less than the edges and it in fact is not gaining any polish at all. What started there is more likely to stay there.

I think Kevin Brown used the analogy of marbles trapped underneath a dinner plate in a different context, but it seems it would apply here. Not positive it was him, though.
 
I think it was using the x pattern over saturating and heating the pads. When i polished I tried the circle technique for a half, and the pea sized drops technique on the other half. And had no issues for either with my white hex logic pads. I thought that might be the problem just need the reassurance.
 
I've never used Hex Logic pads, I'm kind of a flat pad guy myself as it makes more sense when buffing a flat surface plus all the other factors that go into working on thin, scratch sensitive surface.

I recommend reading this article, more than just the top post....


Video: Mark your backing plate to make it easy to see pad rotation


:dblthumb2:


I agree 100%. I tried those pads and the ccs pads and went back to LC flat pads. I also didn't like the fact that product gets lost down in the grooves or dimples, this lead to over saturation.
 
I still can't understand what laws of Physics could lead to this phenomenon

Centrifugal force should be moving whatever is on the pad out towards the edges

What you wrote above makes sense but after using dual action polishers since they were taken from the wood sanding industry and introduced to the paint polishing industry here's what I've seen over and over and over again...

Product residue builds up in the center of the backing plate


This means if you buff long enough with a single pad the product will migrate through the pad, through the adhesive, through the velcro loop material and build up on the hook material on a DA backing plate and build up in the center first.

Can I get a witness?


So I too don't understand how this happens as it would seem that centrifugal forces would cause excess product to sling outward but I know what I've seen for over 25 years now. This is way I also would teach people to use the Circle Pattern instead of the X-Pattern.

Then Kevin Brown started the practice of priming your pad and adding drops of product to the OUTSIDE of the pad and because I agree with this approach I started sharing it too and always giving credit where credit is due, see my how too book on page 61 in the First Edition and page 77 in the Second Edition.

Just to note, Meguiar's as far as I know started the X-Pattern as that's what they showed in their early videos and all though I don't think it's a good idea to place product in the center of the pad MILLIONS of cars have been de-swirled using the X-Pattern. It's just as a "collective" when new or better ideas are introduced they are disseminated over time and this is greatly sped up via this thing called discussion forums.

:D


Here's my article on the history of the electric DA Polisher, I've never seen anyone else document this before... since I was there when it happened it's kind of easy to write the article.


The history behind polishing paint with a DA Polisher


:xyxthumbs:
 
Product residue builds up in the center of the backing plate


This means if you buff long enough with a single pad the product will migrate through the pad, through the adhesive, through the velcro loop material and build up on the hook material on a DA backing plate and build up in the center first.

Can I get a witness?


So I too don't understand how this happens as it would seem that centrifugal forces would cause excess product to sling outward but I know what I've seen for over 25 years now. This is way I also would teach people to use the Circle Pattern instead of the X-Pattern.

I'm with you, brother Mike! Circle Pattern!
 
I still can't understand what laws of Physics could lead to this phenomenon

Centrifugal force should be moving whatever is on the pad out towards the edges
With Newton's Third Law of Motion in mind...

I'll venture to say
that what is at play, is:
Centripetal Force; and, its counterpart:
Centripetal Acceleration----whose direction is always towards the center...towards the rotating axis.


But, to be sure:
"I feign no hypotheses". :)


Bob
 
I'm totally new to polishing. My first attempt was with porter cable with orange CG hex logic pads. I had all 3 pads detach from the Velcro and fall apart.

Sounds like you're using too much pressure or you have defective pads.
 
I think it was using the x pattern over saturating and heating the pads. When i polished I tried the circle technique for a half, and the pea sized drops technique on the other half. And had no issues for either with my white hex logic pads. I thought that might be the problem just need the reassurance.

Sometimes I'll start with the circle, and from there do the drops
 
I agree 100%. I tried those pads and the ccs pads and went back to LC flat pads. I also didn't like the fact that product gets lost down in the grooves or dimples, this lead to over saturation.

My CCS pads have varying depths of dimples, ranging from very deep to almost non existent.

Personally I like them these pads with the designs in them. I feel like they don't generate as much heat, and it helps manage product dispersion. Granted I've only got Megs smat products in my arsenal. I might want to use a flat pad with a diminishing abrasive product.
 
Back
Top