Hello there from Vancouver, Canada.
Hi Slicer!
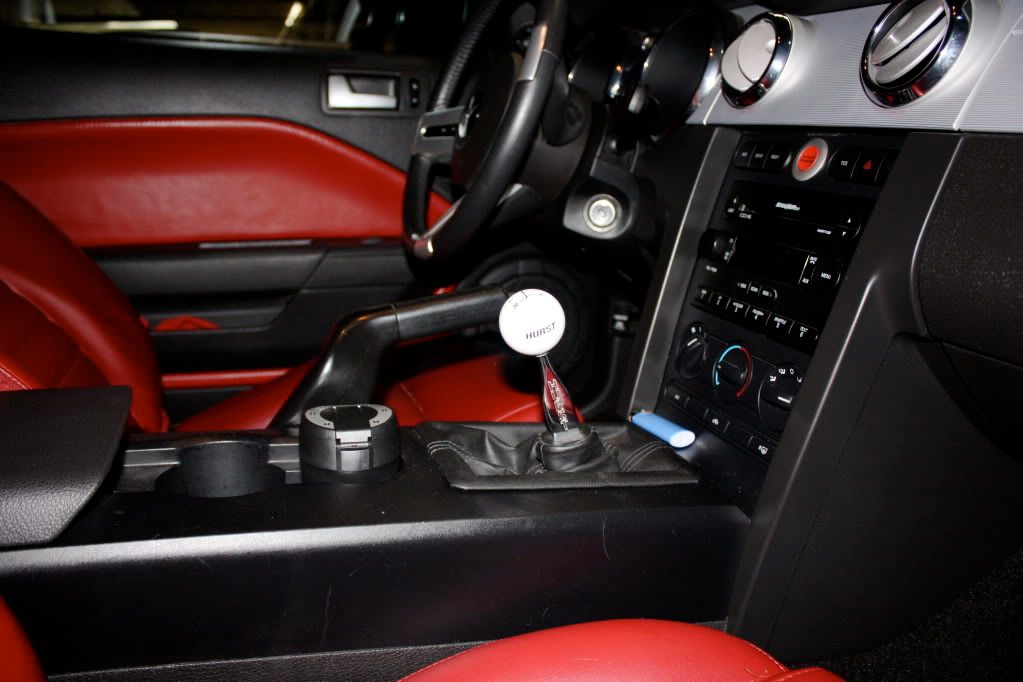
Any tips on how to remove a scratch from the plastic center console? I've got two on the passenger side that look like a blonde hair on black plastic.
Beneath the shifter
Nutshell Answer
For the most part you can apply a plastic dressing and this should mask the scratch a little. The problem is that you can't really abrade that time of material and "Surface Texture" with the end result looking like the plastic around it and the way you remove below surface defects is to level the surface through some type of abrading process until the the upper surface is level with the lowest depths of the defect/scratch you're trying to remove.
Long Answers 
The best article I ever wrote for questions like yours is actually on MOL. I tried to re-write it for Autogeek without plagiarizing myself which is kind of funny, here's both...
On AutogeekOnline.net
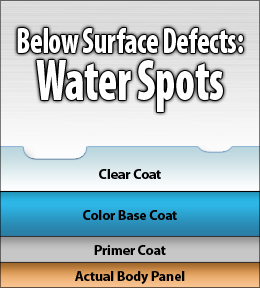
What it means to remove swirls, scratches and water spots out of automotive clear coats
One of the most common problems people want to solve when it comes to improving the appearance of their car's finish is to remove swirls, scratches and water spot etchings out of their car's clear coat finish.
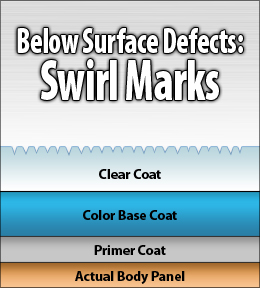
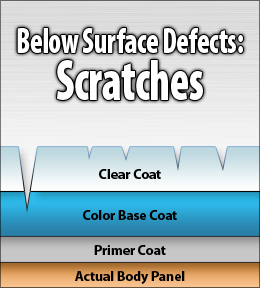
Below Photographs Courtesy of MeguiarsOnline.com
Swirls
Scratches
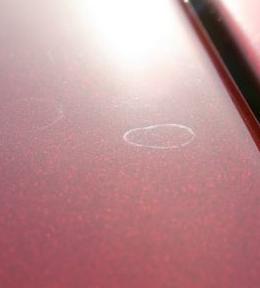
Water Spots
In order to remove any type of below surface defect out of a clear coat finish you need to carefully remove small amounts of paint surrounding the defect, (or defects), until the surface is uniformly level or flat. Of course some defects may be too deep to remove safely and in these situations you can often time improve the defect but not completely remove the defect.
In other words, in order to remove a scratch out of an automotive clear coat you must remove enough paint surrounding the scratch until the upper most portions of the surface are level with or equal to the lowest depths of the scratch or defect you're trying to remove.
Does that make sense?
The idea being, you don't really remove a scratch,
you remove the paint surrounding a scratch.
The problem with removing below surface defects like swirls and scratches is whether or not you have enough
film-build or
paint thickness to safely remove the defect completely without going through the clear coat and exposing the basecoat also called color coat. Generally speaking, factory clear coats are thin so you need to be careful and take the cautious approach of using the least aggressive product to get the job done.
If you remove too much paint and expose the underlying color coat the only way to fix the problem is to have the affected area repainted. The color coat is usually dull as it gets its gloss from the clear layer of paint.
On MOL
What it means to remove a scratch out of anything...
We get a lot of questions on our forum and at our Saturday classes from people trying to remove scratches out of all kinds of things, for example:
How do you remove a scratch out of;
* Glass?
* Clear plastic like a headlight lens, radio face plate, dash gages?
* Chrome, like a chrome wheel?
* Paint?
* Interior plastics like a plastic door sill or glove box door?
* Stainless steel, like a stainless steel door sill protector?
* Aluminum?
* Rubber?
* Pebble textured plastic like trim components?
This article isn't' about the how-to for removing scratches out of the above materials or coatings but about the practical science behind how you remove a scratch or
any below surface defect out of any material or surface coating.
Read the below statement and think about it for a few minutes...
"Some materials and/or surface coatings don't lend themselves well to being abraded with the end-result looking good or looking like the original appearance"
In order to remove a scratch out of anything, metal, plastic glass, paint, etc.
You must remove material around the scratch until the upper most portions of the surface are level with or equal to the lowest depths of the scratch or defect you're trying to remove.
Does that make sense?
The below diagram is for paint, however the the same idea applies to just about any coating or surface material.
In essence, you don't really remove a scratch,
you remove material around a scratch.
Then the big question becomes...
Is the material or coating workable?
As in, can you abrade small particles of the material or surface coating and leave behind an original looking surface.
For example: Some things you can abrade, (remove the scratch), but you can never completely remove all of your abrading marks, thus you can't really fix the problem, all you can do is exchange one set of scratches of a different set of scratches.
The next factor you have to consider or at least understand is;
How thick is the surface material or material you're working on?
You are limited to what you can do with any material or surface coating. By this we mean there is usually a limit as to how much material you can remove before you run into the risk of removing too much and exposing the underlying surface or removing so much material that you change the component you're working on in a way that it won't look good and you can't undo the damage.
There's a saying on this forum we use often when discussing different members detailing projects and it goes like this,
"Sometimes you don't know what you can so until you try"
It's always a good idea to test your choice of products, applicator materials and application process, (by hand or by machine), to an inconspicuous area. If you cannot make a small area look good with your product, applicator and process, you will not be able to make the entire surface look good.
It's always a good idea to test first and error on the side of caution, versus make a mistake you cannot undo over the entire component or vehicle.
Hope that helps...
")