Holiday Project One - Ceramic Coating the Jag Part 2
Up early this morning to get a start on the coating before it got too hot. With the bulk of the hard work done, all that I needed to do was to wipe the car down with Gyeon Prep before getting on with the whole point of this project.
In the past, I have been happy using waxes and sealants on my cars, the usage patterns and care they receive means that longevity is not an issue. But I have wanted to try a ceramic coating for a while now, so this represents a change in direction for me. Not to mention the chance to learn a new skill.
So what coating? I looked at Carpro, Gtechniq and NV coating's before landing on the new EVO range from Gyeon. Because I'm a classic overthinker, the key requirement I wanted was something that was going to be forgiving to work with, the EVO coatings seemed to have focused on that aspect in particular. I was tossing up between Mohs EVO or Pure EVO, the former getting the gong because of the "depth and pure candy gloss" qualities. Pure EVO also has a longer working time and more forgiving overall than Mohs.
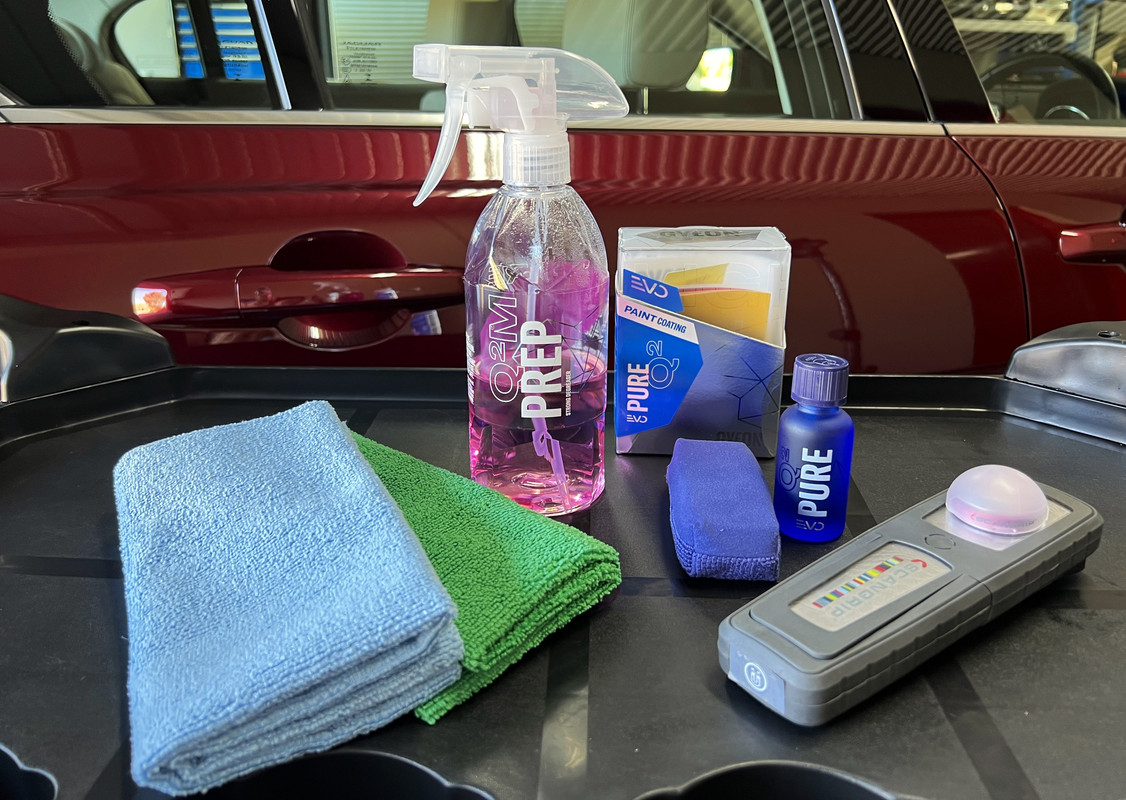

Gyeon Pure EVO comes in two different bottle sizes, 30ml and 50ml, the 30ml will easily do a car like this. Pure EVO is also a single layer coating with up to 3 years longevity with correct care. The kit comes with the coating and an applicator, along with installation and care instructions. With the huge catalog of Youtube videos available to watch, the instructions are largely useless anyway.
Such was my concentration, I sort of got in the zone during this process and didn't focus on pics, so they won't be as prominent as usual.
The first step is to shake the bottle and then prime the applicator with a generous amount of product. It's good practice to put the cap back on the bottle between applications.
There are different methods of laying down a coating, I put down a "draw line" down the middle of the panel and then followed with the usual crisscross pattern. The draw line allows you to pick up the coating and distribute it more evenly as you work across the panel. Pure EVO is also a thick, sticky coating to work, I'm guessing this is to make it very obvious where it's been applied.

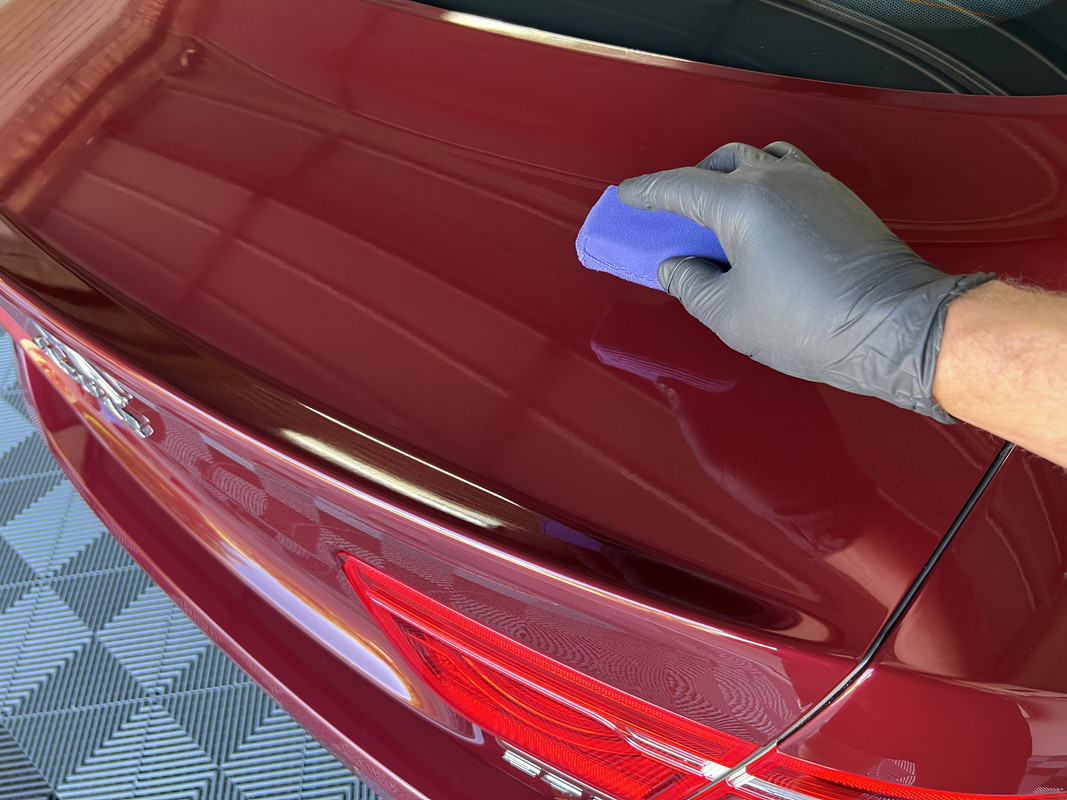
One of Pure EVO's drawcards is the super long working time, up to 10 minutes in the right conditions. The warm temps today sped that up a little for me, hence starting early. That said, Pure EVO will bond instantly to the paint and can be removed before the 10min.
Removal is via two low-pile towels, one for the initial wipe to level down the coating, followed by a second towel as a final buff. In my case, I had blue towels for the first wipes, green for the second to help me remember which was which. Using a diffused light will help pick up any high spots.


And that's where the pics stop on the coating process. I started on the boot lid and adjoining rear quarter panels. I then did the roof, hood and front quarter panels, followed by the doors and mirrors, finishing with the bumpers, lights and lower sills. Overall, Pure EVO was very easy to work with.
I chose not to coat the glass with Pure EVO, opting for Gyeon Quick View Instead. In a technical sense, Pure EVO would be fine on glass and probably outlive Quick View, but I have found Quick View to very good, especially on garage queens. Having said that, it's been doing stellar work on my daily Ranger.

What I love about Quick View is the simple installation. Having the glass back to the bare bones after claying and polishing yesterday, all that was needed was a quick wipe with Prep. The major drawcard for Quick View is the integrated felt applicator, except mine is welded shut by the cap! So, I just remove the secondary lid and squeeze the product onto a microfiber applicator pad. Quick View is applied to all the exterior glass in one shot, left to sit for 15 - 20 min and then buffed clean with a damp towel. I then follow up with glass cleaner and two towels to deliver a streak free finish. The glass cleaner doesn't remove the coating by the way.
After the exterior glass was in shape, I had to go through and clean the interior glass as it was letting the side down. If you think the back glass of a Mustang is hard to clean, a Jaguar XE sedan is not much easier..........hence it being a touch neglected.
Having removed the number plates, they needed some attention too. I cleaned the plate and plate protector in the sink with APC, dried and then, yes I know I know :doh:, polished those too with the Nano in rotary mode and Rupes yellow compound.

I then followed up by coating both pieces with Gyeon Cure. It's amazing what a difference this made to how they looked on the car. So, jokes aside, certainly worth doing. It's called "detailing" for a reason you know! :xyxthumbs:

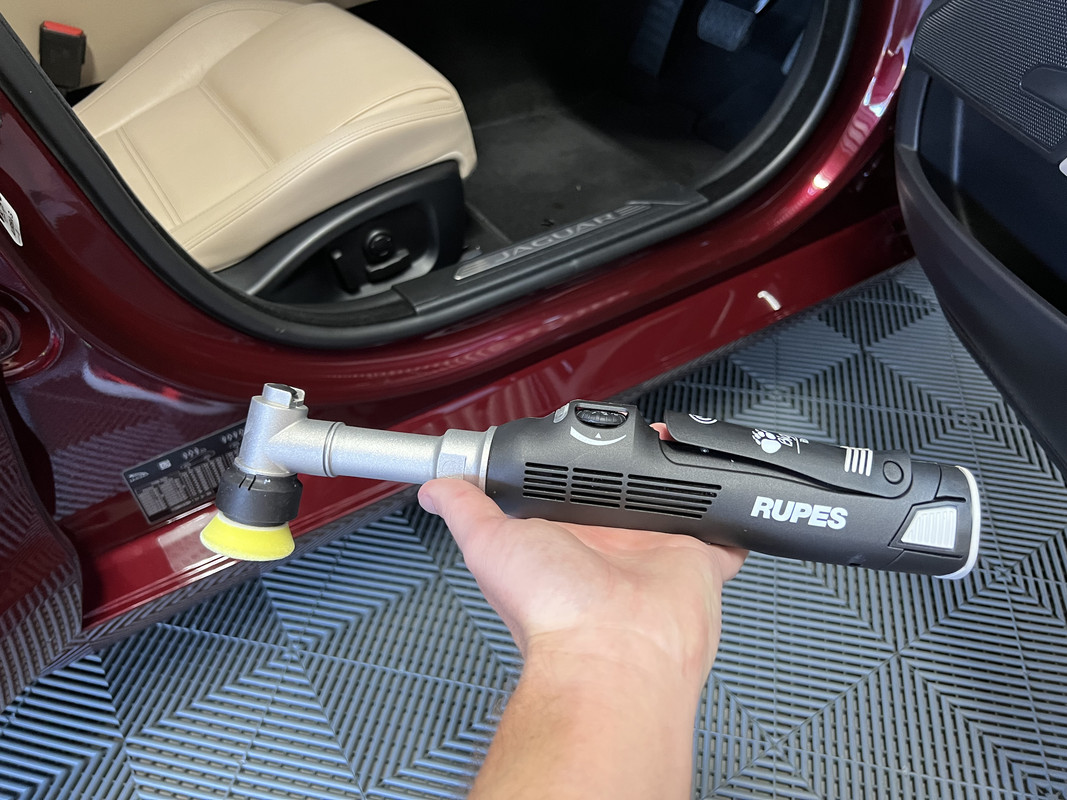
Next, the door sills. The XE has massive inset door sills that tend to get hacked up quite easily. The Nano in rotary mode again, this time with Sonax Perfect Finish. I then coated these areas in Cure as well. Again, a job worth doing due to the big difference this step brought to the table.

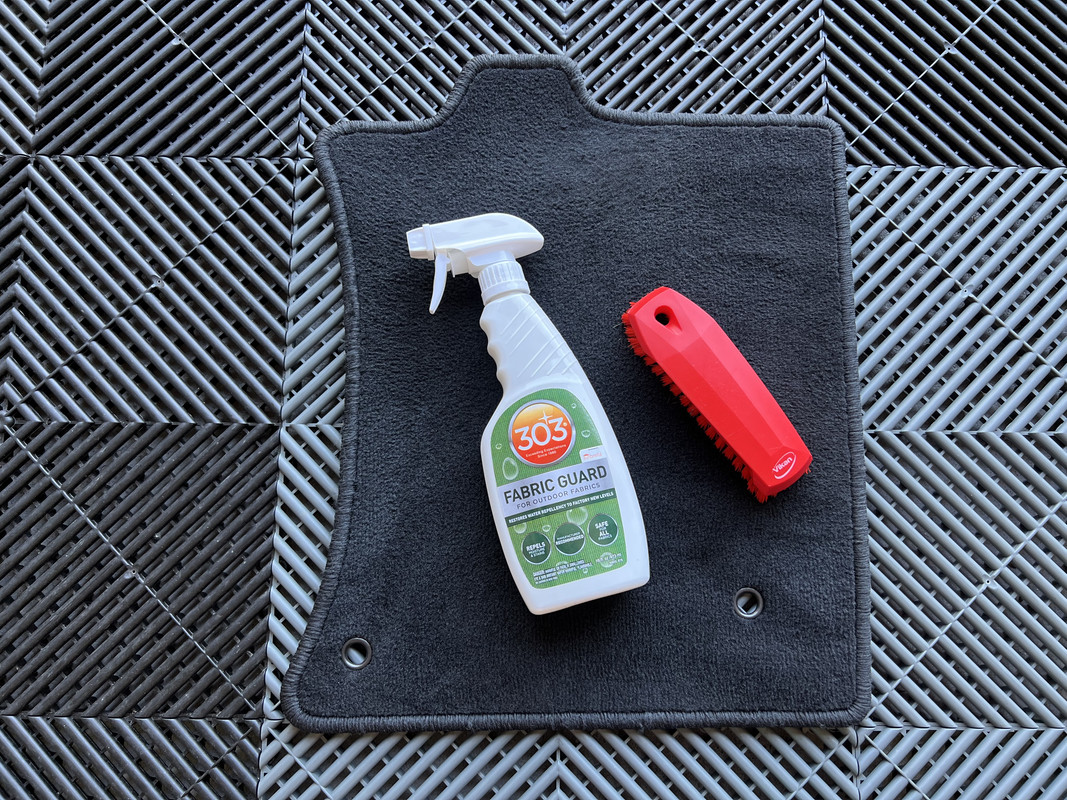
The next steps focused on the interior. After a vacuum, I decided to apply some 303 Fabric Guard to the floor mats.
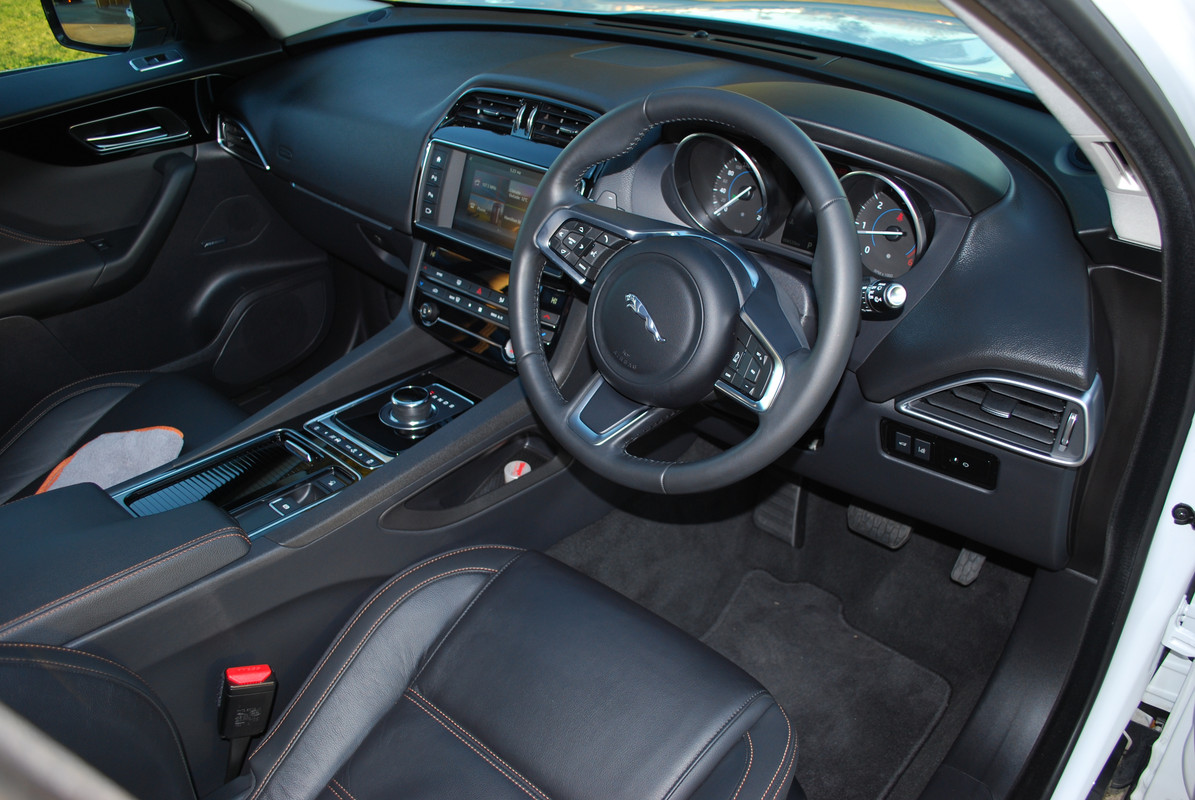
It was then onto the leather. Having such light coloured leather requires diligent maintenance. Even so, it didn't need much so I settled on the Mild Leather Cleaner from ColourLock, teamed with their leather brush and an interior towel to wipe away the residue.
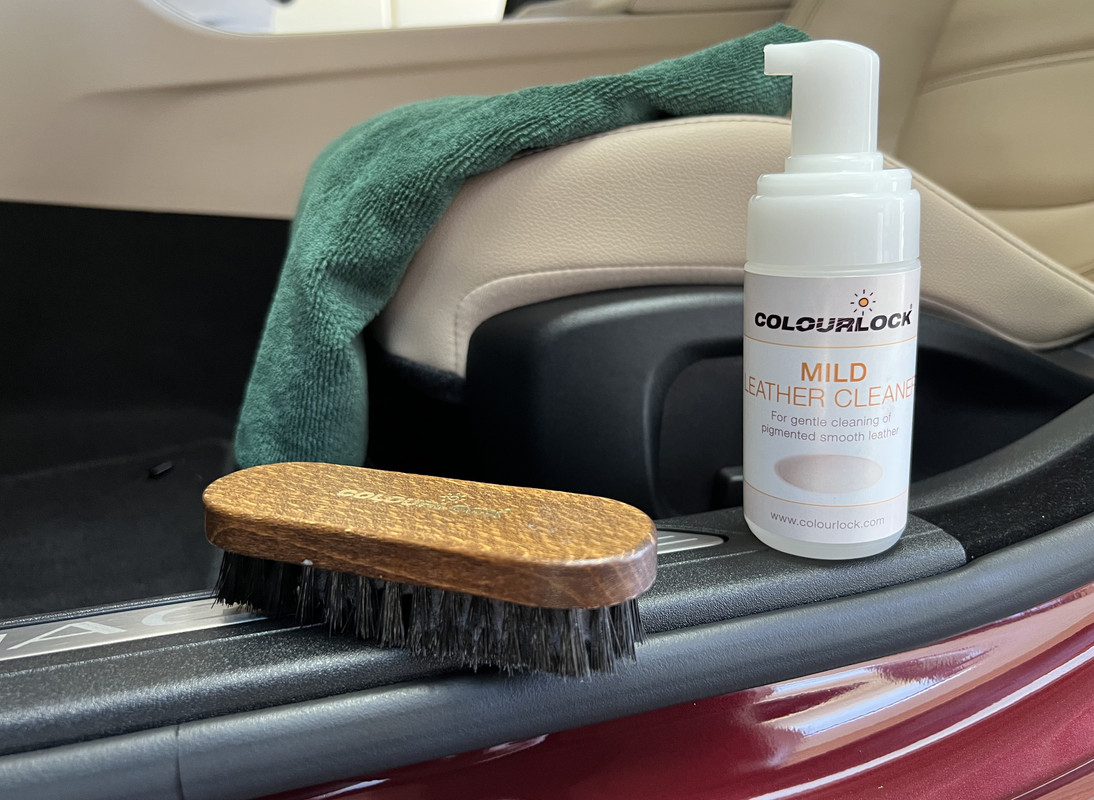
Once all seats, door trims, center console and steering wheel were clean, I followed up with ColourLock Leather Protector, applied with one of their applicator sponges.

The key reason why I like ColourLock leather products is the natural, matte sheen they leave behind, especially on a lighter colour like the Light Oyster seats shown here.
Final step on the interior was a wipe down with Auto Finesse Spritz.

Returning to the exterior, I dressed the tires and then gave the engine bay a wipe over with ONR and followed up with Meguiar's Hyper Dressing. Don't be fooled by the Jaguar logo, a Ford EcoBoost is hiding under there.


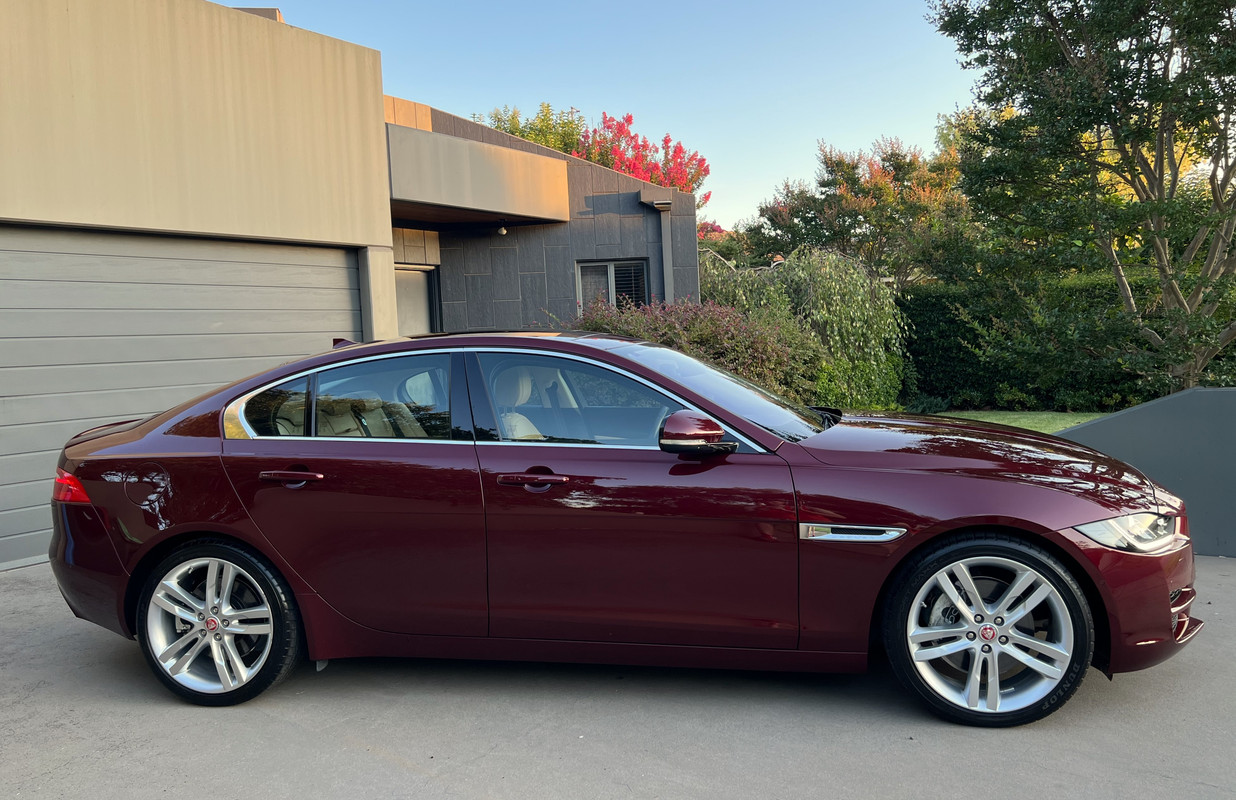
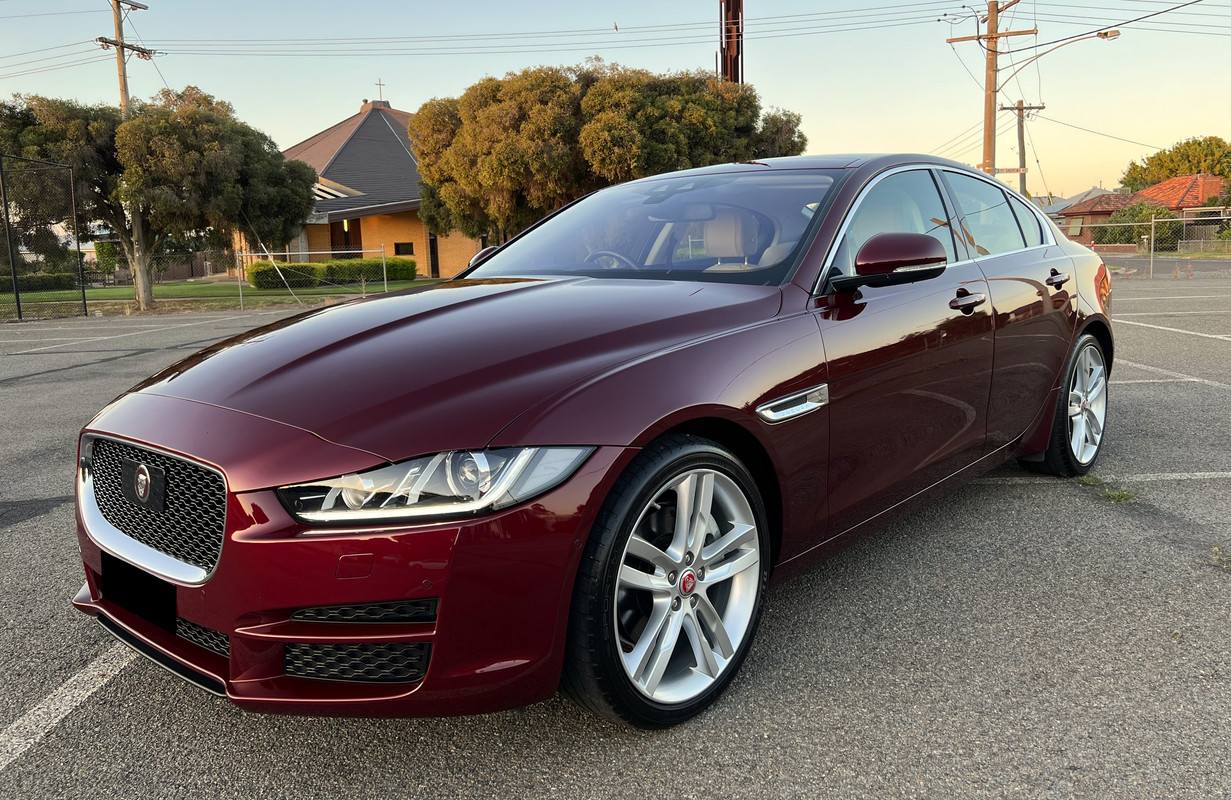
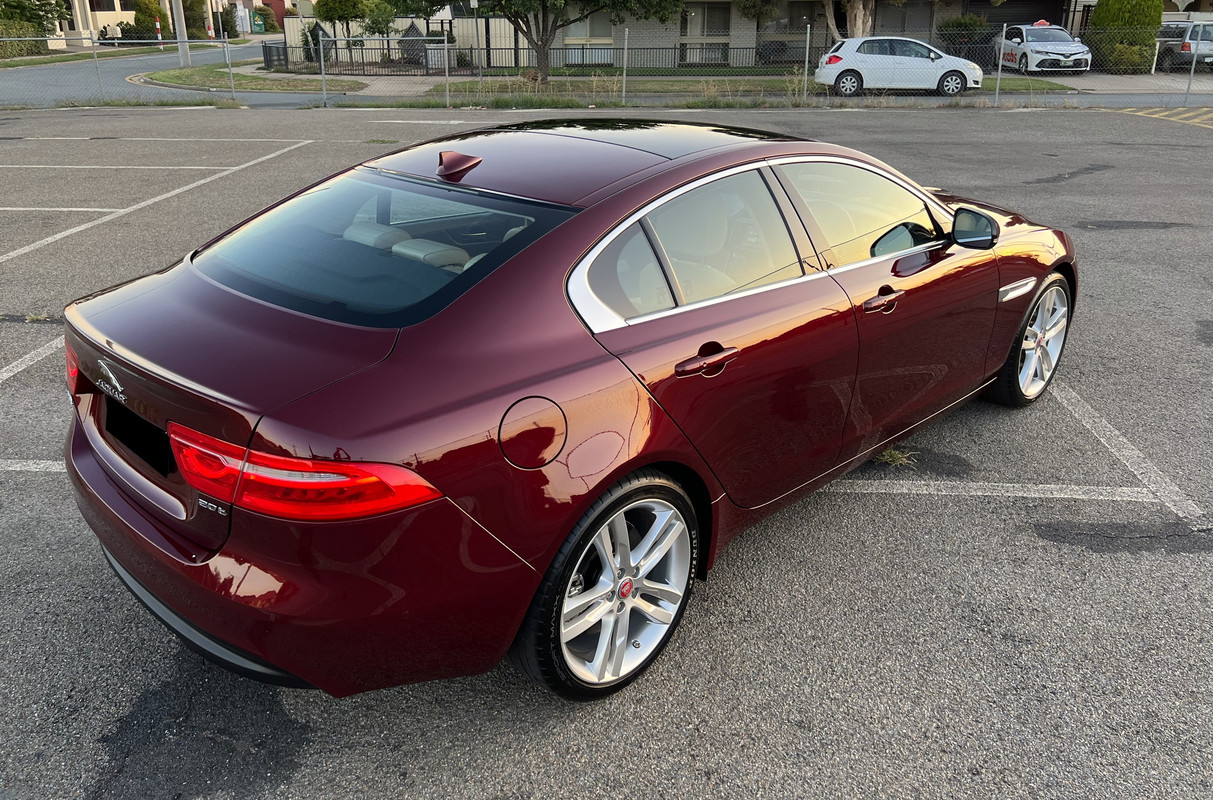
I bloody love this interior! In all black, these cars look a little plain in terms of interior presentation. But with the two-tone treatment, it looks a million dollars in my opinion!

And that concludes this project. Apologies that I don't have any nice glamor shots just yet, it's cold-drink-o'clock and I'm buggered! :sleep

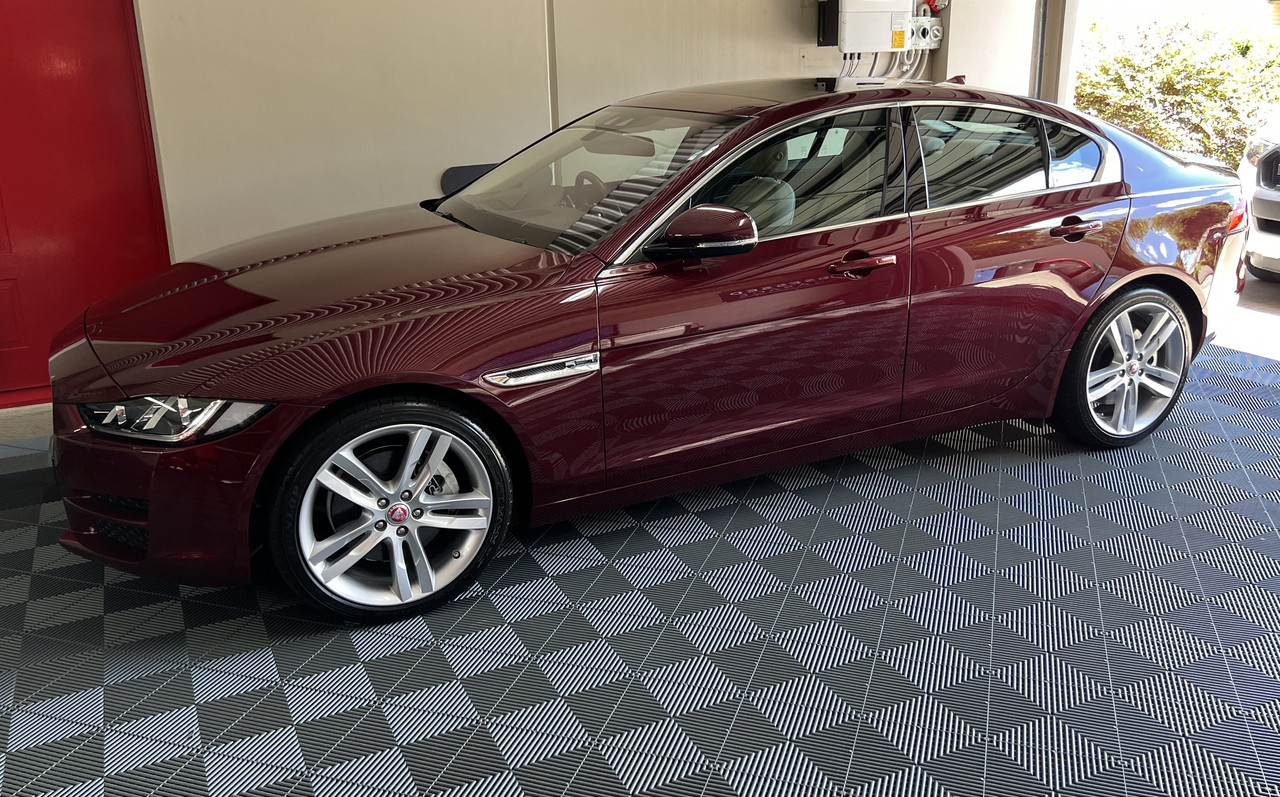


Overall, I'm happy with the result. Important to note that Pure EVO is not a "slick" coating, however it makes up for that with it's candy gloss appearance, chemical resistance and extreme water repellency. I can't wait to wash it now!

Special thanks to those who gave advice regarding this project, much appreciated. :dblthumb2:
️Those extra steps are what people like us LOVE to do, I always go overboard when prepping because THAT is the time to use everything and make it right
 ️Those extra steps are what people like us LOVE to do, I always go overboard when prepping because THAT is the time to use everything and make it right

 c7424::buffing::drool: