Using Megs Ultimate Compound

John`

New member
Joined
Jul 25, 2010
Messages
6
Reaction score
0
Hello everyone, I am new here but have been a detailing enthusiast for many years now.

I have always used a cheap 3000 rpm orbital and have finally made the step to a Porter Cable 7424XP.

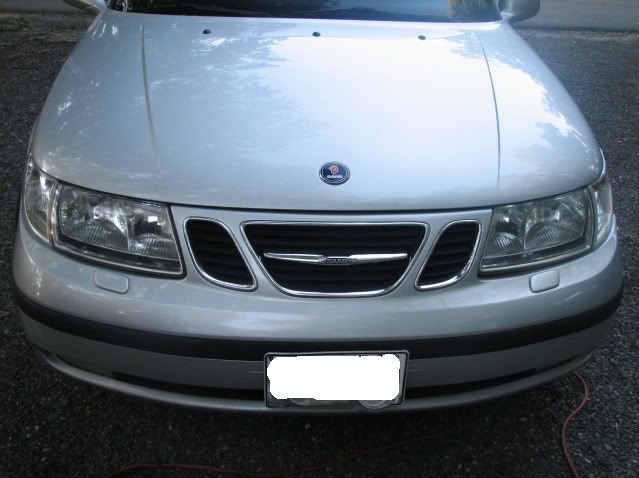
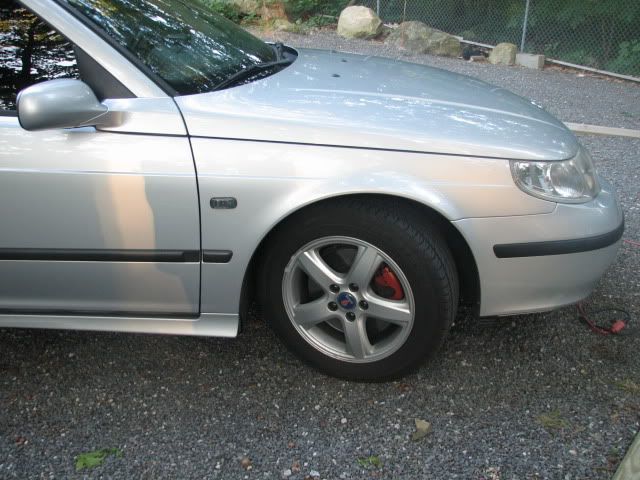
The paint on both of my cars are in great shape, one is silver and one is black so I have different potential issues on both.

I want to use my Porter Cable tonight so I went to Advance Auto and saw some Ultimate Compound, read the bottle and figured it would be a good starting product.

I then read online about it and realized it may be too much for my paint as I do not have any swirls, or defects to remove.

Am I going to hurt anything by starting with this product on an otherwise find surface or should I just use the cleaner wax and follow up with my regular NXT 2.0?

I often do family vehicles and some of those can be pretty rough, and I may save the UC for those.

Thanks so much for any input.
 
The Ultimate Compound is perfectly safe to use on your projects. This is a SMAT product and one of the benefits to SMAT is you can stop at any time during the buffing cycle.

In simple words, it's only as aggressive as you make it and as soon as you see the defects are gone stop working the product and wipe the residue off the paint.


And since this was your first post to our forum....

Welcome to Autogeek Online!


:welcome:
 
All the techniques shown in the videos and all the how-to information in the below article will work with Ultimate Compound and any compound or polish for that matter with a DA Polisher.


:xyxthumbs:


How To Remove Swirls, Scratches and Water Spots using a PC 7424XP, Meguiar's G110v2 or Griot's Garage 6" Random Orbital Polisher

Using a DA Polisher - Part 1
[video=youtube_share;zUHRnHsSXZU]- How to remove swirls, scratches and water spots using a Porter Cable DA Polisher[/video]

Using a DA Polisher - Part 2
[video=youtube_share;fxwlWijdIxM]- How to remove swirls, scratches and water spots using a Porter Cable DA Polisher[/video]

Using a DA Polisher - Part 3
[video=youtube_share;9objUFdpsG4]- How to remove swirls, scratches and water spots using a Porter Cable DA Polisher[/video]


Most Important...

Here's how to do a "Section Pass" when trying to remove swirls, scratches and other below surface paint defects.

How to do a Section Pass
[ame=http://www.youtube.com/watch?v=Q70g83mnTn4]YouTube - How to do a "Section Pass" with a Porter Cable 7424XP[/video]


The Definitive How-To Article for Removing Swirls, Scratches and Water Spots Using a Porter Cable 7424XP, G110v2 or Griot's Garage Polisher


:)
 
Mike, thank you for the input.

No problemo...

If you're new to machine polishing, I like to recommend tackling just a single panel from start to finish your first time, for example the hood of a car. Or maybe the hood and front fenders.

To wash and dry the car, then clay the paint and then machine polish the front clip of a car including the correction step, the polishing step and the waxing step will take you a few hours and you won't get burnt-out...

Tackling an entire car in one day will take an average of 8 to 12 hours depending upon the size of the vehicle, how bad the paint is and how fast you work...


:)
 
Mike,

I clay the car every spring and then use the clay to maintain it in certain areas throughout the summer so I think I am good there.

I just washed and dryed the car last night, I am going to dust it this evening before I begin to make sure its clean.

I am going to focus on just the hood tonight, and will problaby even put some tape down the middle to see a before and after. I plan to start with the UC and then a couple coats of NXT, unless you can advise doing something different (cleaner wax in the middle?)

I am not expecting much as the paint is in such good shape as it sits, but maybe I will be surprised. I went out and tried to find swirls or defects yesterday and could find none on my car (silver Saab 9-5)- I am really OCD about taking care of it.
 
I am not expecting much as the paint is in such good shape as it sits, but maybe I will be surprised.

Take some pics before/after just in case it surprises you, so we can see too. :)
 
Mike,

I am going to focus on just the hood tonight, and will probably even put some tape down the middle to see a before and after. I plan to start with the UC and then a couple coats of NXT, unless you can advise doing something different (cleaner wax in the middle?)


UC will finish out really nice on some paints but on others you'll see some micro-marring. Your pad is a huge factor too...

I was in the studio testing some polishes and pads today and the difference in micro-marring between a foam cutting pad, a foam polishing pad and a finishing pad was very visible.

The point being you want to do some testing on each paint system you work on till you get a feel for which combination of products and pads work best as different paint systems polish differently.


Check the results after the UC, if you have a Brinkmann use that if you don't try to pull the car into the sun when it's high overhead and not cloudy.

If you really want to see what's happening at the surface level then chemically strip the paint with Isopropyl Alcohol or Mineral Spirits or you can even wash the hood with a strong detergent wash like Dawn dish-washing soap.

What you're looking for is a 100% clear, defect free finish. When you can achieve this to one small area, theoretically, you can duplicate this process over the rest of the car and get the same results.

Just to note, usually you want and need to follow an aggressive compound, (anyone's compound), with a less aggressive product. In the Meguiar's line that would be SwirlX or M205, but there are other good finishing polishes available too...

The important thing is to test first and dial in a process that meets your expectations before going over the entire car.


:)
 
Well I used a black pad with the UC and a white with the NXT.

I did not notice any difference with the before/after, but my lighting was pretty poor.

Here are some photos, the left side of the tape is where I started and eventually did the whole hood.

IMG_6038.jpg


IMG_6039.jpg


IMG_6055.jpg


IMG_6051.jpg
 
In simple words, it's only as aggressive as you make it and as soon as you see the defects are gone stop working the product and wipe the residue off the paint.
I've never understood this. Until the polish is wiped away, I'm not sure how you can clearly see if the defects were removed? Even after the polish is removed, only an IPA wipedown will show true results.
 
UC is a compound, not a polish.

I have chemically stripped finishes a time or two and found that when using certain polishes and compounds that they do not fill in defects.

Meguiars does not recommend wiping down paint with IPA after using their polishes and compounds. There was a thread about it somewhere.
 
Meguiars does not recommend wiping down paint with IPA after using their polishes and compounds. There was a thread about it somewhere.

Never heard that before...what's the reason?
 
Well I used a black pad with the UC


Can you give us a little more detail about this black pad?

The two black foam pads that first come to my mind are the Lake Country foam finishing pad and the Meguiar's soft foam finishing pad.

Both of these are so soft that they wouldn't help the abrasives in the Ultimate Compound to work efficiently to remove below surface defects.

Now there's a black wool cutting pad that is used on rotary buffers and it would effectively work the abrasives in the Ultimate Compound if used with a rotary buffer.


So help us out here... which type of pad are you using?

Also, just to double check, what speed setting are you using on the tool?


:)
 
I've never understood this. .

I'm not sure what you mean by the word "this", I tend to type in complete sentences and include details about the topic at hand but if by the word this you mean, being able to stop anytime in the buffing cycle then here's an explanation for you Mark.

I've typed out the reason why you can stop polishing when you see the defects are removed multiple times on MOL, not sure about here...

The point is that since the abrasives don't break down like a diminishing abrasive product you don't have to buff till they break down, therefore when you see the defects you're trying to remove are gone you can stop buffing. With a diminishing abrasive product you have to buff till the abrasives have broken down regardless as to whether you've removed the defects or not because to stop buffing before they have complete broken down could possibly leave swirls or hazing in the paint because the abrasives were still cutting at the time you stopped buffing.


Until the polish is wiped away, I'm not sure how you can clearly see if the defects were removed? Even after the polish is removed, only an IPA wipedown will show true results.

And this is why forums are so great, it gives people the opportunity to really dig deep and dissect a topic.... :props:

What I mean is... in general, if you're starting out on a finish that is filled with swirls and scratches, and not white or silver paint, then it's pretty easy to monitor your success while buffing to some level to at least give you an indicator that you're making some headway. Then when you wipe off the residue you can see you're either removing the majority of the defects or your not and this will be apparent without stripping the finish.

Now if at this point your want to chemically strip the paint and inspect you can also do this too.

Is that enough detail?

If you own a white, or silver metallic finish or some other light colored car... then you're going to have to work at it a lot harder to see changes and difference because of the color of car you chose to buy.

As a habit in life, I've never buffed a lot of daily drivers most special interest cars have some color to them so in this aspect I've alway been fortunate because it's easier to see defects on darker colors.

:laughing:
 
Back
Top