A tip for machine polishing....

WRAPT C5Z06

New member
Joined
Nov 12, 2009
Messages
12,615
Reaction score
0
At times I don't get the correction that I want. For my last correction, I decided to slow my arm speed significantly; 1" per second, and boy did that help!!! I've never used "hack" arm speed, but I was still moving my arms too fast. Slow down your arm speed and you'll get better results, guaranteed!! This especially goes for when removing deeper swirls/defects.


Sent from my iPhone using Tapatalk
 
Yup- I put this into practice for my last correction on my car. It was a HUGE improvement.
Gotta remember to take your time, and let the machine do it's job :dblthumb2:
 
+1 Here as well, I have to remind myself this sometimes while working on one. If I do, the results are always much better.

HUMP
 
"sometimes you just have to slow down to go faster" (Darrell Waltrip)


great tip Mark!
 
"sometimes you just have to slow down to go faster" (Darrell Waltrip)


I use that tip for sharing with people how to do the final wipe...


The Final Wipe – Tips for creating a streak-free, show car finish


Mike Phillips said:
How it works
The way this works is really quite simple but let me break it down for you into simple terms so everyone can understand. When making the final wipe, your job is to remove all trace residues from the previously applied wax or paint sealant; that’s your job. While to the human eye the surface of your car’s paint looks smooth and flat, under a microscope it’s actually a landscape of hills and valleys, (which is high spots and low spots), as well as pits and pores and interstices. (Interstices = microscopic gaps and cracks in the paint)

Trace residues remain in the lower imperfections on the surface and when you move a polishing cloth over the surface the fiber’s of the polishing cloth grab onto and removes residues off the high points the easiest. Again, your job is to remove all the trace residues and do it in such a way that you do no harm to the highly polished surface at the same time, thus you need to use a premium quality microfiber, folded 4-ways to help spread out the pressure of your hand.

Now think about it, if you’re moving the microfiber quickly over the surface how much time do the residues on the surface have to transfer to the cloth? Seconds? Milliseconds? That’s not very long.

That’s why wiping like a mad man won’t remove streaks or residues and could possibly inflict swirls and scratches back into the finish.

Slow down to speed up
Instead, how about moving the polishing cloth slowly over the surface and enabling the microscopic sized fibers to get into the low portions where once they make contact with any remaining wax or polymers, the residue will have time to transfer from the paint to the cloth?

This is called the final wiping technique and most people would agree it makes sense. It also works most of the time for stubborn streaks that sometimes show up on dark colored paints but it’s also just a good technique when working on highly polished surfaces where your or your customer’s expectations are high.


:dblthumb2:
 
Slow down your arm speed and you'll get better results, guaranteed!! This especially goes for when removing deeper swirls/defects.


Great tip and reminder Mark... it's so important to move dual action polishers slowly over the surface for the correction step.

Years ago when I wrote my DA Troubleshooting Guide, I listed this as one of the most common mistakes people make when using dual action polishers.

DA Polisher Trouble Shooting Guide


If fact, I listed it as the #2 most common mistake.


Here's a list of the most common problems,
1. Trying to work too large of an area at one time.

2. Moving the polisher too fast over the surface.

3. Using too low of speed setting for removing swirls.

4. Using too little downward pressure on the head of the polisher.

5. Using too much downward pressure on the head of the polisher so the pad quits rotating.

6. Not holding the polisher in a way to keep the pad flat while working your compound or polish.

7. Using too much product or using too little product.

8. Not cleaning the pad often enough.

The list of remedies to the most common mistakes are shared in the article I linked to above and can also be found in my how-to book.


Great tip and reminder... for all of us....


:dblthumb2:
 
Mike - Do you recommend using the slow wipe down method during the compounding, polishing and waxing stage, or just during the polishing stage?


I'm not Mike but IMHO that theory would be stand true with all three stages.
 
Its funny .. I've watched a bunch of Rupes videos on youtube and it seems like the majority of them are using a fairly quick arm speed, like Paul Dalton for example. Even the official rupes videos show the operator working a blue pad over like half a hood and getting great correction.

So when I finally got a chance to try out my LHR15 recently I tried to replicate their technique... Needless to say I'm no Paul Dalton :laughing: No idea how he gets any correction moving the polisher at the speed he does. Maybe its just trick editing???

Slow and Low, that is the tempo :xyxthumbs:
 
fairly quick arm speed, like Paul Dalton for example.
I've thought the same EXACT thing. I asked one of my good buddies who happens to be one of the top dogs in the industry. He told me, "different strokes for different folks". With that said, yea, it's Paul Dalton. I couldn't get near the results he gets using his technique. He's very skilled. "Slow and go" is a tried and true method and is a lot more fool proof.
 
Yeah I'd love to be able to get the correction he gets with that sort of arm speed but it just ain't happening lol.

I got much better results making like 2 or 3 super slow passes .. Think Barry Theal calls it abrasive isolation, or something like that.

Let me ask you Mark cause I know you have a lot of experiece with all the Rupes polishers .. what pad and product do you tend to favor for heavy defect removal?
 
Let me ask you Mark cause I know you have a lot of experiece with all the Rupes polishers .. what pad and product do you tend to favor for heavy defect removal?

That's easy, I use Meg's 5.5" MF cutting & finishing pads with shine supply classic cut. FG400, D300, M105, M101 work great too. This would be with the LHR21.

With the Duetto, I like LC "thin" purple foamed wool pads.

I sold my Rupes 75E mini, didn't like it.


Sent from my iPhone using Tapatalk
 
Sweet thanks for the info. Never even heard of shine supply before.
 
This Chemical Guys Video has alot of detailed info on how to use a polishing machine properly with detailed hand movements and machine control tips. The video is for rotary polishing, but many of the same principals apply to dual action polishing.

https://www.youtube.com/watch?v=CI78DjvsLwA
 
Mike - Do you recommend using the slow wipe down method during the compounding, polishing and waxing stage, or just during the polishing stage?


The slow wipe method is only for the FINAL wipe or final passes for removing your LSP.

If you read the article it explains why IN DETAIL as that is my writing style.


The Final Wipe – Tips for creating a streak-free, show car finish


Its funny .. I've watched a bunch of Rupes videos on youtube and it seems like the majority of them are using a fairly quick arm speed,


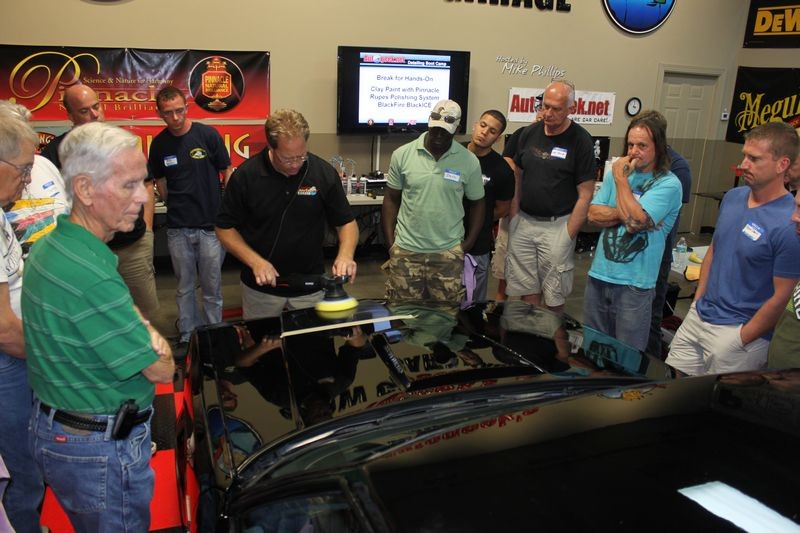
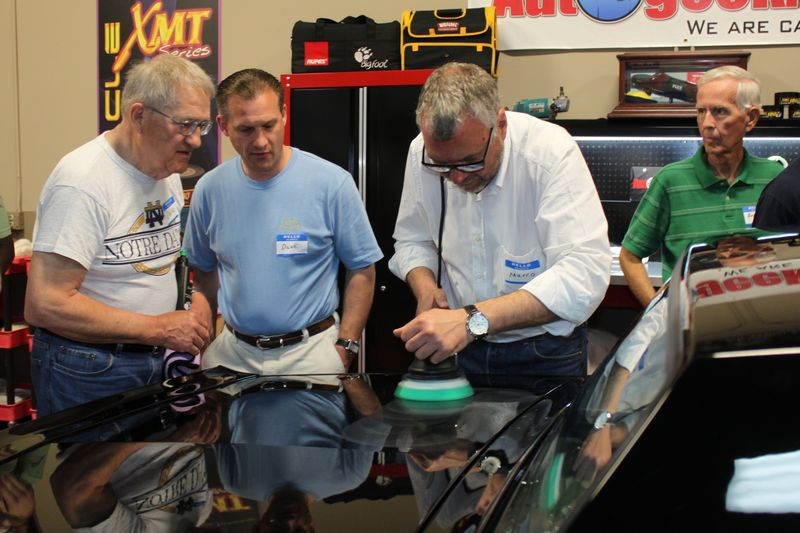
Marco D'Inca attended one of my Detailing Boot Camp Classes as a guest of honor and he demonstrated how to use his tool and in his demonstration he moved the polisher slowly over the paint.

Here's a thread I made about his visit, and I think it's fair to say he and his colleague enjoyed working on the hotrods and the muscle cars I had here for this class.


VIP Guest Marco D'Inca from Rupes at Autogeek's Detailing Boot Camp Class


Andreas and Marco standing by the 1940 Chevy Sedan Hotrod we buffed out our Detailing Boot Camp Class.
Andrea_Marco_Mike_01.jpg


We used this BLACK 1987 Buick Grand National for the Rupes Training portion of the class,

(I have a dedicated car for each tool and always something cool).


Andrea_Marco_Mike_03.jpg


I started the class by doing the Test Spot on the hood as this is always the first thing I teach and practice when buffing out a car I've never worked on before.

Andrea_Marco_Mike_05.jpg


And then turned the floor over to Marco to share the official word from the engineer that behind these polishers....

Andrea_Marco_Mike_07.jpg


Here's the deal....

When buffing out paint with a dual action polisher you need to move the polisher slowly over the paint when doing HEAVY correction work and even moderate correction work to,

  1. Give the abrasives time to take bites out of the paint.
  2. Give the oscillation and rotation of the tool time to work the abrasives against the paint.
  3. Give the pad and it's part in the abrading function time to work against the paint.


See the reoccurring theme? All of the the above requires time.

If you move a dual action polisher quickly over the paint this is called skimming. Sure you can remove defects by skimming over the paint but from my own experience it takes longer.


One of the things I focus all my students on as we work through all the various types of tools on the different cars in my classes is the importance of nailing the correction step and this means moving the polisher slowly over the surface.

You cannot speed the project up and get great results by moving the polisher fast over the paint when using a dual action polisher to remove defects or in other words to remove paint.

Moving the polisher faster might get you to the waxing step faster but after you wipe off the wax you'll find clear, shiny defects still remaining in the paint. At least they'll be shiny.


Also just to interject....

When making a video it takes real concentration to use 100% correct technique, it's easy to make simple mistakes like moving the polisher too fast as you have a lot going on around you.

In the TV world, time is very COMPRESSED as you only have anywhere from 1 MINUTE to a generous 4-5 MINUTES for the entire segment and one area you can cut down time is to move the polisher a little faster or make less passes as the big picture is to get across the big idea, not get mired down in the minute details that we all have the luxury of time to do on a discussion forum.


:)
 
Great tip Mark! :props:

It's always important to remember that instead of changing pad or compound to get more cut, to first slow your arm speed.
 
At times I don't get the correction that I want. For my last correction, I decided to slow my arm speed significantly; 1" per second, and boy did that help!!! I've never used "hack" arm speed, but I was still moving my arms too fast. Slow down your arm speed and you'll get better results, guaranteed!! This especially goes for when removing deeper swirls/defects.


Sent from my iPhone using Tapatalk

Should've came to NXT so that you could've received critique on your technique. ;)
 
Back
Top