Mike Phillips
Active member
- Dec 5, 2022
- 51,004
- 7
Flex + Rupes vs Ceramiclear Paint - How to detail a Mercedes-Benz SL 550
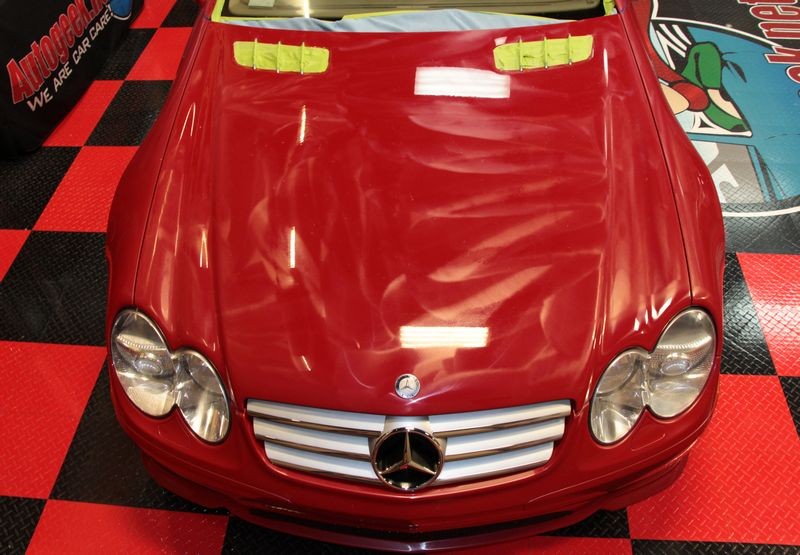
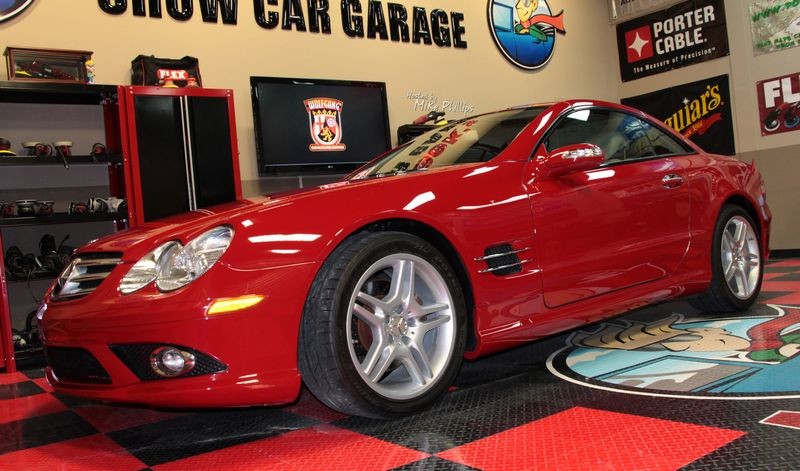
This last Saturday I buffed out a 2007 Mercedes-Benz SL550 with a Ceramiclear finish. The swirls didn't look bad in the sun but it was around 8:15AM in the morning and the sun was still very low in the sky so not the best time to use the sun to reveal swirls and scratches.
Overhead sun shining down on hood at 8:115am Saturday morning

The paint did in fact have a lot of random scratches, my guess is from improper washing and drying techniques, plus the normal wear-n-tear a car that's 7+ years old gets.
The new owner told me he's been looking for a low mileage SL550 for some time and upon finding this one he really like the car but didn't want it with so many scratches in the paint. So he bought figuring I could remove them for him.
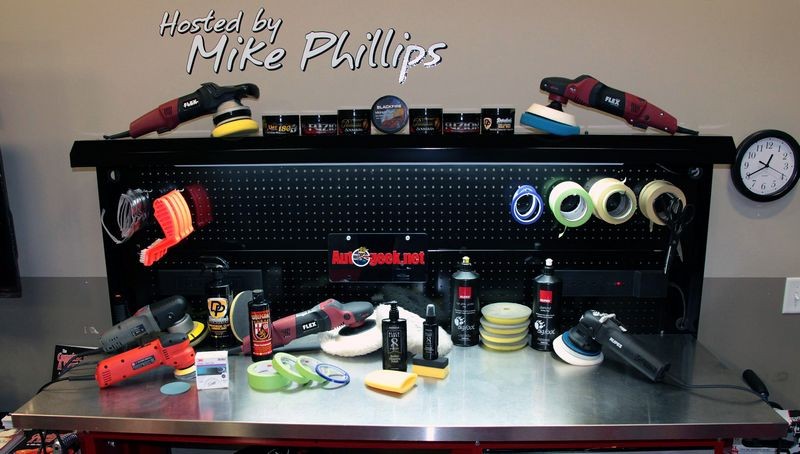
I did some testing using the least aggressive approach, I started with a white foam Hybrid pad on a Flex 3401 with Wolfgang Total Swirl Remover and this easily removed all the shallow scratches and restored clarity and shine to the paint but it wasn't aggressive enough.
Next I tried the Uber Compound with a orange Hybrid foam cutting pad using the Flex 3401 and same thing, it did a better job of removing more scratches but there were still scratches left behind that wouldn't be acceptable.
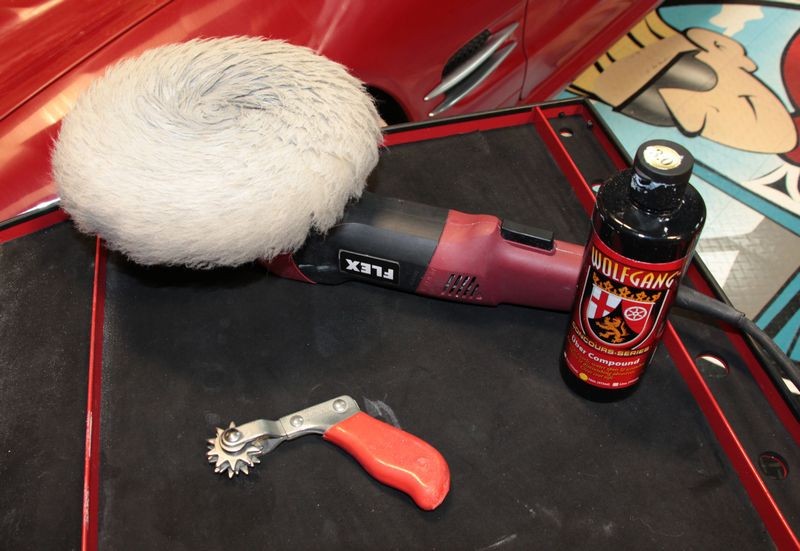
So I switched over to the Flex PE14 Rotary Buffer with both a wool finishing pad and a wool cutting pad and using the Uber Compound did another test spot and this combination did the job.
After dialing in my correction step I then tested my polishing process using the Rupes Duetto with the Rupes Keramik Gloss Fine Cut Polish and this removed the holograms left by the fibers of the wool pads.
I then tested the Diamond Ultra Fine Polish to see if I could squeeze every last little bit of shine out of the Ceramiclear finish.
Next I stripped the surface using Black Label Surface Cleansing Polish and then applied the Black Label Diamond Paint Coating.
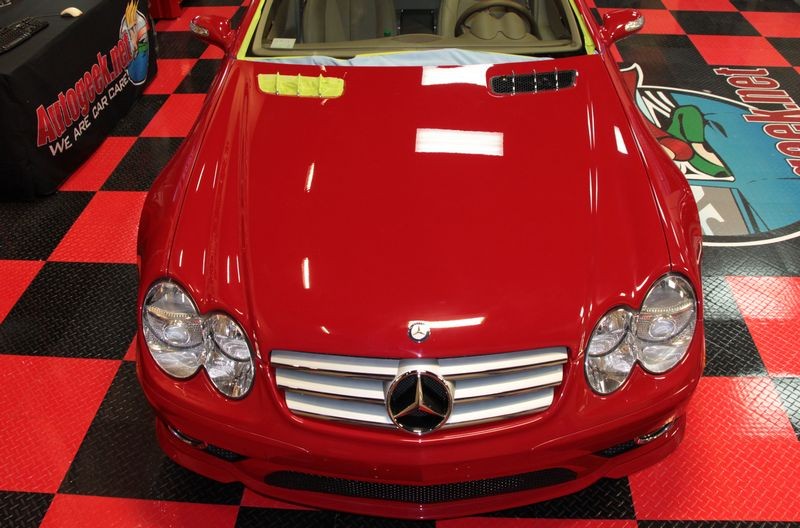
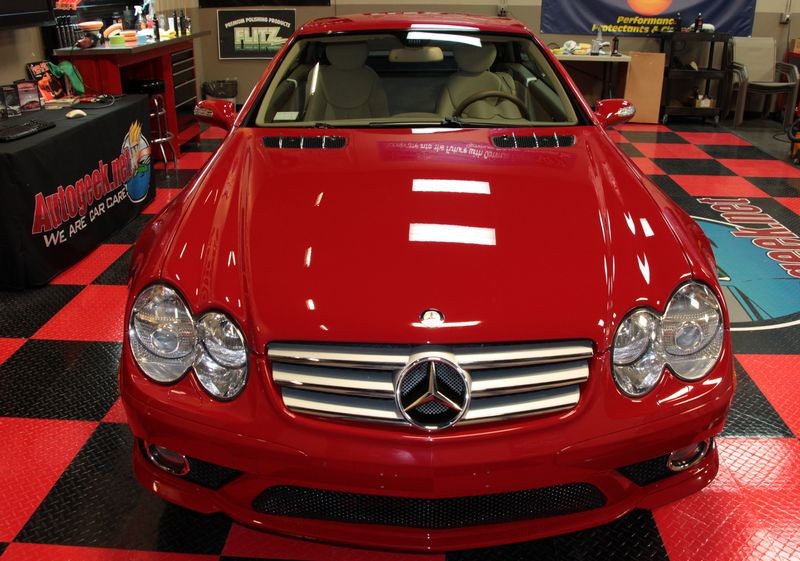
Showed the results to the owner, his wife and their friends before they left for the day and got the nod of approval.
After that I immediately began working on the car and didn't take any before pictures AND only took a few pictures throughout the project with a little help from Nick.
The owner had already washed this Mercedes-Benz a couple of times since purchasing it in the last week, so when he arrived on this very sunny and hot day the car was still clean as a whistle so I skipped washing and only gave it a light dusting with a microfiber towel before starting.
Process
Step 1
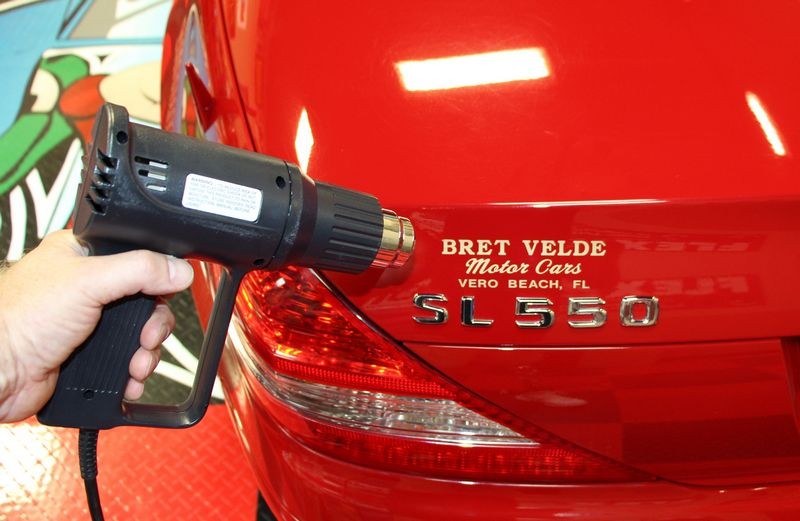
Using a Heat Gun on the low setting, I carefully warmed up the vinyl lettering doing the free advertising for some dealership.
Step 2
Mechanically decontaminate the paint using a Nanoskin Medium Grade Autoscrub Pad on a Porter Cable. For lubricating I used Detailer's Universal Clay Lube. I rand this pad over every inch of paint and afterwards also ran it over all the exterior glass.
Step 3
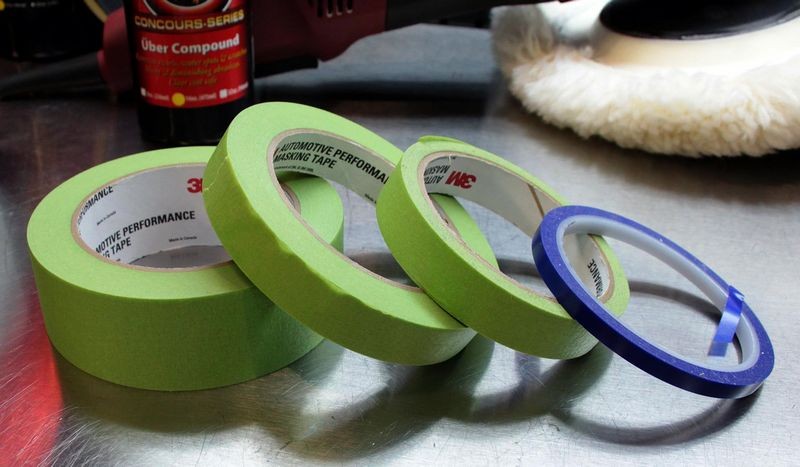
After wiping all the clay lube residue off the entire exterior I then taped off any and all trim that I did not want to risk being hit by a wool buffing pad on a rotary buffer with a white colored compound. For this I used three different widths of 3M Painter's Tape and some 1/4" 3M Blue Vinyl Tape.
Step 4
Buffed out the entire exterior of the car using the Flex PE14 Rotary Polisher with wool pads and Uber Compound.
Step 5
After Compounding the entire car I wiped off all the compound residue using a little 12% IPA to liquefy the reside to make it easier and faster to wipe off.
Step 6
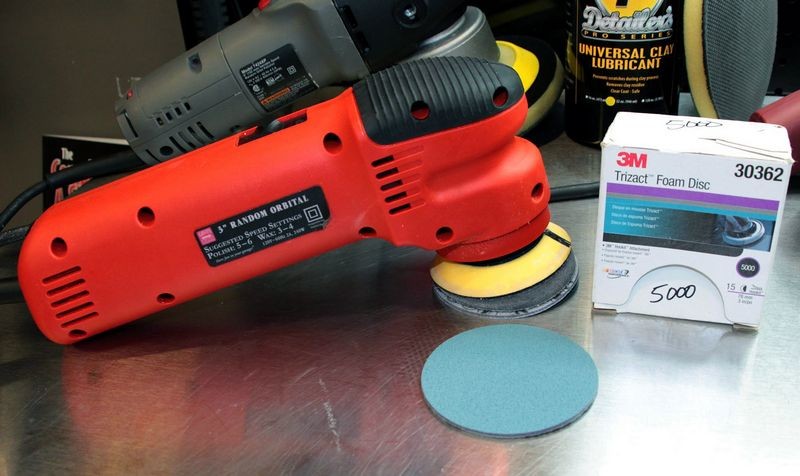
After wiping the compound residue all off the exterior I re-inspected and found a few deeper scratches in random places still remaining. On the hood I very lightly and very carefully machine sanded the trouble areas using 3M #5000 Trizact on a Griot's Garage 3" Mini Polisher using water as the lubricant.
These sanding marks were then removed using a wool cutting pad with the Flex PE14 and the Uber Compound and I re-compounded both the hood and the trunk lid a second time very aggressively, as in about 20 pounds of downward pressure until approximately 98% of the random, deeper scratches were removed.
Step 7
Next I switched over to a orbital dual action polisher and less aggressive products and pads to remove the holograms left in the paint by the individual fibers that make up a wool pad.
My Test Spot showed me that carefully and methodically working the Rupes Duetto with the Rupes Keramik Gloss Fine Cut Polish and the Rupes 6" Yellow Foam Polishing pad I was able to remove the holograms to leave a swirl-free finish.
Step 8
I re-polished the hood and trunk lid, called the "Gloss Panels" in the second edition of my how-to book using the Rupes Diamond Ultra Fine Cut Polish with the Rupes 6" soft foam finishing pad on the Rupes Duetto.
Step 9
Next I removed all the green painter's tape and the blue vinyl tape.
Step 10
I had applied to the entire car the Black Label Surface Cleansing Polish and then carefully wiped the car down twice. The first wipe is to remove about 90% of the cleansing polish residue. During this first application and removal I also worked off any residue lines where protective tape had been placed.
After the first pass around the car I switched to clean towels and then went around the car a second time and this time carefully inspecting the paint to make sure all traces of the cleansing polish residue had been removed.
Step 11
Hand applied Black Label Diamond Paint Coat. I applied this to the entire car at one time. After every square inch had been quoted, I slipped on some microfiber gloves, switched over to the very soft green microfiber towels with the rolled edges and carefully wiped the entire car down wiping off any high spots which in reality is excess product left behind after application.
Step 12
Gave the car a final wipe and returned the car to the owner. Also instructed the owner to wait till the next morning and at that time re-inspect the body panels for trace residues I missed. I point this out in my how-to books as well because too often when you been working on the same car all day you get tired and it's very possible to have missed a few spots that you couldn't see in the light conditions you're working in. So a fresh set of eyes PLUS moving the car into a different area with different light will usually expose any missed spots.
Started at 8:30am
Finished at 7:00pm
Total time = 10 hours
")
This last Saturday I buffed out a 2007 Mercedes-Benz SL550 with a Ceramiclear finish. The swirls didn't look bad in the sun but it was around 8:15AM in the morning and the sun was still very low in the sky so not the best time to use the sun to reveal swirls and scratches.
Overhead sun shining down on hood at 8:115am Saturday morning
The paint did in fact have a lot of random scratches, my guess is from improper washing and drying techniques, plus the normal wear-n-tear a car that's 7+ years old gets.
The new owner told me he's been looking for a low mileage SL550 for some time and upon finding this one he really like the car but didn't want it with so many scratches in the paint. So he bought figuring I could remove them for him.
I did some testing using the least aggressive approach, I started with a white foam Hybrid pad on a Flex 3401 with Wolfgang Total Swirl Remover and this easily removed all the shallow scratches and restored clarity and shine to the paint but it wasn't aggressive enough.
Next I tried the Uber Compound with a orange Hybrid foam cutting pad using the Flex 3401 and same thing, it did a better job of removing more scratches but there were still scratches left behind that wouldn't be acceptable.
So I switched over to the Flex PE14 Rotary Buffer with both a wool finishing pad and a wool cutting pad and using the Uber Compound did another test spot and this combination did the job.
After dialing in my correction step I then tested my polishing process using the Rupes Duetto with the Rupes Keramik Gloss Fine Cut Polish and this removed the holograms left by the fibers of the wool pads.
I then tested the Diamond Ultra Fine Polish to see if I could squeeze every last little bit of shine out of the Ceramiclear finish.
Next I stripped the surface using Black Label Surface Cleansing Polish and then applied the Black Label Diamond Paint Coating.
Showed the results to the owner, his wife and their friends before they left for the day and got the nod of approval.
After that I immediately began working on the car and didn't take any before pictures AND only took a few pictures throughout the project with a little help from Nick.
The owner had already washed this Mercedes-Benz a couple of times since purchasing it in the last week, so when he arrived on this very sunny and hot day the car was still clean as a whistle so I skipped washing and only gave it a light dusting with a microfiber towel before starting.
Process
Step 1
Using a Heat Gun on the low setting, I carefully warmed up the vinyl lettering doing the free advertising for some dealership.
Step 2
Mechanically decontaminate the paint using a Nanoskin Medium Grade Autoscrub Pad on a Porter Cable. For lubricating I used Detailer's Universal Clay Lube. I rand this pad over every inch of paint and afterwards also ran it over all the exterior glass.
Step 3
After wiping all the clay lube residue off the entire exterior I then taped off any and all trim that I did not want to risk being hit by a wool buffing pad on a rotary buffer with a white colored compound. For this I used three different widths of 3M Painter's Tape and some 1/4" 3M Blue Vinyl Tape.
Step 4
Buffed out the entire exterior of the car using the Flex PE14 Rotary Polisher with wool pads and Uber Compound.
Step 5
After Compounding the entire car I wiped off all the compound residue using a little 12% IPA to liquefy the reside to make it easier and faster to wipe off.
Step 6
After wiping the compound residue all off the exterior I re-inspected and found a few deeper scratches in random places still remaining. On the hood I very lightly and very carefully machine sanded the trouble areas using 3M #5000 Trizact on a Griot's Garage 3" Mini Polisher using water as the lubricant.
These sanding marks were then removed using a wool cutting pad with the Flex PE14 and the Uber Compound and I re-compounded both the hood and the trunk lid a second time very aggressively, as in about 20 pounds of downward pressure until approximately 98% of the random, deeper scratches were removed.
Step 7
Next I switched over to a orbital dual action polisher and less aggressive products and pads to remove the holograms left in the paint by the individual fibers that make up a wool pad.
My Test Spot showed me that carefully and methodically working the Rupes Duetto with the Rupes Keramik Gloss Fine Cut Polish and the Rupes 6" Yellow Foam Polishing pad I was able to remove the holograms to leave a swirl-free finish.
Step 8
I re-polished the hood and trunk lid, called the "Gloss Panels" in the second edition of my how-to book using the Rupes Diamond Ultra Fine Cut Polish with the Rupes 6" soft foam finishing pad on the Rupes Duetto.
Step 9
Next I removed all the green painter's tape and the blue vinyl tape.
Step 10
I had applied to the entire car the Black Label Surface Cleansing Polish and then carefully wiped the car down twice. The first wipe is to remove about 90% of the cleansing polish residue. During this first application and removal I also worked off any residue lines where protective tape had been placed.
After the first pass around the car I switched to clean towels and then went around the car a second time and this time carefully inspecting the paint to make sure all traces of the cleansing polish residue had been removed.
Step 11
Hand applied Black Label Diamond Paint Coat. I applied this to the entire car at one time. After every square inch had been quoted, I slipped on some microfiber gloves, switched over to the very soft green microfiber towels with the rolled edges and carefully wiped the entire car down wiping off any high spots which in reality is excess product left behind after application.
Step 12
Gave the car a final wipe and returned the car to the owner. Also instructed the owner to wait till the next morning and at that time re-inspect the body panels for trace residues I missed. I point this out in my how-to books as well because too often when you been working on the same car all day you get tired and it's very possible to have missed a few spots that you couldn't see in the light conditions you're working in. So a fresh set of eyes PLUS moving the car into a different area with different light will usually expose any missed spots.
Started at 8:30am
Finished at 7:00pm
Total time = 10 hours


 rops:
rops: