Start of a major project! '00 Audi A6 Avant- Pic Heavy!

SRConcepts

New member
Joined
May 6, 2013
Messages
255
Reaction score
0
As detailers, we sometimes run into cars that test our abilities. Whether it's finiky paint that swirls when you look at it sideways, an interior that's riddled with 10-year-old fast food and soda stains, or a high-end car that demands absolute perfection and nothing less, these situations are sometimes inevitable. We usually don't seek them out, but no matter how taxing, there's nothing like the feeling after overcoming a major project and knowing you gave it your all.

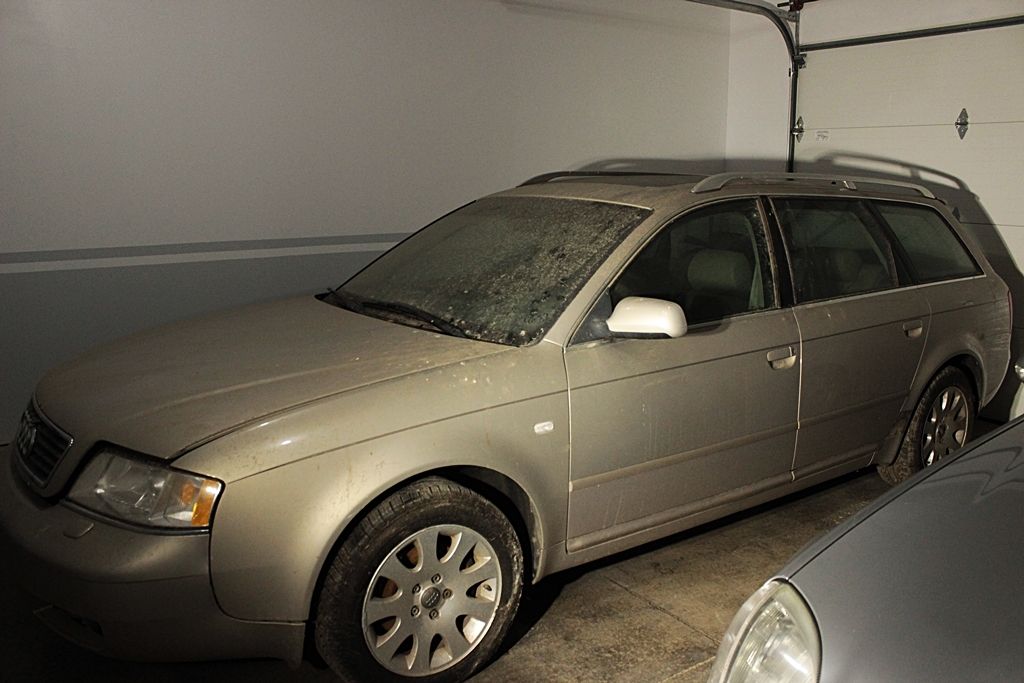
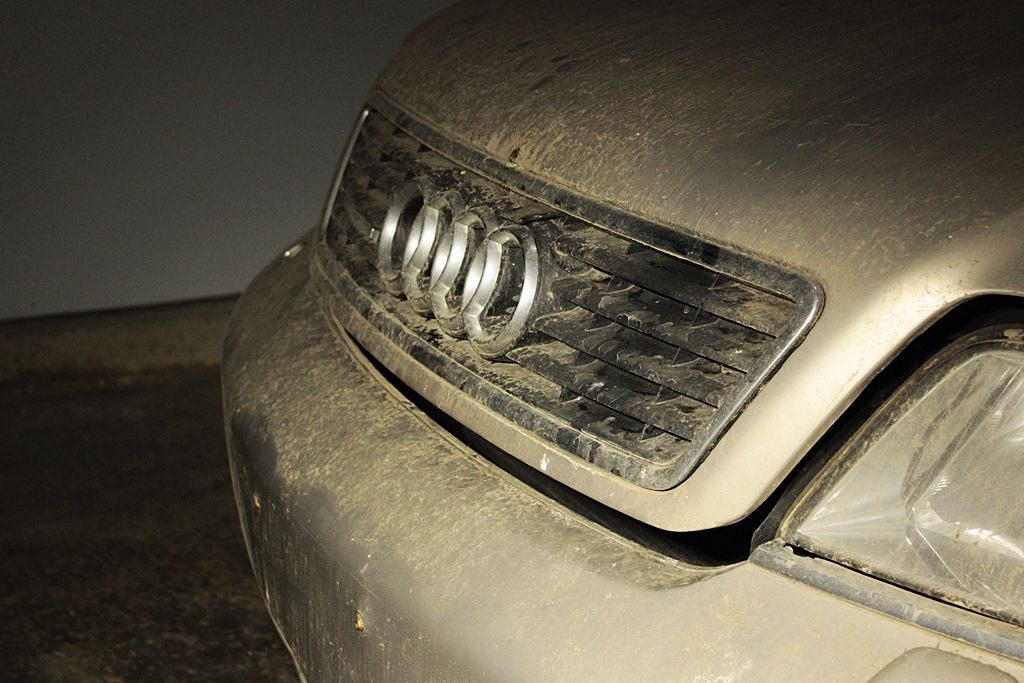
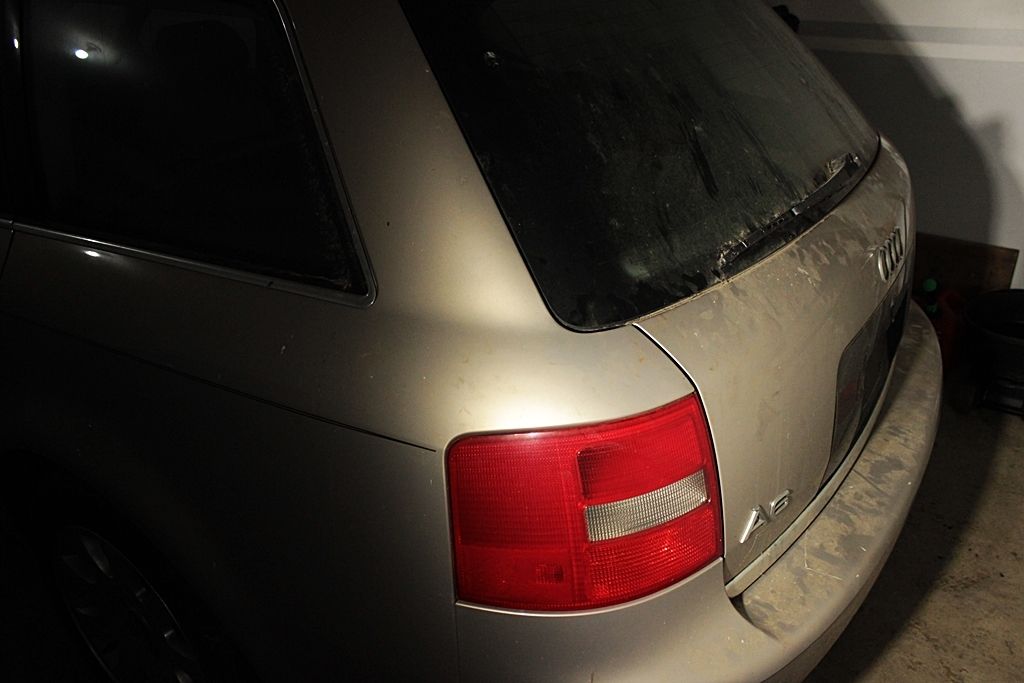
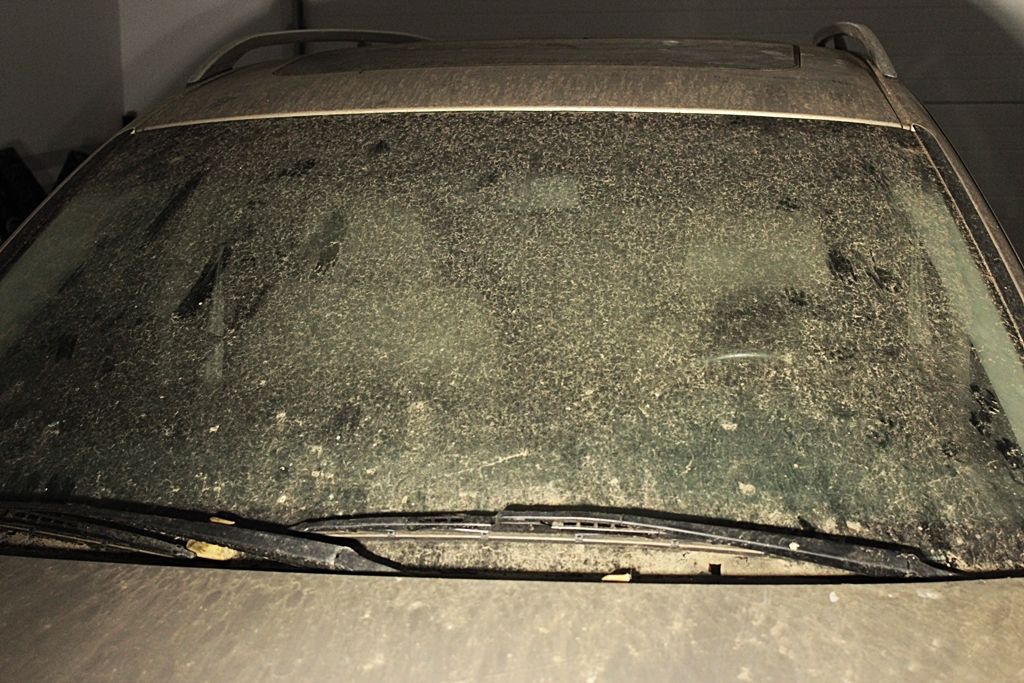
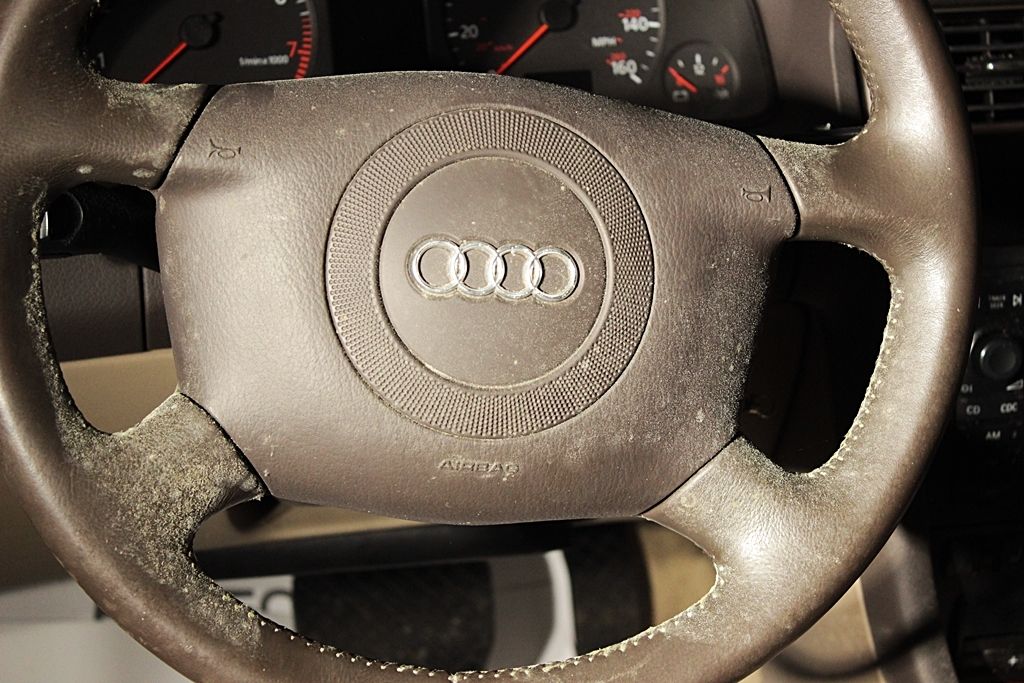
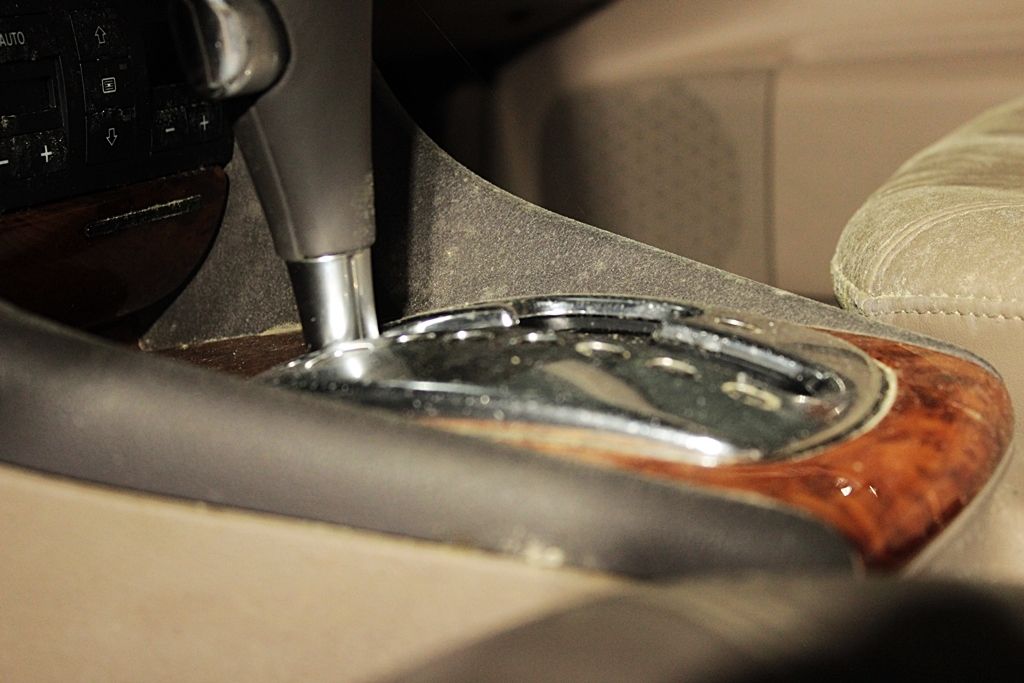
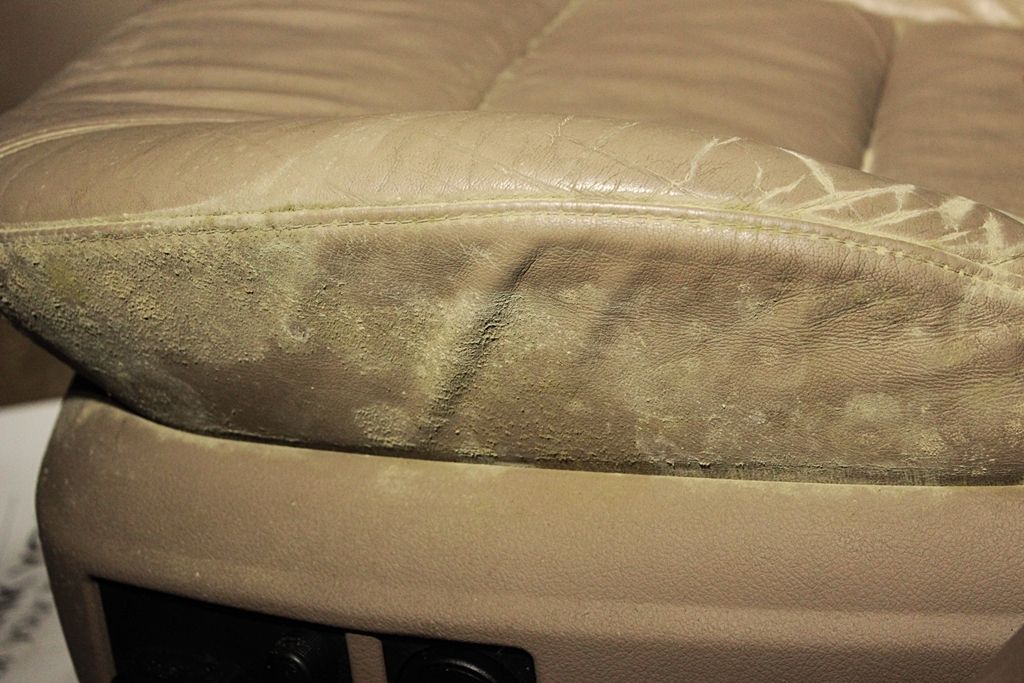
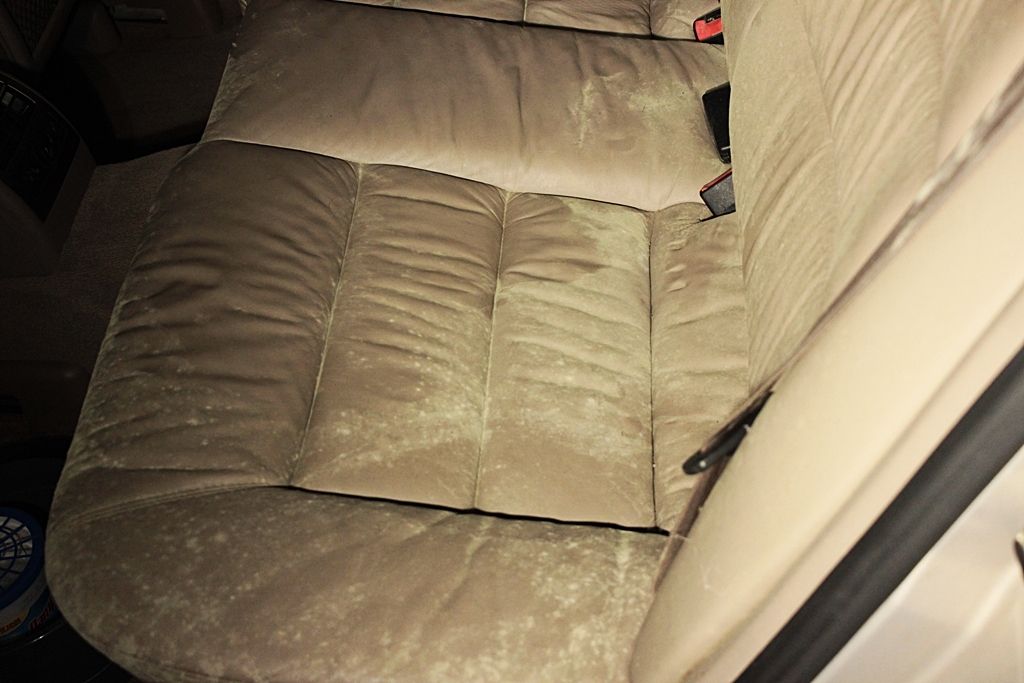
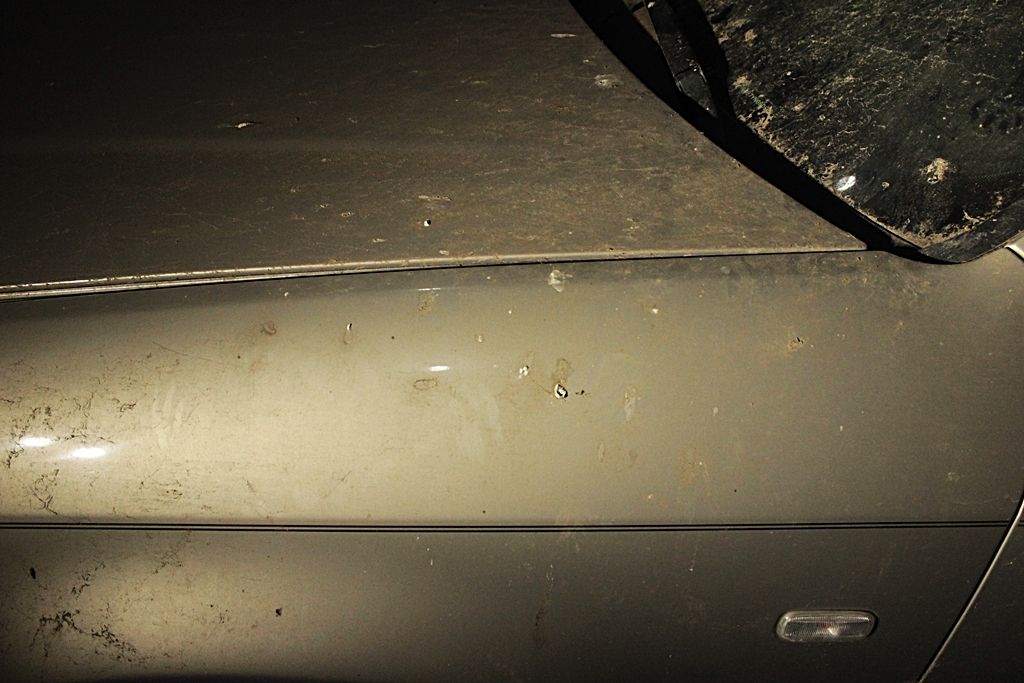
Once in awhile, I seek out one of these major projects. One where hours turn into days, and days into weeks, and I throw every set of skills and every bit of energy I have into it, if for nothing but the satisfaction of turning a car that most would run away from into something to be proud of. This '00 A6 Avant will scratch that itch. It's spent the last 4 years inside a barn, and it shows. This car needs major attention cosmetically, but needs surprisingly few things mechanically. It has it all- heavy dirt, bird droppings, tar, mold, mildew- inside and out. I will put my heart and soul into this one, and hopefully end up with something amazing. I'll let the pictures speak for themselves, though please excuse my horribly amateur photography, and know that these pictures do the state of this poor car no justice-


I will update this thread as work comes along, so please stay tuned!:dblthumb2:
 
Protect yourself with that mold.Bring extra clothing with you so you don't enter your car and house.
 
Was this in a cave or something?
Almost! Nope, just a barn for a long time.
Protect yourself with that mold.Bring extra clothing with you so you don't enter your car and house.
Oh yes, I have some experience with mold in vehicles and always take extra precautions. I have tons of proper clothing, as well as face masks, lots of ventilation, rubber gloves, etc. I'm just short of an actual Hazmat suit!
 
Almost! Nope, just a barn for a long time.

Oh yes, I have some experience with mold in vehicles and always take extra precautions. I have tons of proper clothing, as well as face masks, lots of ventilation, rubber gloves, etc. I'm just short of an actual Hazmat suit!
Good you were scaring me with that.a tyvek would be good for that.
 
After a quick (1.5 hour) wash, we can finally see what we're working with:


Time for an update on this poor thing! I've had the interior basically completely apart- seats, console, door panels, dash- cleaning every piece and nook and cranny I can find. I found quite a few stains on the carpet, so I hit them with some Folex before using an extractor. I had all of the seats out and apart, cleaned them like a madman, cleaned and greased all the tracks... it's been a long few days. Here are the results:


As you can see, it's a world of difference from when I started! I still have a few things I'd like to tie up on the interior, and afterwards, I can concentrate on the exterior. This one needs a full paint correction, as it's littered with swirls, RIDS, and other surprises. Stay tuned!
 
Time for another update! I've been plugging away at this thing in my spare time, I've had a few surprise projects lately so I haven't gotten as much done as quickly as I had planned to. I've started paint correction, utilizing the test spot method to dial in my product and pad choices. Here's a spot that shows what I'm working with, post paint decontamination steps:


This color is extremely hard to photograph, but the entire vehicle is covered in swirls, RIDS, and all sorts of defects. After a test spot, I found the defects to be quite resilient, so I decided this would be a 2-step process: Menzerna FG400 and an LC Purple Foamed Wool on my trusty rotary, followed by HD Speed and a white LC Thinpro via my Rupes MKII 15. I will be using HD Poxy as an LSP as well.

50/50 shot after compounding step:


After HD Speed:


Finally getting some nice reflections!


As it stands, I only have half of the vehicle completed so far, so stay tuned for after shots!
 
Great work!

It looks like it just came off of the showroom floor in 2000 -- and that is only after some compound and polish!
 
what a transformation....absolutely amazing...can not wait to see all the final pics
 
Thanks, guys! It's been a lot of late nights, especially going over all the fine details like polishing the wood on the dash and console, as well as tracking down all the little knick-knacks that are broken/missing. I feel it will be worth it in the end, though!
 
Just wanted to add , That i really like your attention to detail! GREAT OUTCOME.. Can't believe you took that on. I wish i could of seen you in the Hazmat suit. HAHAHAHA Imagine that .. .wow... Overall how many hours did you spend? Great job again dude, You make us all proud!.
 
Thanks for the kind words! So far, I'd estimate I have 25-30 hours of actual detailing time in. I have quite a few more into the car as a whole as I'm doing much more than just detailing, it's pretty much a reconditioning of the entire vehicle. I would say that by the time all is said and done, total detailing time will be somewhere between 45-60 hours. Bringing something back from this level of neglect takes a lot of time, and it seems like the further I dive into it, the more things I find that need to be cleaned. For instance, when I had the carpet and seats out, I went as far as cleaning the floor pan, even taking the time to remove the spare tire and clean the well it sits in. As they say, the devil is in the details!
 
Incredible stuff! These are my favorite detailing posts. Whenever I see these posts, I wonder about the extent of mold down the A/C vents, maybe even the compressor interior surface. How do you take care of that?
 
Incredible stuff! These are my favorite detailing posts. Whenever I see these posts, I wonder about the extent of mold down the A/C vents, maybe even the compressor interior surface. How do you take care of that?

To take care of the HVAC system- I actually disassembled the entire dash, floor venting, and center console venting... basically the whole system as far as possible. I then used a brush and some OPC to scrub and wash out all of the vent tubing, reassembled, and also used steam afterwards through the fresh air inlet under the cabin filter. I found no evidence of mold inside the vents or dash, nor inside the floor vents and rear center console vents. Keep in mind, I've taken this much further than most would dream of, but I wanted to be 100% certain that the HVAC system was as clean and fresh as possible.

To explain the lack of current updates: I've taken time away from the detailing aspect of this project to concentrate on the mechanical side of things, namely replacing the starter and alternator- both of which were worn out. To do this, the car had to be put in 'service mode'- meaning the entire front end had to come off! As it stands, the car is back together and runs like a top, so I'll be finishing this baby up in the days to come. Please stay tuned for more updates!
 
Back
Top