Hammondc
New member
- Jul 24, 2012
- 129
- 0
Mine finally kicked the bucket. It lost a lot of power, so I figured to was brushes (there are 2 on the 7424). There was no good write up on replacing these brushes on the 7424 so I decided to write one. **I did find one, but they completely dismantled the thing, which is not necessary.
I got my brushes off of Ebay for like $10 on a set of 4.
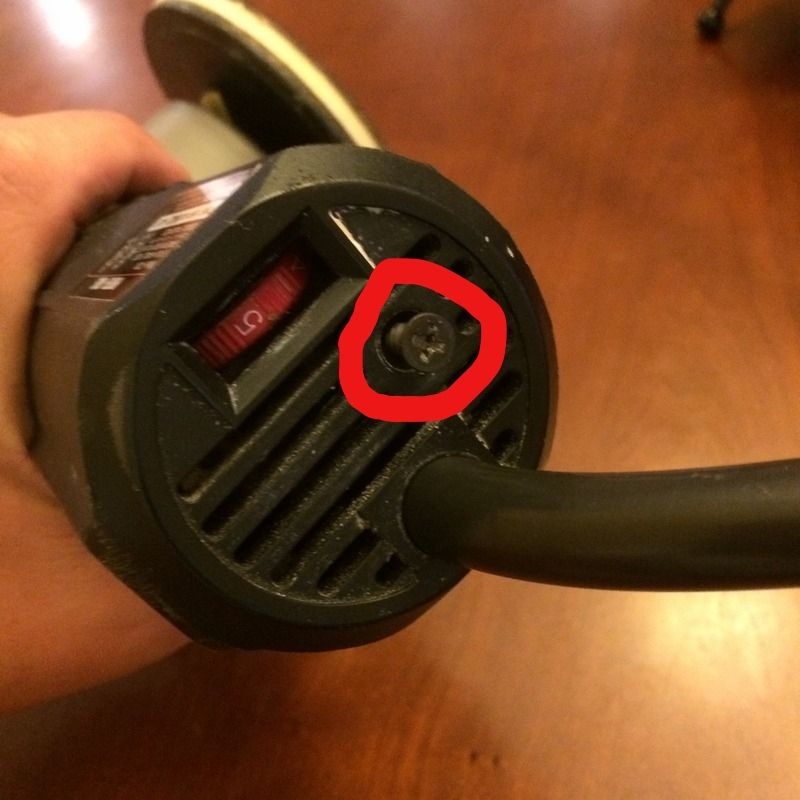
1. Unscrew the (1) housing screw on the back and pull the housing off.
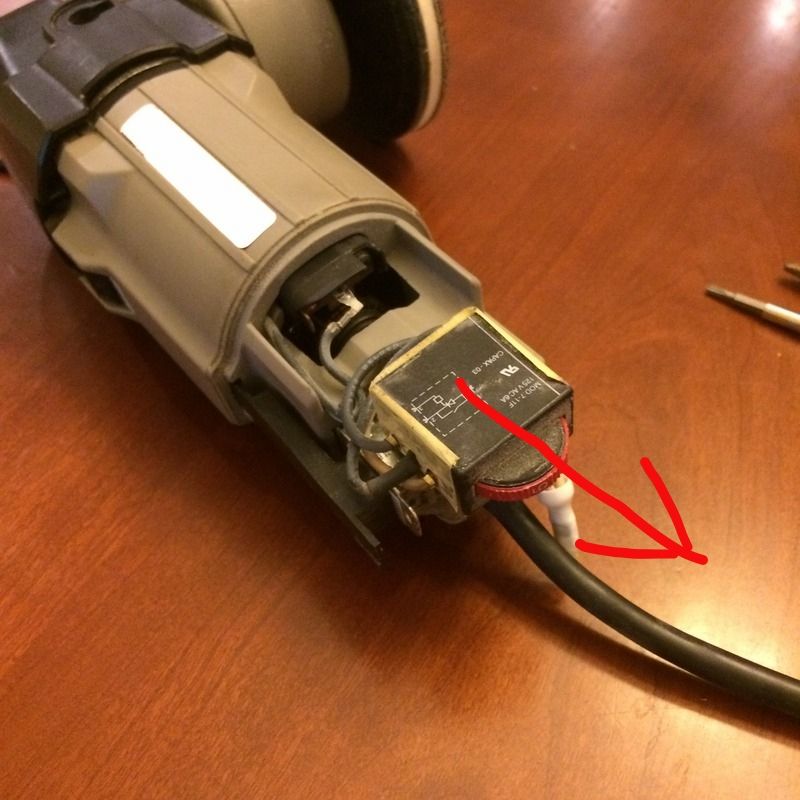
2. The speed control just slides off. Move it and the cables out of the way
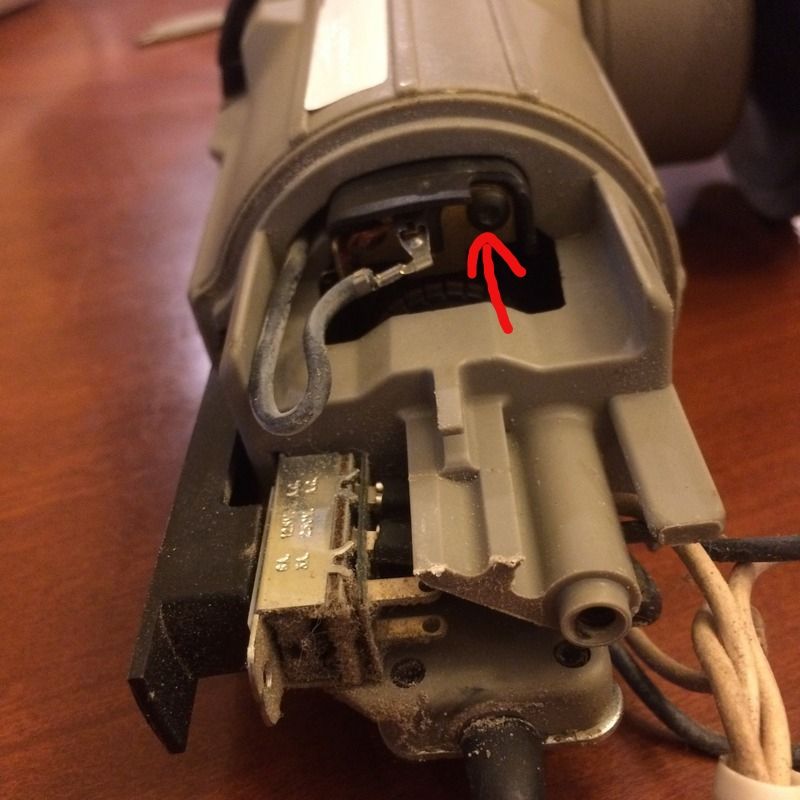
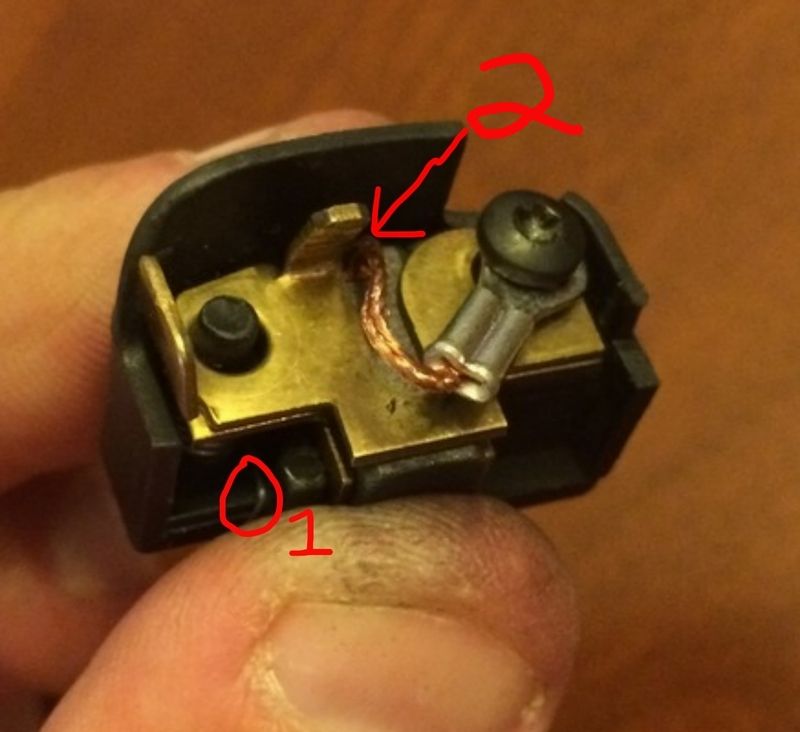
3. Unscrew the (1) Torx screw on the brush housing. It is a T9. Pull the slide clipped wire to remove the assembly then unclip the wire (it slides off).
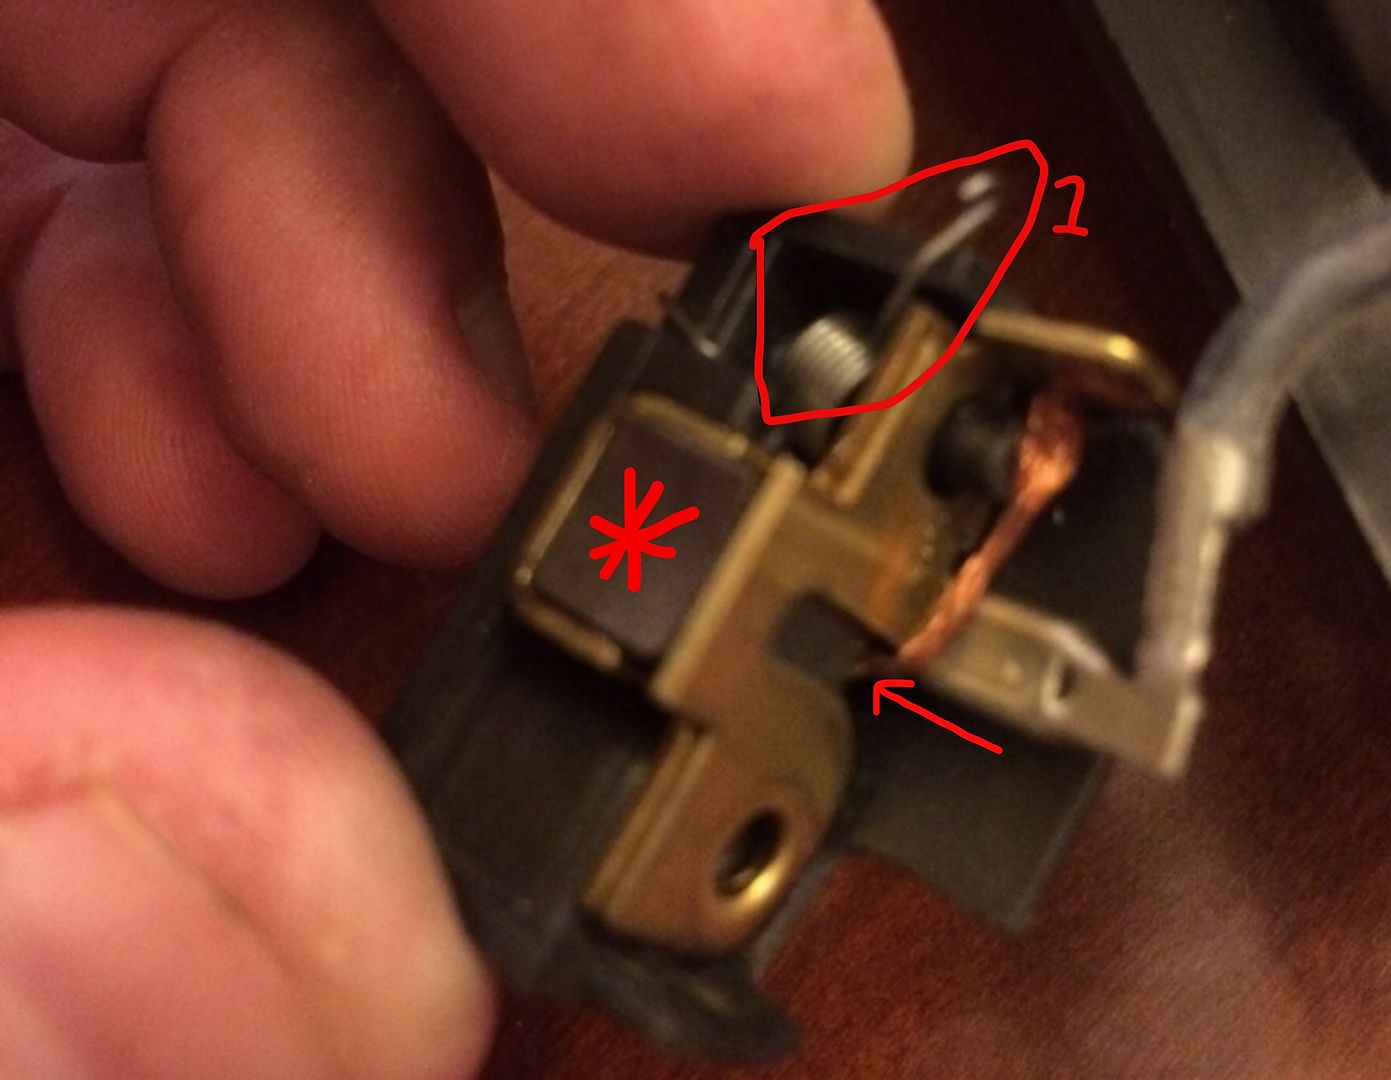
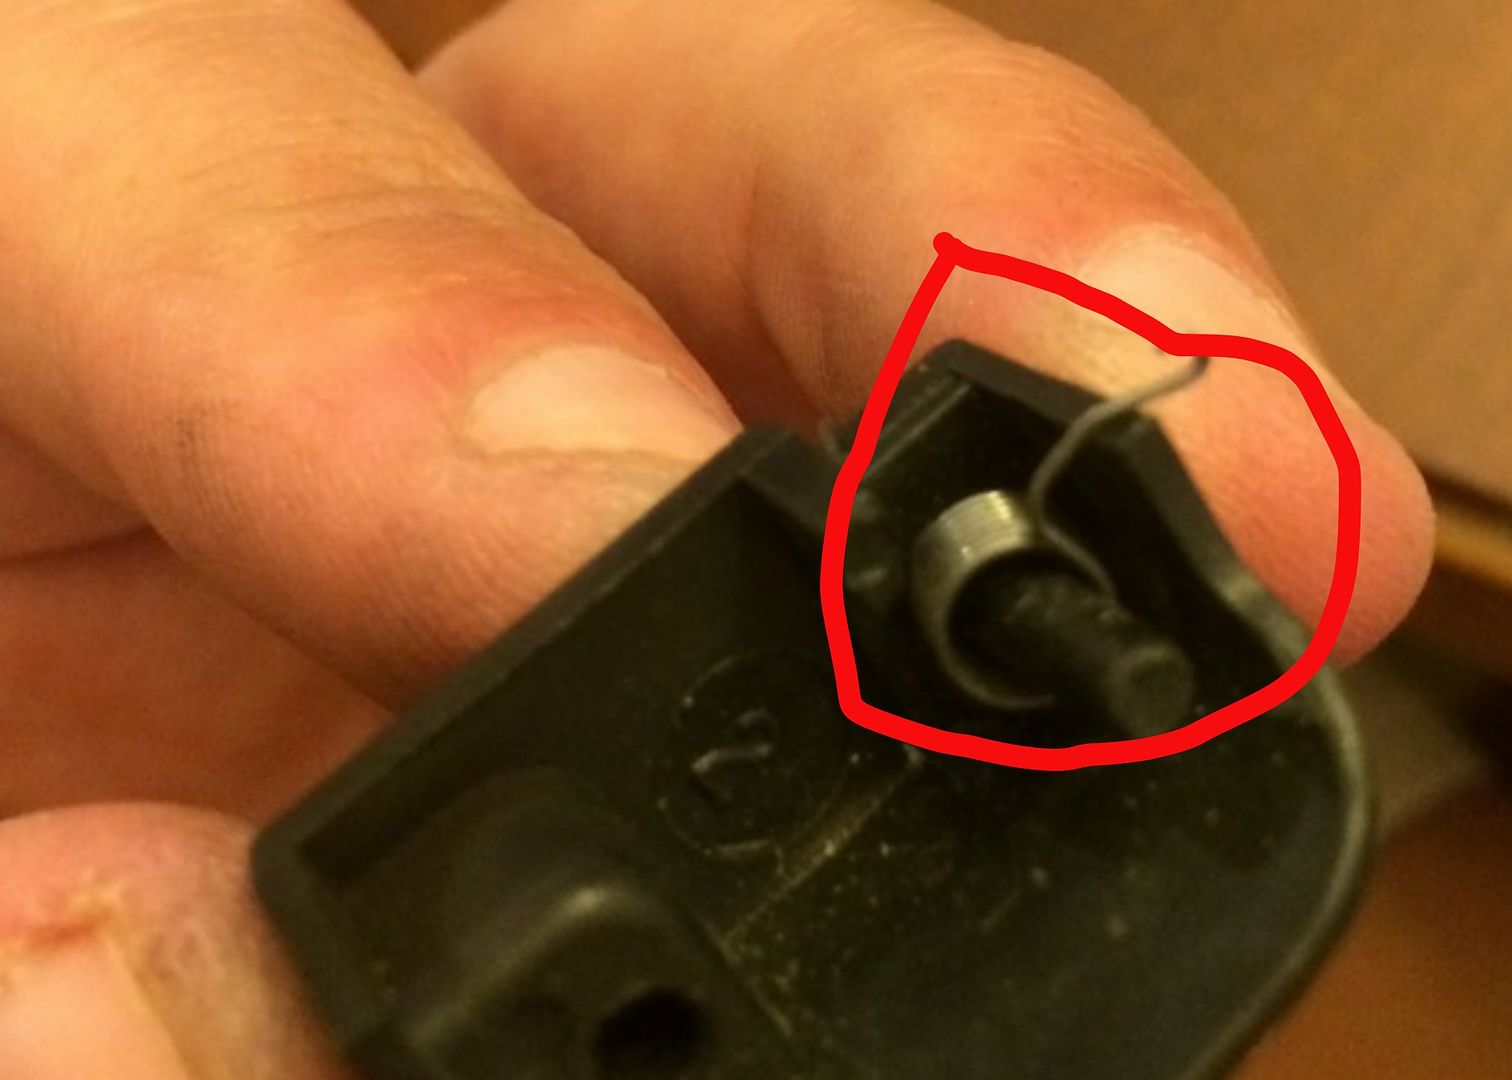
4. This is the housing that holds the brush. The brush is the black square inside the brass holder (red star). Notice the spring sticking out (1) . This spring tip is supposed to be under the brush (arrow) . You will see a grove in the bottom of the brush where it fits. This spring pushes the brush against the Commutator.
5. Pull the assembly apart. You will have (3) parts. The black housing, the brass insert and the brush inside the insert. Again, notice the spring on the black housing.
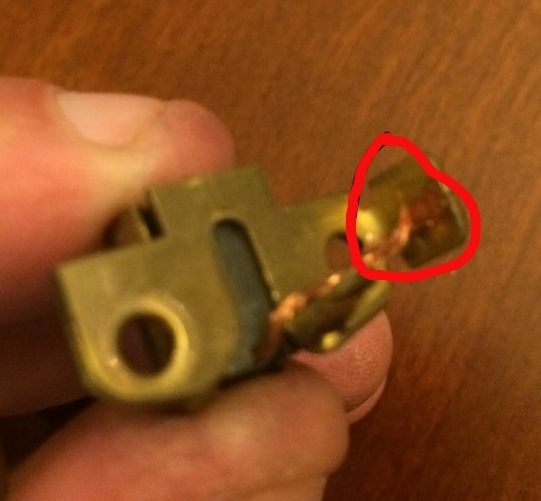
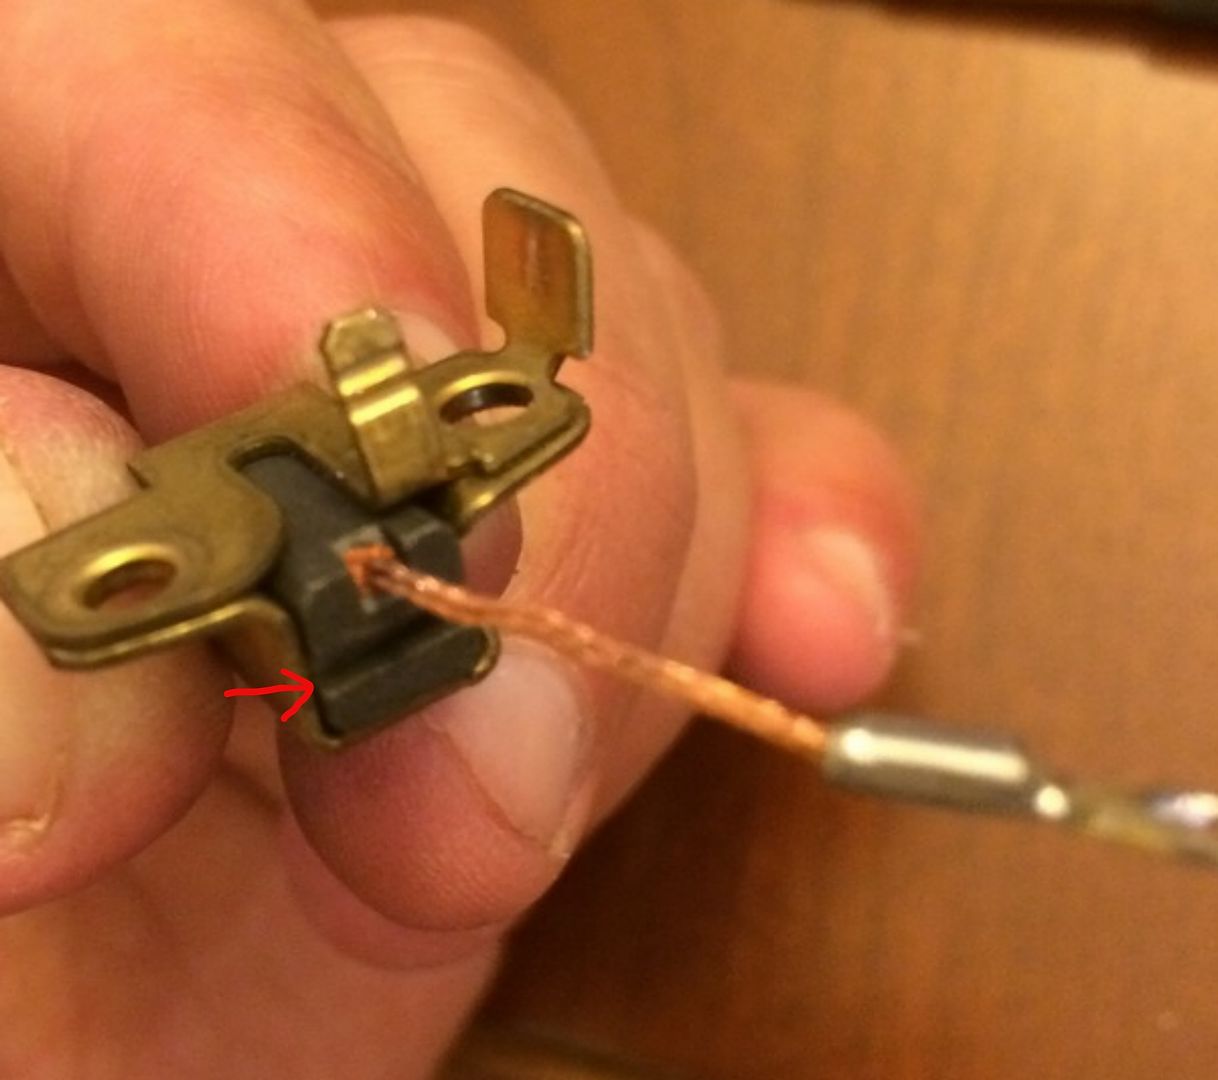
Notice the OE brush is soldered to the brass. Just pull it loose with pliers. Once it is loose, the brush will slide out. Its black carbon. Do not expect an actual 'brush' like a paint brush etc. The new brush leads have a o-loop on the end that goes on the brass insert between the screw and the brass.
6. Insert the new brush making sure the spring arm is in the groove of the new brush. I do not have good advice on this part. It is a bit tricky. I just messed with it long enough and it just came together. If done correctly, the new brush will stick out and be spring loaded. Insert the screw through the eyelet and into the brass insert.
7. Insert the assembly back into the polisher making sure it is seated correctly. You will need to depress the brush a bit to get it to fit square when installing the assembly. I used a tiny screw driver. Tighten screw and slide the connector back.
8. Repeat on the other side
9. Slide the cover back and tighten the screw.
I got my brushes off of Ebay for like $10 on a set of 4.
1. Unscrew the (1) housing screw on the back and pull the housing off.

2. The speed control just slides off. Move it and the cables out of the way

3. Unscrew the (1) Torx screw on the brush housing. It is a T9. Pull the slide clipped wire to remove the assembly then unclip the wire (it slides off).

4. This is the housing that holds the brush. The brush is the black square inside the brass holder (red star). Notice the spring sticking out (1) . This spring tip is supposed to be under the brush (arrow) . You will see a grove in the bottom of the brush where it fits. This spring pushes the brush against the Commutator.

5. Pull the assembly apart. You will have (3) parts. The black housing, the brass insert and the brush inside the insert. Again, notice the spring on the black housing.
Notice the OE brush is soldered to the brass. Just pull it loose with pliers. Once it is loose, the brush will slide out. Its black carbon. Do not expect an actual 'brush' like a paint brush etc. The new brush leads have a o-loop on the end that goes on the brass insert between the screw and the brass.


6. Insert the new brush making sure the spring arm is in the groove of the new brush. I do not have good advice on this part. It is a bit tricky. I just messed with it long enough and it just came together. If done correctly, the new brush will stick out and be spring loaded. Insert the screw through the eyelet and into the brass insert.


7. Insert the assembly back into the polisher making sure it is seated correctly. You will need to depress the brush a bit to get it to fit square when installing the assembly. I used a tiny screw driver. Tighten screw and slide the connector back.
8. Repeat on the other side
9. Slide the cover back and tighten the screw.
 Good post.
")