lane5515
New member
- Mar 3, 2013
- 660
- 0
The owner of this 2011 Cadillac Escalade contacted me stating he wanted it to look like new again! He recently purchased it from his daughter who upgraded to a new Escalade. When she owned it she purchased monthly car wash passes at a local tunnel wash (not touchless). Years of tunnel washes had taken its toll on this Caddy.
We decided on a two-step exterior correction and polish followed with Optimum Gloss Coat.
Here are some pics upon delivery.
Doesn’t look too bad from 15 feet away.

When you get closer and put the lights on the true condition shows.

This thing was a swirled out mess.


Along with the swirls and scratches the paint also had a lot of water etching.

The etching is a little harder to see in this pic but around the light reflection the damage can be seen. All horizontal panels looked like this.

Process
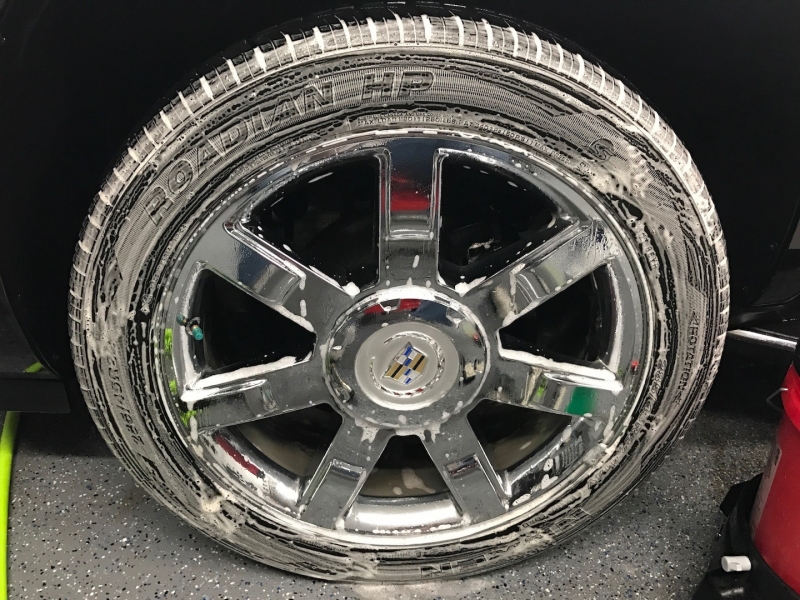
I always start each job by washing the tires, wells and wheels.
Wheels, Wells and Tires – Product and tools used:
- GG HD Wheel Cleaner – various brushes and IncrediFlair mitt
- Shine Supply Wise Guy 2:1 and McKee’s 37 Tire & Rubber Rejuvenator – Tuff Shine Tire Brush
- Wheels polished with Rupes Nano and Optimum Metal Polish
- Tires dressed with GG Black Shine Tire Gel
- Wells dressed with Blackfire AIO Trim & Tire Protectant
Condition upon delivery

Picture of Shine Supply Wise Guy 1:3 working.

Round 2 of Wise Guy after brushing. This stuff is awesome!
Next came a thorough cleaning of the paintwork and everything else.
Wash and Decon
- 2BM wash with Optimum Car Wash
- IronX
- Clayed with NanoSkin Wash Mitt
- Dried with GG PFM drying towel and Master Blaster
After the wash and decon I took some paint measurements. The PTG measurements ranged from 45 to 270!! I discussed the readings with the owner and informed him that a few panels had been repainted and others were too thin to do much polishing. He said go-ahead and proceed knowing that I was very concerned about such low readings in some areas.

Most areas ranged from 75 to 130.

Paint Correction
- Flex 3401 with blue hybrid pads
- GG Fast Correcting Cream
- Rupes Mini with Megs MF pads
- Rupes Nano iBrid and CarPro MF pads
- CarPro Eraser wipe down
Random shots during the correction step.

Passenger side front bumper before:

Passenger side front bumper after:

Rear hatch before:

Rear hatch after:

Rear emblem removed before delivery:

Rear emblem area corrected:

50/50 Shots of different panels


When the correction step was completed, all of the paintwork was wiped down with CarPro Eraser.
Polishing was done next with the following products and tools.
- Flex 3401 / Rupes Mini / Rupes Nano with CarPro gloss pads
Once I was done polishing the vehicle received another CarPro Eraser wipe down before applying the coating.
Coating
- Optimum Gloss Coat
The wheels needed some extra attention because they were in rough shape. The finish on the inside barrels was peeling really bad so they could only receive a good cleaning.
The chrome face of the wheels received a Rupes Nano polishing with Optimum Metal Polish.
Defects before (this was after a cleaning with GG HD Wheel Cleaner)


After polishing:


Wheels, Wells and Tires after dressing

Finished Outdoor Pictures


North Dakota winter merlin shots


Indoor Pictures


This detail was a challenge for me for several reasons: large, black and extreme differences in PTG readings. I felt like I was skating on thin ice in some areas but the owner was aware of what could happen.
The best part of the job was the owners reaction. He was very pleased with the outcome and sent me the following text message a few hours after picking up the vehicle: "Daughter was so amazed (previous owner). You did such an awesome transformation! Thanks again!"
That is why I like doing this work! Thanks for looking and all comments and criticism is appreciated!!
We decided on a two-step exterior correction and polish followed with Optimum Gloss Coat.
Here are some pics upon delivery.
Doesn’t look too bad from 15 feet away.
When you get closer and put the lights on the true condition shows.
This thing was a swirled out mess.
Along with the swirls and scratches the paint also had a lot of water etching.
The etching is a little harder to see in this pic but around the light reflection the damage can be seen. All horizontal panels looked like this.
Process
I always start each job by washing the tires, wells and wheels.
Wheels, Wells and Tires – Product and tools used:
- GG HD Wheel Cleaner – various brushes and IncrediFlair mitt
- Shine Supply Wise Guy 2:1 and McKee’s 37 Tire & Rubber Rejuvenator – Tuff Shine Tire Brush
- Wheels polished with Rupes Nano and Optimum Metal Polish
- Tires dressed with GG Black Shine Tire Gel
- Wells dressed with Blackfire AIO Trim & Tire Protectant
Condition upon delivery
Picture of Shine Supply Wise Guy 1:3 working.
Round 2 of Wise Guy after brushing. This stuff is awesome!
Next came a thorough cleaning of the paintwork and everything else.
Wash and Decon
- 2BM wash with Optimum Car Wash
- IronX
- Clayed with NanoSkin Wash Mitt
- Dried with GG PFM drying towel and Master Blaster
After the wash and decon I took some paint measurements. The PTG measurements ranged from 45 to 270!! I discussed the readings with the owner and informed him that a few panels had been repainted and others were too thin to do much polishing. He said go-ahead and proceed knowing that I was very concerned about such low readings in some areas.
Most areas ranged from 75 to 130.
Paint Correction
- Flex 3401 with blue hybrid pads
- GG Fast Correcting Cream
- Rupes Mini with Megs MF pads
- Rupes Nano iBrid and CarPro MF pads
- CarPro Eraser wipe down
Random shots during the correction step.
Passenger side front bumper before:
Passenger side front bumper after:
Rear hatch before:
Rear hatch after:
Rear emblem removed before delivery:
Rear emblem area corrected:
50/50 Shots of different panels
When the correction step was completed, all of the paintwork was wiped down with CarPro Eraser.
Polishing was done next with the following products and tools.
- Flex 3401 / Rupes Mini / Rupes Nano with CarPro gloss pads
Once I was done polishing the vehicle received another CarPro Eraser wipe down before applying the coating.
Coating
- Optimum Gloss Coat
The wheels needed some extra attention because they were in rough shape. The finish on the inside barrels was peeling really bad so they could only receive a good cleaning.
The chrome face of the wheels received a Rupes Nano polishing with Optimum Metal Polish.
Defects before (this was after a cleaning with GG HD Wheel Cleaner)
After polishing:
Wheels, Wells and Tires after dressing
Finished Outdoor Pictures
North Dakota winter merlin shots
Indoor Pictures
This detail was a challenge for me for several reasons: large, black and extreme differences in PTG readings. I felt like I was skating on thin ice in some areas but the owner was aware of what could happen.
The best part of the job was the owners reaction. He was very pleased with the outcome and sent me the following text message a few hours after picking up the vehicle: "Daughter was so amazed (previous owner). You did such an awesome transformation! Thanks again!"
That is why I like doing this work! Thanks for looking and all comments and criticism is appreciated!!

")
 rops:
rops: