Looks like the clear coat is starting to fail

Mister B

New member
Joined
Jun 16, 2009
Messages
594
Reaction score
0
A friend of mine dropped their car off to me the other night for me to buff out while they are on vacation. He wanted me to see what i can do to make it look better.

It's a 2002 Nissan Sentra SER with over 100,000 miles that is starting to fade out.

Nissan_41.jpg


The next day I pulled the car outside and washed it and then inspected the paint. It was really bad. All of the painted metal surfaces of the car looked like they have a pitted or sand blasted finish to it as well as having 1/16" to 1/8" diameter opaque white spots throughout the entire finish. And again these are only on the painted metal surfaces. The painted plastic surfaces like the bumper covers, mirrors, spoiler, door handles etc... do not have the pitted sand blasted finish or the white opaque dots. They are just faded, which i kind of thought was odd. Maybe the different additives in the paint that the factory uses to paint the plastic parts somehow affected how the paint aged and now looks.

After washing the car I clayed a small test spot on the roof and the surface still had that rough sand blasted texture look and feel to it. So I took some M105 on a Tangerine 5.5" HT pad and my G100 and made a couple passes and it did offer some improvement, but it was taking a while so I got out the rotary and burgundy SOLO wool pad and did two quick passes with M105 and then followed back up with the 5.5" HT pad on my G100 to remove the slight buffer trails in my test spot and the surface was now smooth as glass and glossy. I was able to remove the sand blasted texture from the paint, however the small opaque white dots were still left behind, which I expected because i believe it is the clear coat beginning to fail. the test spot looks so much better than the rest though.

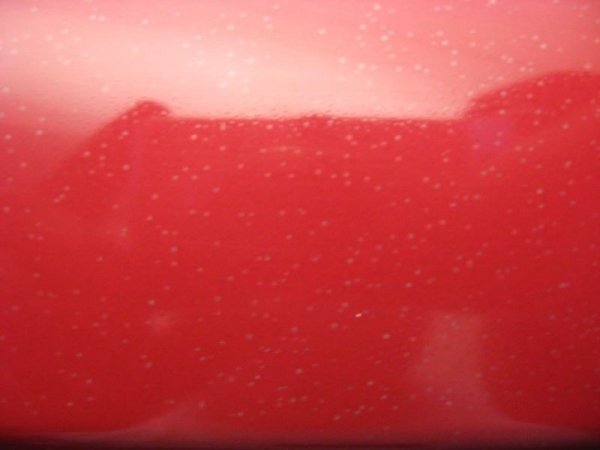
Here is a picture of my test spot on the left side of the roof, and the rough sand blasted texture on the right. You can see a distinct line where my tape was and how much crisper the reflection is and much more glossy on the left.

Nissan_11.jpg


Another angle.

Nissan_21.jpg


Here is more of an overhead look at the same area. In the lower right corner you can see the white opaque dots that I was talking about a little better, that are throughout the entire finish on the metal painted surfaces. It's got to be the clear coat failing.

Nissan_31.jpg


I'd like to get this car looking as good as I can get it, but i don't know if i want to spend too much time compounding with wool and foam pads and then following up with M205 polish and then wax for the entire car considering the condition of the paint. I know i am not going to be able to remove those opaque white spots, but I would like to get rid of that sand blasted texture and get it looking as good as i can in the least amount of time. Any suggestions for a speedier process while still having a good outcome?

I have: M105, M205, D151 Paint reconditioning Cream, M83, M80, Megs yellow polishing pads, Megs burgundy Cutting pads, Megs Tan finishing pads, 5.5" CCS Orange, Yellow and White pads. 5.5" tangerine and Cyan HT pads.

What are your thoughts?

Thanks
 
Try the M80 with a polishing pad followed by the D151 with a polishing pad. Do a test spot first to one of the neglected areas...

M80 = oily plus abrasive
D151 = Mild abrasive plus seals

2 steps


You could try the M80 with a cutting pad but it tends to micro-mar on some clear coat finishes with a DA to start with so a cutting pad might just make this worse. Of course the D151 would probably pull it out...

Have you tried just using the cleaner/wax? If it works that would be a 1 step.


:)
 
Have you tried just using the cleaner/wax? If it works that would be a 1 step.


:)

No I have not tried a cleaner wax. That sand blased texture was so rough, I didn't think something like a cleaner wax would touch it so I went right to M105 with my G100 and the 5.5" Tangerine HT pad first. It was removing that sand blasted texture, I just had to do several passes over my roughly 12" test area. Then I switched to the rotary and solo burgundy wool pad to make quick work of it.
 
Try the M80 with a polishing pad followed by the D151 with a polishing pad. Do a test spot first to one of the neglected areas...

M80 = oily plus abrasive
D151 = Mild abrasive plus seals

2 steps

Are you meaning for me to try this with my Rotary, or my G100 or both?
 
No I have not tried a cleaner wax. That sand blasted texture was so rough, I didn't think something like a cleaner wax would touch it so

The idea being if you didn't want to spend a lot of time, do a lot of steps, invest a lot of money, then see what the cleaner/wax would do, that's the D151 and don't worry about removing the texture, just make it shiny. (see my comments below)

Are you meaning for me to try this with my Rotary, or my G100 or both?

I meant with the DA Polisher, you said you wanted to do as few steps as possible.


My comment...

Whenever I've been asked to detail a car that's severely neglected it's usually for one of two scenarios...

1) New owner bought the car in neglected condition. In this scenario the condition is not their fault but they knew what they were getting into when they make the purchase and often times the price was discounted due to the low quality condition of the paint.


2) Existing owner never took care of the car in the first place.


IF you're working for someone that falls into the Number 1 category, then knock yourself out and try to fix it, heck I love a challenge as much as anyone.


If you're working for someone that falls into the Number 2 category, then cut your loses or walk away or make sure you're taking on a project that you're being handsomely rewarded for your hard work. The reason for this is because if they let the finish go in the first place,

What's changed?

What's changed about them that now they're going to lift a finger to maintain your hard work? Can you identify what's changed inside of them? Usually the answer is nothing, the person has finally come to grips with the fact that their car's paint job is either past the point of no return or heading their real fast and now they're trying to find a cheap way to save it and that cheap way is someone else doing the work.

I understand all the ramifications of "It's my friend's car, or It's my dad's car, or fill in the blank...

Unless something dramatic has changed about the person and how they are going to maintain your hard work, it's all for nothing in the long run. In the short run you can probably work a miracle, but what's your time worth? Plus your chemical and pad investment.

If it's family... go for it. If it's a cute girl you like, go for it, if it's your boss, go for it... these are all decisions you have to make on your own, I'm just trying to point out the bigger picture as I've been there and done that and this is just another reason I always teach people to first... evaluate the customer, then evaluate the finish.

There are some people you can't please, there are some people you don't want to work for, there are times when the best decision is to turn the job down and let a "better" detailer have the blessing.


:)
 
I believe that would be category number 2. That's why I was kinda looking for a faster way, but still make it look considerably better.

I believe I will take your advice and try the D151 with my G100 first.

Hopefully this will make a nice difference in the finish and make them happy as well as save my time and my products like you mentioned. That would probably make the most sense.

Thank you for your input, Mike. :xyxthumbs:
 
p.s.

Your pictures are 1600 pixels wide by 1200 pixels wide and I have to horizontal scroll on a 24" monitor, so that means the majority of people reading your thread have to horizontal scroll to see you pictures...

The best average size for a picture on a "Discussion Forum" is about 800 pixels wide. Height doesn't really matter as most people expect to scroll vertically...

This is 800 pixels wide...

Le_Car.jpg


Just a friendly tip...


:)

Yea, I know. Sorry, but I do not have my Easy Thumb software installed on my computer at work.

Is there a way for me to change the size of those existing pictures in my gallery when I get home and have access to my software?
 
Yea, I know. Sorry, but I do not have my Easy Thumb software installed on my computer at work.

Is there a way for me to change the size of those existing pictures in my gallery when I get home and have access to my software?

You know, I figured there was a reason as you're pretty good with photos... in fact I use your Pigtail Photo all the time and always give you credit for it.

Tracers Tracers - RIDS - Pigtails - Cobweb Swirls - Rotary Buffer Swirls - Holograms - Water Spots - Bird Drooping Etchings - Micro-Marring


Fixed them, they're in your Autogeek Gallery...

Easy Thumbnails is a great image resizer and it's free too.. every picture I post is resized using Easy Thumbnails.


:)

Thanks for resizing the pictures for me, Mike. :props:

I've read your article with my pigtail photo, and I appreciate the credit on that too. I guess that means I have to take the credit for instilling that pigtail also. :laughing: Better my truck than someone elses.

It's time to go out into the garage and start buffing on the Nissan now.

Thanks again.
 
I also have this car, same color. Mine is the Spec V version, and I have the same thing happening. From what I've read on Nissan forums is that the quality of the paint wasn't good, and a majority of Sentra's have this. At least that generation Sentra, the S14 series (I think).

I don't have pics but I'll post some when I can. On the roof of mine in the rear right, there is as spot where you can see the clear starting to flake off. I've never done much with it since I'm new to this, but I kept my car clean.

What I think it is, is small rock or sand chips hitting the body from normal driving and making the clear coat rise. I could be wrong.

My car is mostly garage kept, I'd say about 80/20. The 20 being outside, when parked. Other than when being used.

It's also a 2002 with 51,000 miles.
 
Hey Mike,

How much faster are the newer DA's like the PCXP, Griots and G110v2 when comparing them to my old G100 that I am currently using? It just feels like it is taking me forever to buff out this car. Thank goodness I have it for the whole week to work on a little at a time each evening after work. :D
 
Hey Mike,

How much faster are the newer DA's like the PCXP, Griots and G110v2 when comparing them to my old G100 that I am currently using?

They are better at keeping a pad rotating, it's not the speed they offer, it's the ability they offer.

MILLIONS of cars have been buffed out with the first generation Porter Cable 7424 and 7336 units, I know, I've been there and done that...

This second generation of tools is better able to keep a pad rotating under pressure and that's the key to removing defects because it's when the pad is rotating that it removes a little paint and it's when you remove a little paint that you remove the defects.

Here's an thread that goes over this...

WG TSR/FG & PC 7335 Technique


If you have a first generation Porter Cable Dual Action Polisher, then here's how to maximize it's ability


How to maximize the ability of the 1st Gen Porter Cable Dual Action Polishers

Hang on while I write this article from scratch...


:D
 
Thanks, Mike.

I think I need to look into upgrading to one of the three new generation DA's at some point soon, as well as getting some more of the 5.5" pads that I currently use. That way I can switch to a fresh clean pad more often than I can now.

At this point I am cleaning on the fly after every or every other section, but eventually the pad can't be cleaned enough to work effectively any more and I need to switch to a clean one. That's the problem right now. I only have 2 of the 5.5" orange CCS pads that I am using to remove the defects. So I try to stretch them as far as I can by cleaning them on the fly. Then I have to clean them and let them dry before I can use them again the next night.
 
p.s.

Your pictures are 1600 pixels wide by 1200 pixels wide and I have to horizontal scroll on a 24" monitor, so that means the majority of people reading your thread have to horizontal scroll to see you pictures...

The best average size for a picture on a "Discussion Forum" is about 800 pixels wide. Height doesn't really matter as most people expect to scroll vertically...

This is 800 pixels wide...

Le_Car.jpg


Just a friendly tip...


:)

Hey Mike, what size resolution are you running on your computer? Also, what browser are you using? My computer will auto resize images and put a bar at the top of them that you can click if you would like to view the full size.
 
A couple better pictures showing the paint condition.

Faded out paint.

01_Faded.JPG


What I believe to be the clearcoat beginning to fail. You can see the opaque white dots that I was referring to a little better in these pictures.

02_Clearcoat_Failure.JPG


01_Clearcoat_Failure.JPG


Here is a good picture showing the pitting that is in the clear as well as the opaque white dots.

01_Pitting.JPG


Below are a few 50/50 shots from the other night after some testing.

50/50 Hood.

01_Hood_50-50.JPG


50/50 Fender

01_Fender_50-50.JPG


02_Fender_50-50.JPG


It's slowly coming along.
I will be spending most of the day Friday on it. :buffing:
 
Back
Top