Headlight sealant: spar urethane vs. opti coat 2.0

Yeah, I don't think you can ever make a restored light loo exactly like a brand new one......but we can get em' dang close to it....lol
When the original coating was applied at the factory, it was preceeded by a primer that was then baked on, followed by the protective coating cured by UV. Both coatings were probably sprayed on.

Tough to duplicate. Headlights can be made to look like new, but most customers are unwilling to pay for it.

ray6


Yes, I agree ray6......They can look like brand new if you follow the method spelled out on here(another thread) where the AutoGeek rep actually removed the lights from the vehicle, sanded them and sprayed them(I think with two coats of clear). But most people don't want to spend over $100 on headlights. The majority of people on here are using the spar method, Opti-coat or another type coating that doesn't require headlight removal.
 
I redid my light. The old spar was so far gone it came off extremely quick with a few passes of 3000grit sandpaper. I didn't measure the mixure exactly, but I used more spar than spirits this time around.

I missed a few spots and I got a run in one of the corner. But its hardly noticeable. Hopefully this coat last longer.

One reason the spar method can fail quickly is because of roughness and cleanliness of the polycarbonate base when it was applied. When I used urethane coatings (probably very similar to Minwax, etc) I finishedwith 3000 grit polishing pad and super scrubbed with pure alcohol. No water (rubbing alcohol). This left a nice rough surface for the PU to hold onto. Also, if you have to mix the hardcoat, maxe sure the cup material is compatible with the urethane (doesn't melt) and absolutely no wax. Water and wax are your enemies.

ray6
 
I think the drying time can vary depending on the atmosphere......temp, humidity...ect. I try to get my customers to let it dry out in the sun for at least a few hours......if they can leave it overnight in their garage or not drive it till the next day is best. Many though will pick the car up within an hour of being done. I make certain to show them the result and explain to them not to touch them or get them wet in any way till the next day....just to make them see the importance of drying/curing. Plus, if they know it will cost them for me to "redo" them...they listen. I ALWAYS take before and after pics too.....for those potential disgruntled ones.

You can also ask your customers to drive home eiyh their headlights on. The added heat will shorten the cure.
ray6
 
Can anyone give me as many details as possible about Minwax Spar Urethane (what is it made from maybe, some pdf explaining content)?
I am still looking for an equivalent in Europe/product that will give the same results without damaging plastic lens.

Maybe some pictures around the can will do.

Thanks in advance
Minwax is a solvent based polyurethane (poly meaning many) consisting of different ingredients in a mineral spirits carrier. Additives are to block UV, flowout, moisture sealing, etc.

Unfortunately, due to the high percentage of VOCs (volitle organic concentration) it is illegal to sell in amny parts of the U.S, and because Europe is tougher on VOCs than the U.S., probably harder to duplicate there. There are better coatings available such as waterborne 2K polyurethanes made for this purpose. They may not be available there, but you might be able to buy them from the U.S. and have them shipped to you.

ray6
 
Sorry if this has been covered already, but I have some Ace Spar Varnish in the house will this work as well?

The label seems contradictory though:

Solvent Based Spar Varnish Clear Gloss
-for all wood surfaces
-rich amber finish
-interior or exterior
-Long lasting UV protection
-Water resistant

the color is not clear, however neither is the picture from the OP. will this go on clear even though it says amber finish?

maybe I will just by some minwax spar urethane....
 
And just to add to this thread...

Headlight Sander - Takes the work out of sanding headlights...


I've been using the 3" Griot's Garage for dampsanding paint and now for machine wetsanding plastic headlights and it works great!

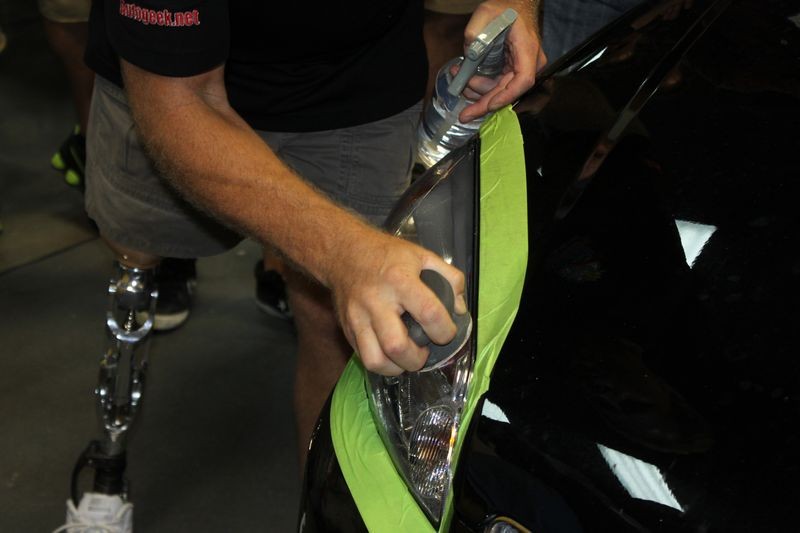
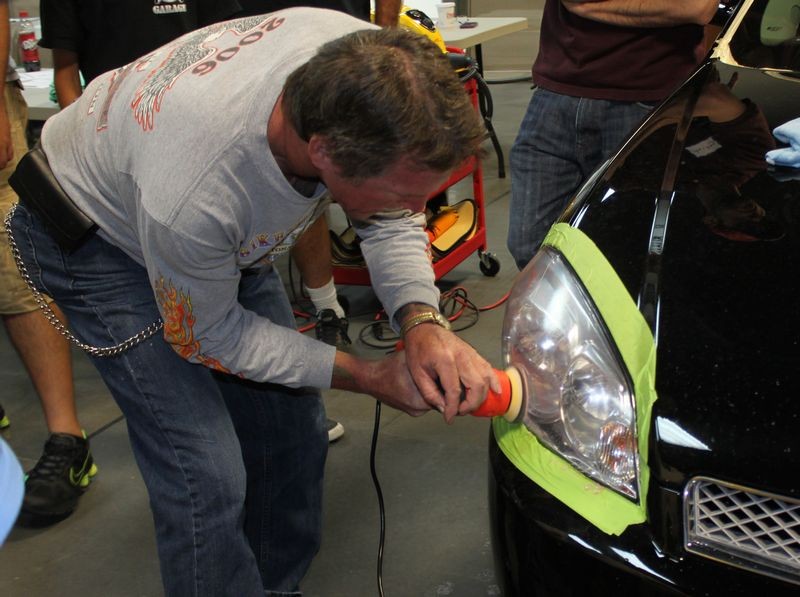
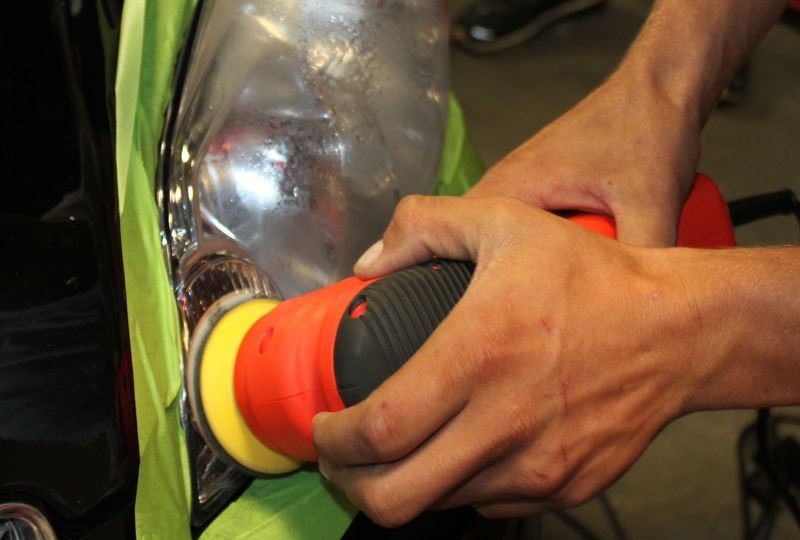
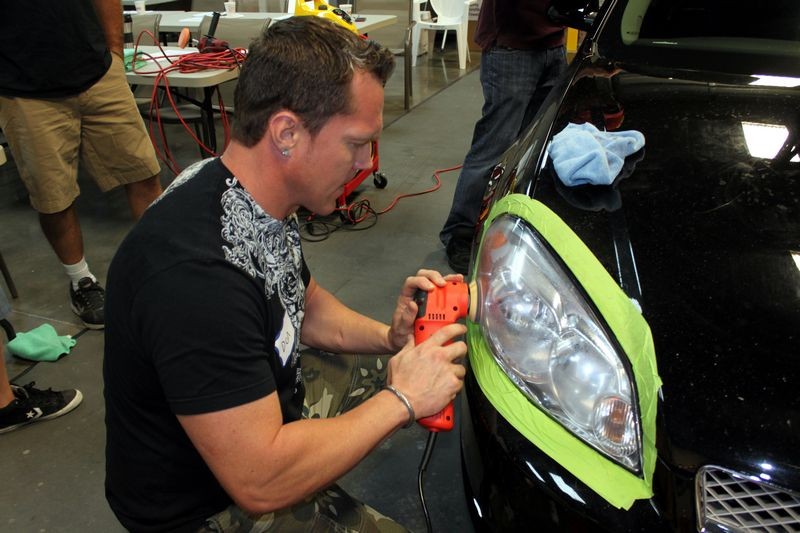
The below pictures are taken from my Detailing Boot Camp Class May 5th and 6th, page 2 where I demonstrated the 3" Griot's Garage Mini Polisher for machine sanding plastic headlights.


First we went over handsanding using the Meguiar's backing pad for their discs. I show hand sanding first so after seeing or actually using your muscles to sand plastic I know the students will love and prefer working by machine.


Handsanding Headlights
Next up is headlight polishing, for this we used the Meguiar's Heavy Duty Headlight Correction System with a twist, I demonstrated the Meguiar's backing pad for the 3" Sanding Discs but then shared how they also fit on the Griot's Garage 3" Mini Polisher and how working by machine takes all the work out of the project.


Wetting the face of the #1000 Unigrit Sanding Disc with plain water...
2BootCamp016.jpg


Hand sanding... (elbow grease)
2BootCamp017.jpg


Machine Sanding Headlights

Machine sanding (no elbow grease)
2BootCamp018.jpg


Everyone pretty much just wanted to work by machine... here's Jeff machine sanding a headlight lens...
2BootCamp019.jpg


Here's Stephan misting some water onto the face of the sanding disc...
2BootCamp020.jpg


Stephan machine sanding a headlight lens
2BootCamp021.jpg


2BootCamp022.jpg


Don machine sanding...
2BootCamp023.jpg


Results after Machine Compounding and Polishing out the sanding marks

HeadlightsFinished01.jpg


HeadlightsFinished03.jpg


Products used...

3" Griot's Garage Mini Orbital Polisher
Be sure to get the 3" Foam Interface Pad if you're planning on using the 3" Griot's Garage Mini Polisher for sanding headlights for dampsanding paint. It makes keeping the sanding disc flat to the surface easier and makes sanding smoother. Serious.


Meguiars Heavy Duty Two Step Headlight Restoration Kit - G3000


Meguiars Unigrit 3 Inch Sanding Discs
Meguiars Unigrit 3 Inch Finishing Discs

Flitz ScuffPads
I also demonstrated the Flitz ScuffPads. The Flitz Mini ScuffPad is made of resin-coated non-woven abrasives in cut fiber strands. The flexible, durable sanding pads are perfect for contoured surfaces. Use the pads wet or dry.

The Flitz Mini ScuffPad is the equivalent to 1500 grit sandpaper. On scratched headlight lenses, plastics, wood, composite, and metal, the Mini ScuffPad sands down the scratched surface to create a more uniform surface. When you begin polishing, the entire surface is being leveled at the same rate. The results are uniform and smooth.


Flitz Mini ScuffPads 6 Pack, 1500 Grit

jpg


:xyxthumbs:
 
I used Hotrod's method and the result is fantastic. The lights are looking brand new. That was a week ago. It rained the last couple of days and finally it stop raining today. I inspected the light and saw water mark all over the lens. What should i do? It's looking so bad that i'm tempted to redo the whole thing again. suggestion please
 
It rained the last couple of days and finally it stop raining today. I inspected the light and saw water mark all over the lens.


Ouch!

Have to wonder what's in the water? :confused:

Regardless, if the water spots have physically etched the surface that is they've left a below surface impression or crater or etching, whatever you want to call it, then the only way to fix it is to try to level the surface via some type of abrading process followed by some type of polishing process.


Kind of back to where you were with the original lens in that nothing stays perfect forever. Not the plastic, not the coating.

:)
 
I used Hotrod's method and the result is fantastic. The lights are looking brand new. That was a week ago. It rained the last couple of days and finally it stop raining today. I inspected the light and saw water mark all over the lens. What should i do? It's looking so bad that i'm tempted to redo the whole thing again. suggestion please


How long was it after applying the spar mix, that the lenses got rained on?
 
I used Hotrod's method and the result is fantastic. The lights are looking brand new. That was a week ago. It rained the last couple of days and finally it stop raining today. I inspected the light and saw water mark all over the lens. What should i do? It's looking so bad that i'm tempted to redo the whole thing again. suggestion please

You gotta renew the seal 'cause it's leaking water inside the lights.

Condensation on headlights is a common problem, and it is mostly fixed by taking lights out of the car, then take apart the polycarbonate cover and the base of the light, cleaning, eliminating dried out silicone, and applying new silicone. IMO :xyxthumbs:


Or maybe you didn't prepared thoroughly the lens before applying the spar urethane mix... (?). But i vote for inner condensation issues.
 
I used Hotrod's method and the result is fantastic. The lights are looking brand new. That was a week ago. It rained the last couple of days and finally it stop raining today. I inspected the light and saw water mark all over the lens. What should i do? It's looking so bad that i'm tempted to redo the whole thing again. suggestion please

The spar urethane WILL absorb a small amount of water, which then has to evaporate out. I've seen it take several hours for the watermarks to disappear. Update us...once the headlights were totally dry...a day or so...how did they look?

If this is happening, do not wipe the headlights until completely dried through, as the surface of the urethane feels a bit softer when damp.
 
Wet the surface with water. If the spots disappear, it's on the outside. If they don't, it's on the inside. I don't use the spar method, but I'm familiar with solvent based polyurothanes of which Minwax is one type. If water got under the coating or the coating appears to be defective, remove it with mineral spirits if it hasn't hardened yet (takes about 2 weeks to fully cure). If it's hard, sand it off but don't use anything rougher than 500 to 1000 grit. If you prepared the surface well the first time, you don't want to go backwards.

Another possibility is that the spar didn't stick to the polycarbonate. Things to check:

Did you use any compound or polish after initial sanding? Any wax will contaminate.

If you used a foam applicator was it latex free?

Did you scrub the light well with pure alcohol (preferred) or odorless mineral spirits.

Did you mix your spar/ms in a wax coated cup?

Any chance of contamination from your applicator?

If rain/high humidity is an issue, apply low heat from a hair dryer after coating to get it cured faster.

ray6
 
Sorry if this has been covered already, but I have some Ace Spar Varnish in the house will this work as well?

The label seems contradictory though:

Solvent Based Spar Varnish Clear Gloss
-for all wood surfaces
-rich amber finish
-interior or exterior
-Long lasting UV protection
-Water resistant

They mean rich amber when applied to wood. The thickness on headlights is too thin to really see the amber finish. It will probably appear amber in the can.
ray
 
If rain/high humidity is an issue, apply low heat from a hair dryer after coating to get it cured faster.

Turning the headlights ON, high beam, helps also, by warming them up from the inside.
 
11 month update on car #1 Mercury Grand Marquis

Sorry, I have been busy recently and forgot to update my test vehicles. But here are the results, and these lights are 11 months from recent restoration. And they look bad. Neither coating is holding up, but this car is outside 24/7 and is rarely washed. So it goes through extreme testing with the weather.

Drivers side opti coat

Before washing, very dirty.

After washing with optimum no rinse. The more time goes by the more the lens degrades.


Passengers side Spar urethane treatment

Before washing, bird droppings and bug splatters

After washing with optimum no rinse. More bug splatter etching and its permanent. Opti coated side did not have any major etching like the spar side from bug splatter.


Neither lens looks that good at this point, but the spar looks slightly better. I am guessing both lens will need to be re done sometime this summer. The other two test vehicles are still holding up but they are garaged and cared for more often.
 
That looks better then others I've seen with a total cloud over.
 
Assuming all the original coating was removed when you restored, when you see heavier deterioration at the top, it's probably be due to that surface receiving more UV than the rest of the headlight. If you wait long enough, the entire headlight will cloud starting from the top and working down.

We use a polyurethane coating, not minwax/MS but probably similar. However, our coating is much thicker than a 50/50 mix. The thicker the coating, the longer the lifetime, but the more difficult it is to apply.

We now only use poly for low end restores (fleets, buy here-pay here, etc.) but we are guaranteeing for 1 year. Few callbacks, but some, especially PT Cruisers because of their horizontal surfaces. They get hammered with UV.

You might try the following to get better lifetime:

Don't sand any finer than 1500 grit. The rougher the surface, the more surface area to stick to.

Make sure surface is spotless before applying poly. We scrub twice with blue lint free scott towel and Propanol. Don't use any alcohol with water in it like rubbing alcohol.

Make sure the cup you mix in isn't coated with wax, like a paper cup from McSonald's. HDPE or PET is best.

You want as heavy a coat as you can apply, Not familiar with Minwax, but would start ay 100% if possible. A heavier coat is thicker and dries slower, giving you time to work the coating. We apply with closed foam applicators wiping on with horizontal strokes, followed by wiping vertically. This smooths out the coating and gives you a uniform thickness. This should last longer. If you're charging money for your restores, I would try using a better coating like 2K LPE. This is what we use on most restores and warrant for 2 years (with 2 coats). The actual cost per headlight (2 coats) is less than a dollar. Poly is probably a quarter, Not worth the risk.

ray6
 
7 month update on test vehicle #3 Pt Cruiser

I just got around to inspecting my third test vehicle, which is daily driven but washed regularly and stored in a car port when not in use. Neither light looks much different than the day I restored them in my opinion. Both lens are holding up very well on this car but remember this car is taken care of better than the Grand Marquis.

And here are some pictures:

Spar urethane side 7 months since restoration


Opti coated side 7 months since restoration


The slight ghosting effect at the top of both lights is on the inside on is non repairable.
 
Back
Top