2010 Ford Escape

Y2KSVT

New member
Joined
Jul 27, 2010
Messages
823
Reaction score
0
Since my mother-in-law purchased this Escape a few months back, I told her I'd detail it for her. Of course, I get the keys on a 90+ degree weekend. She dropped the car off on Friday, so it was there when I arrived home from work. Here's what it looked like. Could it be that I wouldn't have any swirls to remove and all it would need is a wash and seal?

IMG_31321.JPG


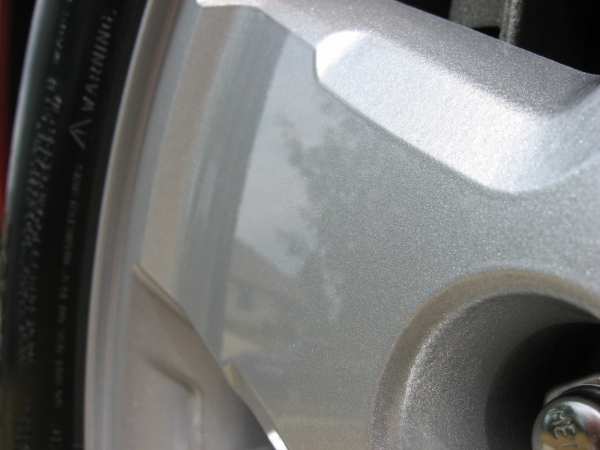
Of course not! Here are a few close ups of the paint.

IMG_31341.JPG


IMG_31352.JPG


IMG_31361.JPG


IMG_31421.JPG


IMG_31411.JPG


IMG_31481.JPG


That tar was THICK! I actually wonder if it wasn't an underbody liner as it looked suspiciously like what was used on parts of the rear wheel wells. Anyway, after an ounce or so of Poor Boy's Bug Squash, an entire Meguiar's clay bar, and some careful fingernail work, that tar was gone.

IMG_31631.JPG


IMG_31601.JPG


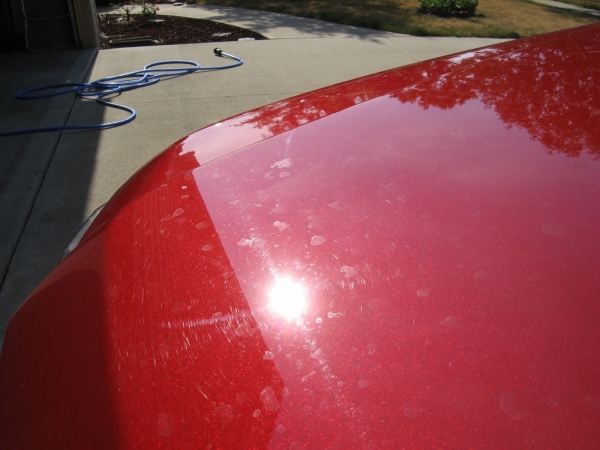
Here are a couple of shots immediately after a Dawn wash using the 2 bucket method.

IMG_31571.JPG


IMG_3156.JPG
 
Here's a 50/50 of a test spot on the hood. I used an LED flashlight for this picture.

IMG_31691.JPG


I used D151 and an LC orange flat pad for this, which proved to be a nice combination on this paint. Here's a before and after of another spot on the hood.

IMG_31701.JPG


IMG_31732.JPG


Once all of the polishing was complete, I pulled it out into the sun (Saturday) for some sun shots. These are right after the polishing stage.

IMG_31801.JPG


IMG_31821.JPG


IMG_31841.JPG


I wanted to give my M-I-L a good amount of protection, so I gave the car another Dawn wash to get rid of whatever the D151 left behind. I also wanted to make sure I had removed any swirls and hadn't just covered them up. Here's how water reacted after this Dawn wash.

IMG_31871.JPG


I pulled the car back in to dry it off and inspect for swirls. Here are some shots with the halogens.

IMG_31891.JPG


IMG_31911.JPG


I was very pleased to see that D151 did not just fill those swirls, but they were removed. I then applied a coat of DP Poli-Coat. This stuff spreads nice and thin and a very little goes a very long way! Here are some sun shots with the Poli-Coat.

IMG_31921.JPG


IMG_31931.JPG


The tires received one coat of DP tire gel and the wheels were treated to one coat of WheelWax.


IMG_31962.JPG


IMG_31972.JPG


And one last reflection shot to leave you with...

IMG_31992.JPG


Mark
 
Man that looks good. I know your MIL will be happy with it.
 
Great Job on the vehicle.
Your MIL is gonna love u even more now and your the best SIL in her eyes.
 
When I buy a house (one day) :work: It has to have a 3 car garage like yours
 
Man that looks good. I know your MIL will be happy with it.

She was thrilled with it. Thank you!

Great Job on the vehicle.
Your MIL is gonna love u even more now and your the best SIL in her eyes.

Thank you!

When I buy a house (one day) :work: It has to have a 3 car garage like yours

We just moved in about a month ago. Our previous house had a 2.5 car detached garage. The 3rd bay unfortunately is pretty unorganized at the moment. That should all change in the coming weeks. Thanks!


Mark
 
It never hurts to have a happy M-I-L ! (lol)

Good job!
 
Back
Top