Looking to detail my truck for the first time.

What is the difference in cleaner wax and caranuba wax? Also are both needed? Gonna buy a buffer just looking at stuff I can get at wal mart right now.
 

Cleaner wax also cleans the paint to save time then also lays down some protection, it cuts out the polishing step if you dont have time to do it seperate, and it may remove some slight imperfections. Carnauba has no cleaning properties, it just lays down protection and shine, and for that aspect it will last longer than a cleaning wax. I believe that is essentially it, if the paint needs cleaning and is not slick prior to applying the carnauba, you could potentially scratch the paint and or trap contaminates under the carnauba. If any of that is wrong, I am sure someone will come along behind me and clarify, but I think that is right.
 
OK thanks. The cleaner wax doesn't replace the clay bar right? Also sorry for all the stupid questions. Just want to get my truck looking good.
 
OK thanks. The cleaner wax doesn't replace the clay bar right? Also sorry for all the stupid questions. Just want to get my truck looking good.
No, the cleaner wax does not replace Clay. And if you are going to clay and polish with a DA you won't need a cleaner wax at all!
 
I am going to be doing it by hand.

If you're going to do all your work by hand then get a bottle of Meguiar's Ultimate Compound and a few microfiber and foam applicator pads. The read through this article as it explains in DETAIL how to use your hand to remove defects like swirls, scratches and Type II Water Spots, (crater etchings), and even "Imprint etchings" like left by Type I water spots.

Man versus Machine

The below is JUST and excerpt from the above article, definitely read the entire article as it is very detailed as it applies to what you want to do.


Test Spot by Hand
At the time of this article, (8/26/09), I had never used the CCS Euro Foam Hand Polish Applicators so the first thing I'm going to do is test them out and see how they work while doing my test spot.

In the strip in the middle of the trunk-lid we're going to test out the three different levels of aggressiveness available in the CCS Euro Foam Hand Polish Applicators using Ultimate Compound.

Note: While Lake Country intended these pads to be used with the CCS pocket side facing down, you can also use the flat side, which I chose to do for this test because I want 100% of the surface of the applicator working against the paint. This is a big car and it's going to take a little passion behind the pad to work the defects out and I want everything possible working for me.


Testing out the CCS Euro Foam Hand Applicator Pads
First I tested each of the different foams with the Ultimate Compound to see how each foam formula worked to remove the defects.

Red Ultra Soft CCS Euro Foam Hand Polish Applicator
The red foam was too soft for applying and working compounds as I thought it would be but I wanted to try it for myself so that anytime these tools are discussed on our forum or in our classes, I can speak from real-world knowledge and hands-on experience.

White Polishing CCS Euro Foam Hand Polish Applicator
Then I tested the white polishing applicator pad and found that it worked well for with Ultimate Compound and SwirlX because of the increased firmness.

Orange Light Cutting CCS Euro Foam Hand Polish Applicator
Lastly, I tested the orange applicator pad and found the extra firmness and aggressive nature of this foam removed defects the fastest and the most effectively with Ultimate Compound but found it to aggressive to use with a cleaner/polish.

The visual results from my testing proved that for removing serious below surface defects, the fastest and most effective pad out of the three would be to use the orange applicator pad.

Now that I confirmed which foam pad worked best on this paint system for the heavy cutting step with the Ultimate Compound, I continued with my test spot by re-working the entire area with the Ultimate Compound and the orange applicator pad.

Large Oval Shape
The CCS Hand Applicator Pads are oval in shape and comfortably fit your hand. What I really like about the orange cutting and the white polishing pads is they are firm enough to distribute the pressure from your hand evenly over the entire face of the pad in contact with the paint.

Softer foam pads tend not to offer this benefit and for some applications that’s okay but for working out defects where you’re going to need to invest a lot of time physically rubbing on the paint the firmer pads work better.

Lincoln008.jpg


Read this too...

How to use a hand applied abrasive polish or paint cleaner by hand


One of my all time favorite vid's:

Here's the same thing, showing how safe the tool is but it also goes through the steps involved...


Motorhead Garage - Machine Polishing with Pinnacle - Episode 7


Removing Swirls and Oxidation By Machine
[video=youtube_share;PWdYCHZrpd8"]How To Remove Oxidation by Machine Polishing with...[/video]​


I don't know the Junkman personally but I'm a huge fan of giving due credit where credit is due and always appreciate it when others reciprocate the practice.

Found and took these screen shots #1 and #2 one day. Posts can have a way of disappearing over time so I thought I would take a screenshot. Note the time stamp is in 2009.


It's all good...


:)
 
OK thanks. The cleaner wax doesn't replace the clay bar right? Also sorry for all the stupid questions. Just want to get my truck looking good.

Detailing clay removes contaminants off the surface. It will do nothing for any type of defect below the surface like swirls, scratches, imprint etchings, etc.


Check these out from my article list,


Water Spots

3 - Types of Water Spots - Type I, Type II and Type III

How To Remove Sprinkler Water Spots

How to remove water spots by hand

Tips for removing Type I Water Spots


The below is just an excerpt from this article,

How To Remove Sprinkler Water Spots


Click the link to read the entire article,


Mike Phillips said:
Just by chance, there's a rental car in the parking lot which also has water spots all over the finish.

SprinklerSpotsS001.jpg


SprinklerSpotsS002.jpg


These water spots look like they're established water spots, that every time it rains, or a sprinkler goes off, the water pools in the same place giving any corrosive substances repeated opportunity to etch into the paint.
SprinklerSpotsS003.jpg


SprinklerSpotsS004.jpg


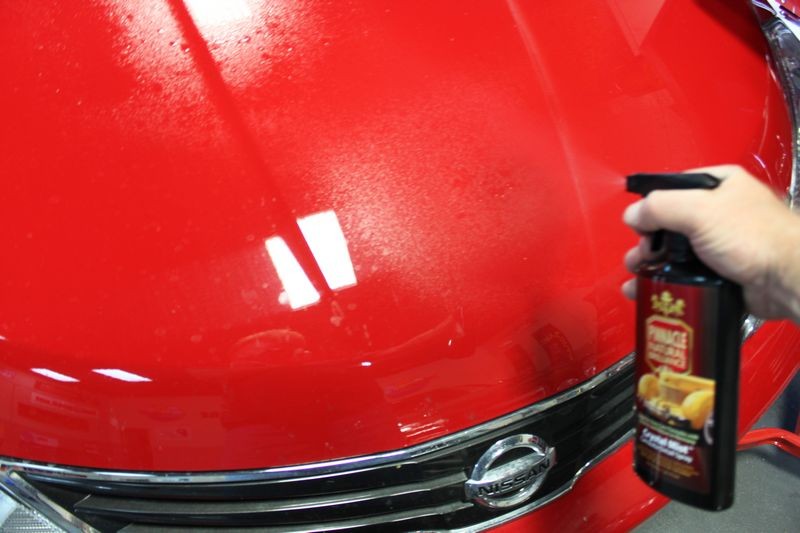
Visually, I can tell the paint is likely etched in this instance but I won't know till I get the surface clean. The first step is to wash or wipe the finish, in this instance I'm going to repeat wiping process I used on the Mercedes-Benz with a spray detailer.

SprinklerSpotsS006.jpg


SprinklerSpotsS007.jpg


SprinklerSpotsS008.jpg


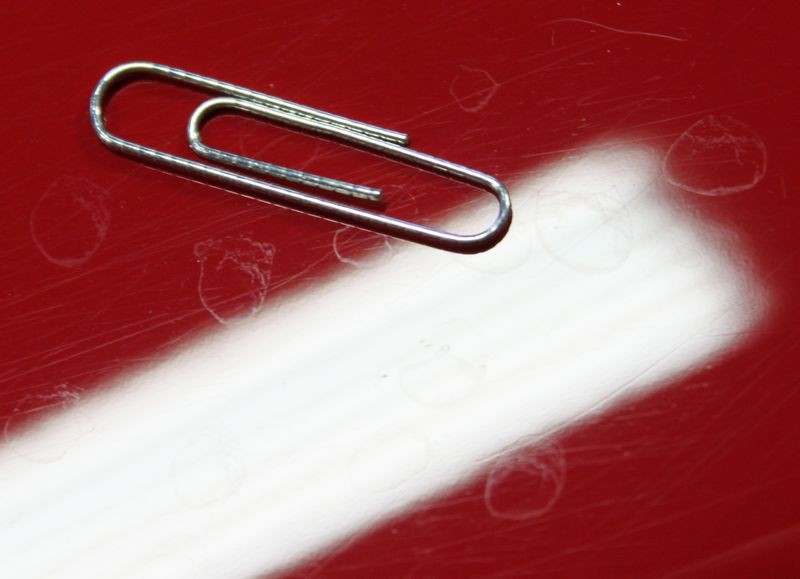
After wiping the paint clean, there are water spot imprints remaining in the paint.

WaterSpotImprints01.jpg


WaterSpotImprints02.jpg


WaterSpotImprints03.jpg


To remove these and use the least aggressive product to get the job done I'm going to use a light paint cleaner with a microfiber applicator pad to gentle clean the paint.

SprinklerSpotsS009.jpg


SprinklerSpotsS010.jpg


SprinklerSpotsS011.jpg


If you want to take some of the work out of the cleaning step as an option you can use a machine polisher to apply and work the paint cleaner, this can save a lot of elbow grease and speed up the process especially if the water spots are over the entire car.

SprinklerSpotsS012.jpg


If you opt to machine apply the paint cleaner and you're starting with a clean, dry pad, be sure to prime the pad by spreading the paint cleaner over the entire face of the pad, by doing this 100% of the face of the pad will be working for you from the very first moment you turn the polisher on and begin buffing.

SprinklerSpotsS013.jpg


SprinklerSpotsS014.jpg


Remove the paint cleaner residue by wiping gently using a fresh, clean microfiber towel and then apply a coat of wax or paint sealant as the paint cleaner will effectively remove everything off the surface including any previously applied wax or paint sealant.

SprinklerSpotsS015.jpg


In keeping with the philosophy of using the least aggressive product to get the job done, if washing or wiping the paint doesn't remove the water spots the next step would be using a light paint cleaner. If the light paint cleaner didn't work you could then test a light finishing polish and if that wasn't working fast enough and/or effectively enough then you could try a more aggressive product. The goal being to remove the water spots using the least aggressive product and by doing so leaving the most amount of paint on the body panels to last over the service life of the car.

SprinklerSpotsS016.jpg


Water Spots and Sprinkler Water Spots Successfully Removed
SprinklerSpotsS017.jpg


One bit of advice... try to avoid parking near sprinklers when their placement is known... in the example of the Mercedes-Benz, the water spots simply wiped off; I have seen instances of Sprinkler Water Spots that have etched round craters into clear coat paints and removing these Type II Water Spots can be not only time consuming but it will require you to remove a measurable amount of the clear layer in order to completely remove the spots.

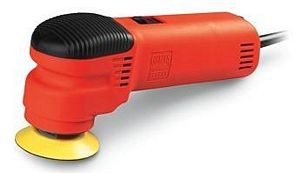
:)
 
Just a little bit of advice,

If you're going to buff out an entire vehicle using only your hand, and this includes trying to remove any type of below surface defect, then only tackle one panel a day and spread the project out over multiple days.

The reason for this is because as you get tired of rubbing the paint out you won't do as good of work and that means you won't remove the defects so you'll be spinning your wheels.

If you tackle just a single panel you'll have the energy, drive and passion to do a good job and your "entire" truck will come out looking great.

Been there, done that lots of times in my life and that's why I'm a machine guy. At the same time I understand everyone starts out working by hand and then sooner or later move up to working by machine.

Read this article as it explains the history behind the popularity of the Porter Cable type polisher...


The Free Floating Spindle Assembly - The Story Behind The Story...


Dual Action Polishers
PC7424XP2.jpg
MegsG110v2.jpg

GriotsPolisher.jpg
3inchGriots.jpg


:)
 
I'm gonna buy a buffer. I was just gonna go ahead and clay and wax my truck. Unless I should just wait till after I buy one.
 
I'm gonna buy a buffer. I was just gonna go ahead and clay and wax my truck. Unless I should just wait till after I buy one.


IF you want to keep it simple until you get your polisher, the definitely "yes", wash, clay and use a cleaner/wax on your car's paint.

Not only will it look better but it will be better protected till you can do the machine polishing step.


I've been detailing cars and teaching others how to machine polish paint for a long time and one of the most common things I've heard people say after getting and using their first electric polisher is,


I should have done this a lot sooner...


The reason why the trend for the last 30 years has been for people to switch to machine polishing is the fact that the car industry changed the type of paint they now use from single stage paints to basecoat/clearcoat paints and modern basecoat/clearcoat paints are generally harder than traditional single stage paints and what that means to you and I when we try to work on our paint by hand is it's lot more difficult to get the defects out and takes a heck of a lot longer which I document in the article I've included in this thread,

Man vs Machine


This article also explains the differences in detail...

The practical differences between single stage paints and a clear coat paints

Top: 1965 Mustang with single stage finish. Bottom: 2009 Mustang with a basecoat/clearcoat finish.
RedMustangs.JPG


:D
 
Back
Top