Navigation
Install the app
How to install the app on iOS
Follow along with the video below to see how to install our site as a web app on your home screen.
Note: This feature may not be available in some browsers.
More options
Style variation
You are using an out of date browser. It may not display this or other websites correctly.
You should upgrade or use an alternative browser.
You should upgrade or use an alternative browser.
Video and Pictures: 2012 Fiat 500 - Chemical Guys Show Car Makeover - AutogeekOnline.net
- Thread starter Mike Phillips
- Start date
Eandras
New member
- Dec 6, 2011
- 808
- 0
Great show congrats to the winnersVideo and Pictures: 2012 Fiat 500 - Chemical Guys Show Car Makeover - AutogeekOnline.net
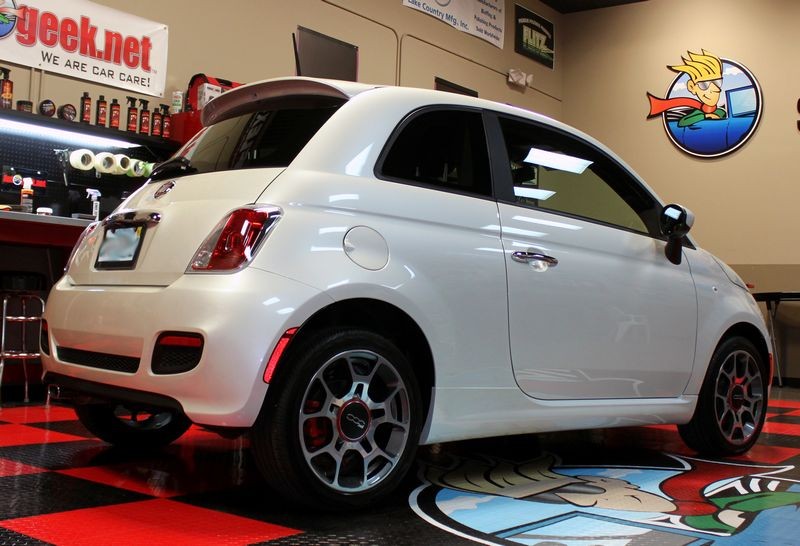
2012 Fiat 500

Chemical Guys Detailing Products

On Thursday, July 26th, we will be performing a full detail to a 2012 Fiat 500
We will also be broadcasting the process LIVE with the video feed starting at 6:00pm Eastern Time.
Start sharing the Live Broadcast Link with your car buddies today!
Live Broadcast Giveaway!
This week we're going to be doing something extra special. By that I mean we're going to give away the featured products to one lucky winner! That's right, if you watch tonight's live broadcast you will have an opportunity to win every featured Chemical Guys product!
Here's the deal: At some point during the live broadcast tonight Yancy is going to zoom the camera in on a Chemical Guys sign (see below). This sign will have a secret code and the first to post the code in THIS THREAD is the winner!
Contestants must be located in the contiguous 48 states to qualify to win.
Mike Phillips
Active member
- Dec 5, 2022
- 51,004
- 7
- Thread starter
- #105
Thank you to everyone that watched and participated in the contest...
I have some high resolution pictures that I'll post to the first portion of this thread tomorrow...
Time to shut down Autogeek's Show Car Garage!
:xyxthumbs:
I have some high resolution pictures that I'll post to the first portion of this thread tomorrow...
Time to shut down Autogeek's Show Car Garage!
:xyxthumbs:
Yancy
New member
- Oct 16, 2007
- 2,263
- 0
well off to work i go... i feel like i was close to the secret code... what a bummer i missed it!!!
Tune in next time, we'll do it again!
I liked the feed and the detailing. What drove me a little batty was the commercials. They were louder and blew my headphones out of my ear and twice surprised me and I almost lost my cookies. I also think it delayed the posting for the contest because people had posted the code before I even saw it. Bummer. But it was a great show. Thanks Mike!!!!!!
Mike Phillips
Active member
- Dec 5, 2022
- 51,004
- 7
- Thread starter
- #109
What to do on a Friday night in winter time and there is nothing on TV .You guessed it watched some polishing :dblthumb2:
I saw the thread on Facebook very cool guys
Ha ha... thanks!
What was funny about last night's project was that the paint polishing took longer than I thought, not actually the time to polish the paint but we had 5 brand new people here,
Brad
Brett
Larry
Tim
Forrest
Brad, Bret and Larry have some experience with the PC but Tim and Forrest had never used any of these types of tools and here's the clincher, they all wanted to test out all the tools, so before we started polishing I went through each of the tools and explained the tool and then demonstrated how to use it.
This part alone took about 45 minutes. After that we did a 3 step machine polish and before that wiping the car and claying the car ended up being about 2.5 hours.
It's all good and the car come out dripping wet looking.
I'll post some pics here in a few minutes...
")
Quattro3.2
New member
- Mar 19, 2010
- 153
- 0
If anyone has the opportunity to get the Autogeek Show Car garage, do it. It was an amazing opportunity to get some hands on experience and tips from a guy like Mike. He was quick to give pointers and advice all while making a great TV show for the viewers. I live two hours away and it was a long trip, but I will be doing it again.
At first, I was thinking "this car already looks great, what else can we do to it? This is just going to be work for the sake of work." Man, was I wrong. The finish looked and felt like it was wrapped in glass. I have done a few cars for friends and family, but this was awesome! Yes, the car might not be the big badass muscle cars we all love, but it has a lot a character, just like its owner.
All in all, it was a great time to learn, use some products that I normally wouldn’t have access to, and spend some quality time with my brother and my old man. If anyone could think of a better time than detailing a car then grabbing some beers after with your family, please PM me and let me know.
I asked Mike for a cart and three minutes in the warehouse alone. He pointed to the wall and said "There's the cart". Unfortunately, the three minutes alone did not happen. Maybe next time.
brentech
New member
- Apr 23, 2012
- 188
- 0
When I get the use of my right foot back and don't require crutches to move, I'm going to spend hours on my car. It's basically been sitting in the garage for 2 straight months now, but it definitely needs some TLC.This part alone took about 45 minutes. After that we did a 3 step machine polish and before that wiping the car and claying the car ended up being about 2.5 hours.
It's all good and the car come out dripping wet looking.
I watched most of the live stream last night, but had to click off after first or second polishing step so I could clean my bandages. Wish I saw the finished product as you were doing it.
Was glad to have something to do. When my wife is gone I'm basically glued to the couch or dragging myself around the house...it gets old.
Hopefully in another month I'll be able to stand up again. I just really miss working on my car.
At least I get to watch some.

Mike Phillips
Active member
- Dec 5, 2022
- 51,004
- 7
- Thread starter
- #113
If anyone has the opportunity to get the Autogeek Show Car garage, do it. It was an amazing opportunity to get some hands on experience and tips from a guy like Mike. He was quick to give pointers and advice all while making a great TV show for the viewers. I live two hours away and it was a long trip, but I will be doing it again.
Hi Brad and thank you for attending our Thursday Night Live Broadcast and bringing your brother Bret and your dad Larry.
At first, I was thinking "this car already looks great, what else can we do to it? This is just going to be work for the sake of work." Man, was I wrong. The finish looked and felt like it was wrapped in glass. I have done a few cars for friends and family, but this was awesome! Yes, the car might not be the big badass muscle cars we all love, but it has a lot a character, just like its owner.
Great observations...
Like I said either during the broadcast or after the show ended,
It's easy to take something really neglected and the restore it and show a incredible and dramatic before and after difference. It's hard to take something in very good condition and take it to an even higher level but with everyone's help and a few Chemical Guys products we accomplished that.
I asked Mike for a cart and three minutes in the warehouse alone. He pointed to the wall and said "There's the cart". Unfortunately, the three minutes alone did not happen. Maybe next time.
Everyone wants to do that! :laughing:
Processing pictures right now, check this out...

Mike Phillips
Active member
- Dec 5, 2022
- 51,004
- 7
- Thread starter
- #115
Just added some to the first page of this thread. Also added the video itself to the first post.
I can try. I just posted some before pictures that I took of the car in the sun, there wasn't a lot of paint issues but it did need to be clayed and anything looks better after machine polishing and waxing.
I think your idea is a good one but would lend itself well to a darker colored car.
I'm working on getting a severely neglected car in here that's dark for a full-on rotary buffer buff-out.
First we're going to do the 65 Mustang on August 9th to showcase Gtechniq EXO, after that it just depends on what I can schedule.
I know your in process of getting the photos ready, but what about a before and after photo in the same post right above one another.
This looks really really good!
Tom
I can try. I just posted some before pictures that I took of the car in the sun, there wasn't a lot of paint issues but it did need to be clayed and anything looks better after machine polishing and waxing.
I think your idea is a good one but would lend itself well to a darker colored car.
I'm working on getting a severely neglected car in here that's dark for a full-on rotary buffer buff-out.
First we're going to do the 65 Mustang on August 9th to showcase Gtechniq EXO, after that it just depends on what I can schedule.
Mc'lovin
New member
- Mar 14, 2012
- 248
- 0
Mike and the rest of the AG crew - I really can't say thank you enough for these videos.. they really are terrific!
I do have a question though, as I'm getting a little confused about whether or not to prime a buffing pad with product.
I was under the impression that priming the pad with a compound/polish is a method intended to be used when using non-diminishing polishes, like Megs m105, and if I wanted to use a diminishing polish (like CG, or Menzerna), I would simply lightly mist the pad with a pad conditioner/QD, put a few pea sized drops of product and start working...
In this video, you do prime the pad with the CG compound. So is this method valid for all polishes?
Thanks!
Mike Phillips
Active member
- Dec 5, 2022
- 51,004
- 7
- Thread starter
- #117
***Update***
All the before, process and beauty shots have been added to the first page of this thread...

Here's the Transformation Team!
From left to right, back row first...
Brad, Bret, Forrest,
Larry, Louie, Tim, Jeff and me...
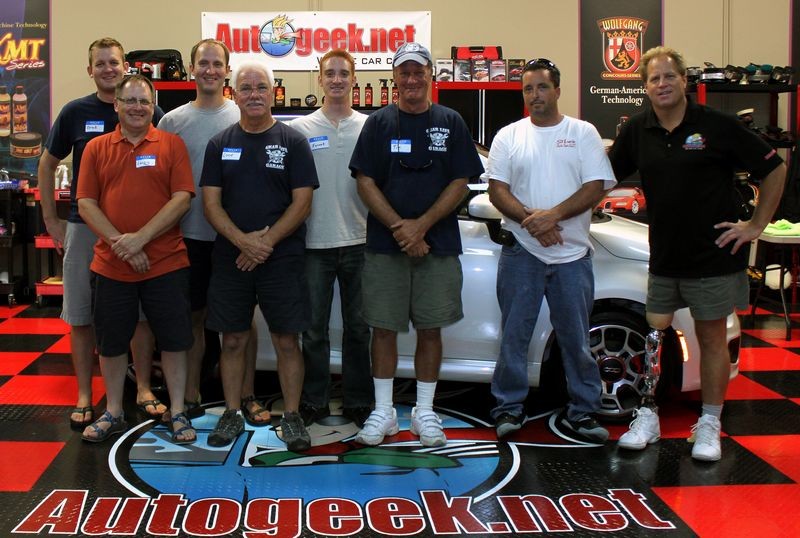
A huge thank you to Louie for trusting Autogeek with his Fiat 500 Sport. We would also like to thank Brad, Bret, Larry, Tim and Forrest for joining us and helping to create the show car finish you see in the above pictures.
:dblthumb2:
All the before, process and beauty shots have been added to the first page of this thread...
Here's the Transformation Team!
From left to right, back row first...
Brad, Bret, Forrest,
Larry, Louie, Tim, Jeff and me...
A huge thank you to Louie for trusting Autogeek with his Fiat 500 Sport. We would also like to thank Brad, Bret, Larry, Tim and Forrest for joining us and helping to create the show car finish you see in the above pictures.
:dblthumb2:
Mike Phillips
Active member
- Dec 5, 2022
- 51,004
- 7
- Thread starter
- #118
In this video, you do prime the pad with the CG compound. So is this method valid for all polishes?
Thanks!
Yes.
The idea being instead of using a wetting agent like a dedicated pad conditioner or spray detailer to go ahead and just prime the pad with the product you're going to use.
That way 100% of the surface of the pad is primed with the product you're going to use and then when you turn the polisher on 100% of the pad goes to work for you.
I even show this when working by hand in both of these early videos...
Show Car Garage Video: How To Apply A Carnauba Finishing Wax By Hand Using The Straight-Line Technique
Show Car Garage Video: How To Apply A Synthetic Paint Sealant By Hand With The Straight-Line Technique
Every video or TV segment I've made, and in this article for working by hand. It just makes good sense...
Priming your pad when working by hand
Anytime you're first starting out working on your car's paint by hand or machine your hand applicator pads or machine buffing pads are going to be clean and dry.
Clean Applicator Pads
You always want to work clean, and in the context of this article that means you want the working face of whatever type of pad you're using is clean so that you don't inflict swirls and scratches into the paint.
Dry Applicator Pads
Doesn't matter if you're starting out with brand new pads or previously used but clean pads, before you start working on your car's paint you should prime your pads with whatever product you're using.
Here are three reasons why you want to first prime your pad before working your car's paint,You always want to work clean, and in the context of this article that means you want the working face of whatever type of pad you're using is clean so that you don't inflict swirls and scratches into the paint.
Dry Applicator Pads
Doesn't matter if you're starting out with brand new pads or previously used but clean pads, before you start working on your car's paint you should prime your pads with whatever product you're using.
1. To wet or dampen it and thus make it more gentle to the paint
2. To help the pad material glide over the paint easier
3. To ensure that 100% of the working face of either the applicator pad is working at maximum efficiency.
How to Prime Your Applicator Pads2. To help the pad material glide over the paint easier
3. To ensure that 100% of the working face of either the applicator pad is working at maximum efficiency.
Pictured below are over 15 types of hand application pads. You can prime all of them in the same manner as shown below.
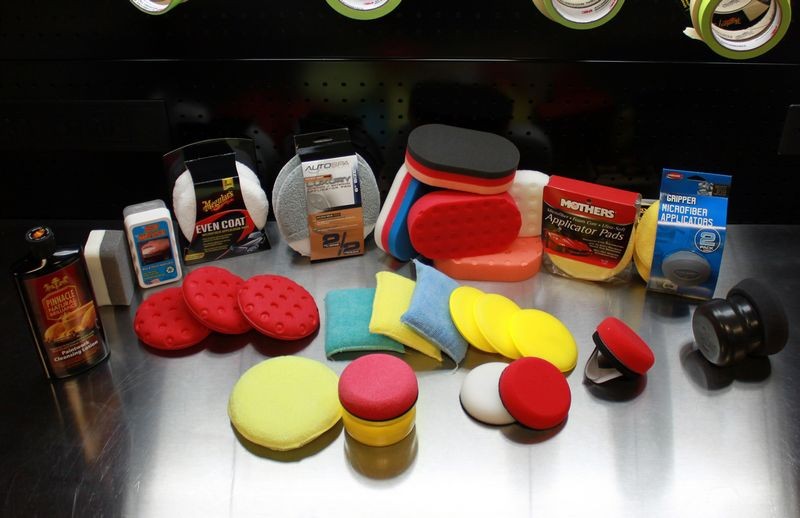
1. Apply some product to the face of the applicator pad, guesstimate the amount of product needed for the size pad being used.

2. Using your clean finger, spread the product out and over the face of the pad lightly working the product into the surface of whatever material your pad is manufactured from.


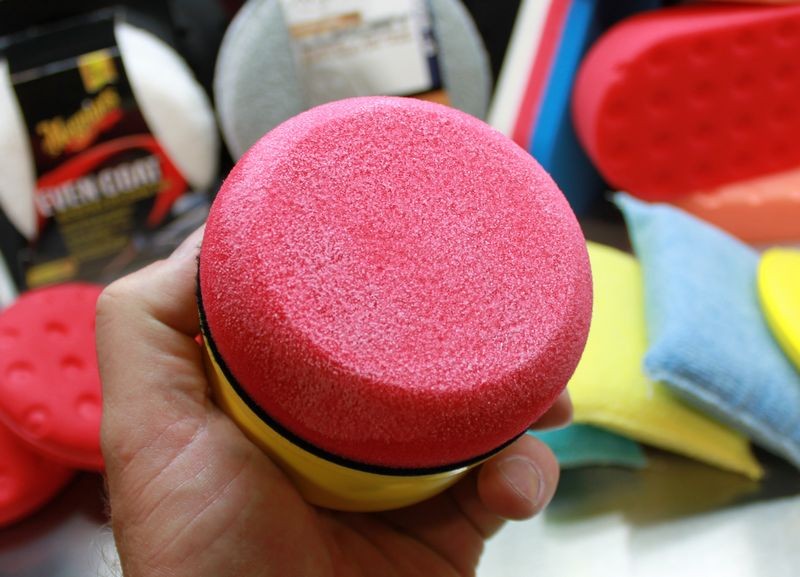
3. After priming the face of your applicator pads, pour some product directly onto the face of the pad; this is your working product, that is the amount of product you'll be working with over a specific section of paint.

You're ready to start working on your car's paint!
:xyxthumbs:
Mc'lovin
New member
- Mar 14, 2012
- 248
- 0
Thank you Mike for this great detailed answer!
Do you also prime a pad when trying to apply a sealant/glaze by machine?
In the video it seemed that you are using only a few drops of Black Light from the beginning, and not priming the finishing pad...?
Thanks
Do you also prime a pad when trying to apply a sealant/glaze by machine?
In the video it seemed that you are using only a few drops of Black Light from the beginning, and not priming the finishing pad...?
Thanks
Mike Phillips
Active member
- Dec 5, 2022
- 51,004
- 7
- Thread starter
- #120
Thank you Mike for this great detailed answer!
Do you also prime a pad when trying to apply a sealant/glaze by machine?
You can prime any pad using the product to be used and that holds for machine or hand application.
See here,
[ame=http://www.youtube.com/watch?v=BX2hhBP06JQ&hd=1&t=1m56s]Flex 3401 on My Classic Car with Dennis Gage and Mike Phillips - YouTube[/video]
In the video it seemed that you are using only a few drops of Black Light from the beginning, and not priming the finishing pad...?
Thanks
I'm pretty sure I asked everyone to prime their pads as we switched over to the next process but sometimes when you have a diverse group of people and you're working under the pressure of "time" not everything is done or captured on film as perfect as you would do it if you were just by yourself working on a car.
You can get amazing results also by simply applying some product onto the pad and getting busy...
Watch this video...
[ame=http://www.youtube.com/watch?v=swLcPlUPd_c&hd=1]My Classic Car with Dennis Gage and Mike Phillip - Wolfgang and Flex 3401 - YouTube[/video]
:xyxthumbs: