Got my 7424xp with the blackfire kit. Followed the steps and instructions on mikes video. The results are not good at all. I did the hood only, as a test. I clayed, used blackfire src with orange lc pad, then polish with blackfire Sr polish then wet diamond, second coat just went on after letting cure for the night. This is what I noticed. A medium amount of dust, and water spots not coming off. The spots seem to just blend in but I still can see the outline of the spots. I put a lil down pressure on the pc also. Do I need a more aggressive compound and pad? The swirls seem to be gone also. I have pics but it doesn't wanna let me upload from my phone. Sorry, my rig fried so no computer .
Navigation
Install the app
How to install the app on iOS
Follow along with the video below to see how to install our site as a web app on your home screen.
Note: This feature may not be available in some browsers.
More options
Style variation
You are using an out of date browser. It may not display this or other websites correctly.
You should upgrade or use an alternative browser.
You should upgrade or use an alternative browser.
possible wrong doings?
- Thread starter hawaiian5
- Start date
swanicyouth
New member
- Mar 3, 2011
- 9,388
- 0
We're the spots there before polishing or are they new? The dust is from using too much BFWD. It should only take about 1/2 ounce to do a regular size car. If the spots were there prior and weren't removed its likely you just need to dial in your technique beefier going to a stronger compound. Try higher OPMs, slower arm speed, more passes, and more pressure on the polisher. The products you have are high quality, that's why I'm guessing it's technique.
rmagnus
New member
- May 28, 2011
- 1,446
- 0
Another thought but when you go to the polishing step also change your pad to a polishing pad. Keep pads clean during the process. For a test panel I prefer doing a small area like 1.5x1.5 and use a less noticeable area than a hood or trunk, rear quarter panel is good test area. I agree with previous post look to your technique.
- Thread starter
- #4
Ok thx. I didn't want to put to much down pressure so maybe its that. Spots was there for a loooong time. I live in a volcanic area so probably from acid rain and salt air from the beach. The look is amazing, but still can see the spots. I was able to upload pic in to my member gallery if u guys wanna see what I mean. Be sure to zoom in on the after pic to see the spots. Ty and Aloha.
bullitt 736
Member
- Apr 2, 2010
- 161
- 0
The spots may not come out regardless due to their nature
primo spaghetti
New member
- Jun 16, 2012
- 763
- 0
try slowing your arm speed and make sure you are really doing at least 6 section passes.
Vegas Transplant
Active member
- Oct 11, 2011
- 4,447
- 3


primo spaghetti
New member
- Jun 16, 2012
- 763
- 0
are you not wearing a shirt? :nomore:
:doh: now that is some reflection!!
- Thread starter
- #10
Lol. No shirt, but that ain't no nipples. Lmao. I did a double take on that pic. Thx for posting, my rig is down so I gotta use my droid. If u zoom in on the pic, u can see the outlining of the spots. Gonna try again next weekend. Single parent means barely any time to myself. Lol.
bullitt 736
Member
- Apr 2, 2010
- 161
- 0
So sanding might be the only way? Still gonna try a more heavy compound after a few more passes and technique. But all options still open.
I'm on my phone so I'm not going to search but look for some threads by Mike Phillips regarding water spots. Really good stuff.
Vegas Transplant
Active member
- Oct 11, 2011
- 4,447
- 3
Originally Posted by hawaiian5 
So sanding might be the only way? Still gonna try a more heavy compound after a few more passes and technique. But all options still open
If OEM paint, on older vehicle, I would go more aggressive before wet sanding also.
Weigh your options: waterspots/clear coat.
Well said. Sage advice.
So sanding might be the only way? Still gonna try a more heavy compound after a few more passes and technique. But all options still open
If OEM paint, on older vehicle, I would go more aggressive before wet sanding also.
Weigh your options: waterspots/clear coat.
The spots may not come out regardless due to their nature.
Well said. Sage advice.
rmagnus
New member
- May 28, 2011
- 1,446
- 0
I wouldn't worry about putting too much down force pressure on the PC. Mark your back plate with a line to better see if the pad is spinning. When compounding you'll need some down force to start with then lighten up as the product starts flashing.
I doubt you'll have to wet sand for water spotting. Compound then polish should so e trick to remove the spots.
I doubt you'll have to wet sand for water spotting. Compound then polish should so e trick to remove the spots.
Might be a different type of water spot. One type sits on the surface, the other is actually etched from acid rain or some type of chemical. you removed the spot, but there's a "fossil" left behind. depending on how deep it can be past the CC and if so sanding wont help.
Mike Phillips
Active member
- Dec 5, 2022
- 51,004
- 7
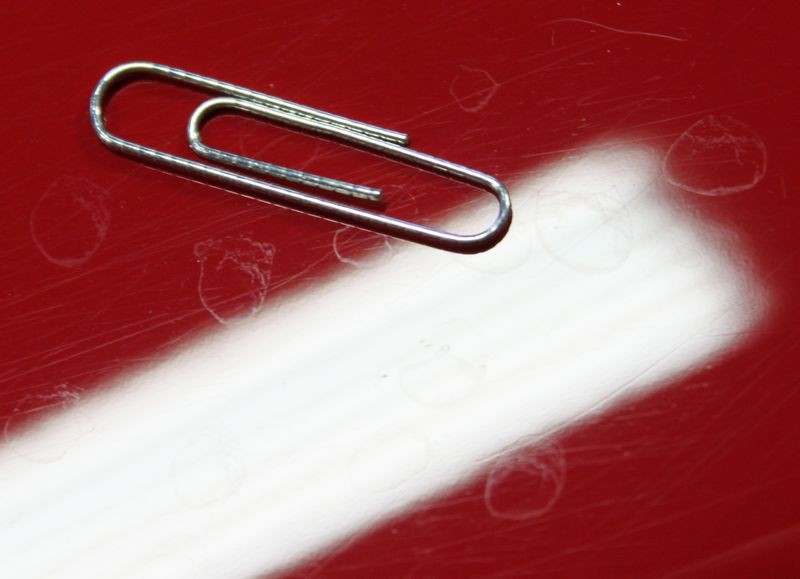
The spots look like Imprint Rings...
From this article,
3 - Types of Water Spots - Type I, Type II and Type III
More Type I and II
These water spots look like they're established water spots, that is, every time it rains, or a sprinkler goes off, the water pools in the same place giving any corrosive substances repeated opportunity to etch into the paint.


Visually, I can tell the paint is likely etched in this instance but I won't know till I get the surface clean. The first step is to wash or wipe the finish, in this instance I'm going to repeat wiping process I used on the Mercedes-Benz with a spray detailer.
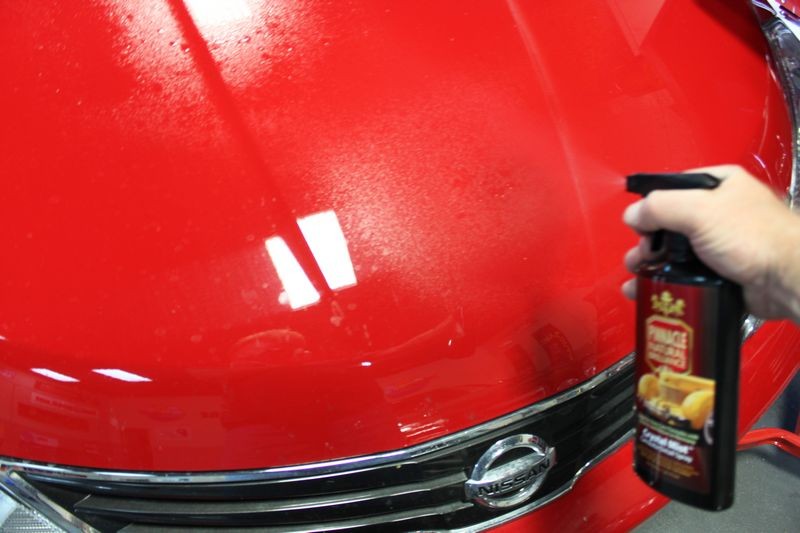

After wiping the paint clean, there are water spot imprints remaining in the paint.


")
From this article,
3 - Types of Water Spots - Type I, Type II and Type III
More Type I and II
These water spots look like they're established water spots, that is, every time it rains, or a sprinkler goes off, the water pools in the same place giving any corrosive substances repeated opportunity to etch into the paint.
Visually, I can tell the paint is likely etched in this instance but I won't know till I get the surface clean. The first step is to wash or wipe the finish, in this instance I'm going to repeat wiping process I used on the Mercedes-Benz with a spray detailer.
After wiping the paint clean, there are water spot imprints remaining in the paint.
Mike Phillips
Active member
- Dec 5, 2022
- 51,004
- 7
If the car is,
Daily driver
Sits outside 24 x 7
Then sometimes improving defects is better than completely removing defects because in order to completely remove some defects you'll have to remove a lot of good paint in the process.
Paint is already thin from the factory and the thinner you make it the more you increase the potential for clear coat failure if the car in question is exposed to a lot of sun and is parked outside all the time.
The PC, SRC and Orange Foam Cutting pads are a very capable combination and also a relatively safe combination.
Anytime you want to get more cutting power for any combination of products simply reduce the size of the area you work.
See my article list for lots of articles on using this tool...
Articles by Mike Phillips
Look under this graphic for most of them but there are tons of related articles all over the page...
Dual Action Polishers
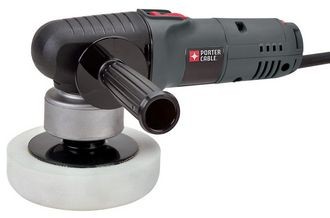

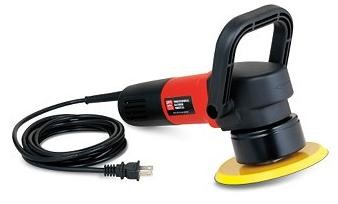
Below you will find a wide variety of articles on the topic of using DA Polishers like the Porter Cable 7424XP and earlier versions, the Meguiar's G110v2 and earlier versions and the Griot's Garage DA Polishers to remove swirls, scratches, water spots and oxidation plus how to machine apply waxes and paint sealants.
Daily driver
Sits outside 24 x 7
Then sometimes improving defects is better than completely removing defects because in order to completely remove some defects you'll have to remove a lot of good paint in the process.
Paint is already thin from the factory and the thinner you make it the more you increase the potential for clear coat failure if the car in question is exposed to a lot of sun and is parked outside all the time.
The PC, SRC and Orange Foam Cutting pads are a very capable combination and also a relatively safe combination.
Anytime you want to get more cutting power for any combination of products simply reduce the size of the area you work.
See my article list for lots of articles on using this tool...
Articles by Mike Phillips
Look under this graphic for most of them but there are tons of related articles all over the page...
Dual Action Polishers
Below you will find a wide variety of articles on the topic of using DA Polishers like the Porter Cable 7424XP and earlier versions, the Meguiar's G110v2 and earlier versions and the Griot's Garage DA Polishers to remove swirls, scratches, water spots and oxidation plus how to machine apply waxes and paint sealants.
Mike Phillips
Active member
- Dec 5, 2022
- 51,004
- 7
Those are exactly the kind of spots I have. Ill try working smaller portions if that don't work, ill settle for just making it look good. Actually, it already does. That blackfire. Is amazing.
Thx again.
No problemo...
Just remember, the "imprint rings" are actually etchings below the surface. To remove them you simply remove more and more paint until the surface is level with the lowest depths of the etching.
If the problem is going to keep happening, that is the car is going to sit outside all its life and get rained on, then maybe improve the paint enough that your happy and learn to live with what's left.