Mike Phillips
Active member
- Dec 5, 2022
- 51,004
- 8
How to use a one-step cleaner/wax to maximize profits
All too often I see people new to detailing get all caught up into performing elaborate, multi-step procedures to create show car finishes on daily drivers. Nothing wrong with this if you need experience or you're trying to showcase your talents. The problem however is that all too often you end up working for peanuts by the time you divide your time into your profits.
Below is an example of reducing your steps to a minimum while still creating dramatic improvement that will blow your customer away with the simple approach of using a one-step cleaner/wax.
Process
Less than 4 hours and I didn't rush. I didn't work slow but instead worked methodically through the above steps with each step building and/or adding to the forward progress of the previous step.
Car: 1970 Oldsmobile 442 Convertible W30
Before
This car is in good condition but the paint was oxidized and thus dull and lifeless. It was rough to the feel with contamination as was the exterior glass. A greasy tire dressing was used and it smeared over the white letters staining them black and brown. The chrome was stained with some type of film causing them to look dull instead of bright and shiny.

Pinnacle Ultra Poly Clay formed into a patty ready to clay the hood...

The contaminants you see here are off just the hood. After claying the hood I clayed the trunk lid and then all of the vertical panels.

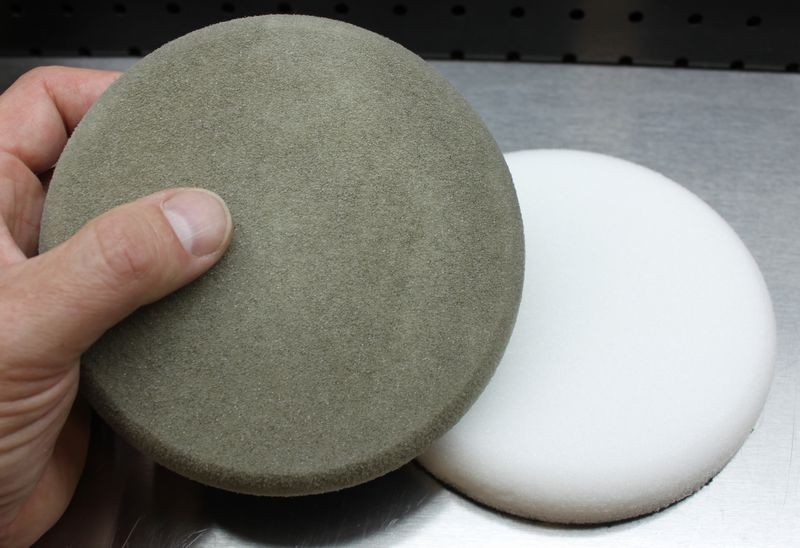
Paint machine polished using a polishing pad and a one-step, cleaner/wax...

After

Photography 101 - The low down front grill shot


The real deal
Yes, this is an authentic Oldsmobile 442 with the W30 package as you can see by the orange inner fender wells.


Tip: Have a detailing package for everyone
Regardless of how much this car is worth on the market, the owner doesn't know the difference between a squirrel or a swirl and didn't want to pay a lot to have it cleaned up. As a detailer you need to have a package for everyone to suit their needs, not yours. Or walk away and move onto greener pastures.
Newbie Mistakes
I see a lot of people new to car detailing that perform multiple step procedures to create a show car finish but at the end of the day have so much time, labor and materials into the job that they end up working for peanuts.
So work smarter, not harder and to do this start by evaluating your customer first and match your services to their needs, not yours. For more information on this topic, see tis article...
A few tips on starting a part-time detailing business
Match your services to your customer
On Autogeek.net
Below are the products I used for the above car...
Pinnacle GlassWork Water Spot Remover
Machine polished all exterior glass.
Pinnacle Signature All Purpose Cleaner
Cleaned old tire dressing off tires.
Pinnacle Clay Lubricant
Wiped exterior paint clean before starting and also used with detailing clay.
Pinnacle Ultra Poly Clay
Decontaminated paint.
XMT 360 Corrects, Cleans, Seals
Cleaned, polished and protected exterior paint by machine, door, hood and trunk jambs by hand and chrome trim and bumpers.
Flex XC 3401 VRG Dual Action Orbital Polisher
For all machine polishing steps .
CCS 6.5 inch Pink Cutting/Polishing Foam Pad
For all machine polishing steps.
Optimum Opti-Bond Tire Gel 32 oz
To dress tires and vinyl top.
")
All too often I see people new to detailing get all caught up into performing elaborate, multi-step procedures to create show car finishes on daily drivers. Nothing wrong with this if you need experience or you're trying to showcase your talents. The problem however is that all too often you end up working for peanuts by the time you divide your time into your profits.
Below is an example of reducing your steps to a minimum while still creating dramatic improvement that will blow your customer away with the simple approach of using a one-step cleaner/wax.
Process
Step 1: Machine polish all exterior glass to remove road film and water spots.
Step 2: Clean and dress tires.
Step 3: Wipe vinyl top down and apply dressing.
Step 4: Wipe paint clean using clay lube.
Step 5: Clay paint.
Step 6: Clean, polish and protect paint using a one-step, cleaner/wax applied by machine.
Step 7: Machine clean and polish chrome at end of paint polishing process using same pad and one-step cleaner/wax.
Step 8: Wipe down door, hood and trunk jambs with a little cleaner/wax on a microfiber towel.
Done. Step 2: Clean and dress tires.
Step 3: Wipe vinyl top down and apply dressing.
Step 4: Wipe paint clean using clay lube.
Step 5: Clay paint.
Step 6: Clean, polish and protect paint using a one-step, cleaner/wax applied by machine.
Step 7: Machine clean and polish chrome at end of paint polishing process using same pad and one-step cleaner/wax.
Step 8: Wipe down door, hood and trunk jambs with a little cleaner/wax on a microfiber towel.
Less than 4 hours and I didn't rush. I didn't work slow but instead worked methodically through the above steps with each step building and/or adding to the forward progress of the previous step.
Car: 1970 Oldsmobile 442 Convertible W30
Before
This car is in good condition but the paint was oxidized and thus dull and lifeless. It was rough to the feel with contamination as was the exterior glass. A greasy tire dressing was used and it smeared over the white letters staining them black and brown. The chrome was stained with some type of film causing them to look dull instead of bright and shiny.
Pinnacle Ultra Poly Clay formed into a patty ready to clay the hood...
The contaminants you see here are off just the hood. After claying the hood I clayed the trunk lid and then all of the vertical panels.
Paint machine polished using a polishing pad and a one-step, cleaner/wax...
After
Photography 101 - The low down front grill shot
The real deal
Yes, this is an authentic Oldsmobile 442 with the W30 package as you can see by the orange inner fender wells.
Tip: Have a detailing package for everyone
Regardless of how much this car is worth on the market, the owner doesn't know the difference between a squirrel or a swirl and didn't want to pay a lot to have it cleaned up. As a detailer you need to have a package for everyone to suit their needs, not yours. Or walk away and move onto greener pastures.
Newbie Mistakes
I see a lot of people new to car detailing that perform multiple step procedures to create a show car finish but at the end of the day have so much time, labor and materials into the job that they end up working for peanuts.
So work smarter, not harder and to do this start by evaluating your customer first and match your services to their needs, not yours. For more information on this topic, see tis article...
A few tips on starting a part-time detailing business
Match your services to your customer
On Autogeek.net
Below are the products I used for the above car...
Pinnacle GlassWork Water Spot Remover
Machine polished all exterior glass.
Pinnacle Signature All Purpose Cleaner
Cleaned old tire dressing off tires.
Pinnacle Clay Lubricant
Wiped exterior paint clean before starting and also used with detailing clay.
Pinnacle Ultra Poly Clay
Decontaminated paint.
XMT 360 Corrects, Cleans, Seals
Cleaned, polished and protected exterior paint by machine, door, hood and trunk jambs by hand and chrome trim and bumpers.
Flex XC 3401 VRG Dual Action Orbital Polisher
For all machine polishing steps .
CCS 6.5 inch Pink Cutting/Polishing Foam Pad
For all machine polishing steps.
Optimum Opti-Bond Tire Gel 32 oz
To dress tires and vinyl top.


 rops:
rops: