1967 Chevy Camaro - Restoration Detail - Original Paint

Re: Classic Car Restoration Detail

The Camaro restoration is on hold for a week, she's unavailable this weekend and I'm headed to FL for the week on Tuesday. 57BORNTORUN do you mind explaining the process of polishing the stainless accents found around the vehicle.

I'm highly interested in this as well. I've just been given the opportunity to tackle a 1959 Buick Invicta. Everyone else turned the guy down..told him it needed a repaint.
 
Re: Classic Car Restoration Detail

I'm back from my vacation from FL (loved it)...although, I would have love to be close enough to have visited AG...next time!

Anyway, spoke with my client and the restoration of the 67' is scheduled for Thursday-Saturday of next week.

57BORNTORUN...anyway you could lend your advise on properly polishing up the SS accents and bumpers? My plan currently, would be to use Optimum Metal Polish.
I have polished the stainless on my 57 Chevy off the car. I wet sanded by hand up to 2000 grit, and then used stainless compound, then white rouge then jeweler's rouge. After I was done, it looked like a mirror. I couldn't find 2500 or 3000 grit at the time, but if I could, I would have used it.

The only way to remove scratches in stainless is to sand. Stainless is very hard. If you do it on the car, you will need to mask around the trim. Use a spray bottle of water with a little car was soap in it. Just a drop or two. Keep it wet while sanding. The tough part will be the buffing.

I've never buffed stainless on a car, but I'm guessing felt cones on a die grinder would work, using the right polish.

Be sure you keep the area well masked, and when buffing, you must keep the buffer moving. You cannot leave it in one place too long. A few seconds in one place could get it hot enough to warp it. That is the danger in buffing stainless. Try not to let the stainless get hotter than is comfortable to touch. Make sure it's not too hot. If so, move on to another section, where it's cool.
Also, be careful not to let the buffer catch on an edge of the trim, lest it bend it and crease it.
As far as the grit to start, it's hard to say without looking. I started with 320 on mine.
 
Re: Classic Car Restoration Detail

Good info. so far.The problem with polishing stainless even if you start with 320 then 400, 600, 800, 1000 ect.But good quality wet-dry paper(not HF). Unless you are experienced you may have to go back and do it all over again depending on the end product that`s required.On the car after taping off and sanding you would start with the spiral sewn with 2000-3400 RPM capacity(drill or die grinder)and black rouge.Load it up constantly as well as clean it constantly(hand saw or other tools made for cleaning wheels).You will see clarity come through but not completely shinny.If your happy with the removal of deep scratches you can move on.With a second wheel as you can`t cross containment wheels you do the same with red rouge.Some guys might move on to white rouge and a loose or a canton disk but it`s a waste of time in most cases.Always use soft towels (T-shirts ect.)for cleaning spent product so as to not reintroduce scratches.If no one has done this before I recommend practicing on stainless similar in composition.(different grades)Thankfully GEN. one Camaros are easy.Believe it or not you can over polish stainless which changes the molecular structure and induces pitting(ask me how I know).Polish it until it looks good (good light needed)and move on.I hope this helps but feel free to ask more questions.

When you say that overpolishing stainless changes the molecular structure, are you referring to heat damage? I know that heat can change molecular structure. What if the part is not heated excessively?
 
Re: Classic Car Restoration Detail

When you say that overpolishing stainless changes the molecular structure, are you referring to heat damage? I know that heat can change molecular structure. What if the part is not heated excessively?
I and others(mostly that do it as a business which I do not do and others on another forum) have found that stainless from the 55-57 Chevys have inconsistent molecular makeups which lend them to showing pits that the normal person (which I`m not) may or may not be seen.The general concensis is that when you disrupt a what would be perceived as solid layer of metal some of the inner flaws show through with polishing(abrasives) The stainless I polished on first Gen. Camaros did not show the same problems.Thinner stamping might allow for a tighter molecular structure.I study more food science than alloy science so these words come from just my experience when polishing stainless.:buffing:
 
Re: Classic Car Restoration Detail

Ok, the restoration of the 67' Camaro will begin this Wednesday. I want to post a few things, just to have everyone look over my process. I've had many discussions with the client, that has helped me dial in just what she's looking for in the end result.

This vehicle will be placed up for sale after the detail and for this reason, she doesn't want to go crazy.

The Plan:
1. Engine Detail
2. Interior Detail
3. Exterior Detail (Recondition the Dead Paint and Perform a One-Step Polish)
4. Polish Metal Pieces

My Process:
1. Before Photos
LOTS...as many angles as possible and make sure I take several from above, looking down.

2. Engine Detail
  • Remove and cover all necessary items.
  • Foam Cannon using CG Honeydew...5 mins dwell time.
  • Rinse.
  • Foam the engine for a second time and clean using the Daytona Speed Master Brushes, Montana's Original Boar's Hair Brush.
  • Rinse.
  • Dry.
  • Dress.
3. Interior Detail

4. Exterior Detail
  • Clean Wheels.
  • Foam Cannon using CG Honeydew...5 mins dwell time.
  • Rinse
  • Wash Exterior Surfaces using CG Maxi-Suds II
  • Scrub convertible top with Natural Horse Hair Interior Upholstery Brush
  • Rinse
  • Iron-X...??????????
  • Dry
  • Clay
Here is where I may do things a bit differently...
  • Tape around Metal Accents and Bumpers
  • Polish Small Metal Accents - Optimum Metal Polish, Electric Drill, Mothers Polishing Ball/Cone
  • Polish Large Metal Accents (Bumpers and Wheels) - Optimum Metal Polish, Electric Drill, Mothers Polishing Ball/Cone
Now that the metal is cleaned up, I can focus on the paint and wont have to attach tape to recently rejuvenated and polished paint.
  • First Application of Meguiars #7 via Terry Cloth (really going to work this first application into the paint.) Dwell for a hour and then remove.
  • Second Application of Meguiars #7 via Terry Cloth (going to work this second application into the paint, super thick.) Dwell over night. At least 12 hours and then remove.
  • Third Application of Meguiars #7 via MF Cloth (going to work this third application into the paint.) Dwell for a hour and then remove.
  • One Step Polish via GG6. Product used will either be Klasse AIO or Menzerna PF2500, likely paired with a 5.5" Green or White LC CCS Pad.
  • Wax - BLACKFIRE Midnight Sun Ivory Carnauba Paste Wax
  • Tire Shine
  • Windows
Let me know how all of this works. I'm super excited to get started on this vehicle!

Thanks for all the insight up to this point and any offered progressing from here. I will make sure to provide you with many photos for your enjoyment.

Kieran
 
Re: Classic Car Restoration Detail

I have one question as to the condition of the car. Is there any rust on the car? And do the side windows seal sufficiently?

Cars of this era have very poor rust resistance. so if an area is still wet it WILL rust.

I have seen some horribly rusted muscle cars here in the wet HI.

Good luck!
 
Re: Classic Car Restoration Detail

Here is where I may do things a bit differently...
  • Tape around Metal Accents and Bumpers

Do you mean actually taping off any polished metal surfaces? chrome or stainless in the case of this car?

IF so I would skip it. I never tape this stuff off, in fact when I'm doing the paint correction, "whatever" my product is for my first and most aggressive step is after buffing all the paint I then run the same pad and product over the metal trim, bumpers etc.

I do tape off any "scripty" emblems if I don't remove them, like see in one of my detailing boot camp classes where I used a 1966 Corvette to teach people how to use a rotary buffer.

Note The Corvette Stinray script is taped off as is the Corvette Crossed Flags. Lots of pictures and education in the below documentation of what one of my classes is like... lots...


Pictures & Comments from September 2012 Detailing Boot Camp


Greg's Turn...
First I'm going to show Greg how to pick up a bead of product using the 10 @ 10 Technique...
TrainingVette028.jpg


After he picks up his bead he instantly holds the pad flat to the surface to start cutting out the original swirls and scratches...
TrainingVette029.jpg


Here I'm placing some fresh product into the curved section of the spear to provide lubrication and abrasives. I actually take my finger and spread this out a little bit to lubricate and protect the paint.
TrainingVette030.jpg


Now Greg brings the wool pad into the curved body line to carefully cut out the swirls and scratches....

TrainingVette031.jpg


Here's Greg edging...
TrainingVette032.jpg


Here's Greg going up on edge to cut a thin section between the corner of where the hood meets the body and the edge of the body line where the hideaway headlights are located.

TrainingVette033.jpg


Here I'm guiding Greg to show him the angle to hold the pad to cut the paint next to the headlight edge...
TrainingVette034.jpg


And after cutting all the edges now he ties it all together by holding the pad as flat as possible to major on the major portions of this body section.

TrainingVette035.jpg


:)
 
Re: Classic Car Restoration Detail

@MikePhillips...I planned to tape around the metal pieces, in order to protect the paint while polishing the metal properly with metal polish.
 
Re: Classic Car Restoration Detail

Now that the metal is cleaned up, I can focus on the paint and wont have to attach tape to recently rejuvenated and polished paint.
  • One Step Polish via GG6. Product used will either be Klasse AIO or Menzerna PF2500, likely paired with a 5.5" Green or White LC CCS Pad.
Kieran


After the #7 soak and rub-down, test the Klasse AIO as that is the least aggressive approach and you want to avoid Tiger Stripes.

There are two types of Tiger Stripes,

1. The kind painters cause when spraying paint

2. The kind detailers cause when buffing on single stage metallic paint


Because you're working on a single stage metallic finish, if you buff too much paint off you will lighten the color of the paint where too much paint is removed.

One of my detailing boot camp class students restored the single stage paint on his old Dodge and it looks like he may have caused a little bit of tiger stripping during the buff-out...

Because I can kind of see the striping effect in the before pictures it could have also been caused previously by the 'other guy" that buffed this car out at some point in it's history.

1971 Dodge Coronet Original Paint Extreme Makeover with Meguiar's #7 Show Car Glaze


1971_Dodge_Single_Stage_009.jpg


1971_Dodge_Single_Stage_010.jpg


After

1971_Dodge_Single_Stage_011.jpg


1971_Dodge_Single_Stage_012.jpg


See the light and dark areas in lines?


Here's the point...

Try the Klasse AIO first and see if after doing the #7 rub-downs this is aggressive enough with the pad of your choice and tool to remove any further dead paint to restore a clear and glossy finish.

If not, move onto the Menzerna PF 2500 and buff with a light and careful touch...


Error on the side of caution and don't buff too much in any one area...


:)
 
Re: Classic Car Restoration Detail

Here are the before photos...enjoy!
 
Re: Classic Car Restoration Detail

Is it me or is the header panel and half of the pass. fender mismatched in color?
 
Re: Classic Car Restoration Detail

Nice work documenting the "before condtion".


Looking forward to the "after pictures"


The condition of this metallic single stage paint looks to be pretty bad, it's definitly going to be a challenge and from experience, it's going to be the hand rubbed #7 treatment, really heavy that saves this paint if it can be saved.

Hope you're doing push-ups or working out to get ready for it...


:D
 
Re: Classic Car Restoration Detail

Is it me or is the header panel and half of the pass. fender mismatched in color?


Actually, when you compare the color of the paint in both of these pictures, it looks like it's the hood and a part of the driver's side fender that are darker or richer in color and possibly it might be these areas that are repainted as the header panel and the front half of the passenger fender match the trunk lid.


67_Camaro_10.JPG


wol_error.gif
This image has been resized. Click this bar to view the full image. The original image is sized %1%2 and weights %3.
67_Camaro_11.JPG


This is still a great example of what I talk about in this article, remember the owner just wants to take what he has and make it look as good as possible for the best possible sale of the car.


"Taking your car's paint to it's maximum potential"


:)
 
Re: Classic Car Restoration Detail

This is still a great example of what I talk about in this article, remember the owner just wants to take what he has and make it look as good as possible for the best possible sale of the car.

"Taking your car's paint to it's maximum potential"

:)

This is exactly what the client and I talked about prior to beginning the job.

Today, I'm forced to take a day off due to very wet weather, but yesterday I put in a few extra hours, so I could be at an excellent pick up point come tomorrow.

I started with the engine. I followed Mike Phillips method for cleaning the engine bay of a classic car. Removed the intake, covered the carburetor, alternator, and distributor. I used my foam cannon (from a distance) and foamed the engine and underside of hood. I allowed for some dwell time and then began agitating via various brushes. Followed by a thorough rinse. I stayed away from the top of the engine, due to rusting and the paint chipping away...better to leave a little dirt, then remove paint.

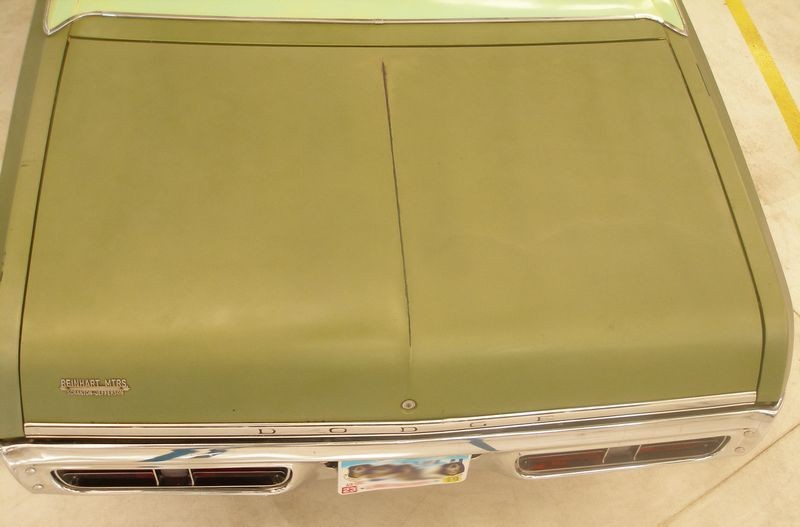
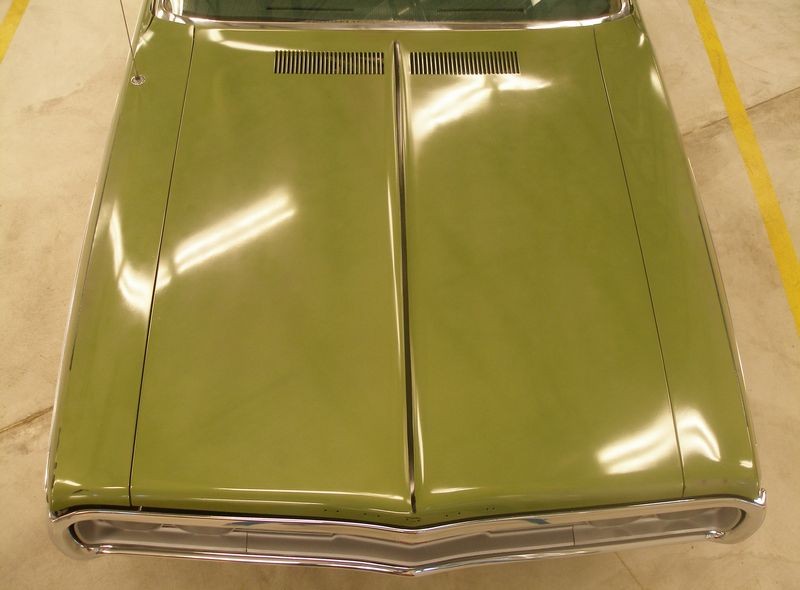
Next, I moved onto the exterior surfaces. Thorough wash, rinse, iron-x, and clayed. The paint was now prepped and ready for it's first application of Meg's #7. After applying (vigorously rubbing in) Meg's #7, I allowed it some time to soak. During this time, I broke out the Optimum Metal Polish, Mothers Powerball and Electric Drill. Their is significant pitting on almost all metal surfaces, as well as rust, and white rust. I'm not refurbishing to new, rather just clean and brighten.

Moving on, I turned my attentions to the interior. The interior received a thorough cleaning from top to bottom and looks great. (I didn't ask the client, but I suspect that at one point during her ownership, a mouse may have made its home inside the vehicle.

Finally, prior to ending for the day, I went back to the exterior and removed the Meg's #7. First coat likely soaked in for 2 hours. Then I reapplied a very very thick coat of Meg's #7 which will be left to soak for about 36 hours.

So far so good!
 
Re: Classic Car Restoration Detail

I'm back onsite this morning and completed a test spot via my GG6, LC Pads and both Klasse AIO and Menzerna PF2500. The end results are very similar, although I feel the Menzerna is finishing better.

I wish I could post a photo...anyone want to accept and email from me with the test spot and post it? I'd really like you all to add your opinions before I push on.

Thanks!
 
Re: Classic Car Restoration Detail

Is it me or is the header panel and half of the pass. fender mismatched in color?


No, it's not just you ... perhaps a minor fender bender in the past?
 
Back
Top