New Caddy ATS (Glacier Blue). When bought, I detailed with Zaino, been using it for years. Anyway, here in south Florida, one is always getting bird crap on the car. 99% of the time, if I can get to it early, it will simple wipe off; but sometimes, it will leave an milky-like outline of the dropping. Mild rubbing compound, 3M scratch remover, Zaino AIO...nothing gets the shi-t off. It is only seen when one looks at it from a low angle. I would appreciate it someone can help me.
Navigation
Install the app
How to install the app on iOS
Follow along with the video below to see how to install our site as a web app on your home screen.
Note: This feature may not be available in some browsers.
More options
Style variation
You are using an out of date browser. It may not display this or other websites correctly.
You should upgrade or use an alternative browser.
You should upgrade or use an alternative browser.
Bird crap leaves a milky-like outline?
- Thread starter flycaster
- Start date
GenesisCoupe
New member
- Mar 3, 2013
- 1,920
- 0
Claybar, Polish or i've had luck with water spot remover, just clean it off right after use.
Setec Astronomy
Well-known member
- Aug 31, 2010
- 17,061
- 1,360
You might try putting some baking soda paste on it to neutralize and draw out any acids. Someone from another forum used to recommend then putting a towel dampened with IPA on it. Once it's all neutralized like that, the only thing you can do is polish it. It's also possible that oily products like #7 or waxes may "soak into" it and hide it. But your best bet is to polish and in the future, as you already know, get it off as soon as possible, the summer sun is the worst for bird poop.
Also give it a little time to outgas...sometimes there seems to be something from the poop that penetrates the clear, but these spots sometimes seem to get better over time.
Also give it a little time to outgas...sometimes there seems to be something from the poop that penetrates the clear, but these spots sometimes seem to get better over time.
Mike Phillips
Active member
- Dec 5, 2022
- 51,004
- 7
New Caddy ATS (Glacier Blue). When bought, I detailed with Zaino, been using it for years. Anyway, here in south Florida, one is always getting bird crap on the car. 99% of the time, if I can get to it early, it will simple wipe off; but sometimes, it will leave an milky-like outline of the dropping. Mild rubbing compound, 3M scratch remover, Zaino AIO...nothing gets the shi-t off. It is only seen when one looks at it from a low angle. I would appreciate it someone can help me.
Look at the pictures here to see what "type" you have...
Two Types of Bird Dropping Etchings
If it's Type I, just a topical stain or imprint ring you can remove these pretty easily my machine or with good hand applied compound or medium cut polish.
")
- Thread starter
- #5
...
If it's Type I, just a topical stain or imprint ring you can remove these pretty easily my machine or with good hand applied compound or medium cut polish.
Well, Mike, you are spot on. Your picture, which I might add is difficult to take, shows exactly what's going on...or rather, what I'd like to take off.
Although I try to take great care of my cars, I'm just an amateur and would appreciate a little detail on how I should proceed. I have a mild compound and I have 3M Fine Cut, both for clear coat. I have tried both, maybe not correctly (maybe didn't rub hard enough - who knows), but neither one seems to work. Thanks.
Mike Phillips
Active member
- Dec 5, 2022
- 51,004
- 7
Well, Mike, you are spot on. Your picture, which I might add is difficult to take, shows exactly what's going on...or rather, what I'd like to take off.
This one, the
Type I Bird Dropping - Topical Stain Etching
Type I Topical Stain Etchings are usually only topical, that is shallow enough that they can be completely removed or at least greatly improved to the point where they are difficult to see.
This type of etching can be removed using a clear coat safe compound or polish by hand or machine. Hand removal is almost always more efficient as you can exert more pressure to a small area and thus keep your work area isolated to just the affected area. By machine you can use a Spot Repair System, again to keep the work area isolated to just the affected area.
Photo courtesy of MeguiarsOnline.com

Although I try to take great care of my cars, I'm just an amateur and would appreciate a little detail on how I should proceed.
You're in luck, giving detailed information is what we do on this forum...
I have a mild compound and I have 3M Fine Cut, both for clear coat. I have tried both, maybe not correctly (maybe didn't rub hard enough - who knows), but neither one seems to work. Thanks.
First, since you didn't mention what brand compound you have here's a recommendation, most compounds I've used in my life leave scratches in clear coat paints when they are applied by hand.
The exceptions are,
Meguiar's M105 Ultra Cut Compuond
Meguiar's Ultimate Compound
Menzerna FG 400 Fast Gloss Compound
I rant and rave about abrasive technology a lot but it's important. In order to get GREAT results on a layer of paint that is CLEAR and applied over a colored layer of paint, (a combination that will show ever little defect to your eye), you need to use product that have good abrasive technology.
The above "compounds" have it. There's a lot of polishes that have it too but you're asking about a "compound".
I've taught thousands of people how to remove defects by hand over the years and I say this because after teaching physically showing people with my hand how to remove defects out of a clear coat finish by hand the most common comment I've heard goes like this,
That's now how I was doing it?
And what they are saying in context is, they watched me push REALLY HARD and move my hand REALLY FAST over the paint surface and make defects literlly disappear.
Removing defects means REMOVING PAINT and because clear coats tend to be on the hard side you cannot simply wipe a compound on and spread it around like a finishing wax and think that somehow, the product is going to magically dissovle the paint off the affected area. It doesn't work like that.
You have to push the abrasives against the paint to "engauge" them with the paint and "force" them to take little bites out of the paint.
Read my article on this here, note this can be found on my article list and the link is in my Sig Line...
How to use a hand applied abrasive polish or paint cleaner by hand
Note my hand is a blur.... that's because it's moving at the speed of light and I'm pushing down about 20 pounds of pressure to remove teh sanding marks off the hood of a 1970 El Camino I sanded and buffed...


- Always work clean
- Use a clean, soft foam applicator pad, I really like these,
CCS Red Wax/Sealant Applicator Pads 2 Pack
Because they are fairly thick so the spread out the pressure of your fingers better than thinner versions.
(I like thinner versions for applying finishing waxes and sealants because then I'm not pushing hard so don't need the thickness).
- Work on a cool surface in the shade
- Work a small area at a time, about 8" to 10" squarish or so...
- Use an "ample" amount of product, don't under-use and don't overuse to the point that you hyper-lubricate the surface but use enough to keep the surface lubricated throughout the process. I would use a teaspoon to a tablespoon of product, usually a tablespoon's amount to start with because your pad is dry when you start and some of the product is going to go into the pad, and after breaking in your pad then cut down to about a teaspoon's amount of product.
- Hold your hand flat to the pad, not vertical, the idea is to not put pressure ONLY on your fingertips but over the face of your fingers to avoid Fingermarks
- Spread the product out over the area you're going to work
- Work the product for about a minute, don't work till the product is dry, but it should go from an opaque film to a clear film
- Wipe off before residue dries
- When you move on to a new area overlap a little into the previous area
When working on clear coats by hand to actually "remove" defects, technique is just as important as your choice of product and pad, (pad = application material).
So do a Test Spot first.
Also, read the manufactures directions and follow them as the above is just a general guideline. The manufacture always knows their products best.
One more thing...
Also, often times I'll use a microfiber or terrycloth applicator to start with as these types of fiber appliator pads are more aggressive and give the compound more bite.
Fiber applicator pads can leave their own scratch in the paint when rubbing hard though. So after removing the defect by rubbing hard with a fiber applicator pad it's real simple to recover, just re-apply the same product using a soft foam applicator pad.
As an option, after using the compound you could follow with a polish to refine the reslts of the compound and for sure, apply some wax when you're all done.
And that's a detailed answers on how to solve your problem from this forum.
Share our forum with your car buddies.... --> Win/Win
:dblthumb2:
Mike Phillips
Active member
- Dec 5, 2022
- 51,004
- 7
Here's an example of removing sanding marks using Menzerna FG 400
The point being, if I can remove sanding marks by hand with Menzerna FG 400 you can remove the bird dropping stain...
How to remove wetsanding scratches by hand - FG 400
Anytime you're wetsanding a car there will be places you cannot easily or safely get a rotary buffer and a buffing pad to remove your sanding marks. In these situations you need an aggressive compound that you can use by hand.
The trick is to remove your sanding marks while not scouring the paint from the abrasives used in the compound. If you leave light or shallow scratches that's okay because the tricky and important goal is to be able to remove the sanding marks, you can always refine your results using a finer polish applied by hand.
For the wetsanding, cutting and buffing project on the mystery car this weekend there will be places where it will be risky to remove sanding marks using a machine, at least the initial cut.
So before leaving the well equipped Autogeek garage, I machine sanded one of our black paint panels and then tested the new Menzerna FG 400...
Paint panel machine sanded using #3000 Triazact...


Use a cloth applicator with a nap
To make any compound or polish more aggressive use a cloth applicator pad or cloth material that has a nap. The larger more stout the nap the more aggressive the abrading action.

Chemically stripping the paint
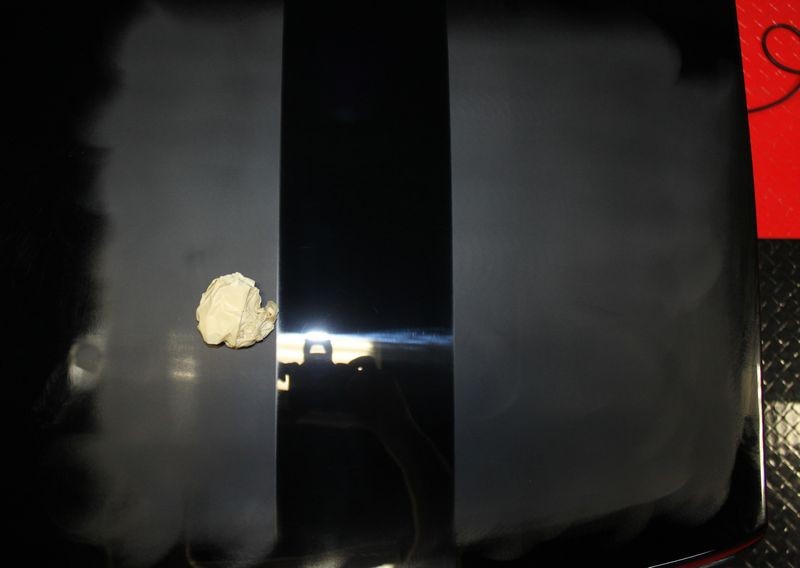
Looks great before chemically stripping so lets strip the paint to make sure the sanding mars are in fact removed. I don't care if there are toweling marks because I expect that from the pressure I'm going to be applying when rubbing the paint hard to remove small particles of paint.
Removing clear coat paint by hand requires putting some pressure behind the pad...

Sanding marks removed, only fine or shallow toweling marks remain...

Close-up cropped out of the above shot...
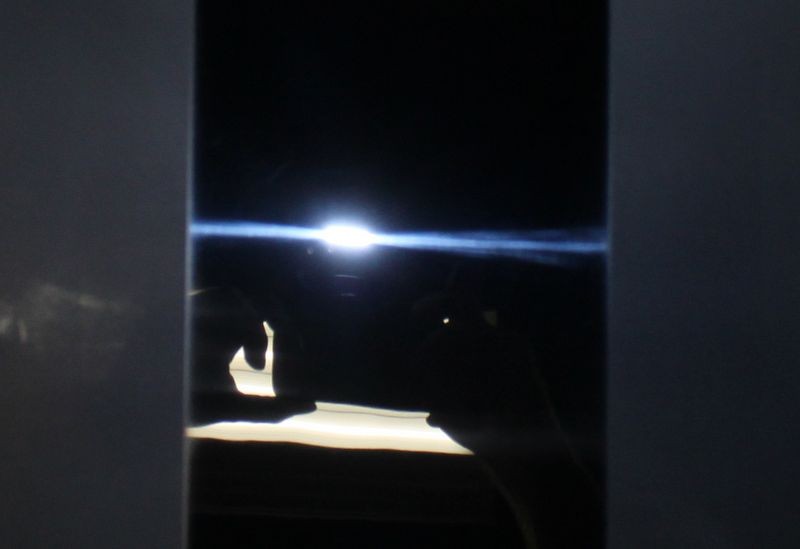
Chunk of masking tape to give my camera something more definitive to focus on...
From another angle you can see the flash of my camera lighting up the paint but you can also see how distinct the 4 florescent tube lights are overhead.

Here I've pushed the panel closer to the work bench to capture a reflection of the holes in the peg board...
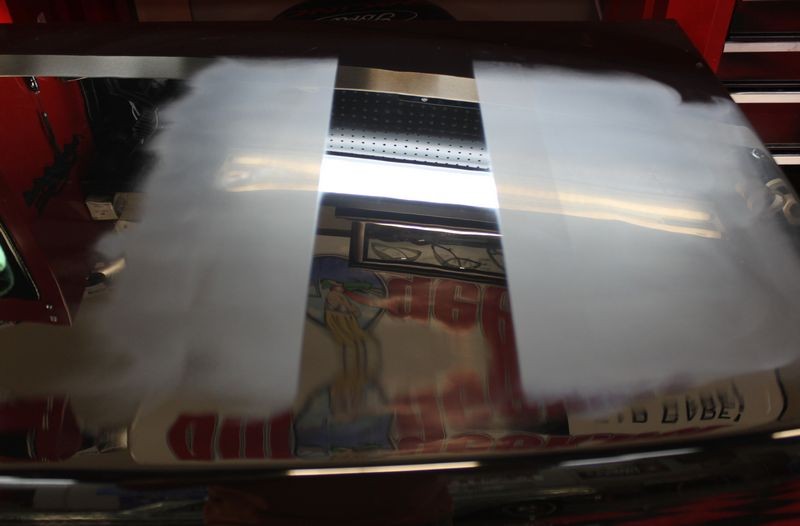
Success!
We'll be using Menzerna FG 400 to cut out our sanding marks for the wetsanding project this weekend and for the areas we cannot safely buff by machine we can use FG 400 by hand. Yancy says he can capture this on video too...
:xyxthumbs:
The point being, if I can remove sanding marks by hand with Menzerna FG 400 you can remove the bird dropping stain...
How to remove wetsanding scratches by hand - FG 400
Anytime you're wetsanding a car there will be places you cannot easily or safely get a rotary buffer and a buffing pad to remove your sanding marks. In these situations you need an aggressive compound that you can use by hand.
The trick is to remove your sanding marks while not scouring the paint from the abrasives used in the compound. If you leave light or shallow scratches that's okay because the tricky and important goal is to be able to remove the sanding marks, you can always refine your results using a finer polish applied by hand.
For the wetsanding, cutting and buffing project on the mystery car this weekend there will be places where it will be risky to remove sanding marks using a machine, at least the initial cut.
So before leaving the well equipped Autogeek garage, I machine sanded one of our black paint panels and then tested the new Menzerna FG 400...
Paint panel machine sanded using #3000 Triazact...
Use a cloth applicator with a nap
To make any compound or polish more aggressive use a cloth applicator pad or cloth material that has a nap. The larger more stout the nap the more aggressive the abrading action.
Chemically stripping the paint
Looks great before chemically stripping so lets strip the paint to make sure the sanding mars are in fact removed. I don't care if there are toweling marks because I expect that from the pressure I'm going to be applying when rubbing the paint hard to remove small particles of paint.
Removing clear coat paint by hand requires putting some pressure behind the pad...
Sanding marks removed, only fine or shallow toweling marks remain...
Close-up cropped out of the above shot...
Chunk of masking tape to give my camera something more definitive to focus on...
From another angle you can see the flash of my camera lighting up the paint but you can also see how distinct the 4 florescent tube lights are overhead.
Here I've pushed the panel closer to the work bench to capture a reflection of the holes in the peg board...
Success!
We'll be using Menzerna FG 400 to cut out our sanding marks for the wetsanding project this weekend and for the areas we cannot safely buff by machine we can use FG 400 by hand. Yancy says he can capture this on video too...
:xyxthumbs:
- Thread starter
- #8
Re: Bird crap leaves a milky-like outline?-SOLVED
I know I haven't responded to you guys in a while. Believe me, you all had given me a lot of good advice, but I didn't act on it because I was fearful of screwing up my new car's finish. Well, I just got another bird dumping that also left an etched in splatter mark. OK, enough was enough and I had to bite the bullet and try to get rid of these marks. Although, I must say they were only visible when looked at at a certain angle...but I knew they were there.
My biggest fear was that I would be removing too much clearcoat??? But, what the hell, I had to do something as I knew there would be many more etched in droppings that I would have to deal with.
I had already tried rubbing in by hand (don't have a PC) some old compound that didn't work. On reflection, it probably didn't work because I didn't rub hard enough, or fast enough. This time around, I tried little bit of 3M's Fine Cut Rubbing Compound. Used a clean terry cloth rag, put a little bit of the stuff on it and tried rubbing in a random circular manner. Damn, if it didn't get rid of those etching after a couple of tries.
Although the finish looks good, I'm wondering if I did some "unseen" damage to the finish?
Thanks again for all your help.
Re: Bird crap leaves a milky-like outline?-SOLVED
I had the exact same thing happen to me as well a couple days ago. I am worried about doing more damage by trying to fix it.
I have a 2014 BMW 328xi and some people say this shouldn't happen on a new car... I wonder if it is just 'normal' wear and tear?
Best,
Matt
I know I haven't responded to you guys in a while. Believe me, you all had given me a lot of good advice, but I didn't act on it because I was fearful of screwing up my new car's finish. Well, I just got another bird dumping that also left an etched in splatter mark. OK, enough was enough and I had to bite the bullet and try to get rid of these marks. Although, I must say they were only visible when looked at at a certain angle...but I knew they were there.
My biggest fear was that I would be removing too much clearcoat??? But, what the hell, I had to do something as I knew there would be many more etched in droppings that I would have to deal with.
I had already tried rubbing in by hand (don't have a PC) some old compound that didn't work. On reflection, it probably didn't work because I didn't rub hard enough, or fast enough. This time around, I tried little bit of 3M's Fine Cut Rubbing Compound. Used a clean terry cloth rag, put a little bit of the stuff on it and tried rubbing in a random circular manner. Damn, if it didn't get rid of those etching after a couple of tries.
Although the finish looks good, I'm wondering if I did some "unseen" damage to the finish?
Thanks again for all your help.
I had the exact same thing happen to me as well a couple days ago. I am worried about doing more damage by trying to fix it.
I have a 2014 BMW 328xi and some people say this shouldn't happen on a new car... I wonder if it is just 'normal' wear and tear?
Best,
Matt
- Thread starter
- #10
Re: Bird crap leaves a milky-like outline?-SOLVED
Bird dropping can be very, very acidic and I really don't think that even new car finishings can prevent the etching...if the crap isn't immediately removed. Although I haven't gotten an answer to my last question, I think that using some rubbing compound (as previously suggested and successfully used by me) would be the way to go.
I had the exact same thing happen to me as well a couple days ago. I am worried about doing more damage by trying to fix it.
I have a 2014 BMW 328xi and some people say this shouldn't happen on a new car... I wonder if it is just 'normal' wear and tear?
Best,
Matt
Bird dropping can be very, very acidic and I really don't think that even new car finishings can prevent the etching...if the crap isn't immediately removed. Although I haven't gotten an answer to my last question, I think that using some rubbing compound (as previously suggested and successfully used by me) would be the way to go.
Re: Bird crap leaves a milky-like outline?-SOLVED
What is your rubbing compound of choice?
All my best,
Matt
Bird dropping can be very, very acidic and I really don't think that even new car finishings can prevent the etching...if the crap isn't immediately removed. Although I haven't gotten an answer to my last question, I think that using some rubbing compound (as previously suggested and successfully used by me) would be the way to go.
What is your rubbing compound of choice?
All my best,
Matt
- Thread starter
- #12
Re: Bird crap leaves a milky-like outline?-SOLVED
I'm not the one to really ask as I am no expert. Nonetheless, I successfully used 3M Fine Cut Rubbing Compound. It didn't work the first time I tried it because I was probably using the wrong kind of rag (should use a rag that has nubs, like a terry cloth) and didn't rub hard enough (use 10-20# pressure doing "random" type circles). However, here's an expert's (as seen earlier in this thread) opinion on which compounds to use:
Meguiar's M105 Ultra Cut Compuond
Meguiar's Ultimate Compound
Menzerna FG 400 Fast Gloss Compound
Good luck.
What is your rubbing compound of choice?
All my best,
Matt
I'm not the one to really ask as I am no expert. Nonetheless, I successfully used 3M Fine Cut Rubbing Compound. It didn't work the first time I tried it because I was probably using the wrong kind of rag (should use a rag that has nubs, like a terry cloth) and didn't rub hard enough (use 10-20# pressure doing "random" type circles). However, here's an expert's (as seen earlier in this thread) opinion on which compounds to use:
Meguiar's M105 Ultra Cut Compuond
Meguiar's Ultimate Compound
Menzerna FG 400 Fast Gloss Compound
Good luck.