1956 Chevy Bel-Air - Dampsanding, Cut & Polish

Matt S.

New member
Joined
Jan 24, 2007
Messages
1,909
Reaction score
0
1956 Chevy Bel-Air - Dampsanding, Cut & Polish


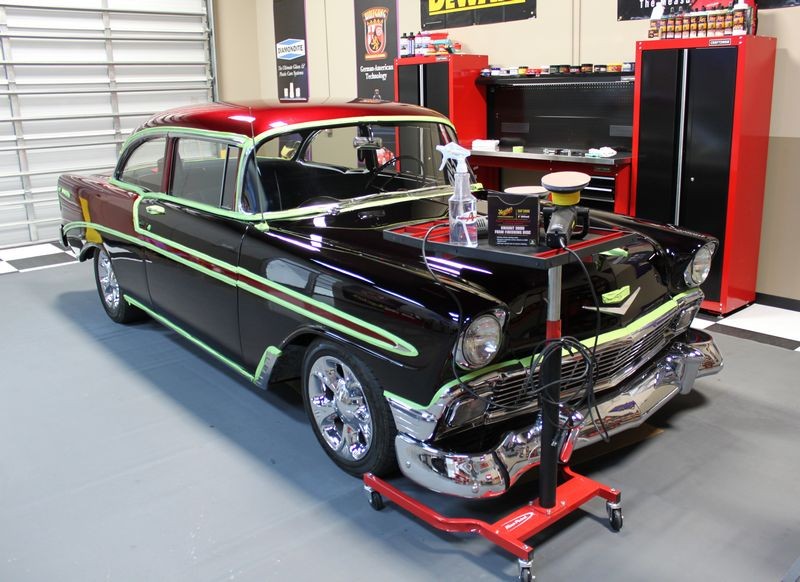
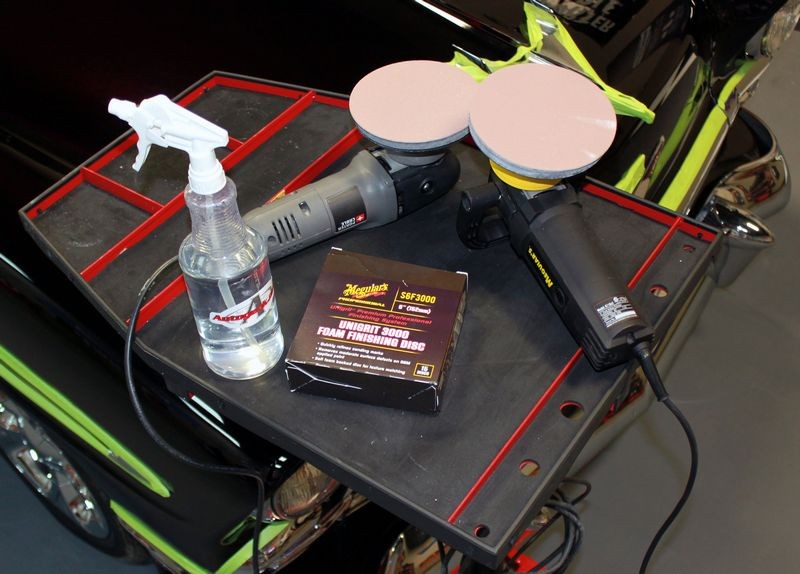
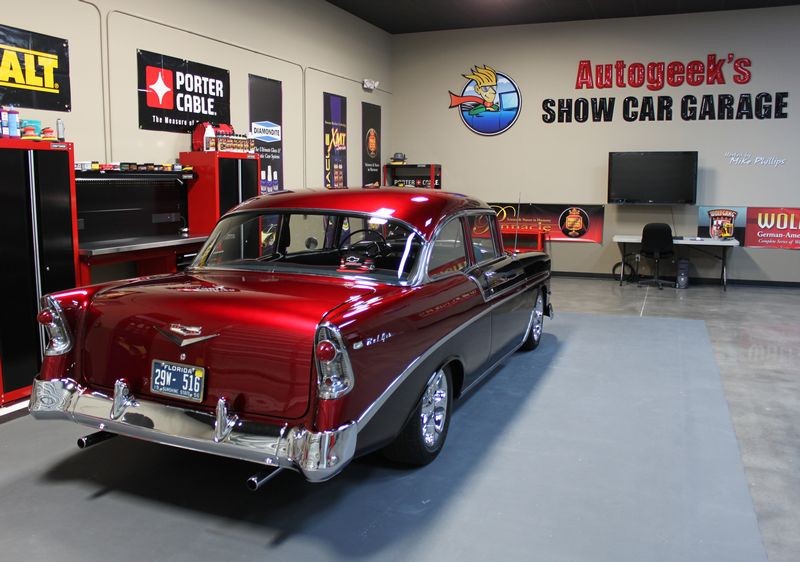
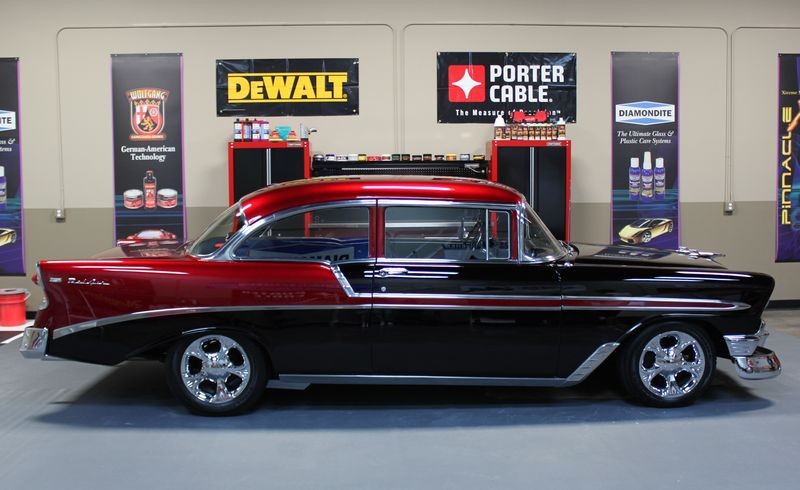
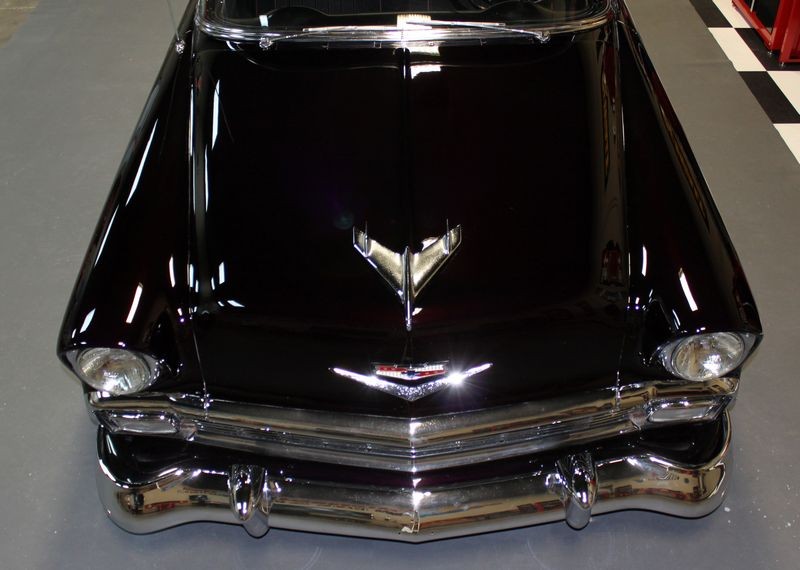
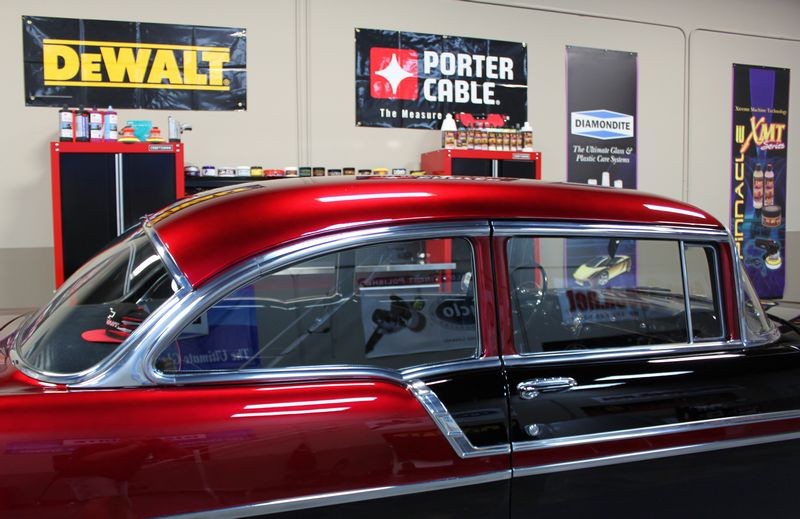
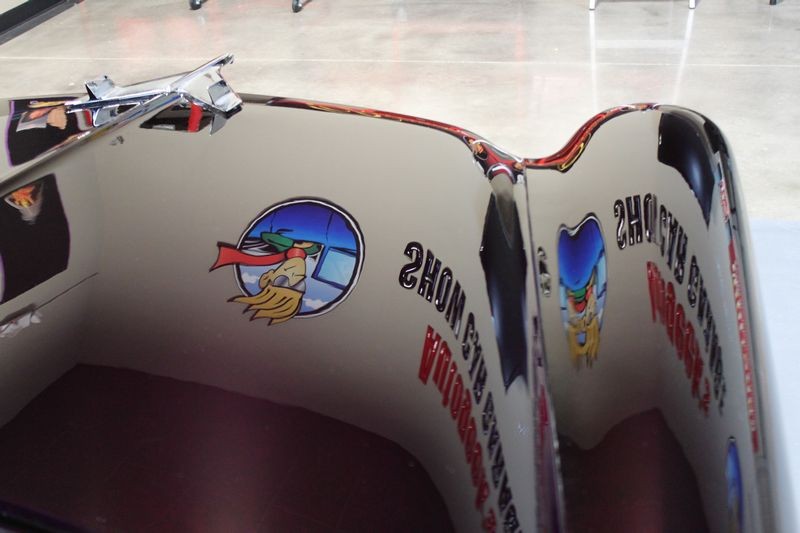
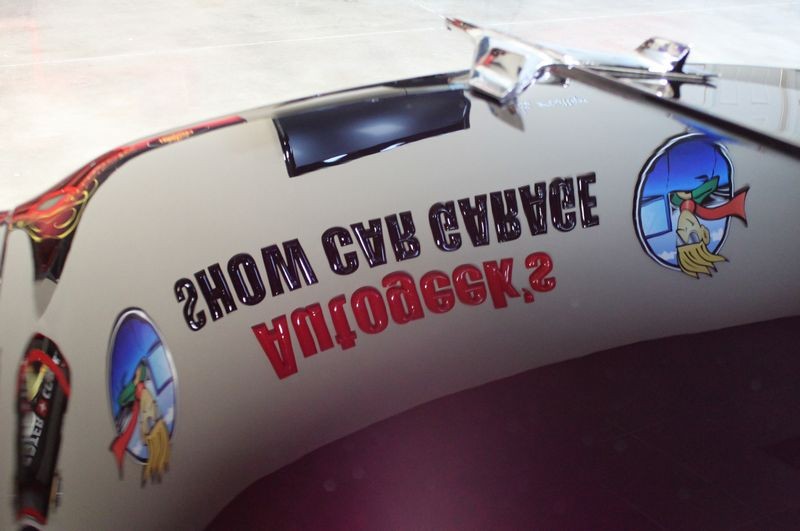
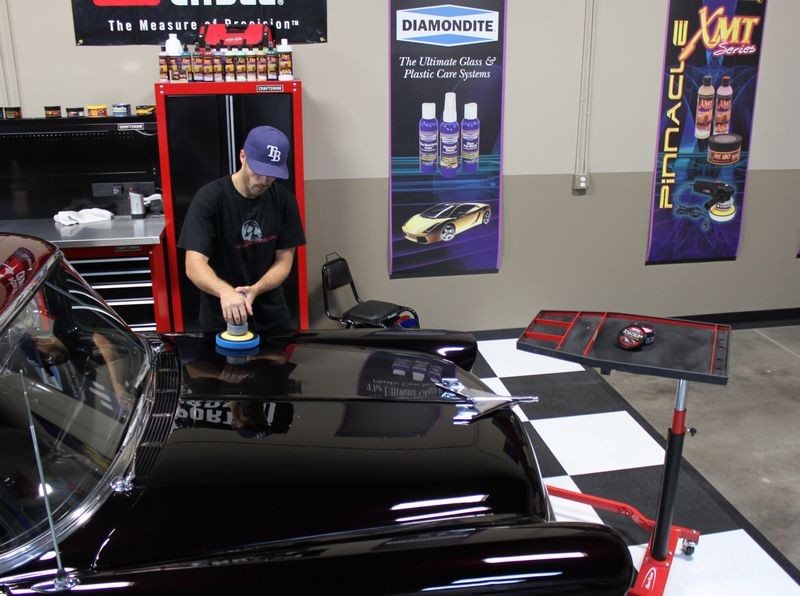
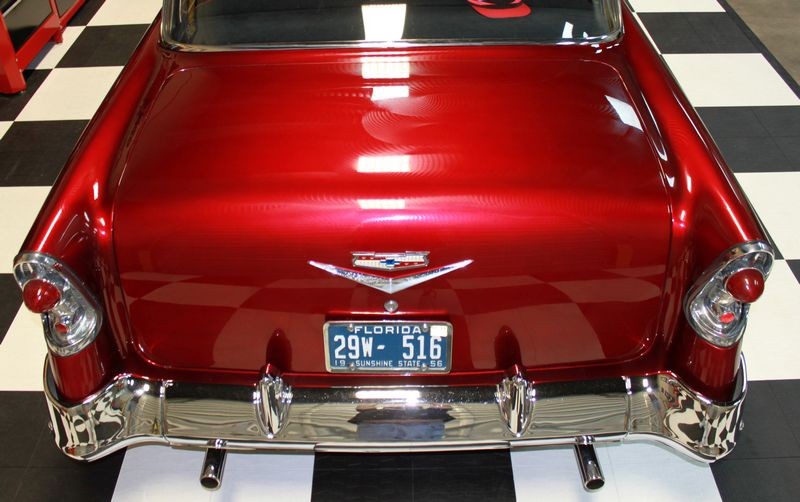
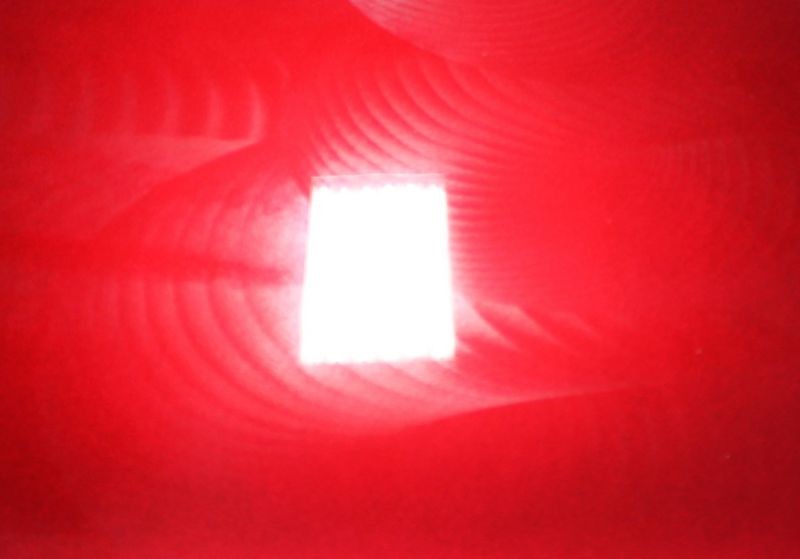
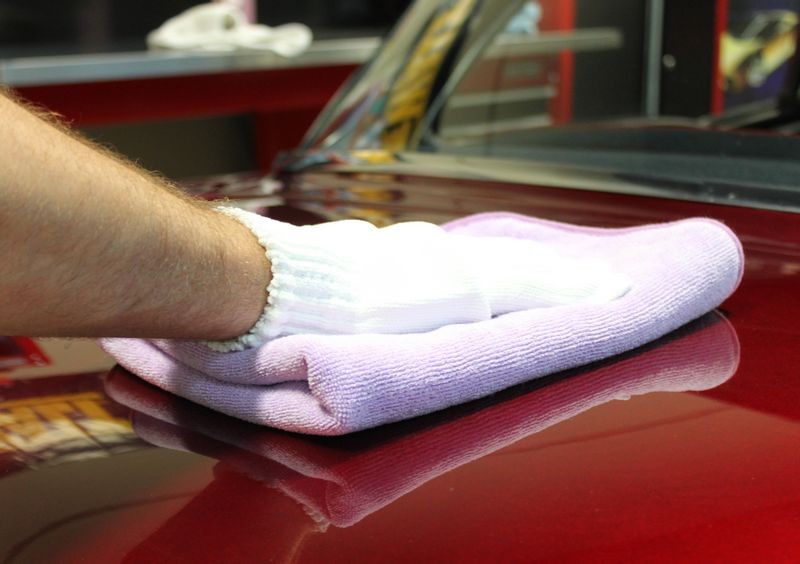
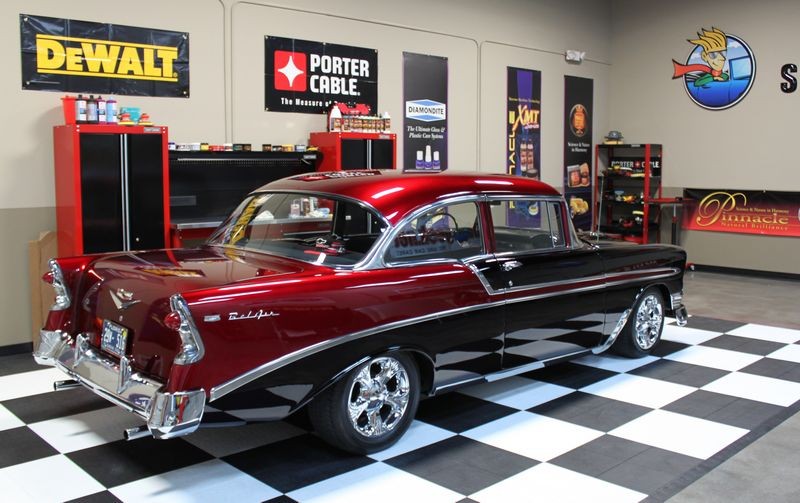
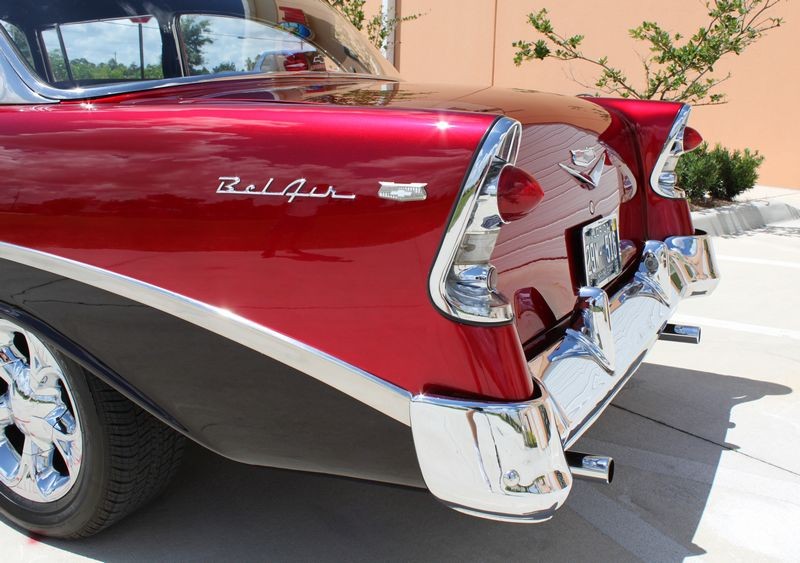
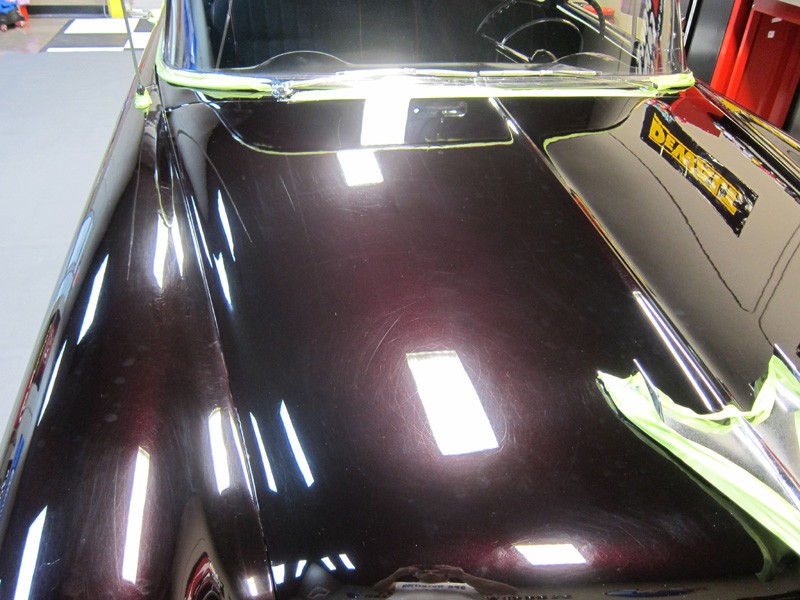
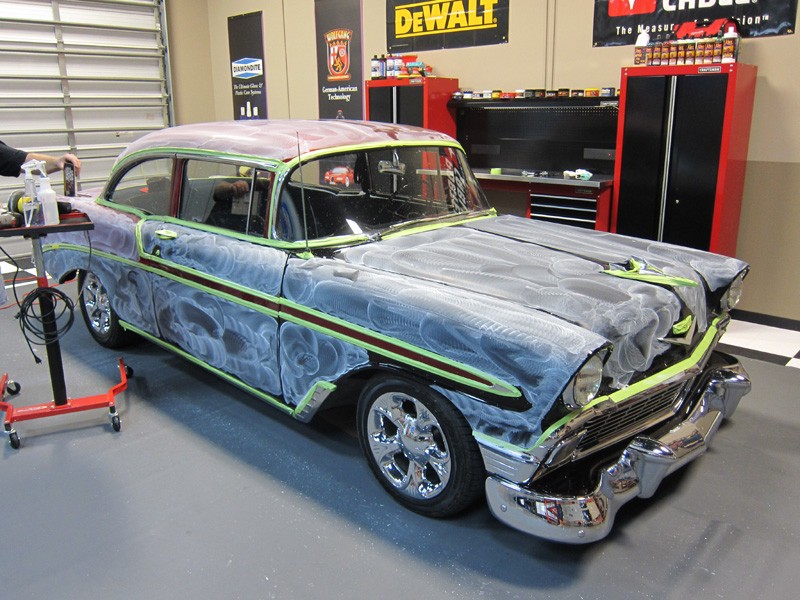
This is a bit of a work in progress thread...I washed and clayed the car last night, and when I got here this morning Mike asked if I wanted a hand. We decided to damp-sand the entire car with 3000 grit and we are now going to finish it up with the products shown (can't tell you what they are just yet).

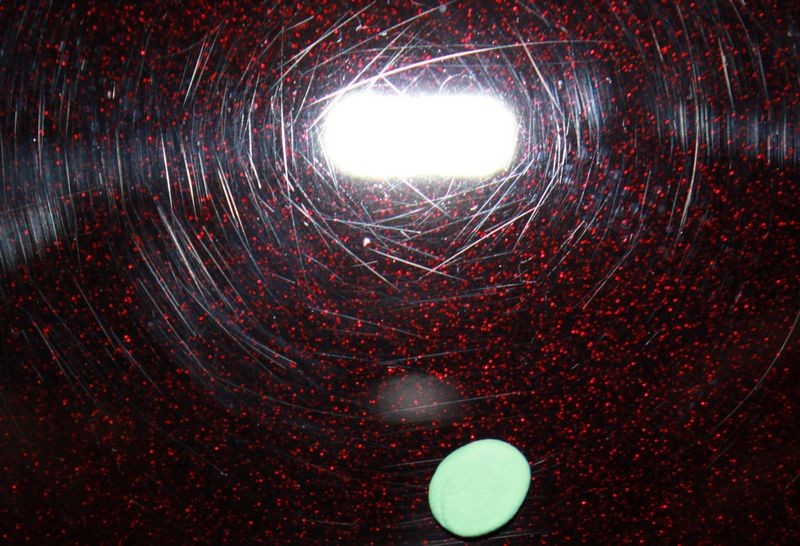
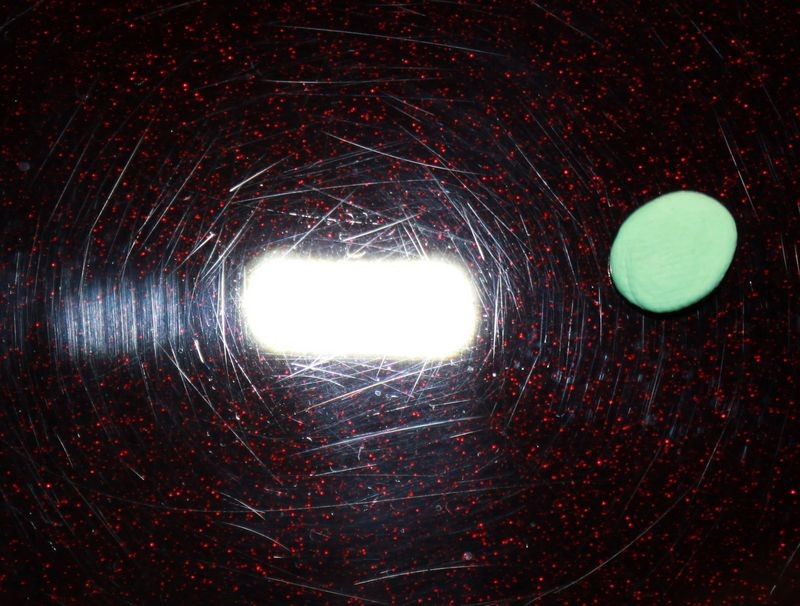
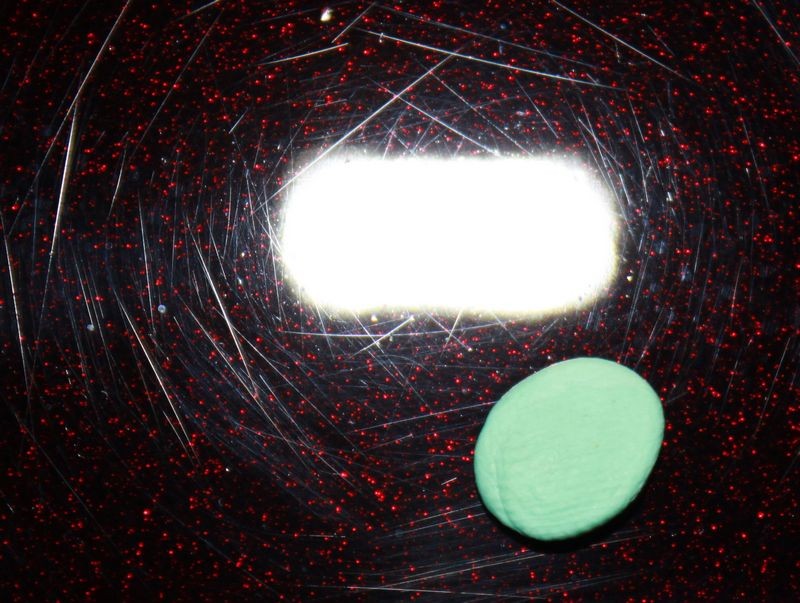
I'll let the pictures do the rest of the talking...you can see this baby was in need of some real TLC! This repaint of 20-25 years old according to the owner, but my Defelsko gauge told me that it had anywhere from 12 to 18 mils of paint...

IMG_1202.jpg


IMG_1213.jpg


IMG_1211.jpg


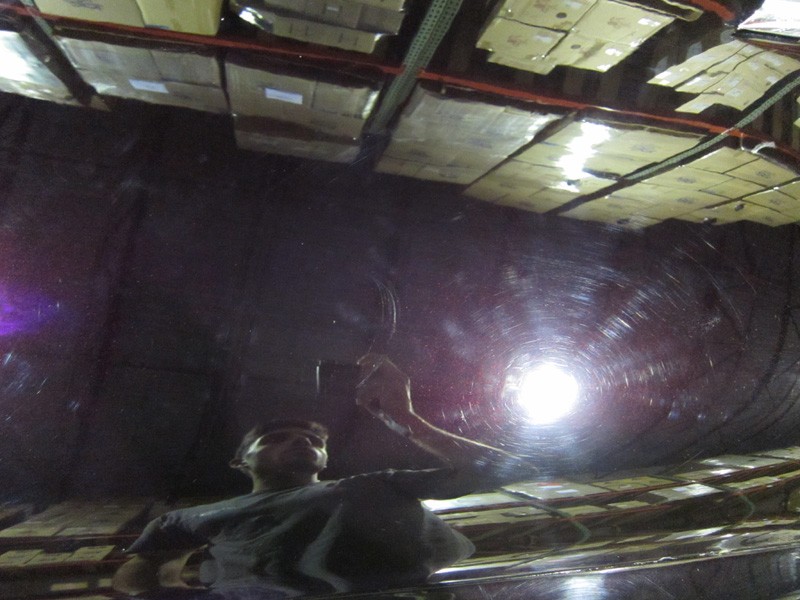
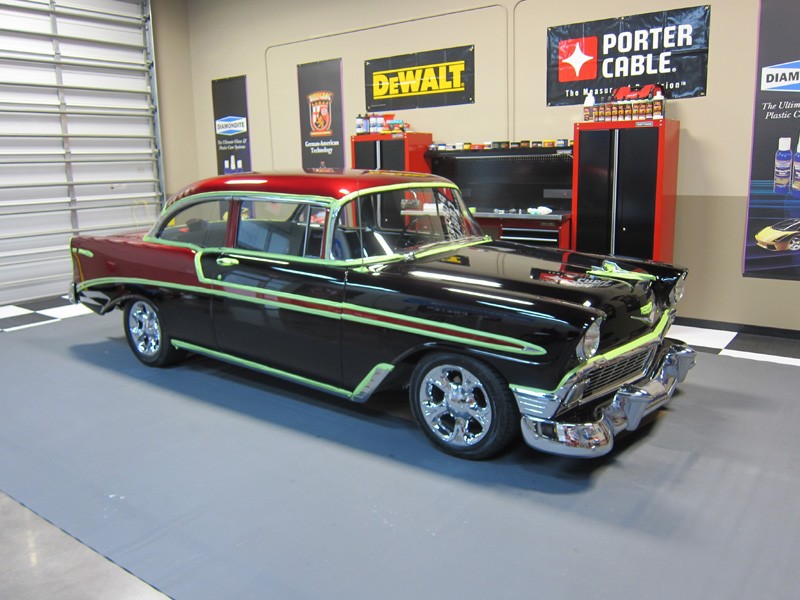
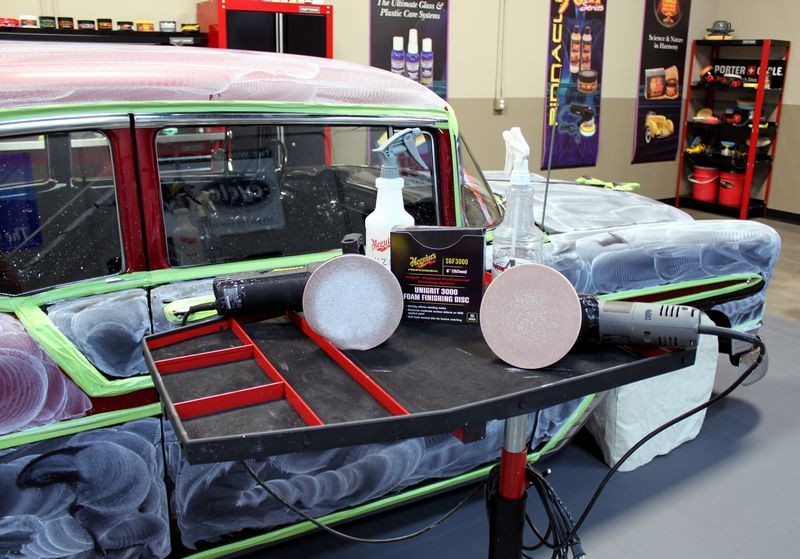
We started at 9:16AM, and finished around 9:42AM. Under 40 minutes to damp-sand an entire car this big, and we only used (2) sanding discs (1 each)!

IMG_1223.jpg


IMG_1238.jpg


:)
 
Re: 1956 Chevy Bel-Air - Damp-Sanding, Cut & Polish

Looking forward to seeing the final product!
 
Re: 1956 Chevy Bel-Air - Damp-Sanding, Cut & Polish

Can't wait to see the out come and can't wait to find out the product line
 
Re: 1956 Chevy Bel-Air - Damp-Sanding, Cut & Polish

What speed do you use on the PC to wet sand?
 
Re: 1956 Chevy Bel-Air - Damp-Sanding, Cut & Polish

What speed do you use on the PC to wet sand?

I think we were on the 4.0 to 5.0 Speed Setting, faster for flat surfaces and then bump it down a little for getting into curves and contours... Keep in mind you need to keep the disc rotating but it takes less power to keep a sanding disc rotative as compared to most foam pads.

:)
 
Re: 1956 Chevy Bel-Air - Damp-Sanding, Cut & Polish

Beautiful car, can't wait to see the final results
 
Re: 1956 Chevy Bel-Air - Damp-Sanding, Cut & Polish

I think we were on the 4.0 to 5.0 Speed Setting, faster for flat surfaces and then bump it down a little for getting into curves and contours... Keep in mind you need to keep the disc rotating but it takes less power to keep a sanding disc rotative as compared to most foam pads.

:)
Cool, thanks. Cant wait to see the finished product! :props:
 
Re: 1956 Chevy Bel-Air - Damp-Sanding, Cut & Polish

Here's a few shots I took with a Canon Rebel T1i


Here I'm using a small piece of detailing clay stuck to the hood to give my camera something to focus on and the using the flash to expose the swirls. Without the clay, a quarter or nickle, or my finger the shot would come out all fuzzy because the camera wouldn't be able to focus directly on the surface.

56ChevyBelairDampSand002.jpg


56ChevyBelairDampSand003.jpg


This is a very nice 1956 Chevrolet Belair but the paint was thrashed...
56ChevyBelairDampSand004.jpg


Damp-Sanding with Meguiar's Unigrit #3000 Unigrit Finishing Discs
56ChevyBelairDampSand005.jpg


Matt and I used 2 discs to sand down the entire car...
56ChevyBelairDampSand006.jpg


Here's Matt damp-sanding the roof...
56ChevyBelairDampSand007.jpg


Hey Matt, I have to leave now... something suddenly came up...
56ChevyBelairDampSand008.jpg


56ChevyBelairDampSand009.jpg


56ChevyBelairDampSand010.jpg


56ChevyBelairDampSand011.jpg


56ChevyBelairDampSand012.jpg


Normally you would want to wipe off the sanding sludge as you work around the car but it makes for a more cool photo to leave all the sludge on the car. Here we've wiped the car clean and we're ready to start compounding.
56ChevyBelairDampSand014.jpg


#3000 Grit leaves a flat sheen that's easily buffed out...
56ChevyBelairDampSand015.jpg


It's vitally important to always work clean, anyone that's worked with me before knows I'm a little on the D.O. side when it comes to working clean and that includes cleaning pads during the compounding process. To keep our wool pads clean we're gong to use the System 2000 Pad Washer which works great for cleaning wool pads with a rotary buffer. I cleaned my pad once or twice for for each panel and then spurred it using a steel spur. And of course a pad washer is useless without the right non-foaming pad cleaning solution, for this we used the DP Polishing Pad Rejuvenator.

56ChevyBelairDampSand016.jpg


Mix well before re-installing the base with the pump drive wheel and cleaning spurs...
56ChevyBelairDampSand017.jpg


Ready to go...
56ChevyBelairDampSand018.jpg


After compounding, polishing, and applying the first coat of a paint protection product, we "edged" the car, in this example edging means to open all the doors, trunk lid and hood and wipe out any compounding or polishing residue in the cracks and crevises...

Edging....
56ChevyBelairDampSand019.jpg


When you open the car all up for any reason and take a picture, this is called stretching, kind of like you when your spread out your arms and stretch out...

Stretching...
56ChevyBelairDampSand020.jpg


I brought in 3 cans of Mountain Dew and by the time we were through I had one can left and I was sooooo thirsty, it was all I could do to set up these reflection shots not drinking the cold refreshing Dew in my Autogeek Insulated Tumbler...

56ChevyBelairDampSand022.jpg


Fear not for the paint...
After taking the hood reflection shot, I cut a small square out of a Cobra Indigo Microfiber Towel and created the first official Cobra Indigo Microfiber Coaster.
56ChevyBelairDampSand021.jpg


All finished in around 8 hours with two guys working in the garage... you know, 2 Guys Garage... in Autogeek's Show Car Garage...
56ChevyBelairDampSand023.jpg


56ChevyBelairDampSand025.jpg


56ChevyBelairDampSand026.jpg


56ChevyBelairDampSand027.jpg


56ChevyBelairDampSand028.jpg


56ChevyBelairDampSand029.jpg


56ChevyBelairDampSand030.jpg


56ChevyBelairDampSand031.jpg


Parting shot...

Time to close down Autogeek's Show Car Garage...

56ChevyBelairDampSand032.jpg


:)
 
Re: 1956 Chevy Bel-Air - Damp-Sanding, Cut & Polish

As I said before, Beautiful car. After the work you guys did, absolutly stunning. WOW
 
Re: 1956 Chevy Bel-Air - Damp-Sanding, Cut & Polish

Beautiful finish. :dblthumb2:
 
Re: 1956 Chevy Bel-Air - Damp-Sanding, Cut & Polish

Amazing work, the boys are back in the garage again today finishing up a few things on that beauty. I must say its really awesome to have that garage to work in, Max did a great job with building it.

Looking forward to more pictures from the boys!
 
Re: 1956 Chevy Bel-Air - Damp-Sanding, Cut & Polish

Hmmmmm unknown products for this project. Maybe DP came out with a compound and polish????

Great work guys
 
Re: 1956 Chevy Bel-Air - Damp-Sanding, Cut & Polish

Hmmmmm unknown products for this project. Maybe DP came out with a compound and polish????

Great work guys

DP used to have a compond/polish a few years back. I have them at home, I think the compound was called super swirl remover, can't remember the polish name.
 
Re: 1956 Chevy Bel-Air - Damp-Sanding, Cut & Polish

Great work Matt and Mike! The car looks amazingly smooth too! :dblthumb2:
 
Re: 1956 Chevy Bel-Air - Damp-Sanding, Cut & Polish

Got it all finished up today. Unfortunately I'm very busy answering all my e-mails and stuff from the weekend (plus the phones don't stop ringing!) so hopefully I can get the rest of the pics up tomorrow! :)
 
Re: 1956 Chevy Bel-Air - Damp-Sanding, Cut & Polish

Simply amazing work you two :dblthumb2:
 
Re: 1956 Chevy Bel-Air - Damp-Sanding, Cut & Polish

Continued...


This is Matt putting the frosting on the cake, for frosting he's using Wolfgang Fusion and applying by machine...
56ChevyBelairDampSand033.jpg


56ChevyBelairDampSand034.jpg


56ChevyBelairDampSand035.jpg


If you look at the front most overhead florescent lights you can see a clear circle where he's broken the wax open... we show this technique here and here...
56ChevyBelairDampSand036.jpg


Wearing Microfiber Gloves and using a Cobra Deluxe Jr. 600 Microfiber Towel to remove the Fusion...
56ChevyBelairDampSand037.jpg


Thin coating...
56ChevyBelairDampSand038.jpg


56ChevyBelairDampSand039.jpg


Fold your microfiber towels 4-ways to give you 8 wiping sides and plenty of cushion to spread the pressure of your hand out...
56ChevyBelairDampSand040.jpg


56ChevyBelairDampSand041.jpg


Finish shots...
56ChevyBelairDampSand042.jpg


56ChevyBelairDampSand043.jpg


56ChevyBelairDampSand044.jpg


56ChevyBelairDampSand045.jpg


56ChevyBelairDampSand049.jpg


56ChevyBelairDampSand048.jpg


56ChevyBelairDampSand047.jpg


Here's Yancy having way too much fun...
56ChevyBelairDampSand046.jpg


:)
 
Re: 1956 Chevy Bel-Air - Damp-Sanding, Cut & Polish

Great thread, great pics, great work. Fantastic job guys!!

Can't wait to see what products were used.
 
Re: 1956 Chevy Bel-Air - Damp-Sanding, Cut & Polish

NFW.

Damp sanding materials are going to be on the way to my house in the next week. That is just too good to be true. Wow! Great job!!!!
 
Back
Top