Mike
I appreciate your input on assisting me with my new acquisition. I am getting an all original 1959 Coupe Deville in #36 Kensington Green Metallic.
For people interested in seeing my car here is the link to it on the CLC message board
1959 Cadillac Coupe DeVille to arrive soon
I would love to see your step by step processed to preserve and restore my finish. There is no oxidation or checkering or cracking. The color is still vibrant and just needs some TLC to help the appearance.
Thank you for your assistance in the matter.
Hi George,
Thank you for bringing your 1959 Cadillac paint restoration and maximizing project to the AGO forum. Like I mentioned on the Cadillac & LaSalle Club forum, I don't make newbie mistakes by breaking the rules on other forums only to become banned. Since Autogeek is not a sponsor of the C & L forum, without expressed permission I don't mind posting how-to info over there but I can't include any links.
So thank you for bringing your project to our forum and welcome to AutogeekOnline! :welcome:
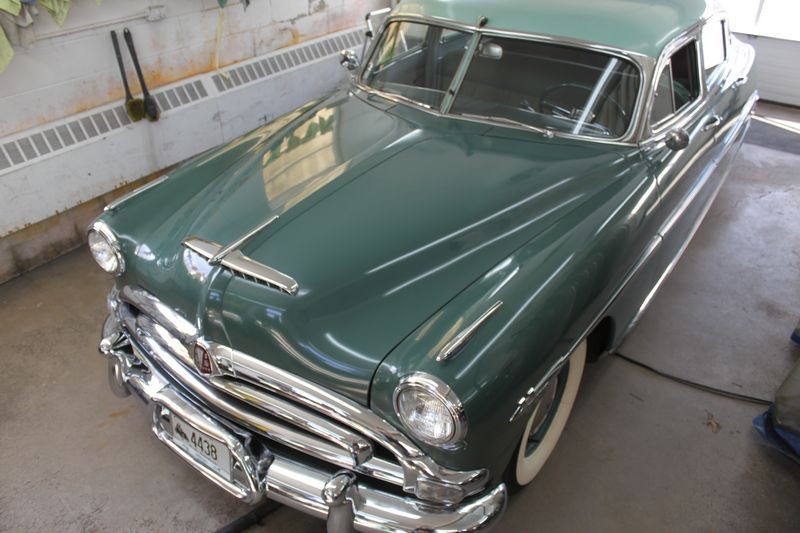
First, for everyone reading this thread, here are some pictures of the Kensington Green 1959 Cadillac George just purchased and my favorite color for the 1959 Cadillac.
This ain't not Honda or Toyota....
You've shared that the previous owner clayed and polished the paint before you purchased the car and from the pictures it does look like the paint is in very good condition.
Even so... since it's almost the year 2015, if we subtract 1959 we get 56 years. And that's old when it comes to original single stage paint in this nice of condition.
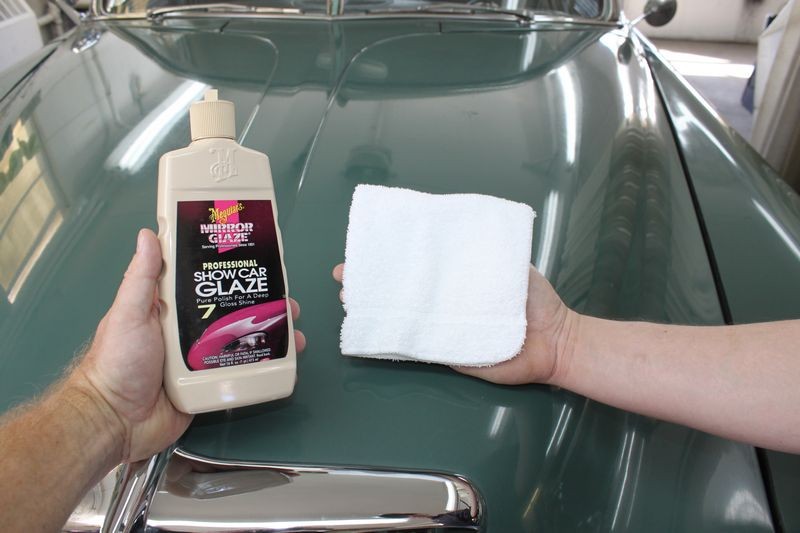
To keep in in this nice of condition and to squeeze out even a little more richness of color, depth and beauty, then I'd highly recommend rubbing this paint down with the only product on the market today that I know of that's been around as before the paint on your car was invented and that's the Meguiar's #7 Show Car Glaze.
This is a NON-abrasive pure polish that uses the Trade Secret Polishing Oils discovered by Frank Meguiar's Jr., the founder of Meguiar's back in 1901.
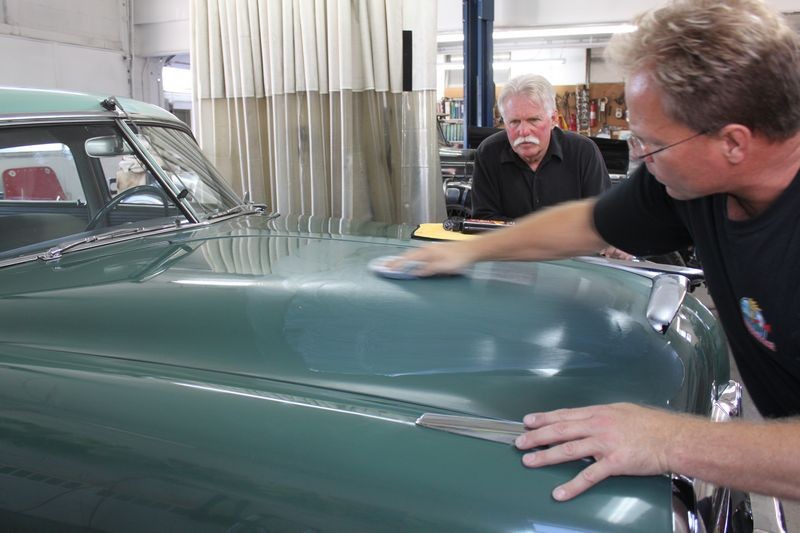
Normally when I'm helping someone restore their antique paint it oxidized and looks more like the paint I restored on Wayne Carini's 1953 Hudson.
Before
Here's the Hudson outside, if you look you'll see Wayne is in the driver's seat moving the car out of where we were filming and into the wash and wax bay.
Dull, oxidized paint. If you look at the bumper that's me taking this pictures.
Rear shot, the 1959 Corvette we're going to use for a training car is to the right...
Dull, oxidized paint...
Same shot from above only I cropped out a 800 pixel section from the full size shot.
Here it is moved into the bay...
To some people, this car doesn't look to bad and in reality it wasn't horrible but it garage kept all of it's life.
It's still oxidized, dried-out and brittle and needs to be approached just the right way or the green top layer will be removed and the black primer will be exposed.
Here's a thin spot where you can see black primer showing through...
Here's some shots showing the oxidation that has occurred over the decades even parked in a garage....
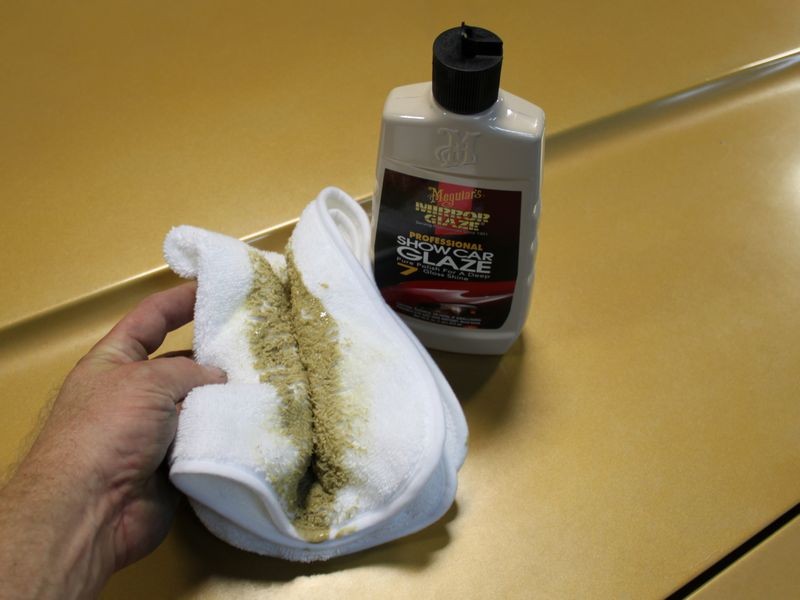
For paint that is oxidized I recommend rubbing the #7 in using cotton terry cloth and the reason why is you're suing the nap or tiny cotton loops of fiber as your abrasive.
Thus this is a VERY GENTLE method of carefully removing the dead paint from cars where it's IMPORTANT to the owner to preserve the original paint.
Like this,
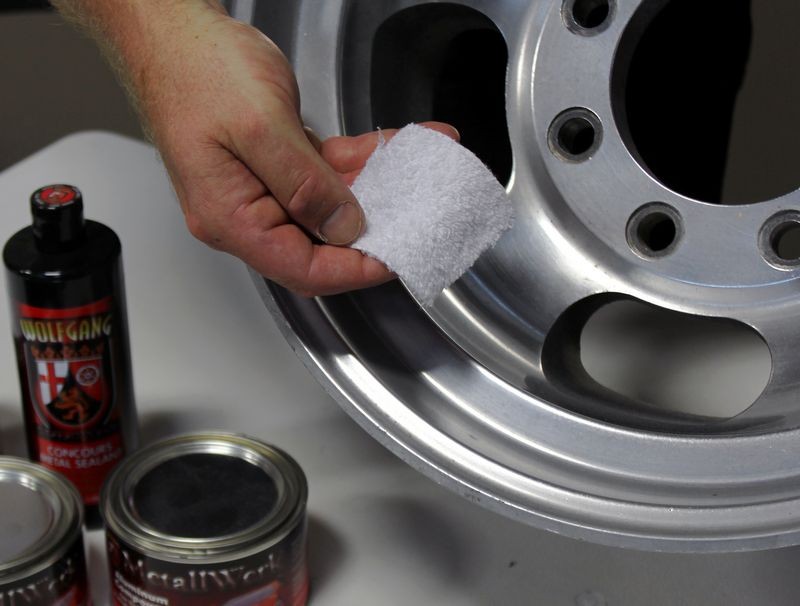
Terrycloth Wash Cloth - This is your Abrasive
In my article, I use and recommend terry cloth wash cloths to apply the #7 and the reason for this is because the nap, that is the tiny little cotton loops will work to not only agitate, loosen and abrade dead paint off the car they also help to really work the oils into the paint.
Microfiber towels would be too gentle. Microfiber towels would however be the right tool to remove the future polish and wax we apply.
BUT.....
If the paint on this Cadillac is as nice as it looks in the pictures, that is it's clear, clean and smooth and there is no visible signs of white, chalky oxidation... then you DON'T want to use Terry Cloth but something softer instead.
This can be either microfiber applicator pads or a microfiber towel like I show in this thread,
The Secret to Removing Oxidation and Restoring a Show Car Finish to Antique Single Stage Paints
This is a very soft, fluffy microfiber towel that we carry here at Autogeek.
Arctic White Microfiber Towel - 16" x 16"
Fold the cloth into itself to spread the product out and wet the face of the cloth.
The point being is you don't need to get aggressive or abrasive so don't. Get gentle.
Another option is microfiber applicator pads which will be less aggressive than terry cloth, like these,
6 Pack Microfiber Applicator Pads
(Sorry the picture is so small but you get the idea)
You could also use foam applicator pads, the simple foam pads like these, which would be the LEAST aggressive.
Pinnacle Foam Wax Applicators
Here's why....
Because the paint is already in good to great condition and your goal is to take it to it's maximum potential while at the same time doing everything you can to preserve it for the next 56 years, all you really want to do is massage these polishing oils into the paint and load it up so it's full... so to speak.
The oils have a unique ability to bring out the full richness of color in single stage paints and that's what you want to do to create beauty.
The oils will also fill any voids in what is a porous type of paint and by filling the voids or pockets and pores you prevent OTHER things like water and oxygen from causing oxidation which would break the paint down. So the oils act like an insurance policy or form of protection.
If the paint is already smooth and clear you don't need to get aggressive, just take the gentle approach and massage or rub-out the paint using the #7 Show Car Glaze.
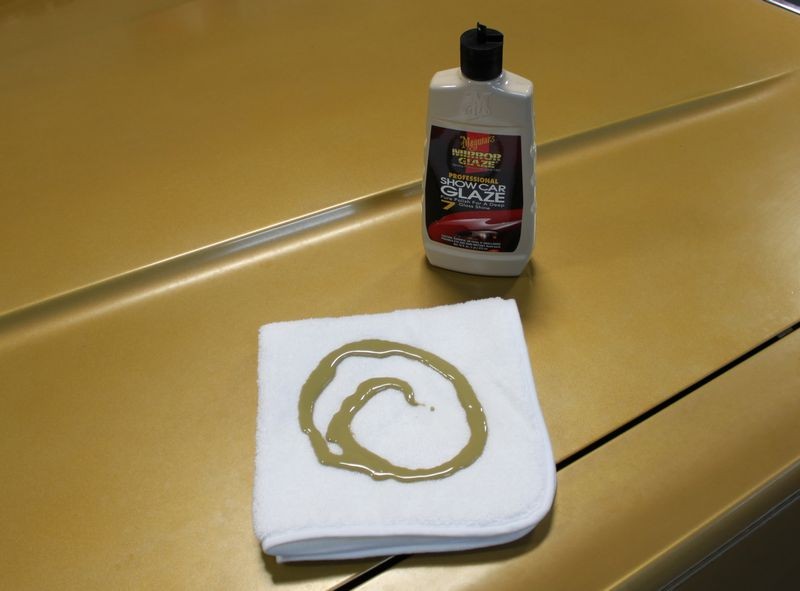
The first application use the product heavy or wet
This means use a LOT of product. That's so there's plenty oils on the surface to soak in. I demonstrate how this works by placing some #7 on a sheet of paper and letting 24 hours go by...
Saturation Application --> The First Application
This is a mostly unknown technique and that is to let the first application penetrate and soak into the paint for up to 24 hours before wiping the product off. The idea being to really apply the product wet and work it in really well and the walk away.
The idea is to allow the heavy concentration of oils to penetrate and seep into the paint for maximum saturation before removing the product and continuing with the process. In this case I finished applying the first application of #7 around 9:00 pm and then left the #7 to soak in until the next day. I started wiping the product off then next morning right about 10:00am.
Some will argue if this works or not but my experience is that with a porous single stage paint it does in fact help. One thing for sure it can't hurt.
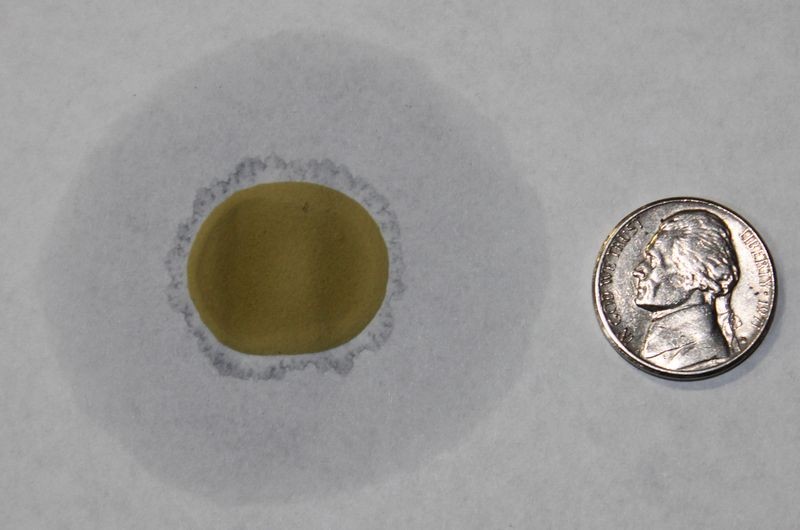
Paper Test for Capillary Action
If you place a few drops of #7 onto a piece of paper and then monitor it over a few days you will see the oils in the #7 migrate or seep away from the actual drop of product. It does this through capillary action and the same thing can work to your car's paints' advantage if it's a single stage lacquer or enamel paint.
I placed a few drops about the size of a nickel on a piece of standard printer paper around 3:00pm.
The next day I took these pictures at approximately 10:00am, (19 hours later), note how the oils in the drops of #7 have migrated outward via
capillary action.
Feeder Oils penetrate or feed the paint
This same effect can take place in a single stage paint but not only will the oils travel horizontally, they will also travel vertically, that they will penetrate downward "into" your car's paint and this is where the term
feeder oils comes from as the oils penetrate into or feed the paint. The result is they will condition the paint restoring some level of workability as compared to just working on old dry paint, and they will also bring out the full richness of color, something that will showcase the beauty of your car's paint.
And this is what you want to happen to the paint on your car. You want to gorge this old, original single stage paint with these oils.
Barry Meguiar & Wanye Carini talk about #7 Show Car Glaze
Take a moment to watch the below video and you'll see and hear both Barry Meguiar and Wayne Carini vindicate me and they've been doing this a couple decades longer than yours truly.
Velocity Discussion Panel at the 2014 Detail Fest
[video=youtube_share;FABEguuDMFs"]Velocity Panel [/video]
- Wayne Carini - Host of Chasing Classic Cars
- Barry Meguiar - Host of Car Crazy
- Dennis Gage - Host of My Classic Car
- Bruno Massel - Co-Host of TruckU
- Matt Steele - Co-Host of TruckU
- Mike Phillips - Autogeek's Director of Training
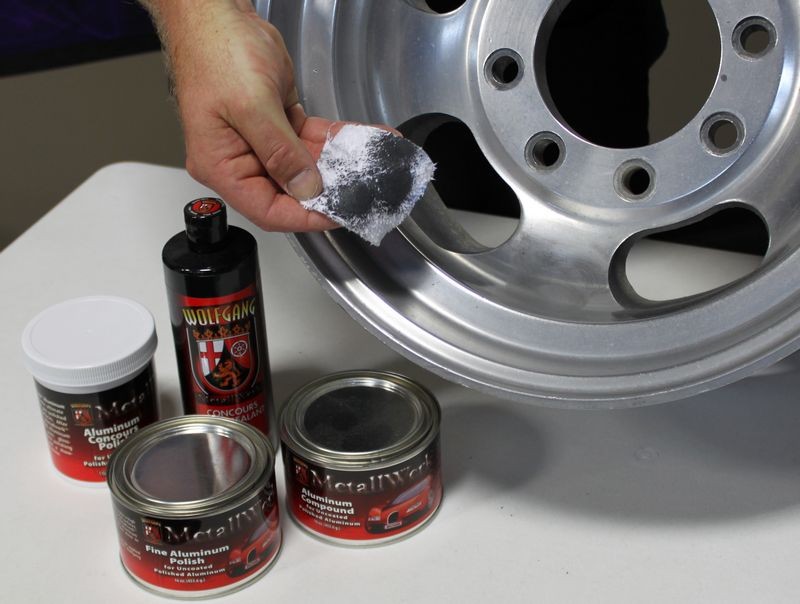
Then after letting the #7 soak in overnight or for a day, carefully remove the #7. This is a very oily product and while microfiber towels are very gentle to paint it is their gentleness that also makes them a tick on the ineffective side for removing these oils. What works better is a VERY soft 100% cotton terry cloth towel. Just make sure the terry cloth is clean and soft and then take your time to wipe the oils off.
Use an overlapping, circular motion when wiping and only take off small bites of product at a time. Also fold and flip your towel to a new side or potion often as these oils are removed easiest by a section of clean terrycloth nap.
How it works
The tiny loops of cotton known as terrycloth act to slice into the oily film and break it up and this helps to make it easier to wipe off.
My technique
My technique is actually
Bill Stuart's technique. I learned this from Bill Stuart. If you've ever used an Absorber (synthetic chamois), my friend Bill Stuart owns the Absorber company and we've been friends for about 30 years.
What Bill taught me to do was to go around the car once and only try to get off about 80% to 90% of the oily film. After wiping down the entire car with this initial pass then get fresh towels and even switch over to microfiber towels to make the second pass around the car.
If you're going to apply a wax after this step don't even worry about getting 100% of the oils off just aim for about 95% to 98%... a little trace oils on the paint won't hurt anything.
Multiple Applications For cars that are neglected and the paint is chalky white, it's good to do 2-3 applications following the method shared above.
For paint in good to excellent condition, one application is enough but be sure to do a very good job.
Machine Polishing
The human hand cannot compete with a machine when it comes to creating a true show car finish.
You want to do the #7 treatment by hand and enjoy it as not only is it a good workout but rubbing out a genuine original single stage paint on a classic car like a 1959 Cadillac is becoming a VERY RARE OPPORTUNITY. So enjoy it.
After the #7 though, now is when you want to do a light machine polishing to really smooth over the paint, remove any shallow swirls and scratches and maximize the gloss.
For this I would use the same product I used on Wayne Carini's 1953 Hudson and that is the Pinnacle Advanced Finishing Polish. This is a FINE CUT Polish and really the perfect product for this paint.
There are 4 categories of compounds and polishes and ANY compound or polish in the world can be placed into one of these 4 categories.
1. Aggressive Compound
2. Medium Cut Polish
3. Fine Cut Polish
4. Ultra Fine Cut Polish
Pinnacle Advanced Finishing Polish is a Fine Cut Polish. While I'm not there to look at the paint in person, from the pictures and from experience and I've done a lot of this in my life, I'm confident you don't need a Medium Cut Polish and an Ultra Fine Cut polish wouldn't offer enough cleaning and polishing.
So if it were mine I would go with the Pinnacle Advanced Finishing Polish with a Lake Country 5.5" White Foam Polishing Flat Pad and I'd use a Porter Cable 7424XP on the 5-6 speed setting and then meticulously and methodically machine polish this paint till it glistened like an Emerald.
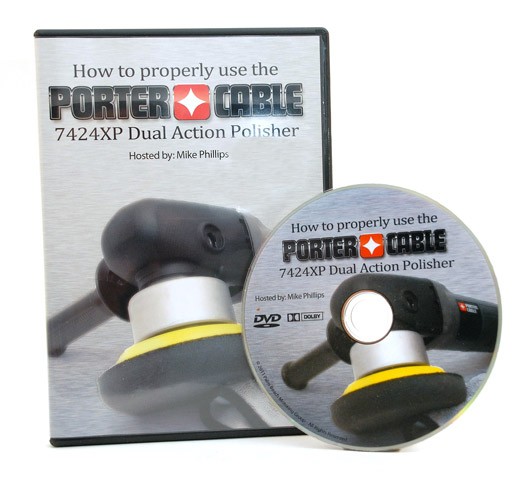
My how-to DVD shows you everything you need to know on how to use the Porter Cable 7424XP.
How to Properly Use the Porter Cable 7424XP Dual Action Polisher Updated!
Here's the tool you want....
Porter Cable 7424XP Dual Action Polisher
Here's the backing plate you want and will need....
5" Backing Plate
Lake Country 5" DA Backing Plate <-- Get this one as the Velcro will match Lake Country Pads
The 5" Lake Country Backing Plates fits all popular dual action polishers including Porter Cable, Griot's Garage and Meguiar's.
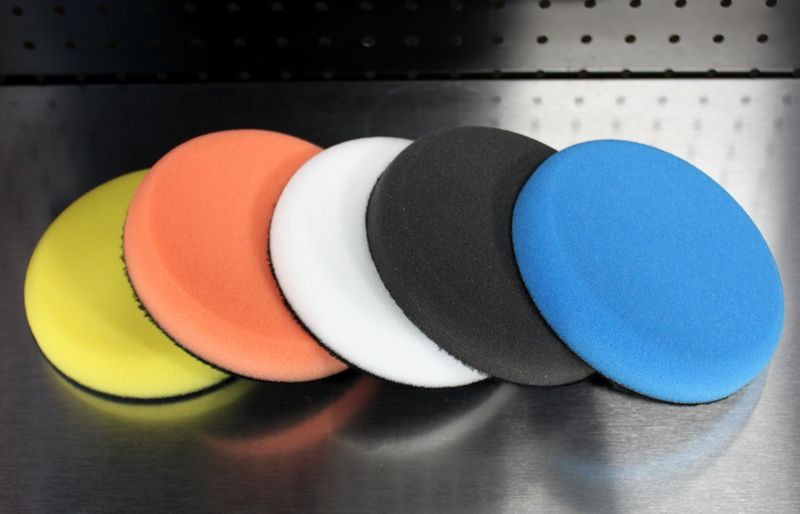
And here is a picture of the Lake Country 5.5" Flat pads...
Lake Country
5.5" Flat Pads
In order from the most to the least aggressive
Yellow = Cutting pad (most aggressive)
Orange = Light Cutting Pad
White = Polishing Pad
Black = Finishing Pad
Blue = Waxing Pad (softest)
The outer edge of the face of these pads is tapered so they are actually a little under 5" in diameter
Approximately 7/8" thick
Autogeek offers a 6-pack of these pads, get 5 white pads and one blue pad.
The white pads are to apply the polish. The blue pad is to machine apply the wax.
Then if you don't have a true show car wax you already love, then I would suggest the Pinnacle Souverän Paste Wax or the Pinnacle Souverän Liquid Wax.
Both will create and maintain the deep, wet shine everyone loves and they are the easiest waxes in the world to use and when machine waxing a car that is 19.5' long, (I know, I've owned a few of these beauties), you want a wax that goes on easy and just as important wipes off easy.
That's what I'd do George and if you lived closer I'd be happy to show you first hand how to do all of the above. I recently taught my core group of guys how to do the #7 rub-out to a vintage Isuzu in this thread,
1998 Isuzu Rodeo Extreme Makeover! - Single Stage Paint
Before
After
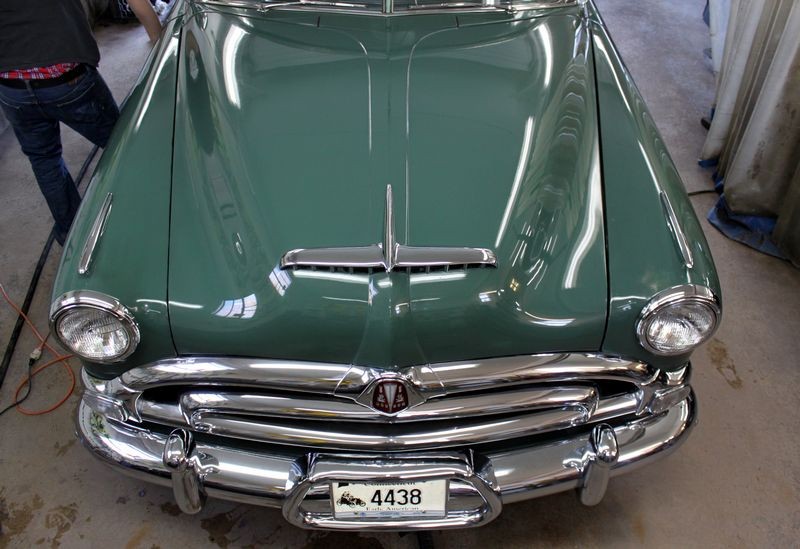
Hope that helps George and if you have any further questions please don't hesitate to ask... and just to tie this post up with a nice little bow... the original antique single stage paint on Wayne Carini's 1953 Hudson came out perfect.
I have to say though... that Wayne was very aprehensive... we had just met for the first time a few day previous and he had been chasing this car for over 40 years!
I love the look on Wayne's face as he watches me hand-apply the Pinnacle Advanced Finishing Polish... the paint on the hood was to thin to risk buffing by machine but we did machine polish all of the rest of the body panels.
Now you can see the paint is turning clear as we bring out the full richness of color...
Machine Waxing (no pictures)
After the above, we machine applied the
Pinnacle Souveran Paste Wax using a Lake Country soft blue foam waxing pad with the Porter Cable 7424XP on the 4.0 speed setting.
Finished!
In this shot you can see Wayne's hand as he's walking down the side of the car inspecting the results and giving the paint a final wipe....
And this my friends is one of the most rewarding pictures I've ever taken. This shot was taken after we finished polishing every square inch of paint and then applying a coat of Souveran Paste Wax.
This is what I'm talking about....
:xyxthumbs:


")


