Mike Phillips
Active member
- Dec 5, 2022
- 51,004
- 6
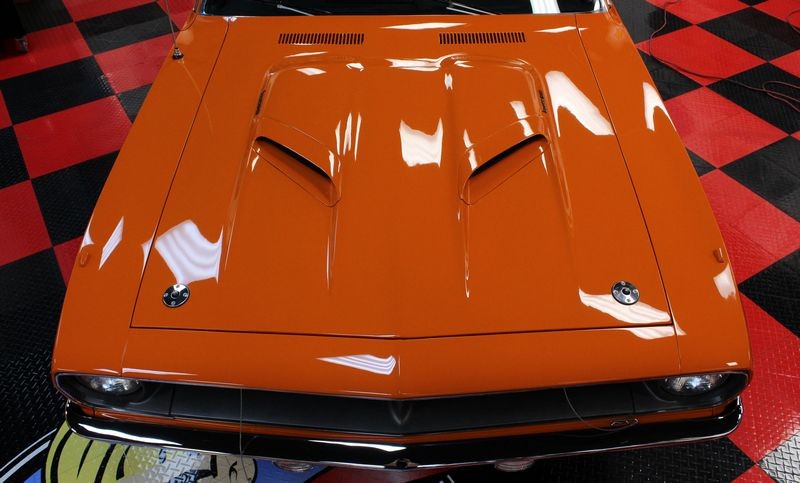
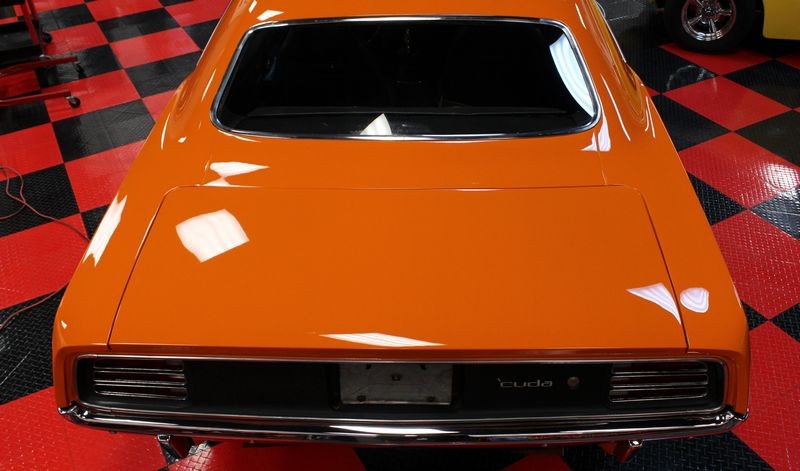
1970 Plymouth Cuda Vitamin C Orange - Detailed by Mike Phillips
I have two cars to prep for car shows this week plus test out NEW products being announced at SEMA. One is a 1970 Plymouth 'Cuda fresh out of museum for the last 15+ years. The other is a 1940 Pointiac 5-Window Coupe Streetrod. Both are filled with swirls, scratches, holograms and oxidation. They are no where near ready for display.

So we begin...
Second thing I did was a waterless wash.
Next I did was the baggie test. The paint felt rough.
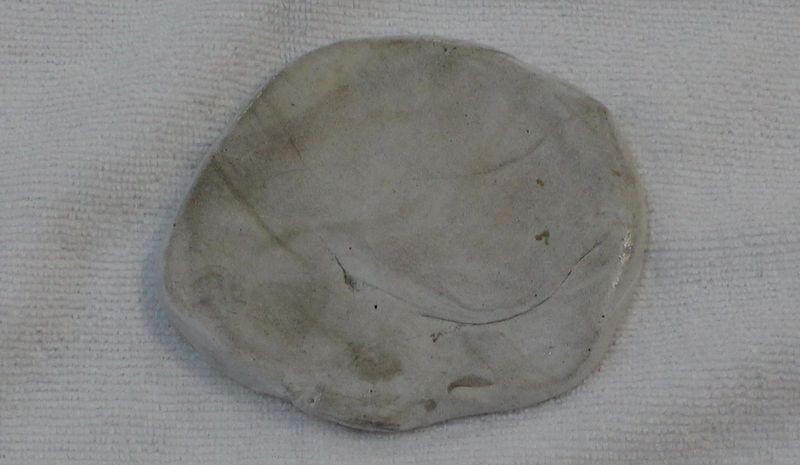
Next I clayed a section on the front of the hood. I like to use clay when I'm curious to see the color of the contaminants on the paint. Other methods work great to remove contaminants but clay can show you what's coming off the paint.

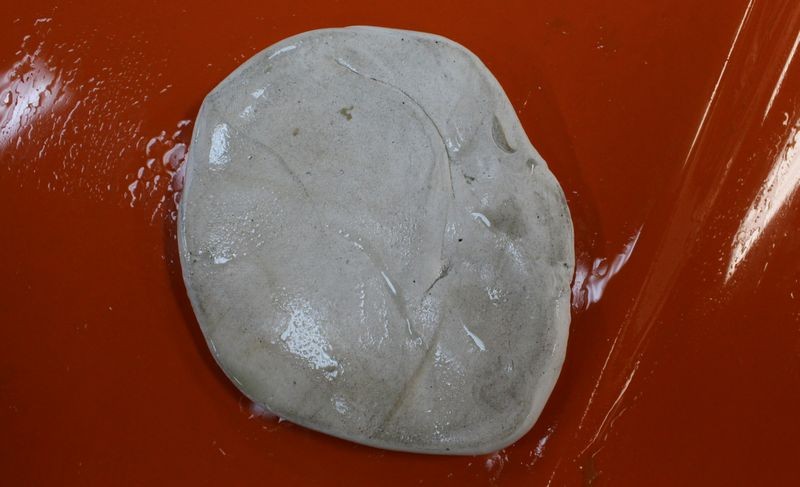
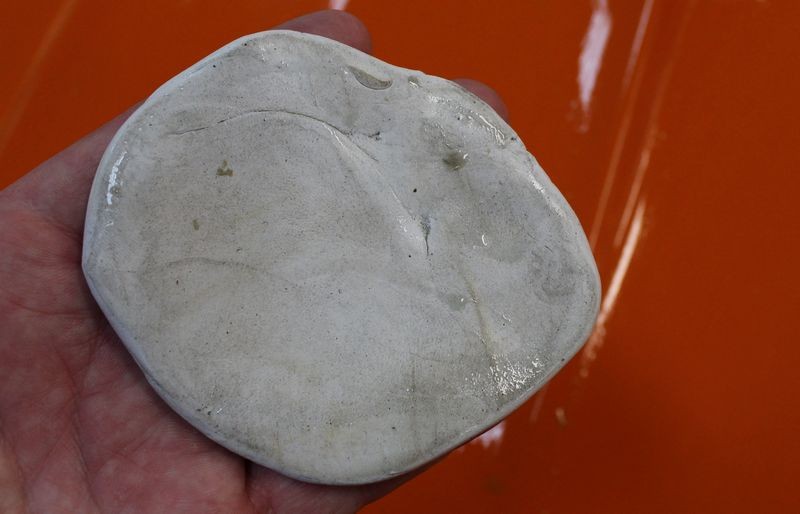
Sometimes I like to place the clay on a white microfiber towel to show the contrast...
Gloss comes from a smooth surface
Years ago I wrote an article that explains that gloss starts with a smooth surface. In order to create a super high gloss finish you must make the paint as smooth as possible and this starts with removing the contaminants like you see on the clay patty above.
After removing all the contaminants off all of the paint you can see the gloss has definitely amped up.

Pictures can be deceiving
The paint in the picture below looks pretty good huh?

Here's what the paint really looks like when I light it up using the FLASH off my camera.
Besides the swirls, you can also see the paint has a splotchy stain over it.
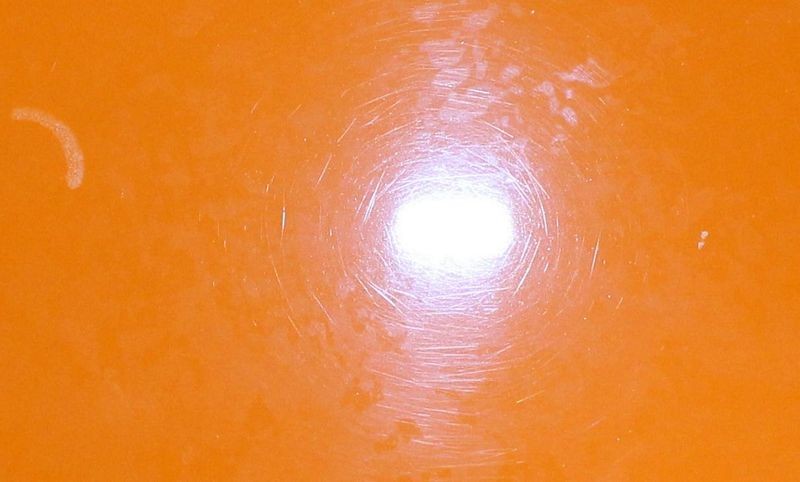


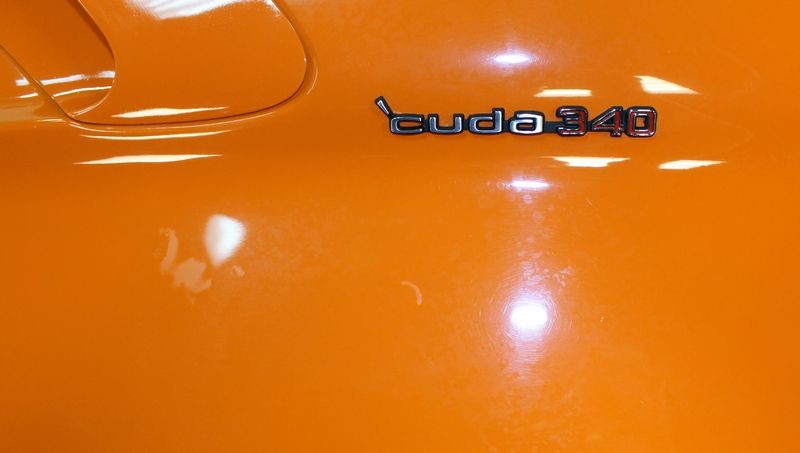
Here I'll frame up the shot so you can see the section of paint I'm revealing with my camera's flash.

Now we zoom in a little - I left a little bit of the number 0 from the 340 for perspective...

And here's a 800 pixel wide section cropped out of the original.

To the average person, this car looked great when it arrived to Autogeek. To the trained eye there's a show car finish hiding under the swirls and stains.
More to come....
Oh yeah, here's the link to the original article I wrote on where gloss comes from...
Gloss starts first with a smooth surface...
")
I have two cars to prep for car shows this week plus test out NEW products being announced at SEMA. One is a 1970 Plymouth 'Cuda fresh out of museum for the last 15+ years. The other is a 1940 Pointiac 5-Window Coupe Streetrod. Both are filled with swirls, scratches, holograms and oxidation. They are no where near ready for display.
So we begin...
Second thing I did was a waterless wash.
Next I did was the baggie test. The paint felt rough.
Next I clayed a section on the front of the hood. I like to use clay when I'm curious to see the color of the contaminants on the paint. Other methods work great to remove contaminants but clay can show you what's coming off the paint.
Sometimes I like to place the clay on a white microfiber towel to show the contrast...
Gloss comes from a smooth surface
Years ago I wrote an article that explains that gloss starts with a smooth surface. In order to create a super high gloss finish you must make the paint as smooth as possible and this starts with removing the contaminants like you see on the clay patty above.
After removing all the contaminants off all of the paint you can see the gloss has definitely amped up.
Pictures can be deceiving
The paint in the picture below looks pretty good huh?
Here's what the paint really looks like when I light it up using the FLASH off my camera.
Besides the swirls, you can also see the paint has a splotchy stain over it.
Here I'll frame up the shot so you can see the section of paint I'm revealing with my camera's flash.
Now we zoom in a little - I left a little bit of the number 0 from the 340 for perspective...
And here's a 800 pixel wide section cropped out of the original.
To the average person, this car looked great when it arrived to Autogeek. To the trained eye there's a show car finish hiding under the swirls and stains.
More to come....
Oh yeah, here's the link to the original article I wrote on where gloss comes from...
Gloss starts first with a smooth surface...


 that looks dang good!