First, just so I know because in the article I talk a lot about how this article is for
neglected, oxidized antique and original single stage paint on cars that
important to the owner to preserve the original oxidized single stage paint. This would mostly apply to
antique and
classic cars.
So if you don't mind me asking...
Have you read the article?
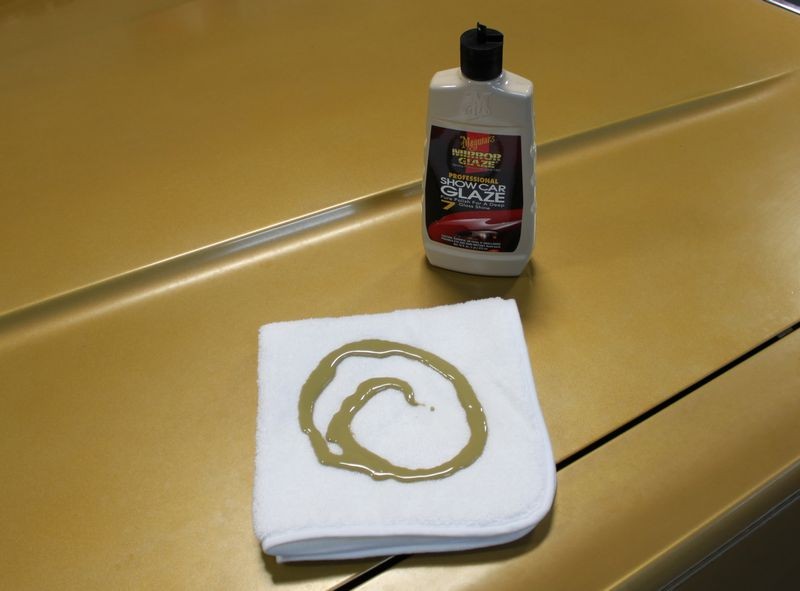
And I mean this in the nicest way. It's kind of long because it's VERY DETAILED. If fact, it has pictures like this to show WHY to rub single stage paint down with the oily #7 and that's because there's something taking place inside the paint that won't take place if you just compound or use a one-step cleaner/wax.
This is key...
Saturation Application --> The First Application
This is a mostly unknown technique and that is to let the first application penetrate and soak into the paint for up to 24 hours before wiping the product off. The idea being to really apply the product wet and work it in really well and the walk away.
The idea is to allow the heavy concentration of oils to penetrate and seep into the paint for maximum saturation before removing the product and continuing with the process. In this case I finished applying the first application of #7 around 9:00 pm and then left the #7 to soak in until the next day. I started wiping the product off then next morning right about 10:00am.
Some will argue if this works or not but my experience is that with a porous single stage paint it does in fact help. One thing for sure it can't hurt.
Paper Test for Capillary Action
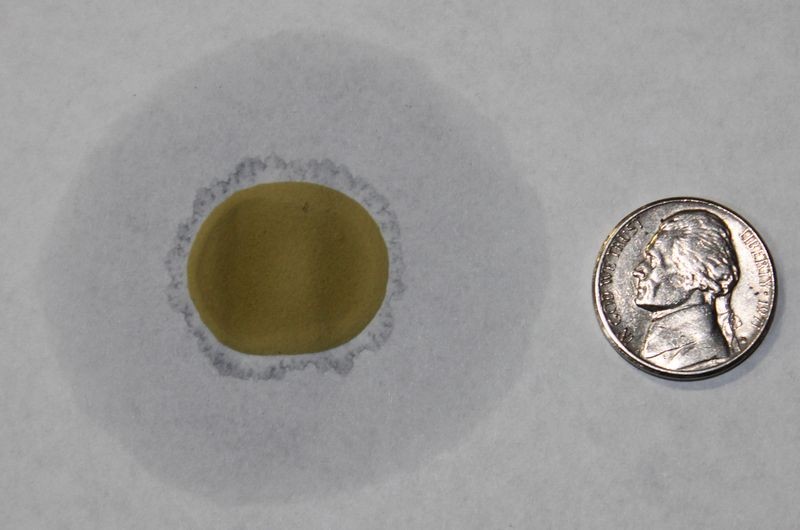
If you place a few drops of #7 onto a piece of paper and then monitor it over a few days you will see the oils in the #7 migrate or seep away from the actual drop of product. It does this through capillary action and the same thing can work to your car's paints' advantage if it's a single stage lacquer or enamel paint.
I placed a few drops about the size of a nickel on a piece of standard printer paper around 3:00pm.
The next day I took these pictures at approximately 10:00am, (19 hours later), note how the oils in the drops of #7 have migrated outward via
capillary action.
Feeder Oils penetrate or feed the paint
This same effect can take place in a single stage paint but not only will the oils travel horizontally, they will also travel vertically, that they will penetrate downward "into" your car's paint and this is where the term
feeder oils comes from as the oils penetrate into or feed the paint. The result is they will condition the paint restoring some level of workability as compared to just working on old dry paint, and they will also bring out the full richness of color, something that will showcase the beauty of your car's paint.
When you ask about,
Mike, what is the advantage of this method over using a cleaner/wax or AIO product via DA?
The advantage is that if you own a classic or antique car and it's IMPORTANT to you to do everything you can to save the original paint, then ONE thing you can to is revitalize the old, brittle, dried out paint by gorging it with the polishing oils found in #7 Show Car Glaze, a non-abrasive, pure polish that's been around since the era of Model T's when single stage paints were first being invented for the car world.
Again, I actually cover all this in my article and that's why I'm wondering if you've read the article?
That is the method I personally use and have seen others here use with great success, and it certainly seems like a lot less work that applying #7 by hand several times
The techniques I share in my article on this forum and also on AutoTraderClassic.com are optional. This means you don't have to use them. My two favorite detailing tasks in order are,
Restoring antique single stage paint on "barn finds"
Wetsanding a new paint job for a show car finish on Special Interest Vehicles
The goal of both is to do the job right the first time.
In the case of restoring single stage paint it's because all my life I've seen what I call Caveman Detailers whip out their favorite caveman compound and destroy original single stage paint to the point that now the car MUST be repaint.
In the case of wetsanding a new paint job on a Special Interest Vehicle, it's because most of the time I see others do this they use archaic methods, archaic products and tools and the end results is a finish with,
Pigtails
Tracers
Holograms
Thin paint
All of the above could have been avoided by having someone do the job that actually knows what they are doing.
As far as using a one-step cleaner/wax to restore single stage paint I do believe there is a time and place and I know from experience over the last 30 years that "yes" it can be done, I'll show you below.
But my article that you're asking about is more targeted at the person that owns something cool and old that still has the original paint but the original paint is in BAD condition and it's IMPORTANT to "them" to do everything they can to preserve the original paint and that means rubbing the paint down first with a very oily product that has about 100 time-proven years of success at restoring and maintaining single stage paint.
I don't know of any other product that can make this claim. None.
Now here's how your restore single stage paint using a one step cleaner/wax and make about $100.00 per hour doing it.
How to use a one-step cleaner/wax to maximize profits
All too often I see people new to detailing get all caught up into performing elaborate, multi-step procedures to create show car finishes on daily drivers. Nothing wrong with this if you need experience or you're trying to showcase your talents. The problem however is that all too often you end up working for peanuts by the time you divide your time into your profits.
Below is an example of reducing your steps to a minimum while still creating dramatic improvement that will blow your customer away with the simple approach of using a one-step cleaner/wax.
Process Step 1: Machine polish all exterior glass to remove road film and water spots.
Step 2: Clean and dress tires.
Step 3: Wipe vinyl top down and apply dressing.
Step 4: Wipe paint clean using clay lube.
Step 5: Clay paint.
Step 6: Clean, polish and protect paint using a one-step, cleaner/wax applied by machine.
Step 7: Machine clean and polish chrome at end of paint polishing process using same pad and one-step cleaner/wax.
Step 8: Wipe down door, hood and trunk jambs with a little cleaner/wax on a microfiber towel.
Done.
Less than 4 hours and I didn't rush. I didn't work slow but instead worked methodically through the above steps with each step building and/or adding to the
forward progress of the previous step.
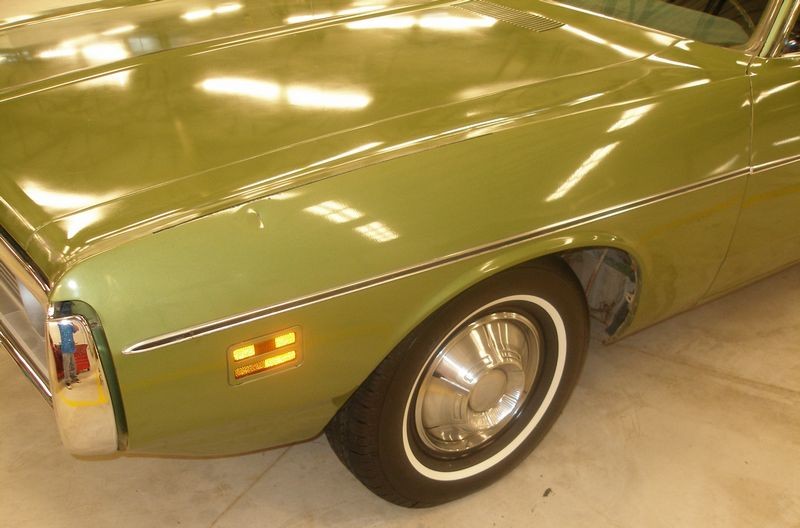
Car: 1970 Oldsmobile 442 Convertible W30
Before
This car is in good condition but the paint was oxidized and thus dull and lifeless. It was rough to the feel with contamination as was the exterior glass. A greasy tire dressing was used and it smeared over the white letters staining them black and brown. The chrome was stained with some type of film causing them to look dull instead of bright and shiny.
Pinnacle Ultra Poly Clay formed into a patty ready to clay the hood...
The contaminants you see here are off just the hood. After claying the hood I clayed the trunk lid and then all of the vertical panels.
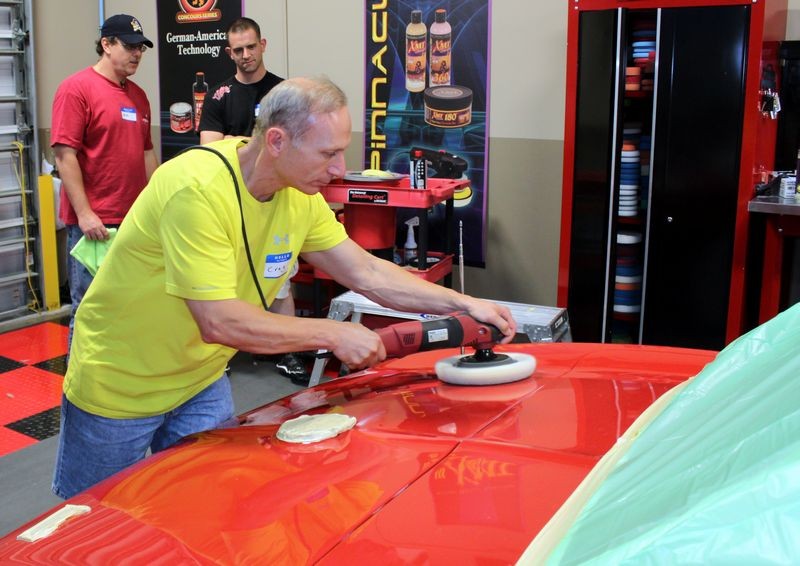
Paint machine polished using a polishing pad and a one-step, cleaner/wax...
After
Photography 101 - The low down front grill shot
The real deal
Yes, this is an authentic Oldsmobile 442 with the W30 package as you can see by the orange inner fender wells.
Tip: Have a detailing package for everyone
Regardless of how much this car is worth on the market, the owner doesn't know the difference between a squirrel or a swirl and didn't want to pay a lot to have it cleaned up. As a detailer you need to have a package for everyone to suit their needs, not yours. Or walk away and move onto greener pastures.
Newbie Mistakes
I see a lot of people new to car detailing that perform
multiple step procedures to create a show car finish but at the end of the day have so much time, labor and materials into the job that they end up working for peanuts.
So work smarter, not harder and to do this
start by evaluating your customer first and match your services to their needs, not yours. For more information on this topic, see tis article...
A few tips on starting a part-time detailing business
Match your services to your customer
On Autogeek.net
Below are the products I used for the above car...
Pinnacle GlassWork Water Spot Remover
Machine polished all exterior glass.
Pinnacle Signature All Purpose Cleaner
Cleaned old tire dressing off tires.
Pinnacle Clay Lubricant
Wiped exterior paint clean before starting and also used with detailing clay.
Pinnacle Ultra Poly Clay
Decontaminated paint.
XMT 360 Corrects, Cleans, Seals
Cleaned, polished and protected exterior paint by machine, door, hood and trunk jambs by hand and chrome trim and bumpers.
Flex XC 3401 VRG Dual Action Orbital Polisher
For all machine polishing steps .
CCS 6.5 inch Pink Cutting/Polishing Foam Pad
For all machine polishing steps.
Optimum Opti-Bond Tire Gel 32 oz
To dress tires and vinyl top.
")