TTQ B4U
Well-known member
- Jan 20, 2016
- 5,504
- 70
So a fellow racing club member contacted me a few weeks back with a potential detail request for a car he may be selling. After a quick stop by and test panel / evaluation we agree on the process to go by to restore the finish of the vehicle which was loaded with swirls and several areas of scratches.
It's a good looking car just in styling but the finish was absolutely killing the real beauty of it. The good news was that I was pretty confident we could shave 10+ years off it.
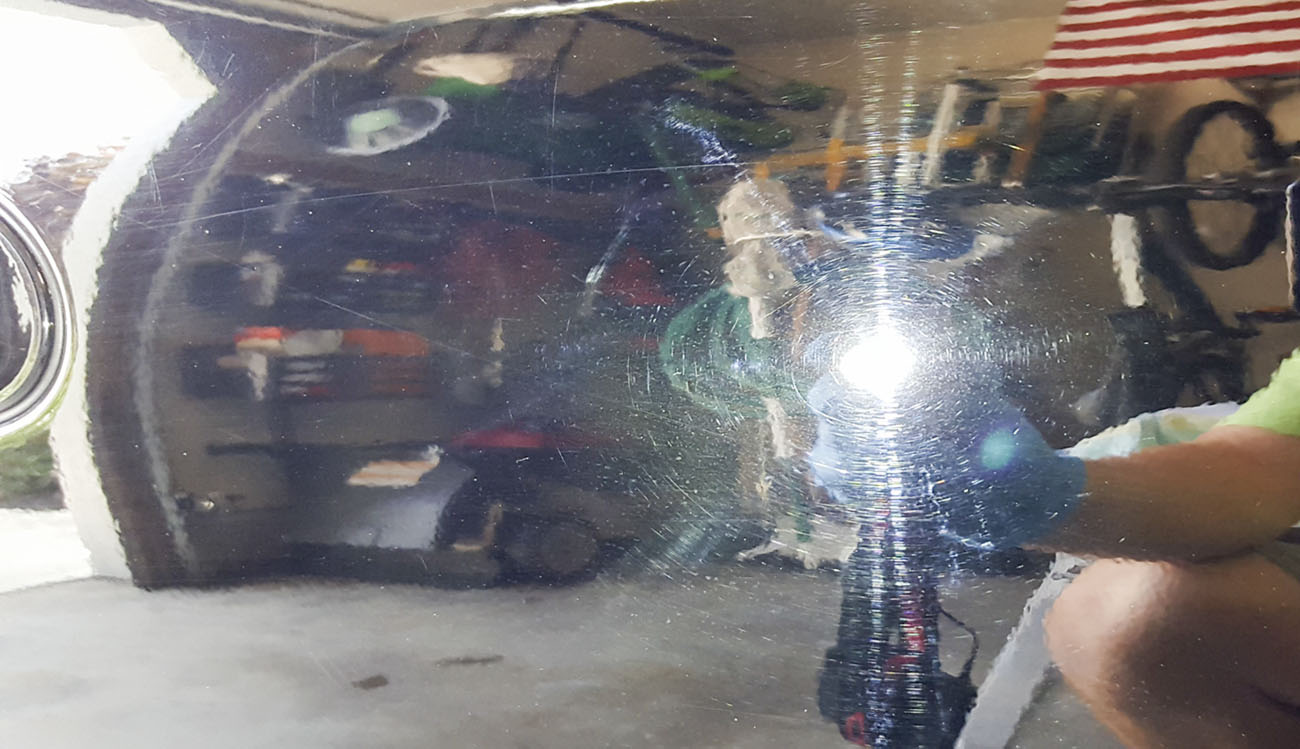
So how did she look coming in? Yuck.
First, the car was loaded with swirls. So much so that it's not the layer of dirt that was dulling it but the fact that your eye couldn't actually see through the swirls to see the color was actually black. It looked like the lid of a 10 year old grill that sat outside. Next it was loaded with water spots etched into the paint so combined, it was a real mess. Looked great wet though


So onto the clean up. Here I took fellow AG Board member Tom's insight and tried a different AIO Polish as my final step. Many thanks for a great find!
So the change-up I made after compounding was to move from what I normally would use in a non-coated job like this was from HDSpeed to the Sonax Paint Cleaner. The main reason being was to see how well the product would finish out not just to compare it but also since the product has some filling properties and I wasn't going all-out on this car due to the nature of it's owner selling it, how well it would perform for say quicker clean ups. To my surprise it really did finish out well, darkened up the paint and did a wonderful job bringing out the clarity. I'll update this thread with some side by side videos showing HDSpeed vs Sonax as the difference when they are next to one another on this paint was visible.
More to come but until then:
Some Preliminary Cell phone pics of the after: Better pics forthcoming
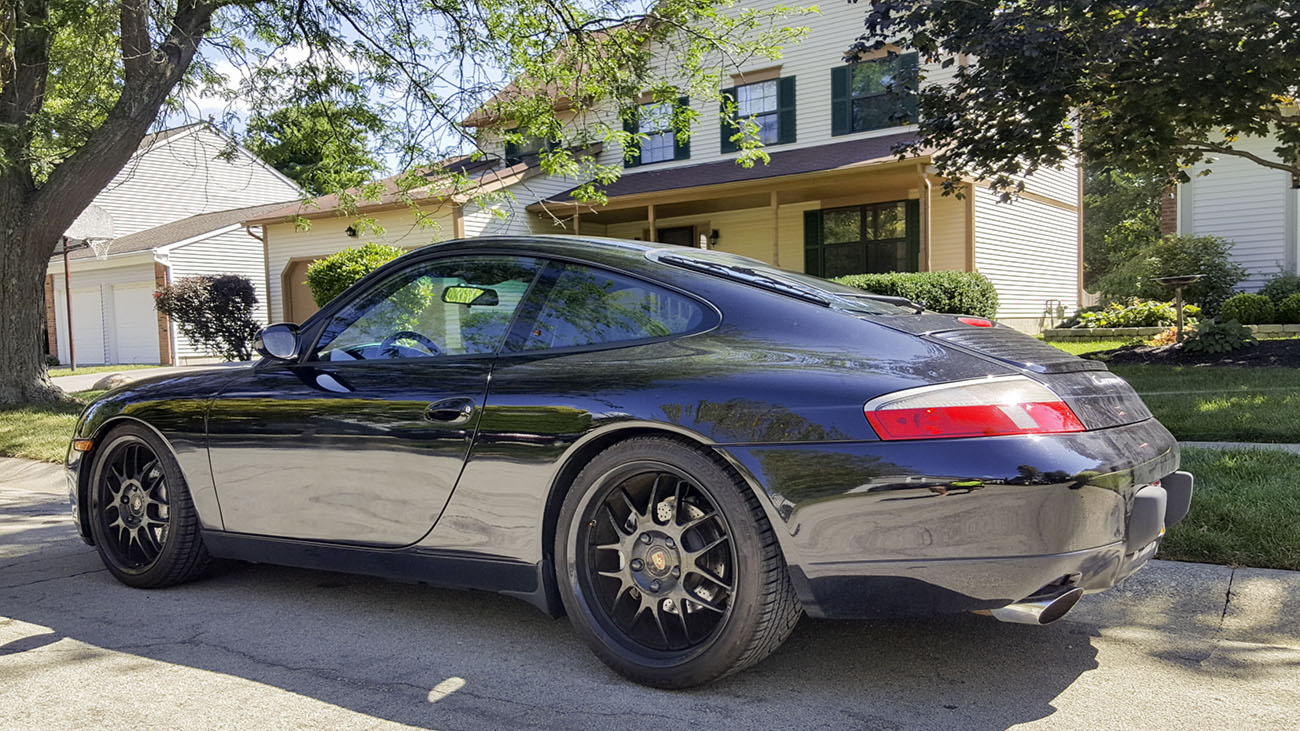
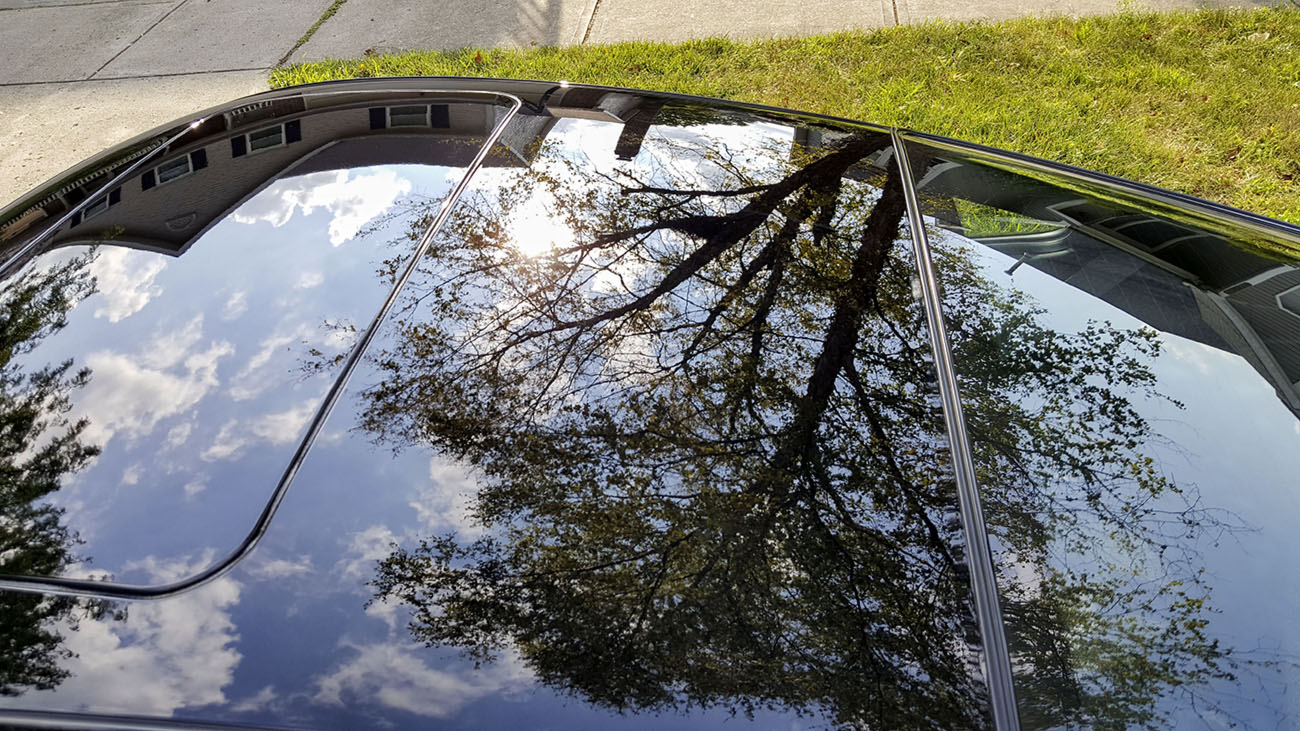
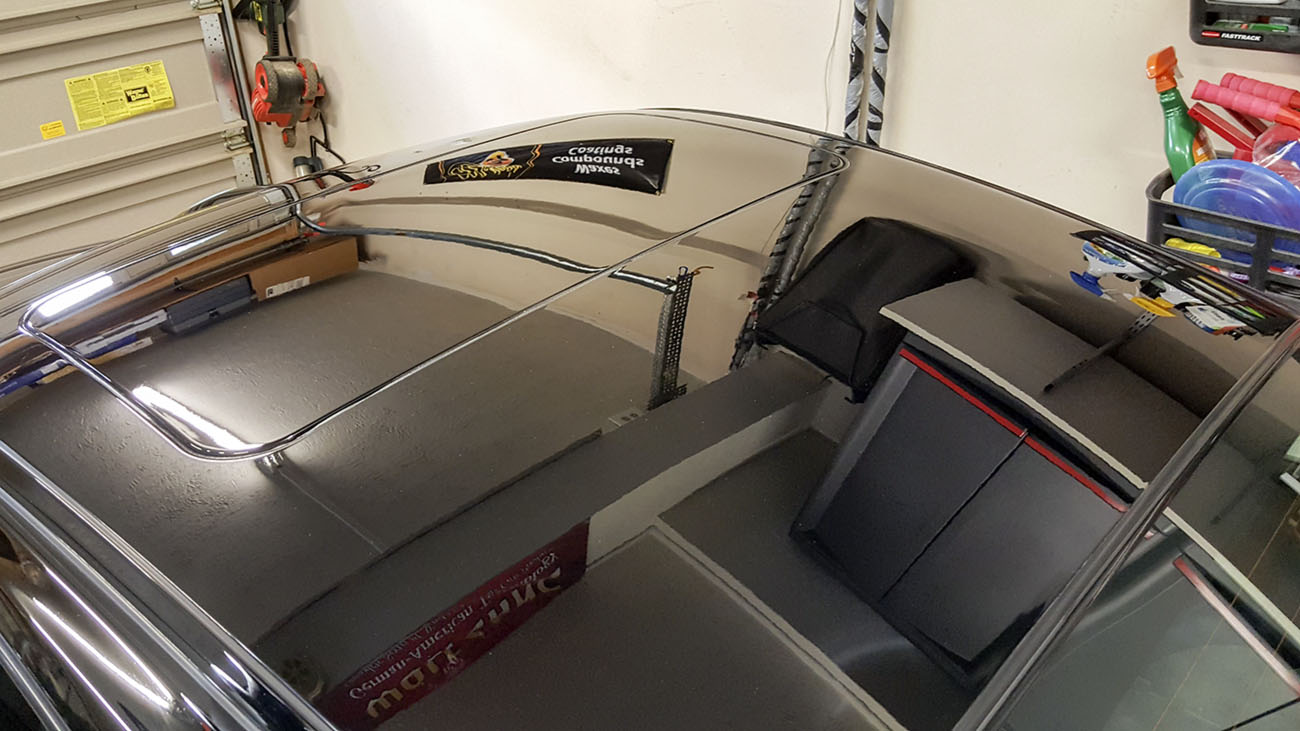
AFTER:


It's a good looking car just in styling but the finish was absolutely killing the real beauty of it. The good news was that I was pretty confident we could shave 10+ years off it.
So how did she look coming in? Yuck.
First, the car was loaded with swirls. So much so that it's not the layer of dirt that was dulling it but the fact that your eye couldn't actually see through the swirls to see the color was actually black. It looked like the lid of a 10 year old grill that sat outside. Next it was loaded with water spots etched into the paint so combined, it was a real mess. Looked great wet though
So onto the clean up. Here I took fellow AG Board member Tom's insight and tried a different AIO Polish as my final step. Many thanks for a great find!
- Wash with Meg's Gold Class
- Iron X
- Nano Sponge - medium
- Meg's Ultimate Compound on Purple Wool with Flex 3401
- Sonax Hybrid NPT Paint Cleaner on Green Hex Logic Pad using a Flex 3401
- More Shine Tire Dressing
- WETS for the Trim
- Solution Finish to restore Cowling
So the change-up I made after compounding was to move from what I normally would use in a non-coated job like this was from HDSpeed to the Sonax Paint Cleaner. The main reason being was to see how well the product would finish out not just to compare it but also since the product has some filling properties and I wasn't going all-out on this car due to the nature of it's owner selling it, how well it would perform for say quicker clean ups. To my surprise it really did finish out well, darkened up the paint and did a wonderful job bringing out the clarity. I'll update this thread with some side by side videos showing HDSpeed vs Sonax as the difference when they are next to one another on this paint was visible.
More to come but until then:
Some Preliminary Cell phone pics of the after: Better pics forthcoming
AFTER:
")


