The Guz
Well-known member
- Jun 17, 2013
- 8,768
- 45
First off this is my uncles 2008 FJ Cruiser TRD Trail Teams Edition. It currently has a 150K miles on it. I polished and coated it with Gyeon CanCoat 3 years ago.
2008 Toyota FJ Cruiser Special Edition
Recently he has been asking me if I had time to polish it again. A few reasons due to it being broken into a couple years ago so the front driver door and the rear door were repainted as the locks were damaged. The trim was looking sad and needed restoration. Toyota used single stage paint for certain white paints for certain vehicles. This FJ has single stage paint that had oxidized.
Keep in mind this was a paint enhancement. I was not going for a full correction to remove all the defects. The paint is soft enough and responded well to a one step polish.
It arrived with lifeless paint and trim. I had removed the roofrack to address that separately and to give me full access to the roof.

No gloss under all that oxidation

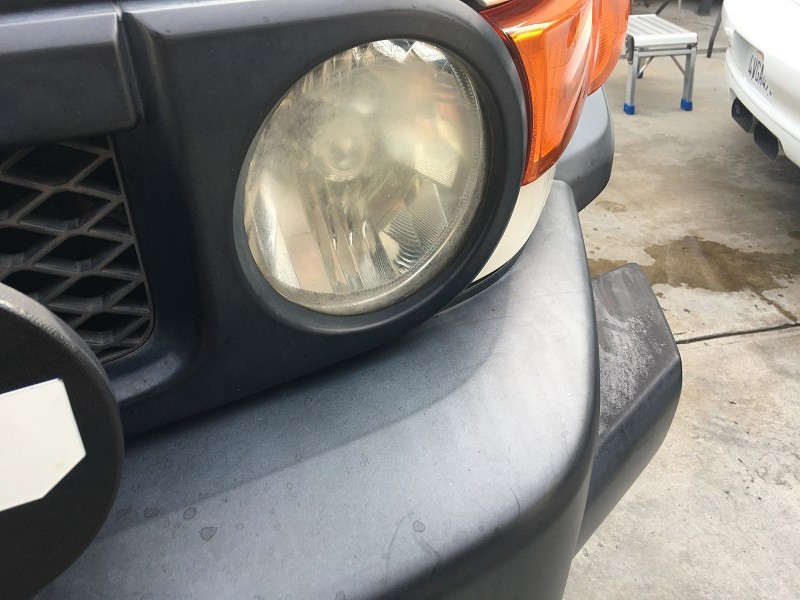
Headlight and trim looking worse for wear.
First up was a chemical decon and this was a bleeder. Meguiar's D1801 in action.

I addressed the headlights first. A quick restoration and protected with CarPro DLUX. He is planning to purchase new headlights so this will be a temporary fix.

After

Engine bay received a quick clean up and dressed with Meguiar’s D4510.


The trim was cleaned during the wash process and received and IPA wipe prior to restoration. It was first restored with solution finish. It took two coats as the trim soaked in the first coat overnight.

The second part was topping Solution Finish with the Pinnacle Black Label Ceramic Trim Restorer as seen on the left side of this photo. Left an even darker appearance.

Rock rails were cleaned and coated with CarPro DLUX

The paint was next once the trim was complete. First up assessing the paint.

The test spot using Scholl’s S20 Black with a Sonax yellow polishing pad. Good cut and nice finish on certain parts of the paint.

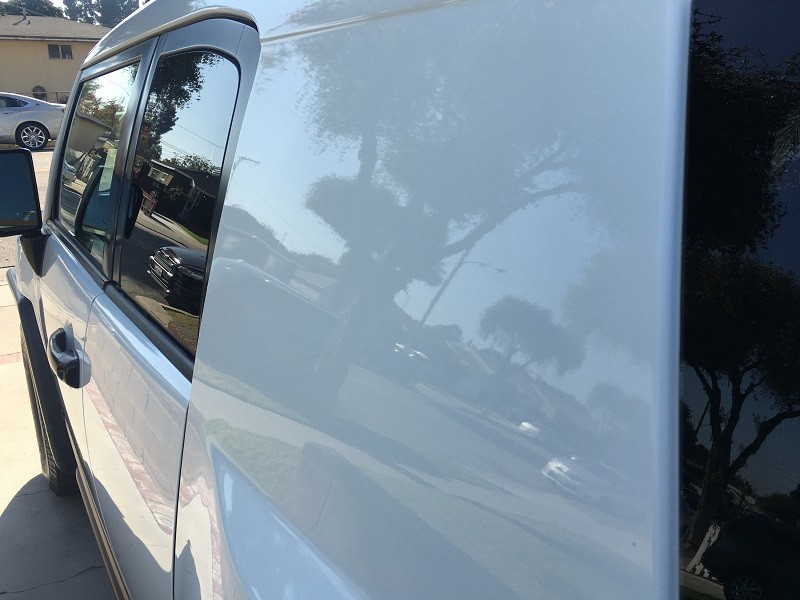
Taking a step back and there is gloss under all that oxidation.


The side panels were covered in oxidation. Rubbing my hand across certain parts of paint resulted in my hand being covered with oxidized white paint.

This panel among others was soft and finicky. It would absorb the polish into the paint making it impossible to remove it. A panel wipe did not help. I tried a couple polishes with a shorter cycle and had the same result. What did work was a primer polish. Shine Supply Slick Back worked just right with a polishing pad.
Opposite panel but one gets the idea of the finish.
The paint was panel wiped with Meguiar’s M122 Surface Prep and the protection of choice was the Adams UV Ceramic Paint Coating. It was topped with their Ceramic Boost to protect it during the 7-10 day curing time.


Products used:
Iron Remover: Meguiar's D1801
Polish: Scholl's S20. Shine Supply Slick Back Primer Polish on finicky areas
Panel Wipe: Meguiar's M122 Surface Prep
Protection: Adams UV Ceramic Paint Coating
Trim: Solution Finish topped with Pinnacle Black Label Ceramic Trim Restorer
Glass: P&S Vue inspiration Glass Coating (front & rear), CarPro FlyBy3o (side glass)
Headlights: CarPro DLUX
Rock rails: CarPro DLUX
Tires: Adams Tire Shine
Wheels: Adams UV Ceramic Wheel Coating
Roof Rack: Adams Graphene Ceramic Spray Coating
Tools: Rupes LHR15 MKII, Flex PXE 80, Rupes iBrid Nano, Porter Cable (dedicated 3")
Various videos can be seen on my channel. I have created a playlist for certain aspects of this project.
2008 FJ Cruiser Detailing Project - YouTube
2008 Toyota FJ Cruiser Special Edition
Recently he has been asking me if I had time to polish it again. A few reasons due to it being broken into a couple years ago so the front driver door and the rear door were repainted as the locks were damaged. The trim was looking sad and needed restoration. Toyota used single stage paint for certain white paints for certain vehicles. This FJ has single stage paint that had oxidized.
Keep in mind this was a paint enhancement. I was not going for a full correction to remove all the defects. The paint is soft enough and responded well to a one step polish.
It arrived with lifeless paint and trim. I had removed the roofrack to address that separately and to give me full access to the roof.
No gloss under all that oxidation
Headlight and trim looking worse for wear.
First up was a chemical decon and this was a bleeder. Meguiar's D1801 in action.
I addressed the headlights first. A quick restoration and protected with CarPro DLUX. He is planning to purchase new headlights so this will be a temporary fix.
After
Engine bay received a quick clean up and dressed with Meguiar’s D4510.
The trim was cleaned during the wash process and received and IPA wipe prior to restoration. It was first restored with solution finish. It took two coats as the trim soaked in the first coat overnight.
The second part was topping Solution Finish with the Pinnacle Black Label Ceramic Trim Restorer as seen on the left side of this photo. Left an even darker appearance.
Rock rails were cleaned and coated with CarPro DLUX
The paint was next once the trim was complete. First up assessing the paint.
The test spot using Scholl’s S20 Black with a Sonax yellow polishing pad. Good cut and nice finish on certain parts of the paint.
Taking a step back and there is gloss under all that oxidation.
The side panels were covered in oxidation. Rubbing my hand across certain parts of paint resulted in my hand being covered with oxidized white paint.
This panel among others was soft and finicky. It would absorb the polish into the paint making it impossible to remove it. A panel wipe did not help. I tried a couple polishes with a shorter cycle and had the same result. What did work was a primer polish. Shine Supply Slick Back worked just right with a polishing pad.
Opposite panel but one gets the idea of the finish.
The paint was panel wiped with Meguiar’s M122 Surface Prep and the protection of choice was the Adams UV Ceramic Paint Coating. It was topped with their Ceramic Boost to protect it during the 7-10 day curing time.
Products used:
Iron Remover: Meguiar's D1801
Polish: Scholl's S20. Shine Supply Slick Back Primer Polish on finicky areas
Panel Wipe: Meguiar's M122 Surface Prep
Protection: Adams UV Ceramic Paint Coating
Trim: Solution Finish topped with Pinnacle Black Label Ceramic Trim Restorer
Glass: P&S Vue inspiration Glass Coating (front & rear), CarPro FlyBy3o (side glass)
Headlights: CarPro DLUX
Rock rails: CarPro DLUX
Tires: Adams Tire Shine
Wheels: Adams UV Ceramic Wheel Coating
Roof Rack: Adams Graphene Ceramic Spray Coating
Tools: Rupes LHR15 MKII, Flex PXE 80, Rupes iBrid Nano, Porter Cable (dedicated 3")
Various videos can be seen on my channel. I have created a playlist for certain aspects of this project.
2008 FJ Cruiser Detailing Project - YouTube