FrankS
Active member
- Jul 7, 2013
- 1,560
- 0
2008 Mercedes C300 Luxury Edition detail using Dr. ColorChip for paint chip repair and Optimum Gloss-Coat paint coating.
Before Shots
Doesn't look too bad from here

Let's take a closer look - damage from a minor accident

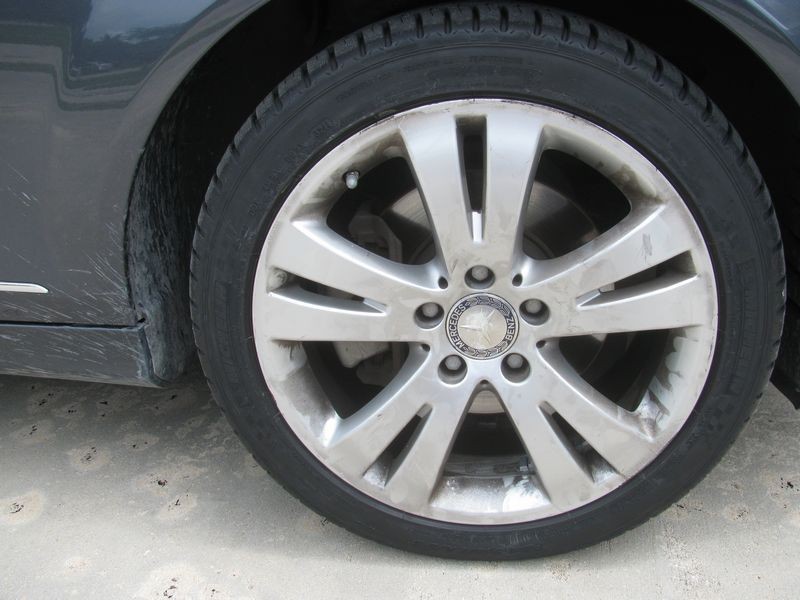
Wheels need some attention

Interior
The interior was in good condition (no before and after shots).
Interior was thoroughly vacuumed, used DP Interior Cleaner and GG 3-In-1 to clean, condition and protect the leather using Lexol Applicator Sponges.
Like the leathery smell of the Griots Garage.

Windows
Windows were cleaned on the inside and outside with Carpro Fast Glass Towels, no chemicals needed.
Wheels & Tires
Before shot again - brand new Michelin tires

Compared a couple of wheel cleaners - Sonax - Strong cleaner

Wolfgang - Like the foaming action

Speedmaster Wheel Brush - good for cleaning the barrel and behind the spokes (wear eye protection when using, has tendency to splatter)

Professional Lug Nut Brush

Wheel Woolies Boars Hair Wheel Brush for the face of the wheels

Q-Tips to get into the tight places

Hydro2 to seal the wheels

Hydro2 working - easy application - just spray and then rinse off

Here's a shot of the wheels & tires completed.
Tuf Shine Tire Cleaner was used to clean the tires using the TS Tire Brush.
TS Tire Coating was used for the dressing - about 4 coats (the new tires really soaked up the dressing).

Exhaust Tips
Before

Speedmaster brush and Megs APC+ (4 to 1) to clean the inside

Steel Wool #0000 and Mothers Mag & Aluminum Polish to further clean inside and out


Chemical Guys V07 for extra protection

After shot

Car Wash
1. Pre-wash - foamed with Chemical Guys Citrus Wash Clear and let dwell for a few minutes
2. Rinsed with pressure washer
3. Foamed again with CGCW Clear
4. 2 bucket method with CGCW Clear at 1 ounce per gallon
5. Rinsed with pressure washer
6. Dried with Master Blaster

Paint Decontamination
1. Iron X Spray Lemon Scent (no pictures)
2. 6 " Nanoskin Autoscrub Medium Foam Pad w/ Nano Shock as the lube.

Paint Correction
Hard to capture the defects with a camera but there were minor swirls and scratches throughout.
The worst places were on the horizontal panels - hood, roof and trunk lid.
This car has been hand washed it's entire life.


WG Uber Compound, 5" LC Orange Hybrid Pad with Flex 3401 was used on the hood, roof and trunk lid as the 1st step

Followed by Menzerna 4000, 5" LC White Hybrid Pad with Flex 3401 on the hood, roof and trunk lid as the 2nd step (no pictures)
The sides were done with a 1 step process using Menzerna 2500, 5" LC White Hybrid Pad and Flex 3401.

The small tight areas were done with a PC with 3" Low Profile Orange Hydrotech Pads

Paint Chip Repair
This is what came with the Dr. ColorChip kit

Cleaning the paint chips first with IPA


Step 1 - Dab and smear the paint on the chip (Mike Phillips has a good write-up on this)

Step 2 - Use the SealAct solution to clean the smear after about 5 minutes

Dr. ColorChip is designed for small chips but I used it on larger chips also.
Though it was not perfect on the larger chips it made the areas a lot less noticeable. The paint matched perfectly.

This was the damaged area on the back bumper.
It's not perfect but it's not as noticeable as before after using Dr. ColorChip.

Paint Coating
The paint was then cleaned with a 15% solution of IPA to remove all polishing oils.
Then Optimum Gloss-Coat Paint Coating was applied.


Beauty shots


Did a 2-step on the pillars (not the dance -Im the MAN)
Step 1. Uber compound, 3" LC Orange Hydrotech pad on a PC
Step 2. Menzerna 4000, 3" LC Orange Hydrotech pad on a PC
And of course the Opti Gloss-Coat coating


Optimum Gloss-Coat is easy to apply (just follow the instructions) and glossy...as its name implies.
Used about 5cc (half of the tube) and it was applied generously, more than just a few drops per panel :dblthumb2:
Before Shots
Doesn't look too bad from here
Let's take a closer look - damage from a minor accident
Wheels need some attention
Interior
The interior was in good condition (no before and after shots).
Interior was thoroughly vacuumed, used DP Interior Cleaner and GG 3-In-1 to clean, condition and protect the leather using Lexol Applicator Sponges.
Like the leathery smell of the Griots Garage.
Windows
Windows were cleaned on the inside and outside with Carpro Fast Glass Towels, no chemicals needed.
Wheels & Tires
Before shot again - brand new Michelin tires
Compared a couple of wheel cleaners - Sonax - Strong cleaner
Wolfgang - Like the foaming action
Speedmaster Wheel Brush - good for cleaning the barrel and behind the spokes (wear eye protection when using, has tendency to splatter)
Professional Lug Nut Brush
Wheel Woolies Boars Hair Wheel Brush for the face of the wheels
Q-Tips to get into the tight places
Hydro2 to seal the wheels
Hydro2 working - easy application - just spray and then rinse off
Here's a shot of the wheels & tires completed.
Tuf Shine Tire Cleaner was used to clean the tires using the TS Tire Brush.
TS Tire Coating was used for the dressing - about 4 coats (the new tires really soaked up the dressing).
Exhaust Tips
Before
Speedmaster brush and Megs APC+ (4 to 1) to clean the inside
Steel Wool #0000 and Mothers Mag & Aluminum Polish to further clean inside and out
Chemical Guys V07 for extra protection
After shot
Car Wash
1. Pre-wash - foamed with Chemical Guys Citrus Wash Clear and let dwell for a few minutes
2. Rinsed with pressure washer
3. Foamed again with CGCW Clear
4. 2 bucket method with CGCW Clear at 1 ounce per gallon
5. Rinsed with pressure washer
6. Dried with Master Blaster
Paint Decontamination
1. Iron X Spray Lemon Scent (no pictures)
2. 6 " Nanoskin Autoscrub Medium Foam Pad w/ Nano Shock as the lube.
Paint Correction
Hard to capture the defects with a camera but there were minor swirls and scratches throughout.
The worst places were on the horizontal panels - hood, roof and trunk lid.
This car has been hand washed it's entire life.
WG Uber Compound, 5" LC Orange Hybrid Pad with Flex 3401 was used on the hood, roof and trunk lid as the 1st step
Followed by Menzerna 4000, 5" LC White Hybrid Pad with Flex 3401 on the hood, roof and trunk lid as the 2nd step (no pictures)
The sides were done with a 1 step process using Menzerna 2500, 5" LC White Hybrid Pad and Flex 3401.
The small tight areas were done with a PC with 3" Low Profile Orange Hydrotech Pads
Paint Chip Repair
This is what came with the Dr. ColorChip kit
Cleaning the paint chips first with IPA
Step 1 - Dab and smear the paint on the chip (Mike Phillips has a good write-up on this)
Step 2 - Use the SealAct solution to clean the smear after about 5 minutes
Dr. ColorChip is designed for small chips but I used it on larger chips also.
Though it was not perfect on the larger chips it made the areas a lot less noticeable. The paint matched perfectly.
This was the damaged area on the back bumper.
It's not perfect but it's not as noticeable as before after using Dr. ColorChip.
Paint Coating
The paint was then cleaned with a 15% solution of IPA to remove all polishing oils.
Then Optimum Gloss-Coat Paint Coating was applied.
Beauty shots
Did a 2-step on the pillars (not the dance -Im the MAN)
Step 1. Uber compound, 3" LC Orange Hydrotech pad on a PC
Step 2. Menzerna 4000, 3" LC Orange Hydrotech pad on a PC
And of course the Opti Gloss-Coat coating
Optimum Gloss-Coat is easy to apply (just follow the instructions) and glossy...as its name implies.
Used about 5cc (half of the tube) and it was applied generously, more than just a few drops per panel :dblthumb2:
")
