Tato
New member
- Nov 27, 2013
- 2,157
- 0
Dear friends,
Today I'm going to show my latest work on a Chev. Cruze 2013. The car (although new) was severely neglected.
Claying was essentially the one single step that made the huge whole difference. I've used my wash mitts (both medium and fine grade) and my favorite clay lube, Wash and Wax shampoo (sorry for that... lol!). This was by far the most contaminated vehicle I've clayed, feeling like some 100 grit sand paper... Thank god we have the nanoskin! I believe it came with huge contamination since the car lot.
I've polished the whole car using Cyan HT Pad + WG Uber Compound basically trying to make an one-step polish, but I've used tangerine HT on sides and Meguiar's MF (cutting) on some severe defects, also MF finishing disc to apply LSP (D301). I've used white flat pad + M205 on spots I thought useful to improve gloss.
PS: Sorry for the pictures, I have a cell phone camera and limited time, also, I've finished this job exactly on time and couldn't get better AFTER pictures.
By the way, I believe some pictures of the process can somehow enrich the forum.
Hope you enjoy!
Before Pictures:
Hood:


Sides:

Roof:


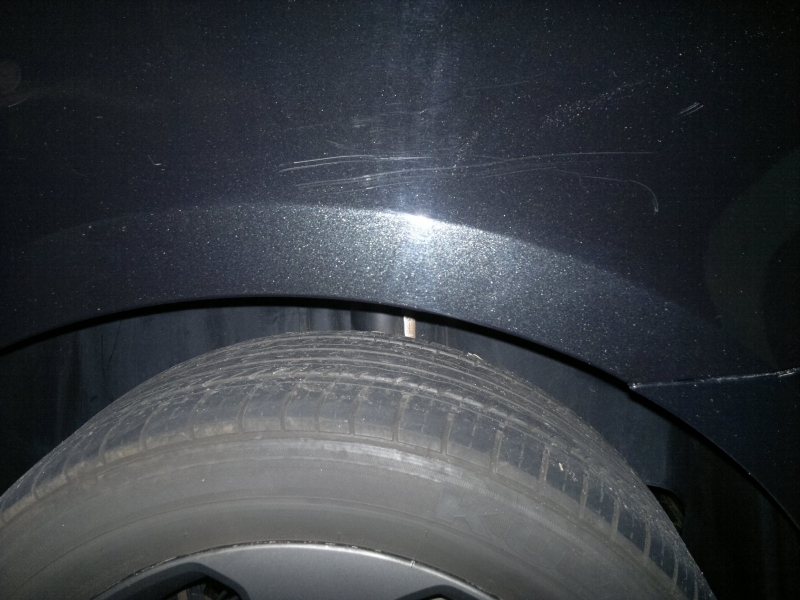
Thrashed Rear Bumper:


Start of correction and re-touch (preliminary results):

Sorry for stopping taking pictures of the rear bumper correction here, following this picture results I wet sanded with 2000 - 3000 grit and then finished with 2 step polishing using Meg's MF + D300 and HT tangerine + Uber Compound.
To inform, client was very impressed with final results on this scratch, however I've recommended him to seek help with a professional re-toucher. By the way, I doubt he'll seek any improvement, it became barely seen when not looking real close. Anyway, it's his option to go further on this from now on.
Claying:
Prepare the 'arsenal'

Fill the bucket

Lubing the surface:

Go for it!

Priming my pad:


And Here we go!

Before, After, Side:


Hood Partially corrected (notice defects on lamp / superior part of the picture)

Hood Fully Corrected:


Roof Corrected:

Just before last wash prior LSP to remove all compound dust:

Finished Job (really sorry for lack of good pictures)!


PS2: The bonus this time (I always give a bonus!) was polishing the glass with Pinnacle Glasswork Waterspot remover.
PS3: Interior was fully, completely detailed and protected (sorry, no pictures).
This car looks like new again, in and outside, and I have another very happy customer!
Comments, critics, suggestions, please, welcome.
Thank you very much for watching,
Thanks to everyone at Autogeek for all knowledge and product supply / recommendation.
Kind Regards.
Today I'm going to show my latest work on a Chev. Cruze 2013. The car (although new) was severely neglected.
Claying was essentially the one single step that made the huge whole difference. I've used my wash mitts (both medium and fine grade) and my favorite clay lube, Wash and Wax shampoo (sorry for that... lol!). This was by far the most contaminated vehicle I've clayed, feeling like some 100 grit sand paper... Thank god we have the nanoskin! I believe it came with huge contamination since the car lot.
I've polished the whole car using Cyan HT Pad + WG Uber Compound basically trying to make an one-step polish, but I've used tangerine HT on sides and Meguiar's MF (cutting) on some severe defects, also MF finishing disc to apply LSP (D301). I've used white flat pad + M205 on spots I thought useful to improve gloss.
PS: Sorry for the pictures, I have a cell phone camera and limited time, also, I've finished this job exactly on time and couldn't get better AFTER pictures.
By the way, I believe some pictures of the process can somehow enrich the forum.
Hope you enjoy!
Before Pictures:
Hood:
Sides:
Roof:
Thrashed Rear Bumper:
Start of correction and re-touch (preliminary results):
Sorry for stopping taking pictures of the rear bumper correction here, following this picture results I wet sanded with 2000 - 3000 grit and then finished with 2 step polishing using Meg's MF + D300 and HT tangerine + Uber Compound.
To inform, client was very impressed with final results on this scratch, however I've recommended him to seek help with a professional re-toucher. By the way, I doubt he'll seek any improvement, it became barely seen when not looking real close. Anyway, it's his option to go further on this from now on.
Claying:
Prepare the 'arsenal'
Fill the bucket
Lubing the surface:
Go for it!
Priming my pad:
And Here we go!
Before, After, Side:
Hood Partially corrected (notice defects on lamp / superior part of the picture)
Hood Fully Corrected:
Roof Corrected:
Just before last wash prior LSP to remove all compound dust:
Finished Job (really sorry for lack of good pictures)!
PS2: The bonus this time (I always give a bonus!) was polishing the glass with Pinnacle Glasswork Waterspot remover.
PS3: Interior was fully, completely detailed and protected (sorry, no pictures).
This car looks like new again, in and outside, and I have another very happy customer!
Comments, critics, suggestions, please, welcome.
Thank you very much for watching,
Thanks to everyone at Autogeek for all knowledge and product supply / recommendation.
Kind Regards.
") I'm confused on why you used wash/wax when you where doing paint correction?
I'm confused on why you used wash/wax when you where doing paint correction? rops:
rops: