2014 BMW 535i - Removing Dealership Holograms, Swirls and Scratches

Joined
Dec 5, 2022
Messages
51,004
Reaction score
7
2014 BMW 535i - Removing Dealership Holograms, Swirls and Scratches


Recently I was asked by a customer to undo the damage caused by the dealership where my customer purchased their brand new 2014 BMW 535i.

Here's the process....
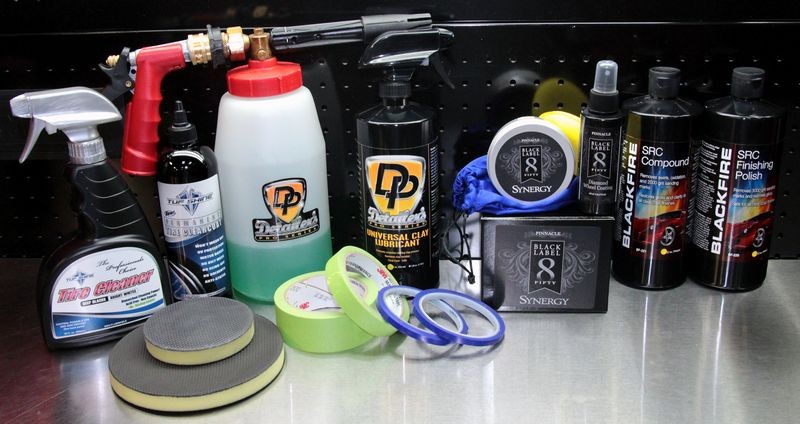
Step 1: Machine cleaned tires using TUF SHINE Tire Cleaner and a Cyclo Grey Ultra Soft Upholstery Brush on Porter Cable 7424XP

Step 2: Cleaned wheels using Iron X with Speedmaster Wheel Brush, Wheel Woolies Boar's Hair Wheel Brush.

Step 3: Washed car using Foam Gun and Detailer's Extreme Foam Shampoo and Microfiber Chenille Wash Mitts.

Step 4: Mechanically decontaminated paint using Detailer's Universal Clay Lube with Nanoskin Autoscrub Pads.

Step 5: Removed swirls and scratches using BLACKFIRE SRC Compound with Lake Country 5.5" Orange Flat Pads on Griot's and Porter Cable dual action polishers.

Step 6: Removed RIDS using Flex PE14 Rotary Buffer with Meguiar's 4" Foam Cutting Pad and BLACKFIRE SRC Compound.

Step 7: Polished paint using BLACKFIRE SRC Finishing Polish with Lake Country 5.5" Black Flat Finishing Pads.

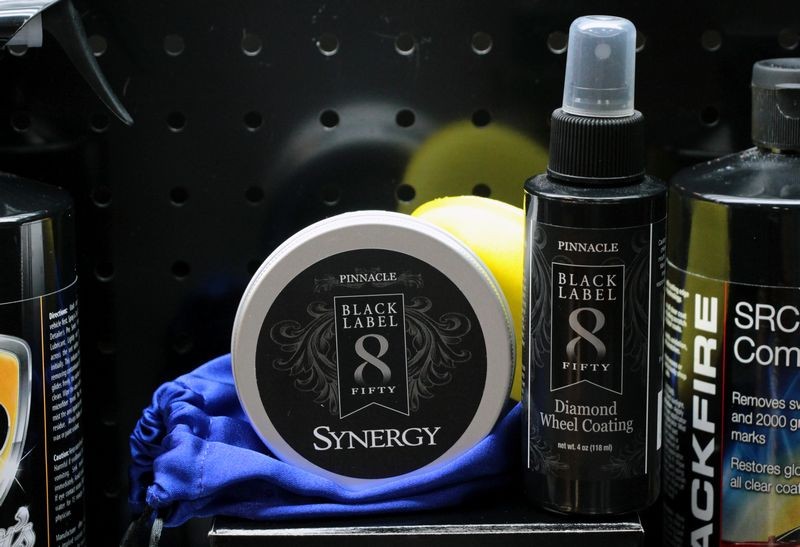
Step 8: Machine applied Synergy past wax using 3" Crimson Hydro-Tech Finishing Pads

Step 9: Removed wax using microfiber gloves using Super Soft Deluxe Green Microfiber Towels with Rolled Edges.

Step 10: Coated tires with TUF SHINE Tire Clearcoat

Step 11: Coated wheels with Pinnacle Black Label Diamond Wheel Coating.​


Products used...

watermark.php


watermark.php


:)
 
The owner lives on the East Coat of Florida and would be driving his new BMW to the West Coast and that's about a 3 hour drive and during Love Bug season that can mean a lot of dead bugs on the front of a car.

I spoke with the owner before hand to discuss the Love Bug issue here in South Florida. I actually suggested holding off on detailing his brand new BMW till after the Love Bug season passes so we wouldn't have to worry about bug impacts for his drive home. He really wanted to get the paint corrected without more time going buy so I sent him the link to a write-up by another forum member showing how to make a Blue Painter's Tape Bra.

This is how the car arrived.

watermark.php


watermark.php


watermark.php


So the first thing we did was carefully remove the Blue Painter's Tape Bra...

watermark.php


:dblthumb2:
 
Next up, time to wash the car...

Normally when I detail someone's car I invite them to assist not so I can get out of work but so they can learn the skills they're going to need to take care of the results moving into the future.

Here's Milind using the Foam Gun to foam his BMW. By the time I took this picture I had already machine cleaned the tire dressing off the tires and washed the wheels.

watermark.php


This picture was taken after washing wile it was still early in the morning. As such the sun was not directly overhead and clouds prevented getting really good sun shots of the holograms inflicted into the paint at the dealership.


watermark.php


watermark.php


These lines you see are where the Dealership detailer moved a rotary buffer back and forth over the paint. These are called HOLOGRAMS or Buffer Trails.

Holograms are a pattern of swirls unique to the rotary buffer.

watermark.php


watermark.php


watermark.php


Using artificial light to inspect for swirls and scratches

After drying the BMW using Guzzler Waffle Weave Towels and the Metro-Vac Sidekick, it's time to re-inspect the paint.

Here you can see the damage inflicted to the paint at the dealership. Luckily it appears they only used a rotary buffer on the hood but their were still sratches in all the paint from being washed at the dealership.


watermark.php


watermark.php


watermark.php


Doing a Test Spot

The below pictures are the results from doing a test spot using a Lake Country White 5.5" Foam Polishing pad with BLACKFIRE SRC Compound. This combination removed the majority of the swirls and scratches.

watermark.php


watermark.php


In the reflection you can see the owner, Milind watching as I do the testing....

watermark.php


watermark.php


While the results were good when it comes time to do the first step, the correction step we'll be swithcing over to Lake Country ORANGE Flat 5.5" foam cutting pads to do the first correction step.


:)
 
Next up....

Inspect for surface contamination...
Next thing we did after inspecting for swirls and scratches was to use the Baggie Test to inspect for contaminants bonded to the paint.

Now this is a brand new car. Most people think a brand new car doesn't have and shouldn't have any above surface bonded contaminants. That's a great idea but it's usually not reality.

The baggie test revealed to our sense of touch that the entire car was contaminated with something. Could be tree sap mist that didn't wash off. Could be industrial fallout? Could be overspray paint? Know way of knowing for sure but one thing for sure we're going to remove it.


Here's Milind and his girlfriend Phyllis inspecting the paint using the Baggie Test.

watermark.php


watermark.php


watermark.php


Milind and Phyllis attended the 9th Annual Detail Fest and while they were here they saw my buddy Glen's 1954 Ford F100 that we buffed out a couple of years ago. This one,

1954 Ford F-100 - Extreme Makeover - Process and products used

54Ford111.jpg


They told me they couldn't believe how glossy the paint on this truck looked. I told them I use the pictures from the results from this project to teach people that,

Gloss starts with a smooth surface -Mike Phillips

And that means removing all the above surface contaminants with a mechanical process.


So to decontaminate the paint on their brand new 2014 BMW 535i I chose to use the Medium Nanoskin Autoscrub Pads on simple dual action polishers like the Porter Cable and Griot's garage dual action polishers.


Here's Milind using a Griot's Garage dual action polisher and in the back is forum member Frank aka FrankS using a Porter Cable to decontaminate the paint.

watermark.php


Here you can see Phyllis helping out by wiping the clay lube residue off the paint as we worked around the car.

watermark.php


:)
 
Next up...


Next we taped off all the rubber, plastic and vinyl trim on the car including all the trim around the windows and the sunroof.

The sunroof on this BMW is a HORRIBLE material. It's a hard, textured material, probably some type of vinyl?

We used 3M Blue Vinyl Tape to tape-off and cover this trim because if we didn't, and then were to get any compound or polish reside on it the trim would be stained forever.

So here's a warning to anyone working on a new BMW with a sunroof,

Tape off the gasket trim before buffing out the roof.


And to the good folks at BMW?

Please start using a more detail friendly material on your cars.


If you have never used or seen the 3M Blue Vinyl Tape, it's a must-have in your collection of detailing tools. Here's what it looks like and a link to get some.


3M Vinyl Tape 1/4 Inch - 06405

Blue_Vinyl_Tape_01.jpg


:)
 
Compounding Pictures?

Sorry to say there are no pictures of any of us doing the compounding step because we were all compounding the paint.

This step, the Major Correction Step takes the longest.

It must be done correctly, that is the defects must be removed at this step or they will be there after you wipe off the wax or they'll still be there, they'll just be shiny defects.


So sorry, no pictures of us machine compounding this BMW.


:buffing:
 
Next....


Removing the RIDS

In the picture below you can see where I used my finger to apply compound directly onto the RIDS or Random Isolated Deeper Scratches.

Here's the deal....

After you machine compound the paint like we did, that is using dual action polishers with foam cutting pads you're going to remove ALL the shallow to medium depth swirls and scratches.

What's going to be left are the DEEPER defects. The deeper defects now stand out like a SORE THUMB because they are no longer masked or camouflaged by the millions of shallow scratches.

Make sense?

watermark.php


watermark.php


watermark.php


Machine Polishing

After doing the compounding step and removing the RIDS we then moved onto the machine polishing step. Here's two picture I snapped and then I got back to work.

If you look at the back of the windshield you can see we folded a beach towel over the wiper blades and wiper arm assemblies and then folded into the engine compartment. The reason we did this is because these components STAIN real easy from any splatter slung from the polisher.

It only takes a few minutes to take this pro-active step and can save you a lot of clean-up time as well as a lifetime of ugly stains on plastic.

watermark.php


Here you can see the 3M Blue Vinyl tape....

watermark.php


Note: If you've seen or heard people using the term RIDS somewhere on the Internet in an article or video, here's where the acronym came from...


RIDS - The Definition of RIDS and the story behind the term...


:)
 
Next....


Wipe-off and De-tape
After machine polishing and carefully wiping off the polish and then de-taping the car, we moved onto machine waxing.

watermark.php


For this we used Black Label Synergy; this is a unique paste wax in the Pinnacle Black Label collection.

From Autogeek.net:

Simply amazing is the only way to describe the fluid, shimmering gloss that Black Label Synergy - the first and only paste wax that fuses nano-glass ceramic particles with No. 1 Brazilian Carnauba Wax - imparts on your vehicle. Formulated using the same nano-glass ceramic particles found in Black Label’s line of Diamond Surface Coatings, Synergy combines Pinnacle’s proprietary blend of Carnauba wax with the most advanced synthetic ingredients available. This synthesis of gloss-enhancing ingredients creates an incredibly glassy, reflective finish that shines like a diamond.


Synergy was my wax of choice for this detail for two reasons:

1. It's very easy to apply and remove, which is exactly the type of wax I like to use after spending all day buffing out a car.

2. The owner wanted two things - long-lasting protection and a deep, glossy shine.​


Sorry no pictures...
No pictures of us applying but here's a few of the wax on the car after letting it dry.


LOOK CLOSELY
I have a couple of different articles on the topic of edging.... that's because there's a number of detailing procedures where you doing "something" to the edge of paint.

If you look closely at the edges of the body panels in the below two pictures you can see that we've ONLY wiped the wax off of the edges that separate body panels.


I call this edging


What I do is carefully wipe all the wax off the paint about 1 inch in from the edge and also OPEN all the doors, trunk lid and hood and wipe underneath and around the panel to remove any compound, polish or wax reside that may have been deposited in these areas.

I do this as the rest of the wax dries. So we edged the car first and by the time we were done edging the car the rest of the wax over the rest of the car was fully dried to a haze and ready to wipe off.

watermark.php


Machine Waxing

Here you can see the trails left by the 3" Crimson Foam Finishing pad used on a Griot's Garage 3" Mini Polisher.

If you don't own a Griot's Garage 3" Mini Polisher I highly recommend you get one to machine apply waxes and sealants. It's TRULY the only way to do this type of work and simply get your hands out the paint polishing process as much as you can for show car results like you're going to see below.

watermark.php


Time to bring up the level of your CAREFULNESS!

I've been typing that and saying that for years now and it's because it's important. After you have spent an entire day creating a show car finish you need to,


  • Bring up the level of YOUR carefulness.

  • Bring up the level of the quality for your microfiber towels.
You also want to inspect your microfiber towels before using them but visually and by your sense of touch. You also want to wear microfiber gloves. MF gloves make ti easier for you to hold and grip microfiber towels PLUS if you touch the paint you won't leave any finger prints or finger oils. At this stage of the game... ANYTHING is going to show up on the paint. So get some microfiber gloves and use them.


watermark.php


watermark.php


:xyxthumbs:
 
And now it's time for the beauty shots!


watermark.php


watermark.php


watermark.php


watermark.php


watermark.php


watermark.php


watermark.php


watermark.php


watermark.php


watermark.php


watermark.php


watermark.php


Wheels are coated with Black Label Diamond Wheel Coating.
Tires have 3 coats of TUFF Shine Tire Clearcoat.


watermark.php


watermark.php


Here's Milind and me....

watermark.php


And here's Phyllis and me....

watermark.php


Thank you!

I thank both of you for all your hard work and also for trusting me with your pride and joy.


I'd also like to thank and give credit to Frank for helping with the project, you've become a very talented detailer in the last year Frank and I'm always impressed with the quality of your work.


On Autogeek.net

And again, here's the products we used for undoing the damage and restoring a finish worthy of the BMW marque.

watermark.php


watermark.php


:)
 
That's just a ridiculous amount of gloss. Looks great! Is the Jet Black on the BMWs still as hard as it has been in previous years?
 
Amazing job. I can't believe how BAD the car was after the detailer..I mean I can but still! that paint looked years old!

Kudos Mike!
 
That's just a ridiculous amount of gloss. Looks great!

Is the Jet Black on the BMWs still as hard as it has been in previous years?


I found this paint to be on the hard side but not super hard. Like I posted in the thread, we removed the majority of the swirls and scratches using simple foam pads on DA Polishers. I kept this simple to teach the owner how to do this type of work moving into the future.

It did buff really well with whatever we through at it and just as important it did not mar or scratch when we wiped products off. Very forgiving if you ask me and that's something that is VERY important in a paint system.


:)
 
...I'd also like to thank and give credit to Frank for helping with the project, you've become a very talented detailer in the last year Frank and I'm always impressed with the quality of your work.

Thanks for the compliment Mike, I've had an excellent mentor :props:. Glad I was able to help out.
 
I'm a little confused. In post #3 you are "Doing a Test Spot" and "The Major Correction Step", but in post #4 you are doing the baggie test and clay cleaning. Certainly you did the claying before any corrections. Am I misunderstanding something?
 
I'm a little confused. In post #3 you are "Doing a Test Spot" and "The Major Correction Step", but in post #4 you are doing the baggie test and clay cleaning.

Certainly you did the claying before any corrections. Am I misunderstanding something?


Sorry for the confusion, YES we did the decontamination before the correction step.

What I posted was that after doing the test spot and determining we needed a more aggressive pad was "state" that we were going to switch to the more aggressive pad "WHEN" we moved onto that step.

If you look again,

In post #4 it shows and explains mechanically decontaminating the paint.

Then in post #5 we're taping off the car.

Then in post #6 we're doing the correction or compounding step.


:)
 
That's phenomenal work! Downright inspirational to be honest.

I also own a black BMW and knowing the reputation of "dealer prep" i had to insist to the salesman to NOT "prep" the car once i closed the deal and ordered my spec'ed new BMW. Take off what you are required to after it comes off the truck but do NOT wash or detail it. LEAVE IT DIRTY!!! The salesman was incredulous each of the 3 times i visited prior to day of delivery. He countered with things like "but our guys are pro's and know what they are doing" and "i'm not allowed to leave it unwashed for the customer" etc. etc.

What finally sank into his thick skull was when i asked him out to the showroom floor to look at the hood of a brand new black Z4 convertible. It was bathed in showroom spot lights and showed perfectly all the swirls! He finally confirmed he saw what i was pointing out to him and i suggested that it didn't look like that when it left the factory. I then said that if we need to get the GM to overide their "cleaned cars upon delivery" then take me to him but if it is washed when i come back for it i ain't taking it!

He finally broke and when i picked it up it was freakin filthy. Made delivery to a detailer much more special. I was happy. Took it home, washed and clayed and it looked amazing.

It continues to amaze me what dealers allow their vehicle prep folks to do.
 
Although it probably continues to amaze that salesman that he once had a customer insist on getting a brand new BMW dirty!
 
Back
Top