BryanH
New member
- Jan 9, 2013
- 152
- 0
Thanks to the great resources and community here at AG (among other sources), I attempted my first machine detail recently. It was my first time having a general idea of what actually happens to the paint during this process. So while not my first detail ever, I'd say it's my first "real" one. ")

A couple months ago I picked up this 1991 300ZX NA to be my new daily driver. It was mechanically pretty sound, despite having sat for almost 5 years before I bought it, but clearly lacked in "presentation." I would go so far as to say it had been neglected.


The filth was seemingly endless!

I found a hood prop rod and grommet right away so I could work underhood properly without fear of the hood falling on me.
The paint on the hood and rear hatch looked particularly bad. In some light I thought it was going to be salvageable, other times it appeared to be experiencing a type of clear coat failure. Things could go well, or very badly...

Hard water stains were everywhere.

So, fast forward to last week. Let's begin!

I started easy, with the interior; it was pretty good overall but the lower portions needed some serious cleaning. No french fries in this car - shock! - but I did find plenty of dog hairs, sunflower seeds, coins and gum wrappers.

Much better. The pedals were cleaned, too, but for safety reasons no dressing was applied.
I also found the missing defogger button. Automotive archaeology, eh?
After a thorough wash with dish soap I applied IronX to reduce the paint contamination before claying.

Once the car was thoroughly rinsed and mostly dried, the garage queen was forced to vacate her spot for the Z.

General shot of the front end. Remember this angle for later.

These scratches (claw marks more like!) on the top and side of the rear hatch were some of the worst ones on the car.

Oh dear...

I had removed the license plate, and next thing I know I'm figuring out how to remove the aftermarket rear bumper extension. It was so dirty underneath I had to back the car out into the driveway and wash that section before continuing.

Ah, "finally", I hear you saying. A test spot! And look, the spot is shiny! At this point I was very happy, encouraged by the result on that nasty hood.
I used my new Meguiars G110v2 DA polisher with a 5.5" MF cutting disc and Meguiars Ultimate Compound, followed by a 7" Meguiars yellow polishing pad and M205. Pleased with the results of this process, I was ready to do the whole car.

My friend came by to help and brought his Porter Cable and some pads. rops:
rops:

I found that my MF cutting pads were losing effectiveness after doing a couple sections of paint. They became "packed down" and although I could fluff the fibers for another pass, it didn't last long. I still haven't quite figured this one out. I cleaned the pads as best I could with a brush after every section pass. If I was using too much product, I wouldn't think the Megs UC would dry out so quickly doing a panel section (usually it was dry by the end of a 2nd section pass, unless I used a lot more product and some QD). Clearly I've still got some learning to do in this area. Meanwhile my friend was whipping out panels with his experience and CSS pads.
Remember the front end photo above? Here's roughly the same angle after the Compound stage:

A slight difference. Now let's polish!

Top of the rear hatch. The upper half in this photo has been polished, making a subtle but important improvement to the clarity of the surface.
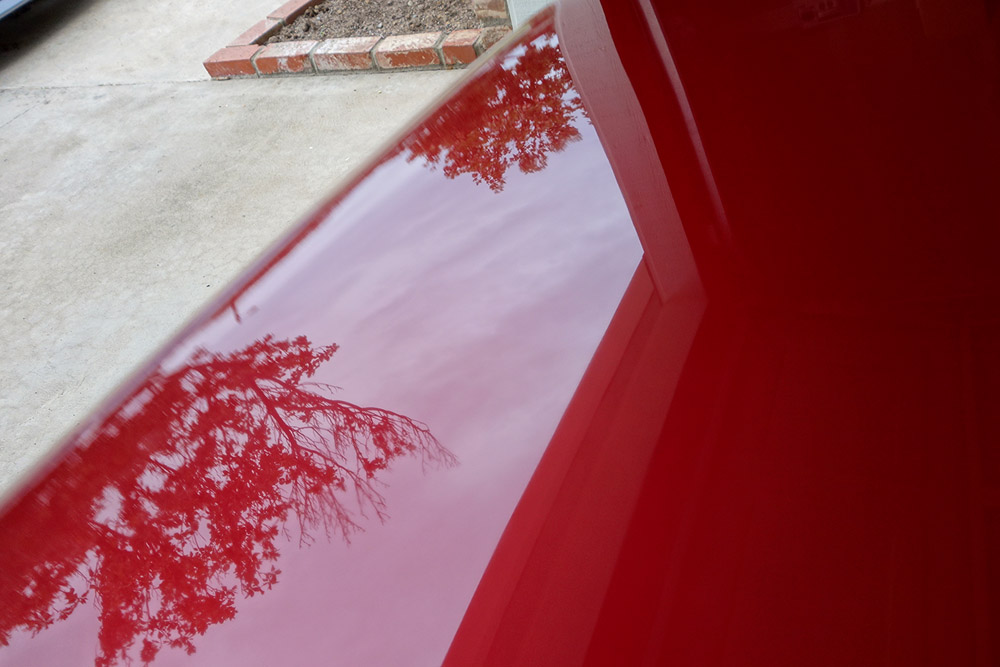
Hatch all done. Anyone for a swim?

Here are the claw marks, now a lot less noticeable. They are probably too deep to be completely removed, and I didn't want to burn through the paint trying.
I then spent a day and a half using Dr Color Chip to minimize the appearance of the hundreds of chips on the car. The process marred the paint around the chips, so I ended up having to re-polish most of the car. Big lesson learned for next time. Do the chips between compound and polish steps!
The paint was looking decent now. But the glass was still covered in water spots. I tried DP High Performance Glass Restorer with modest results at first. So I ignored the directions (like any man does from time to time!) and upped the DA speed and pressure. That seemed to do the trick.

Next was CarPro Eraser to prep the paint for sealant. I found this very easy to use, and it smelled awesome too.
I chose Klasse Sealant Glaze. It seemed to be one of the least expensive options for long-lasting protection. And with my German heritage, how could I not?
Using long strokes to apply the sealant, it seemed to go on a bit streaky. It was hard to apply thin and evenly.

Perhaps I was using the wrong kind of applicator.

After the first coat, periodically I would do the finger swipe test. I learned this years ago when NXT Tech Wax first came out, and it always worked great for me. Klasse was being stubborn. It kept smearing with my swipe test, so I kept waiting. After 4 hours, I decided to remove it anyway. It wasn't easy! I had to use the short nap on my MF towel, and press HARD. Larger body panels flexed. My shoulders down to my fingertips were soon sore. But I got it all off.
For the second coat I waited only 30 minutes to buff off. It was marginally easier to remove but still more difficult than I would like. When I run out of this Klasse (at my rate it'll be 10 years...) maybe I will splurge for something with similar longevity but more ease of use; perhaps Wolfgang DGPS.
The topper carnauba was much more fun to use.

P21S was put to the test immediately. Less than 30 minutes later, I started a drive to LA for the weekend. It started raining as soon as the car left the garage. :laughing: It rained off and on for the whole 4 hour drive and made the car pretty dirty. The "After" pictures would have to wait...
I washed the car as soon as I got back home using my new process. Optimum Car Wash wasn't very sudsy, but seemed to do the job nonetheless.
Before drying...


You can see more deep scratches where the light catches the fender here. Nonetheless I love how the color pops now!
Part of my new wash process is drying with a soft MF towel using FK 425 as a drying agent. Previously, I used a waffle weave towel with no lubricating agent on my nice car, and a California Water Blade (cringe with me now) on my daily driver. Those days are gone. I like drying the new way. It takes a little longer but it's worth it.

End of Part One.
A couple months ago I picked up this 1991 300ZX NA to be my new daily driver. It was mechanically pretty sound, despite having sat for almost 5 years before I bought it, but clearly lacked in "presentation." I would go so far as to say it had been neglected.
The filth was seemingly endless!
I found a hood prop rod and grommet right away so I could work underhood properly without fear of the hood falling on me.
The paint on the hood and rear hatch looked particularly bad. In some light I thought it was going to be salvageable, other times it appeared to be experiencing a type of clear coat failure. Things could go well, or very badly...
Hard water stains were everywhere.
So, fast forward to last week. Let's begin!
I started easy, with the interior; it was pretty good overall but the lower portions needed some serious cleaning. No french fries in this car - shock! - but I did find plenty of dog hairs, sunflower seeds, coins and gum wrappers.
Much better.
The pedals were cleaned, too, but for safety reasons no dressing was applied.I also found the missing defogger button. Automotive archaeology, eh?
After a thorough wash with dish soap I applied IronX to reduce the paint contamination before claying.
Once the car was thoroughly rinsed and mostly dried, the garage queen was forced to vacate her spot for the Z.
General shot of the front end. Remember this angle for later.
These scratches (claw marks more like!) on the top and side of the rear hatch were some of the worst ones on the car.
Oh dear...
I had removed the license plate, and next thing I know I'm figuring out how to remove the aftermarket rear bumper extension. It was so dirty underneath I had to back the car out into the driveway and wash that section before continuing.
Ah, "finally", I hear you saying. A test spot! And look, the spot is shiny! At this point I was very happy, encouraged by the result on that nasty hood.
I used my new Meguiars G110v2 DA polisher with a 5.5" MF cutting disc and Meguiars Ultimate Compound, followed by a 7" Meguiars yellow polishing pad and M205. Pleased with the results of this process, I was ready to do the whole car.
My friend came by to help and brought his Porter Cable and some pads.
rops:
I found that my MF cutting pads were losing effectiveness after doing a couple sections of paint. They became "packed down" and although I could fluff the fibers for another pass, it didn't last long. I still haven't quite figured this one out. I cleaned the pads as best I could with a brush after every section pass. If I was using too much product, I wouldn't think the Megs UC would dry out so quickly doing a panel section (usually it was dry by the end of a 2nd section pass, unless I used a lot more product and some QD). Clearly I've still got some learning to do in this area. Meanwhile my friend was whipping out panels with his experience and CSS pads.
Remember the front end photo above? Here's roughly the same angle after the Compound stage:
A slight difference.
Now let's polish!
Top of the rear hatch. The upper half in this photo has been polished, making a subtle but important improvement to the clarity of the surface.
Hatch all done. Anyone for a swim?
Here are the claw marks, now a lot less noticeable. They are probably too deep to be completely removed, and I didn't want to burn through the paint trying.
I then spent a day and a half using Dr Color Chip to minimize the appearance of the hundreds of chips on the car. The process marred the paint around the chips, so I ended up having to re-polish most of the car. Big lesson learned for next time. Do the chips between compound and polish steps!
The paint was looking decent now. But the glass was still covered in water spots. I tried DP High Performance Glass Restorer with modest results at first. So I ignored the directions (like any man does from time to time!) and upped the DA speed and pressure. That seemed to do the trick.
Next was CarPro Eraser to prep the paint for sealant. I found this very easy to use, and it smelled awesome too.
I chose Klasse Sealant Glaze. It seemed to be one of the least expensive options for long-lasting protection. And with my German heritage, how could I not?
Using long strokes to apply the sealant, it seemed to go on a bit streaky. It was hard to apply thin and evenly.
Perhaps I was using the wrong kind of applicator.
After the first coat, periodically I would do the finger swipe test. I learned this years ago when NXT Tech Wax first came out, and it always worked great for me. Klasse was being stubborn. It kept smearing with my swipe test, so I kept waiting. After 4 hours, I decided to remove it anyway. It wasn't easy! I had to use the short nap on my MF towel, and press HARD. Larger body panels flexed. My shoulders down to my fingertips were soon sore. But I got it all off.
For the second coat I waited only 30 minutes to buff off. It was marginally easier to remove but still more difficult than I would like. When I run out of this Klasse (at my rate it'll be 10 years...) maybe I will splurge for something with similar longevity but more ease of use; perhaps Wolfgang DGPS.
The topper carnauba was much more fun to use.
P21S was put to the test immediately. Less than 30 minutes later, I started a drive to LA for the weekend. It started raining as soon as the car left the garage. :laughing: It rained off and on for the whole 4 hour drive and made the car pretty dirty. The "After" pictures would have to wait...
I washed the car as soon as I got back home using my new process. Optimum Car Wash wasn't very sudsy, but seemed to do the job nonetheless.
Before drying...
You can see more deep scratches where the light catches the fender here. Nonetheless I love how the color pops now!
Part of my new wash process is drying with a soft MF towel using FK 425 as a drying agent. Previously, I used a waffle weave towel with no lubricating agent on my nice car, and a California Water Blade (cringe with me now) on my daily driver. Those days are gone. I like drying the new way. It takes a little longer but it's worth it.
End of Part One.
Last edited:


