Just to note...
Back in 2009 I invented a way to take very close measurement over the same area over and over again for a wet sanding project.
For some reason, this link isn't working but our Admin is looking into it...
Removing Orange Peel & Sanding Marks with the Griot's ROP and the Wolfgang Twins
From post #2
Run what you brung - Use what you have
Black paint always works best for most paint related demonstrations. Black paint is also best for capturing photos of sanding marks plus before and after reflection shots but for this kind of demonstration it's important to be working on
real-world paint which means a factory baked-on clear coat that's as thin as the norm for factory paint. I'm a big fan of using what you have and what I have is a beige colored hood off a 1999 Chevy Silverado that's never been repainted.
For this experiment I'm going to sand in three different section and do my very best to sand each section
equally, as though I were actually sanding the orange peel flat and then remove my sanding marks and throughout the process measure and record 4 places in each of the 3 sections and then look at the numbers to see how much paint is being removed. At some level this will be a test of my ability to remain constant in my sanding ability, something that is key in the real world when hand sanding paint.
Whenever you do any kind of testing it's vitally important to remove and reduce as many variables as possible, so I came up with a way of using 3M Painter's Masking Tape to create a
grid pattern on the hood that I could use to locate the 3 locations in a repeatable method.
I then used the
3M Painter's Tape Grid System to take my measurements with the goal being to record measurements from the same locations for each reading as much as possible. To check myself and my consistency in sanding and compounding, I chose 3 places to duplicate the same test and recorded all the measurements as a "control".
So here we go...
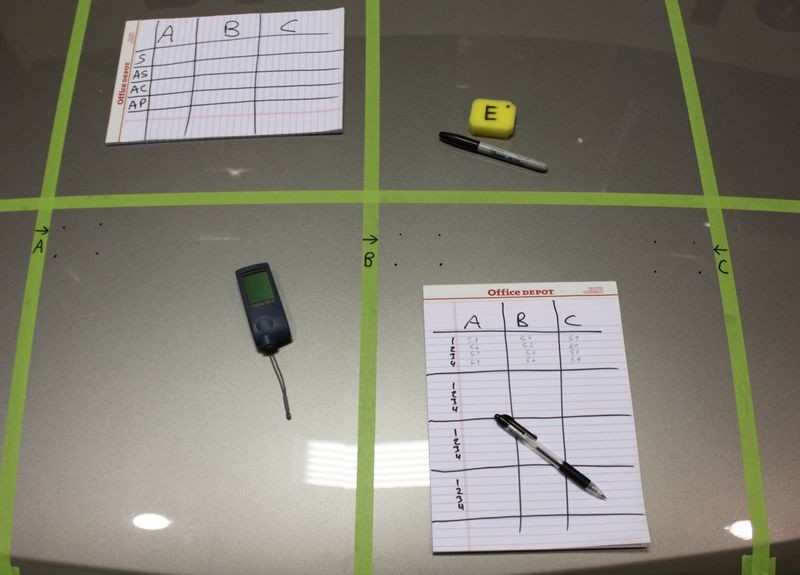
A grid pattern laid out to provide 3 areas to test that are all flat in shape and in places where we would hope the paint thickness or film-build would be as uniform as possible from a factory paint job as compared to testing on the hood, a door, (vertical panel), or some other curved or slanted panel. Again, trying to reduce the variables as much as possible.
3M Painter's Tape Grid System
Three sections marked A, B, and C. The piece of foam is marked with the letter E which stands for "Equalizer" as I need a quick simple tool to help me place 4 dots on the paint in roughly the same place for each step and measurement. I hindsight a piece of thin cardboard with 3-4 holes punched into the corners would have been more accurate but this isn't
Rocket Science, I'm just trying to show how much paint is being removed
on average when hand-sanding with the higher grit papers like the average online enthusiast might do in their garage. In other words, I'm keeping it real-world.
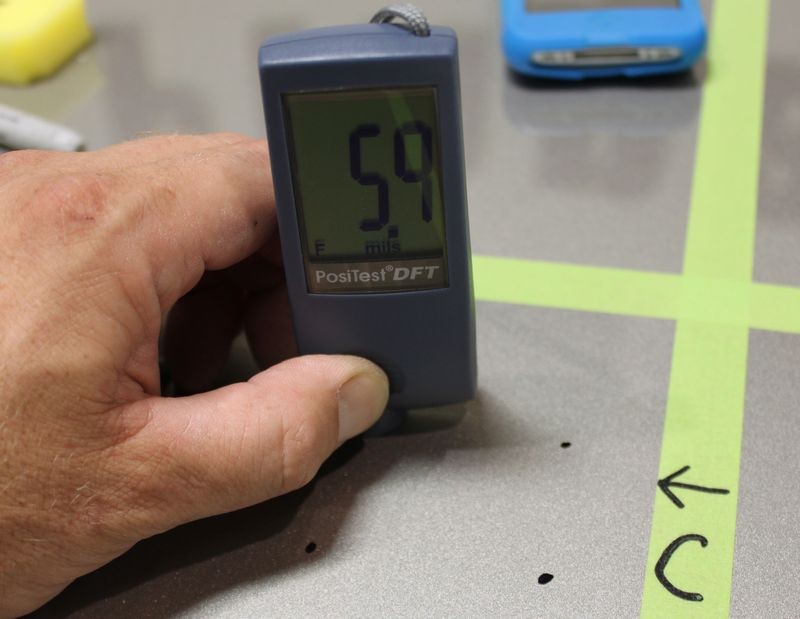
Then I used the PosiTest Paint Thickness Gage and measured each dot 3 times and took the average of the 3 readings. I started in the upper left hand corner and moved around the dots in a clockwise manner. In this picture I've just finished taking the last reading of the number #4 dot at the C location on the panel. (The upper left hand corner dot)
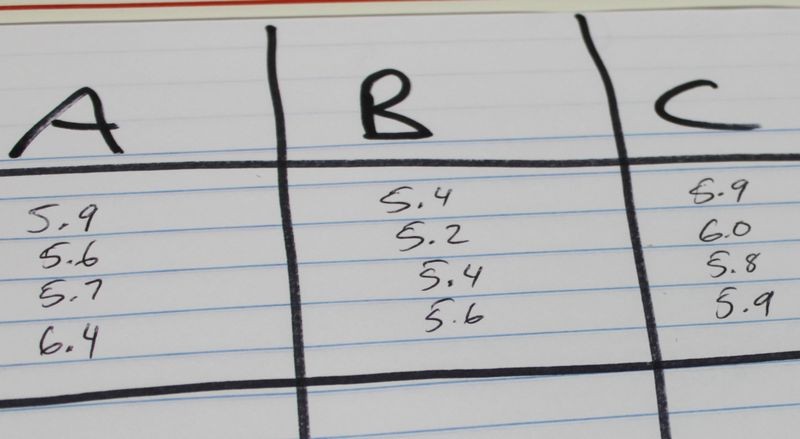
Here are the results from the first set of measurements from the three locations on the paint panel.
Don't know if that helps but it worked for me as caveman as it was...
")